Happy weekend to you all. Today I will be sharing with us my process of making a mini beaded pink bag. As you all know from my previous post, I talked about how I’m learning how to make bead bags from YouTube. It’s amazing how much you can learn online. There are lots of styles with detailed process on how to make them. As long as you aren’t lazy and you’re determined, you can learn virtually anything.
This particular style is very common and I’ve been wanting to create it for a while now so over the weekends, I put into action. This particular style tested my patience I won’t lie. That was because the result I was getting wasn’t what I wanted. When I started the bag, the beads weren’t stiff. It was bending and it wasn’t standing. Despite the fact that I made the rope tight, it was still bending. I almost unravel the bead but then I convinced myself not to.
I kept on working and at the end of the day I was able to achieve the bag.
The important thing is to be able to learn the skill, know the process so that it will become part of me. Now I can recreate this style again just that next time, I will have to find a solution to the bending problem.
Below, I will be putting us through the process of how I made this bag.

MATERIALS USED
- Pink small beads
- Fishing line
- Scissors
PROCESS
Step 1
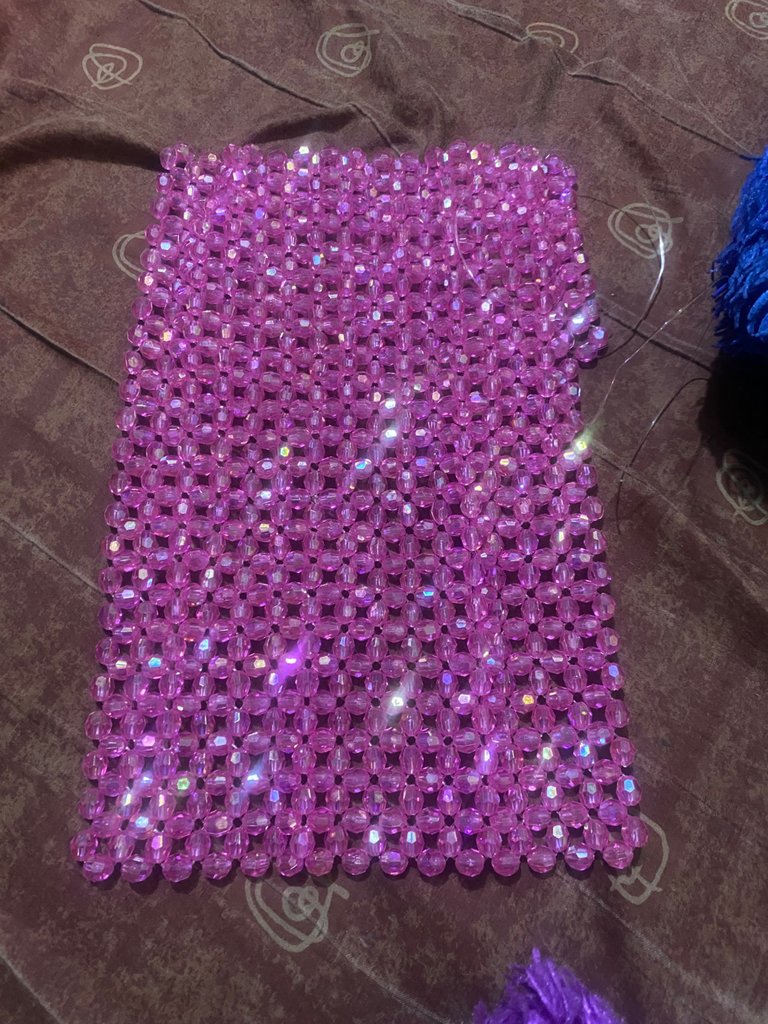
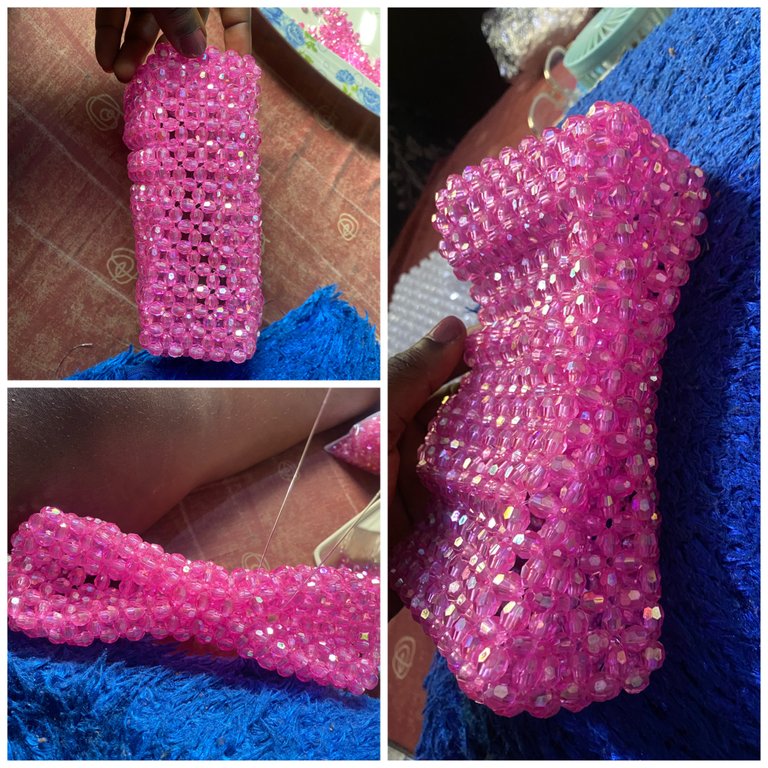
The first thing I did was to measure the fishing line rope I’d be using which was 20rolls of palm. I was using 30 before but I realized it becomes to long and hard to work with so I reduced it to 20. Once the rope is finished, I cut another 20 and so on. I used 25beads by 16 beads in measurements while the width is 5beads.
Step 2
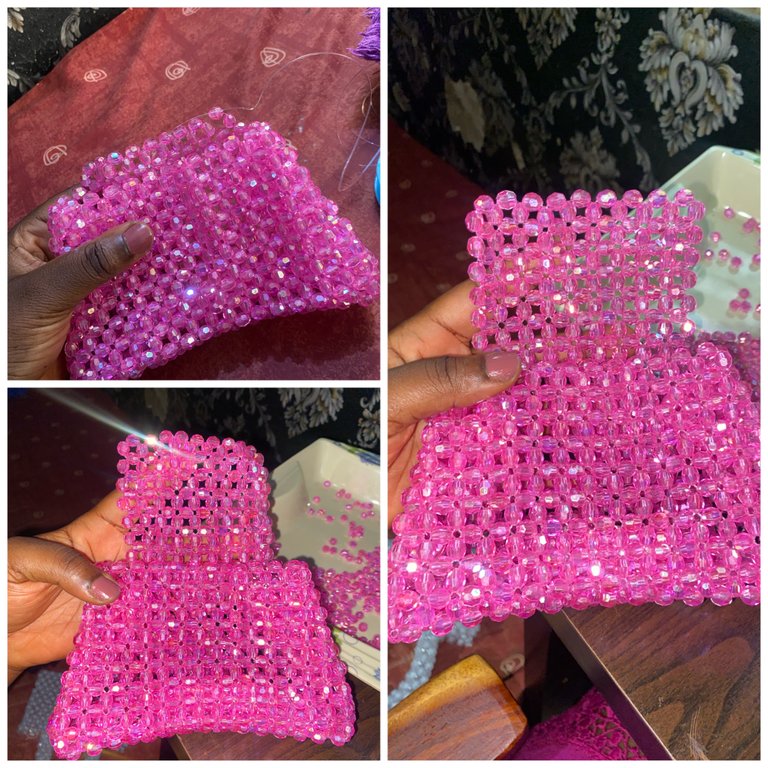
Once I complete the length and breath of the main body using 5 beads for the base, I started working on the sides til it was complete.
Step 2 continuation
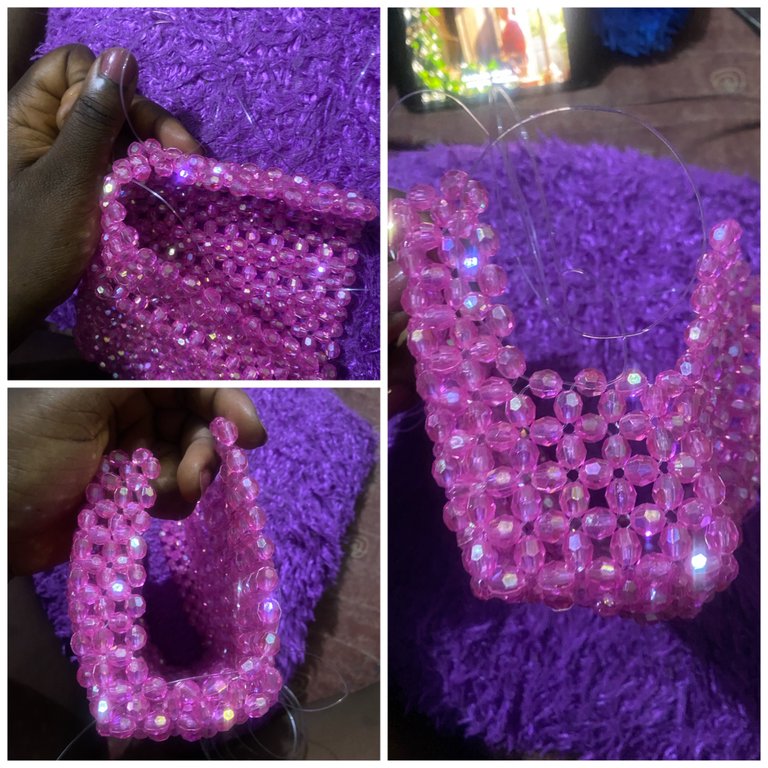
Upon completing the two sides, it looked like the pictures below. You guys can see how it bends instead of being stiff. I think it was a factor of the type of beads I used but I’d figure the solution out later.
Step 3
At the bottom of the bag, I located the 4 beads in the middle and joined them together as seen below to form the curved shape at the bottom.
Step 4
On the square bead beside the upper side of each corner of the bag, I joined the sides together using 2 beads creating a 4 set of beads at the side and forming the bending shape.
Step 5
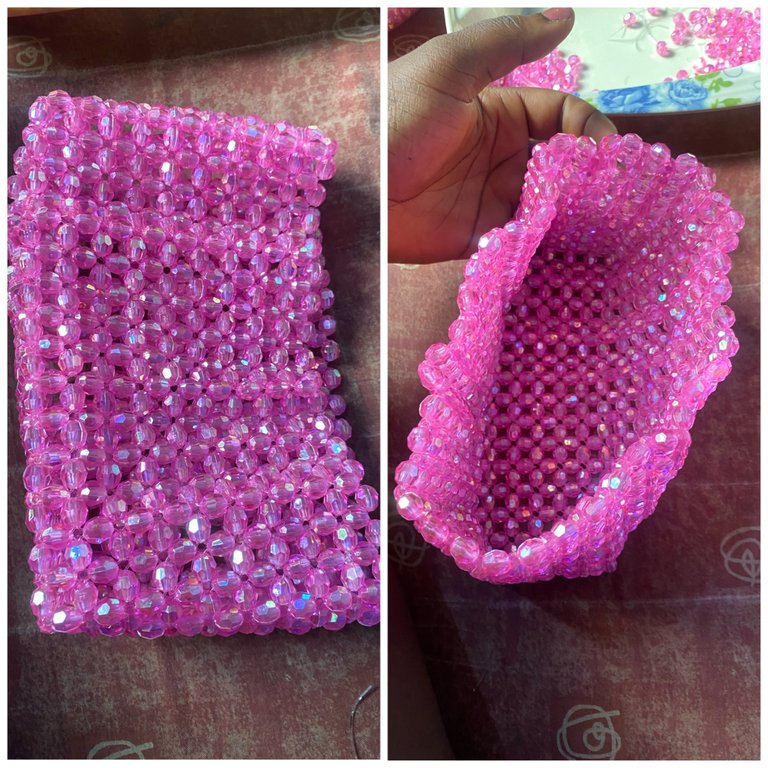
Once the main body of the bag was complete, I create the bag cover using 10 beads for the width and 8beads for the length.
Step 6
Next, I made the upper small handle one bead away fro the sides using a length of 15 beads.
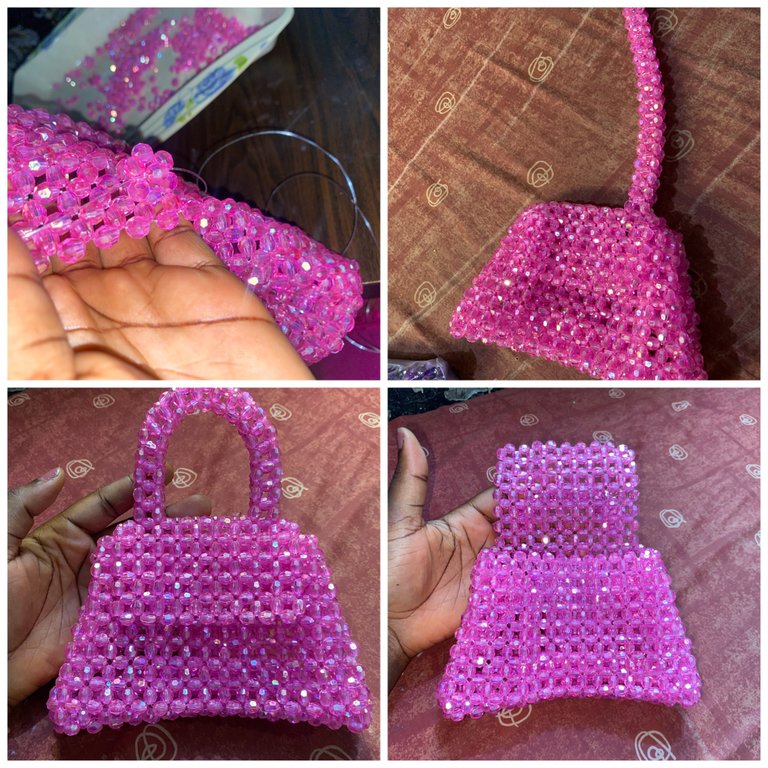
Finally, our bag is complete. In future, I will make sure I put a ring at the side and create a longer rope for it. Also I need to find the reason why at bending. Another thing I need is a magnet to hold the flap. I definitely will be getting that when next I go to the market. For now, I’m proud of what I was able to create and I do hope you guys like it too.
FINAL LOOK

What do you guys think of this style? Is it something you see yourself rocking?