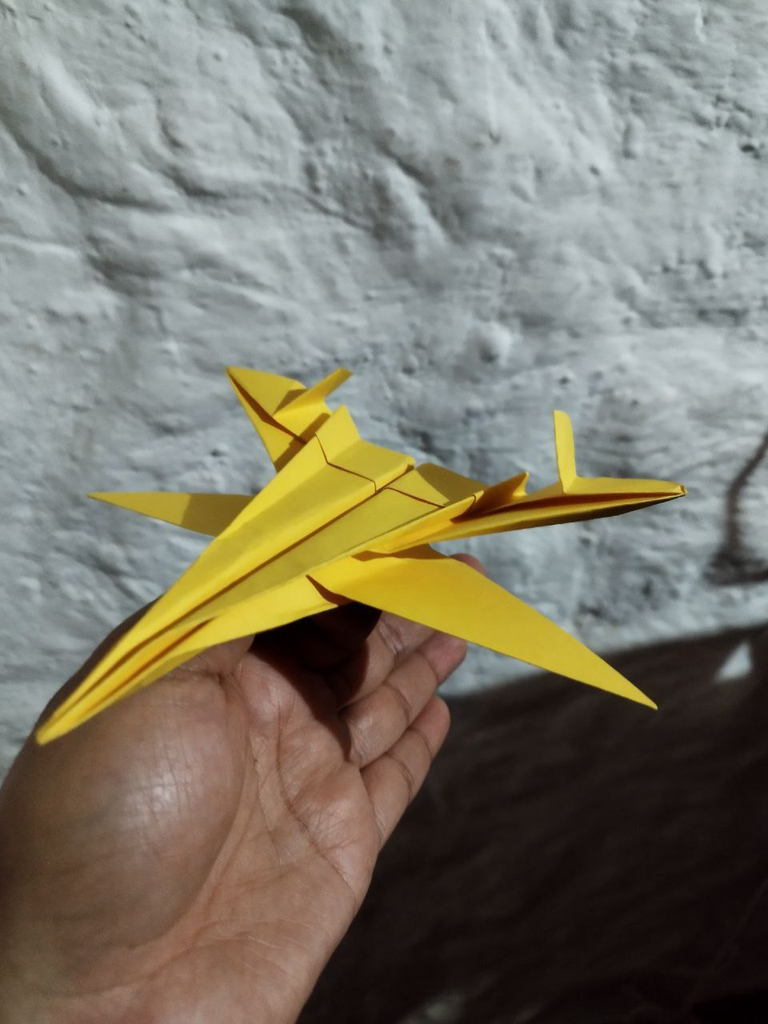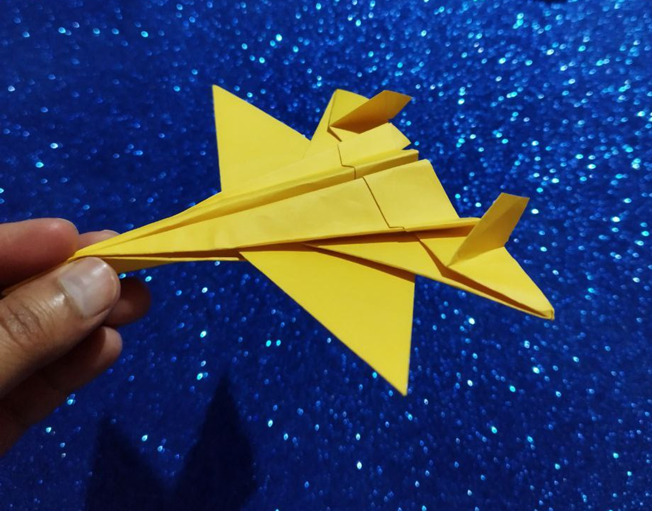
Greetings community!
I hope you have a great weekend. To start off with some inspiration I have encourage myself to upload a second project for the DIY community.
My first project was a Velociraptor. This time I'm sharing with you a really cool jet plane. I hope you enjoy it a lot.
I decided to use normal letter paper but in yellow color. The sheet cost me about 2 Bs (0.05 $ USD). Of course, to practice I made use of some recycled sheets. The size of the sheet I used is (21.5 x 28) cm.
¡Saludos comunidad!
Espero tengan un gran fin de semana. Para comenzar con algo de inspiración he decidido animarme a subir un segundo proyecto para la comunidad de DIY.
Mi primer proyecto fue un Velociraptor. En esta nueva ocasión les estoy compartiendo un avión Jet muy bueno. Espero lo disfruten mucho.
Decidí hacer uso d un papel tipo carta normal, pero de color amarillo. La hoja me valió unos 2 Bs (0.05 $ USD) Por supuesto para practicar hice uso de algunas hojas de reciclaje. Las medidas de la hoja que utilicé son de (21,5 x 28) cm
Tutorial
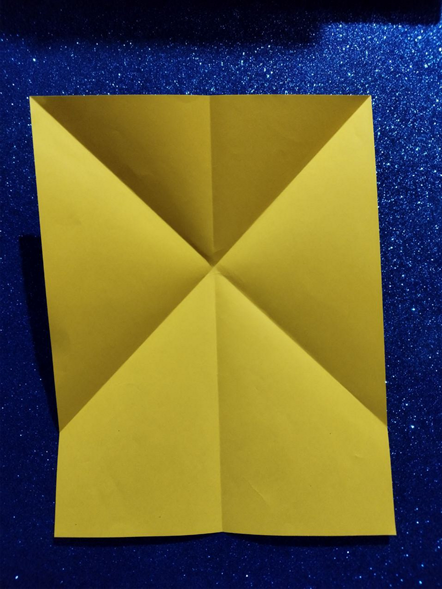
Having our worksheet. The longest part of the sheet was folded in half. Then, we fold the sheet diagonally one by one by the corners that are joined by one of the shorter sections of the paper.
Tutorial
Teniendo nuestra hoja de trabajo. La parte más larga de la hoja fue doblada por la mitad. Luego, doblamos la hoja diagonalmente una a una por las esquinas que se unen por uno de los tramos más cortos del papel.
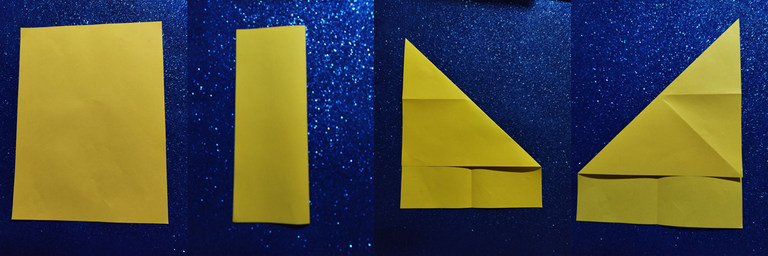
The folds should be well marked, especially the point formed when the three folds meet. As shown in the following image
Los pliegues deben quedar bien marcados, especialmente el punto que se forma al unirse los tres dobleces. Tal y como se ve en la siguiente imagen
Now we proceed to form a triangle with these folds already formed. To do this, hold both lower diagonal folds with both hands and at the same time, press the sides of the paper that I marked in the image with red arrows one in the direction of the other. At the same time, gently pull the upper part towards the table surface until the upper part comes down and forms another triangle. Two triangles will remain on top of each other.
Ahora procedemos a formar un triángulo con estos pliegues ya formados. Para ello, sujete ambos pliegues diagonales inferiores con ambas manos y al mismo tiempo, presione los laterales del papel que marqué en la imagen con flechas roja uno en dirección del otro. Al mismo tiempo, vaya tirando suávemente de la parte superior, hacia la superficie de la mesa, hasta que la parte superior se vaya viniendo hacia abajo y vaya formando otro triángulo. Quedarán dos triángulos uno arriba del otro.

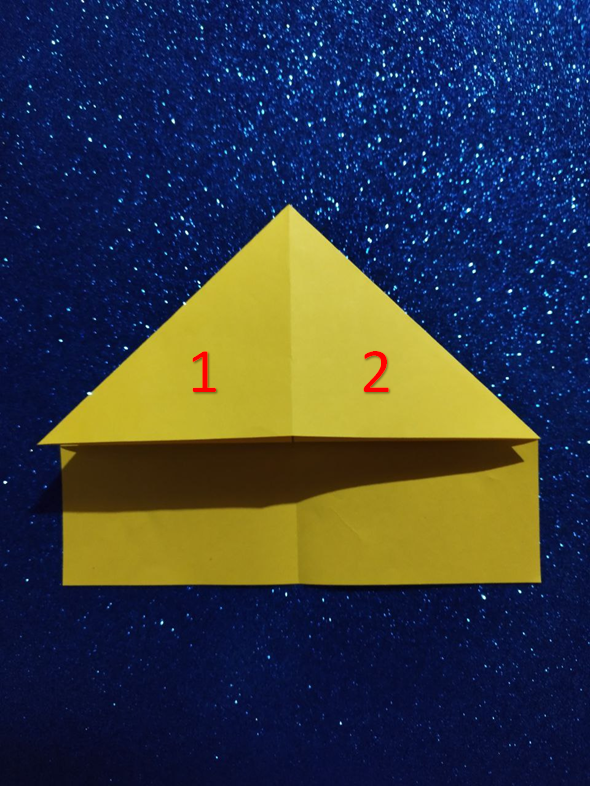
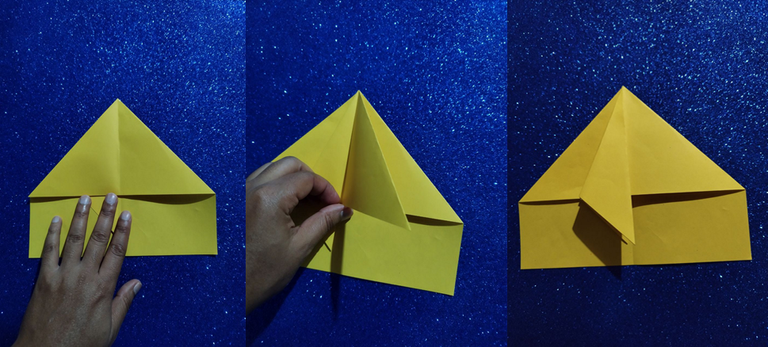
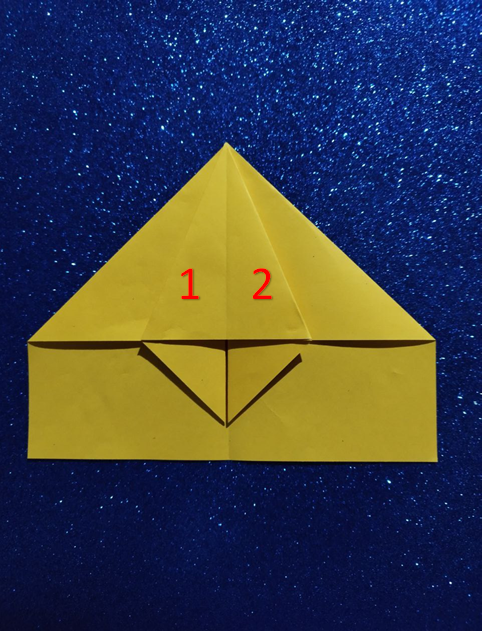
Now, we will work with this first triangle. First, we will work with the flap of the left triangle (in the image represented by the number 1). To do this, bend this flap to the right along the middle line that is demarcated so that the two flaps are facing each other. Once in this position, proceed to fold flap 1, this will be done from the upper middle fold to the middle part of the flap, to make it comfortable, fold so as to form a triangle where the outer edge of this flap joins the middle fold without creating distortion.
Ahora, trabajaremos con este primer triángulo. Primero trabajaremos con la aleta del triángulo izquierdo (en la imagen representada con el número 1). Para ello, doble esta aleta hacia la derecha por la línea media que está demarcada, de manera que las dos aletas queden una frente a la otra. Ya en esa posición, procederá a doblar la aleta 1, esto lo hará desde el pliegue medio superior hasta la parte media de la aleta, para que se le haga cómodo, doble de manera que forme un triángulo donde la arista externa de esta aleta se una al pliegue medio sin crear distorsión.
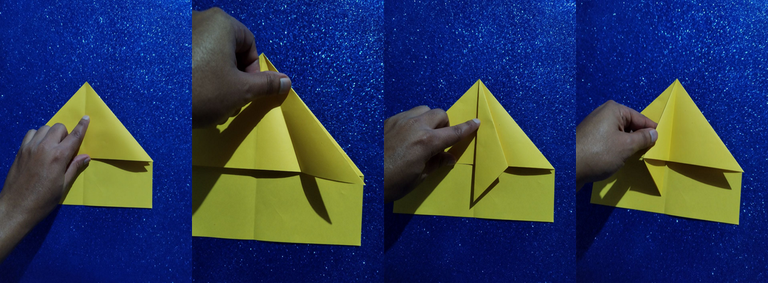
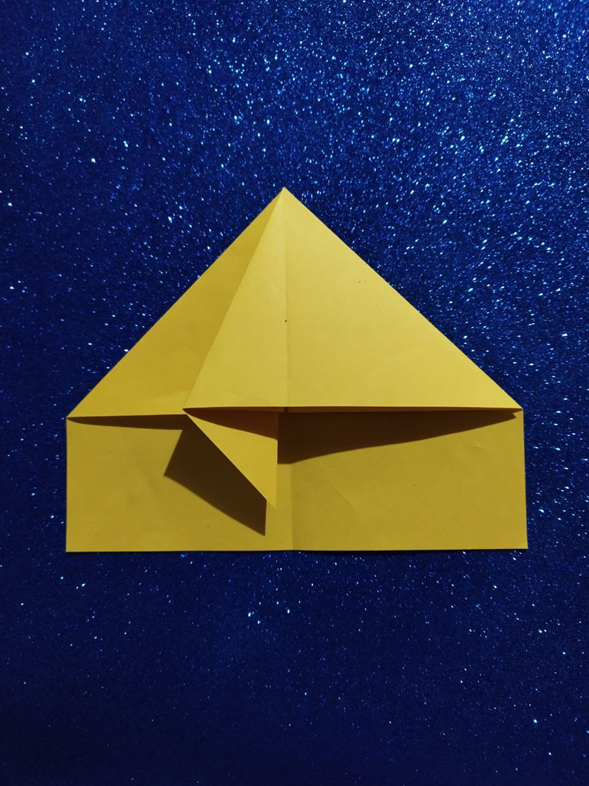
Return this new triangle to the position you had in 1. This is for the intention of working with fin number 2. The steps for this new flap are similar to the previous case. Fold 2 in the direction of 1 along the center line. Then fold this flap to form a new triangle, using the triangle formed from 1 as a guide.
Leave the newly formed triangles in positions 1 and 2 that they had from the beginning.
Este nuevo triángulo regréselo a la posición que tenía en 1. Esto por la intención de trabajar con la aleta número 2. Los pasos para esta nueva aleta son similares al caso anterior. Doble 2 en dirección de 1 por la línea central. Luego doble esta aleta hasta formar un nuevo triángulo, utilice de guía el triángulo que se formó de 1.
Deje los nuevos triángulos formados en las posiciones 1 y 2 que poseían desde un comienzo.
Now let's work on the back end of the project.
Ahora trabajemos por la parte posterior del proyecto.
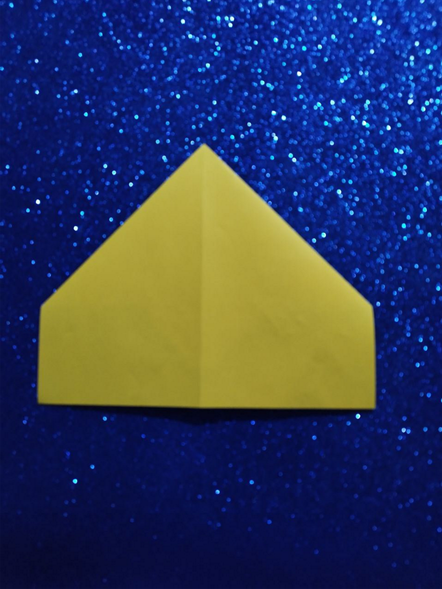
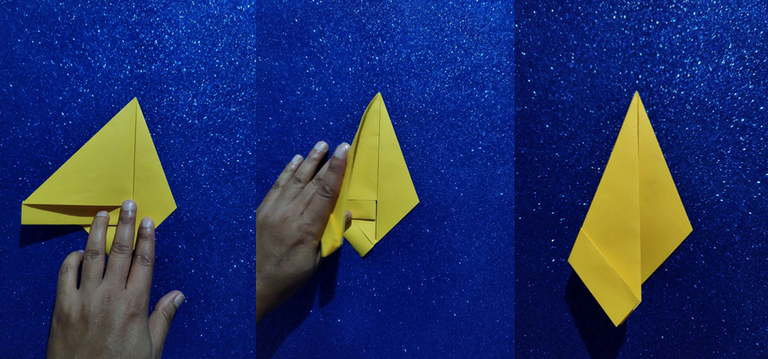
We are going to make a fold at the bottom, only on this side of the sheet. This will be the tail part of our Jet. Then, fold it in half again, but in the opposite direction (downwards).
Vamos a realizar un doblez en la parte inferior, únicamente a esta cara de la hoja. Esta vendrá siendo la parte de la cola de nuestro Jet. Luego, vuelva a doblar éste por la mitad, pero en dirección opuesta (hacia abajo).
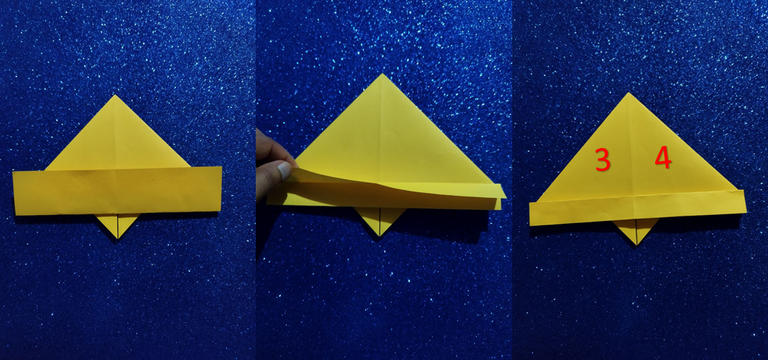
Fold all the way around the center fold. I mean, join sides 3 and 4. Only these sides. Parts 1 and 2 do not join them to this fold.
Now you will fold flap 3 from the center fold. As in one of the previous steps, join the outer edge of this triangle to the center fold. Rotate this new triangle around the center fold, in the direction of triangle 1. Also, you will do this same treatment with flap number 4. Rotate, four towards 3 and use the newly made triangle of 3 as a guide to form the new triangle 4 and then rotate around the center fold in the direction where triangle 4 originally was.
Doble por todo el pliegue central. Me refiero a, unir las caras 3 y 4. Solo estas caras. Las partes 1 y 2 no las una a este doblez.
Ahora la aleta 3 la doblará desde el pliegue central. Igual que en uno de los pasos anteriores, una la arista externa de este triángulo con el pliegue central. Gire este nuevo triángulo en torno al pliegue central, en dirección del triángulo 1. También, hará este mismo tratamiento con la aleta número 4. Gire, cuatro hacia 3 y utilice de guía el triángulo recientemente hecho de 3 para formar el nuevo triángulo 4 y luego gire en torno al pliegue central en dirección donde originalmente estaba el triángulo 4.

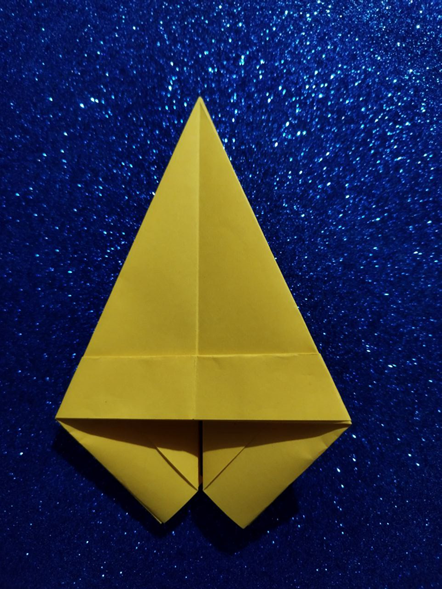
Now, we will flip the project, to work again on the first side.
Ahora, voltearemos el proyecto, para trabajar nuevamente en la primera cara.
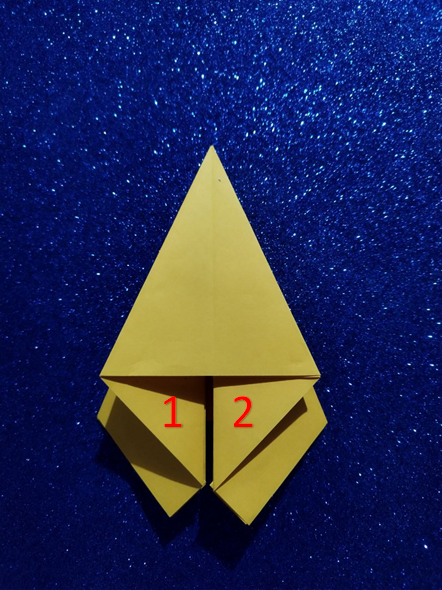
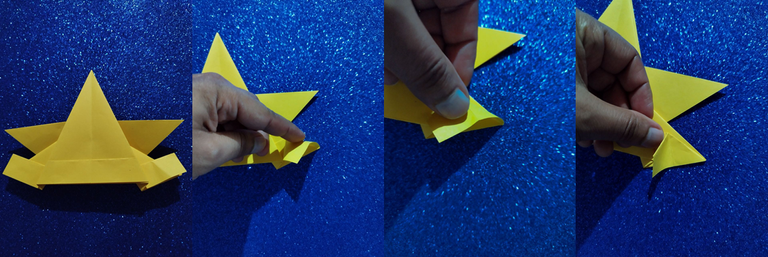
Let's unfold the wings. To do this, slightly unfold 1 or 2 and stretch the paper as far as you can to the fold, and subtly fold in the hidden part as if forming a smaller triangle. This process is for both parts (1 and 2).
Vamos a desplegar las alas. Para ello, desdoble levemente 1 o 2 y estire el papel todo lo que pueda hasta el pliegue, y doble sutilmente en la parte oculta como si formara un triángulo menor. Este proceso es para ambas partes (1 y 2)
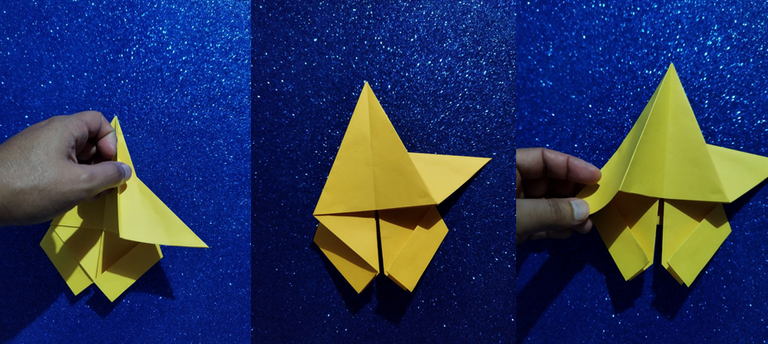
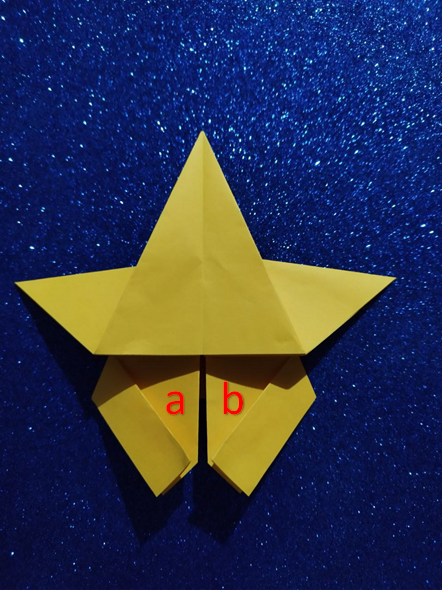
Now, we will start shaping the tail. For this, we will stretch a and b, and just as we did for the wings, we will fold in the folds and form a small triangle hidden under the wings.
Ahora, le empezaremos a dar forma a la cola. Para esto, vamos a estirar a y b y tal y como hicimos para las alas, doblaremos en los pliegues y formaremos un pequeño triángulo oculto bajos las alas.
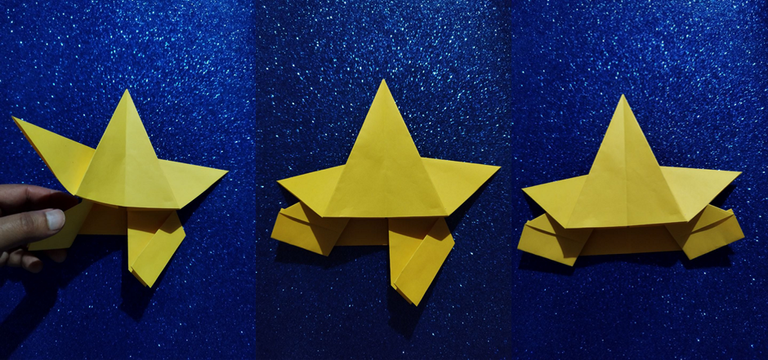
Then you will fold each of the wings down the center fold in the direction of the other wing. This is to make a small fold at each end of the wings.
Luego cada una de las alas la doblarás por el pliegue central en dirección de la otra ala. Esto es para hacer un pequeño doblez en cada extremo de las alas.
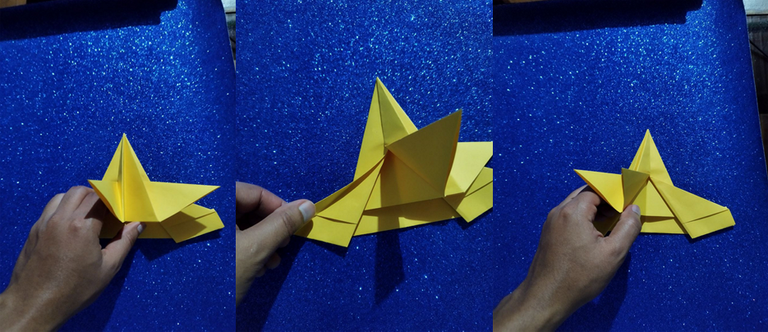
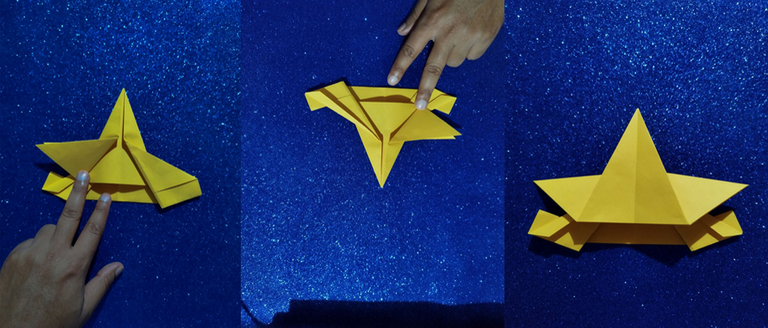
Now, we are going to work again on the other side of the project. We are going to make the ailerons of the tail part of the plane. To do this, let's make a small fold on each edge of the tail.
Ahora, vamos a trabajar nuevamente por la otra cara del proyecto. Vamos a realizar los alerones de la parte de la cola del avión. Para ello, realicemos un pequeño doblez en cada borde de la cola.
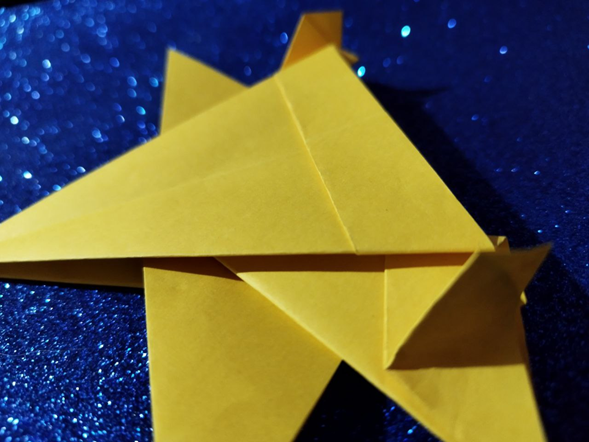
We are almost finished. Let's give the shape to our plane. To do this, we are going to fold the plane all the way around the center fold of the two halves. While the plane is folded, we're going to sink a little bit the whole middle of the plane with our finger.
Ya casi estamos terminando. Vamos a darle la forma a nuestro avión. Para ello, vamos a doblar el avión por todo el pliegue central las dos mitades. Mientras está doblado el avión, vamos a hundir un poco todo el medio del avión con nuestro dedo.
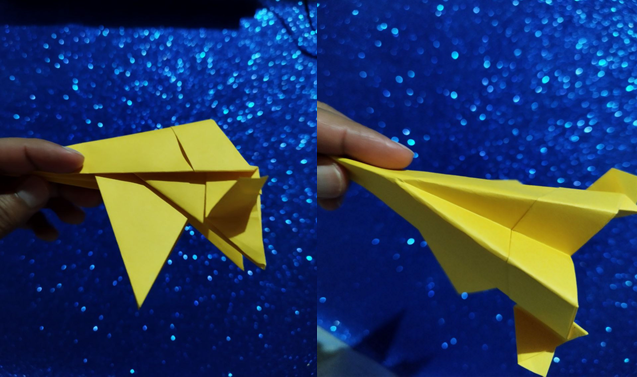
You can already see the shape of our airplane. Finally, we are going to shape our wings and a thinner body. To do this, while maintaining the position of the plane, stretch the wings up the plane and fold them flush with the body of the plane, so that there is no excess underneath and is stylized. This step will also serve to maintain the shape of the entire plane, so bend very securely. This step for both wings.
Ya puede ir observando la figura de nuestro avión. Por último, vamos a darle forma a nuestras alas y un cuerpo más delgado. Para ello, mientras mantiene la posición del avión, estire las alas hacia arriba del avión y dóblelas al ras del cuerpo del avión, de manera de que no se note un exceso por debajo y quede estilizado. Este paso, también servirá para mantener la forma de todo el avión, por eso debe doblar con mucha seguridad. Este paso para ambas alas.
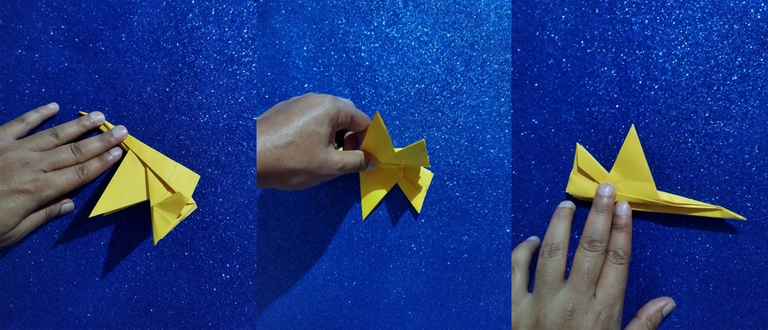
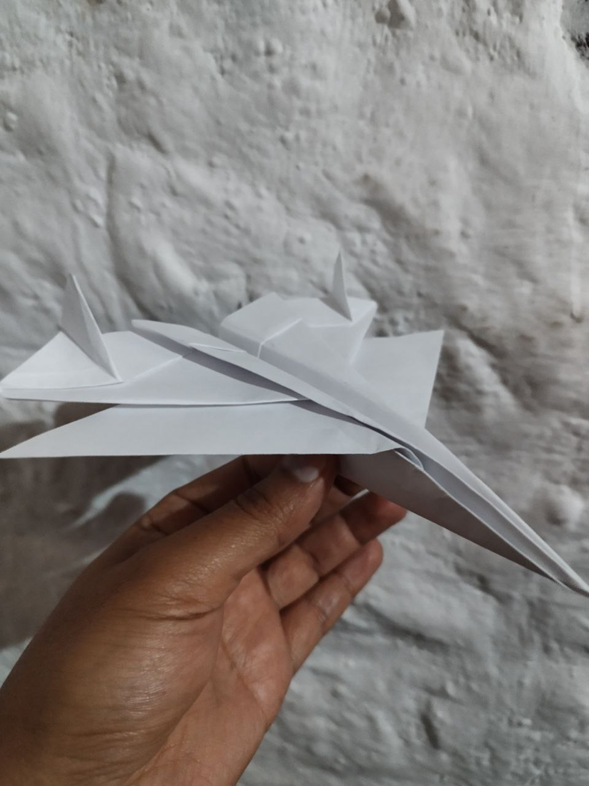
We have already finished our aircraft!
¡Ya hemos terminado nuestro avión!
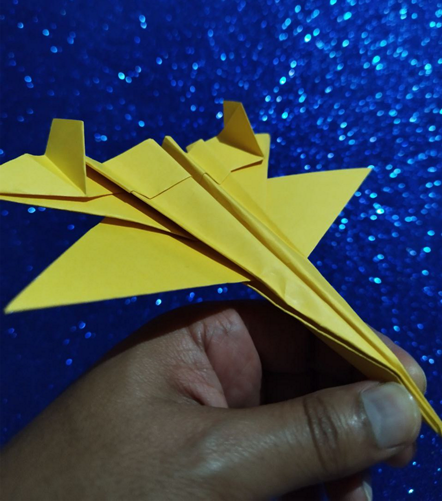
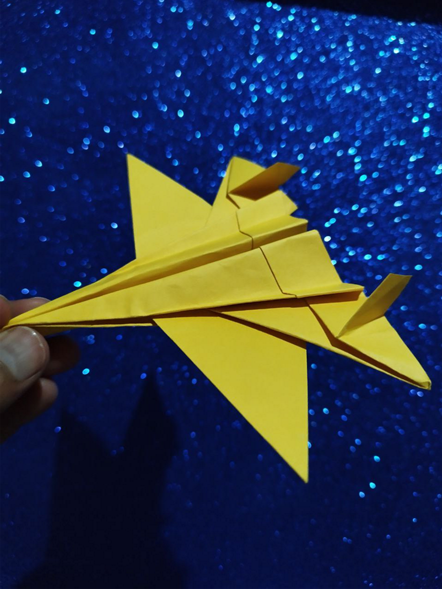
Amazing, isn't it? Like many of my classmates, these are my first origami works and it's great to be able to do them. I have other projects in mind, I hope I have time to share them.
If you liked the project, if you understood the project or something was a little strange, you can let me know.
Asombroso verdad. Como a muchos de mis compañeros, estos son mis primeros trabajos en origami y es genial poder hacerlos. Tengo otros proyectos en mente, espero me de tiempo de compartirlos.
Si les ha gustado el proyecto, si han entendido el proyecto o algo quedó un poco extraño, pueden hacérmelo saber.
