Greetings community. How are you preparing to receive this Christmas? I hope very well. At home we are very busy, finishing work, fixing the house, cleaning, painting and still preparing many things. I am glad that all these activities are being done as a team because they are certainly more bearable this way.
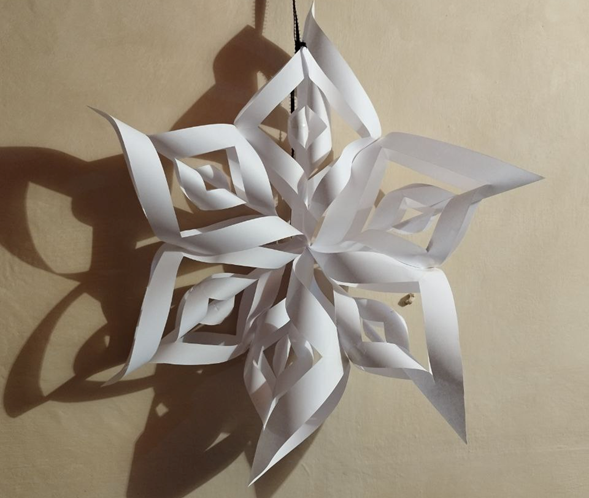
In between the preparations to decorate the house, I have decided to make some decorations. For example, this garland can be hung almost anywhere. The first one I made, was with the purpose of helping my mother to decorate the door of her work. So while I was making it, I thought I would bring you the details so that you would have at your disposal this very pretty and easy-to-design resource.
I hope you like it.
Saludos comunidad. Cómo se preparan para recibir estas navidades. Espero que muy bien. En casa estamos muy ocupados, terminando los trabajos, arreglando la casa, limpiando, pintando y aún preparando muchas cosas. Me alegro de que todas estas actividades las estemos realizando en equipo, porque sin duda alguna son más llevaderas de esta forma.
Entre los preparativos para adornar la casa, he decidido realizar algunos adornos. Por ejemplo, esta guirnalda que pueden colgar casi en cualquier lugar. Esta primera que realicé, fue con el propósito de ayudar a mi madre para adornar la puerta de su trabajo. Así que mientras la hacía, pensé en traerles los detalles para que tuvieran a su disposición este recurso muy bonito y realmente fácil de diseñar.
Espero les guste.
Materials
6 sheets of white letter-size paper.
Scissors
Packing tape (transparent)
Stapler
Great that they are few materials and very inexpensive!
Tutorial
Follow this tutorial to the letter and you will undoubtedly become an expert at making these beautiful ornaments.
We will work on our garland in sections. The process for each section is to repeat the same steps as below.
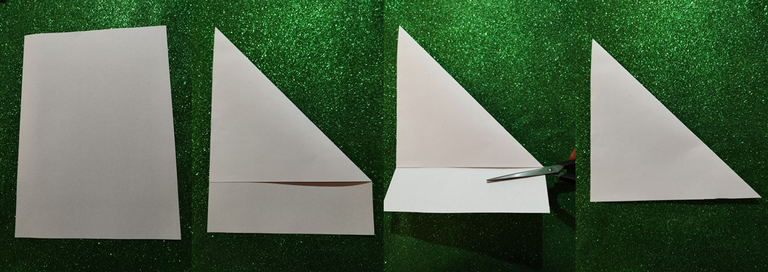
First, take one of the sheets of paper and fold it along any of the diagonals. Then, with the scissors cut off the excess paper that was not folded.
Materiales
6 hojas de tamaño carta de color blanco.
Tijera
Cinta de embalar (transparente)
Grapadora
¡Excelente que sean pocos materiales y de muy bajo costo!
Tutorial
Siga al pie de la letra este tutorial y sin duda se convertirá en un experto realizando estos hermosos adornos.
Trabajaremos por secciones nuestra guirnalda. El proceso, para cada sección es repetir los mismos pasos que efectuará a continuación.
Primero, tome una de las hojas de papel y dóblela por cualquiera de las diagonales. Luego, con la tijera corte el sobrante del papel que no se dobló.
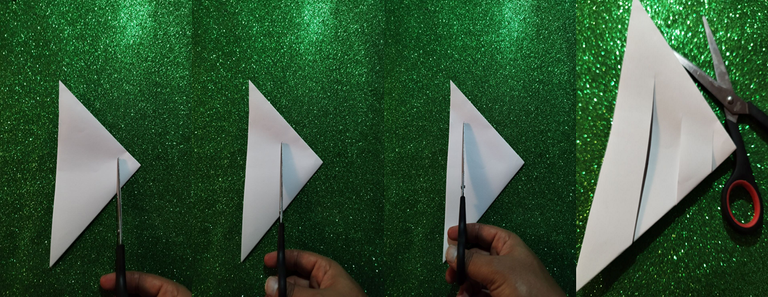
Let's fold this new paper to create a new triangle, as shown below.
Doblemos este nuevo papel con la intención de crear un nuevo triángulo, como se ve a continuación.
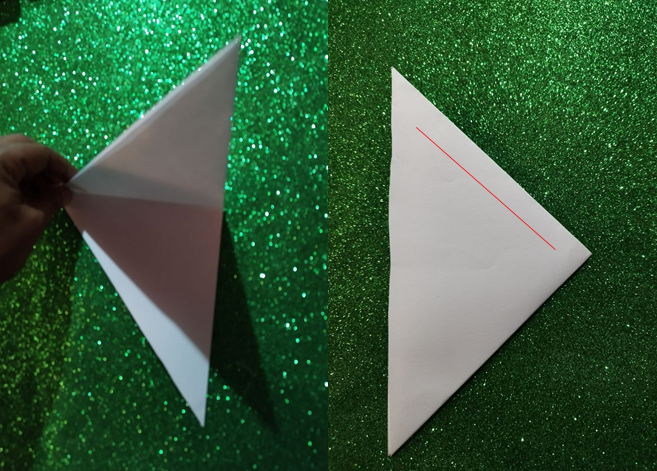
Now, we will make 3 straight cuts side by side with a separation of 2.5 to 3 centimeters between cuts. The length of each cut can be done as if you want to reach an imaginary line that is parallel to the top edge. This is how I drew it in the previous image. Anyway, in the following images, I make the traces with the scissors, approximately where I made the cuts and up to where I made them.
Ahora, realizaremos 3 cortes rectos uno al lado de otro con una separación de 2,5 a 3 centímetros entre corte. El largo de cada corte puede hacerlo como si quisiera alcanzar una línea imaginaria que es paralela al borde superior. Así cómo les dibujé en la imagen anterior. De todos, modos en las siguientes imágenes hago los trazos con la tijera, aproximadamente dónde realicé los cortes y hasta dónde los hice.
Now let's unfold all the work and stretch the paper well to start the next stage.
Desdoblemos ahora todo el trabajo y estiremos bien el papel para empezar la siguiente etapa.
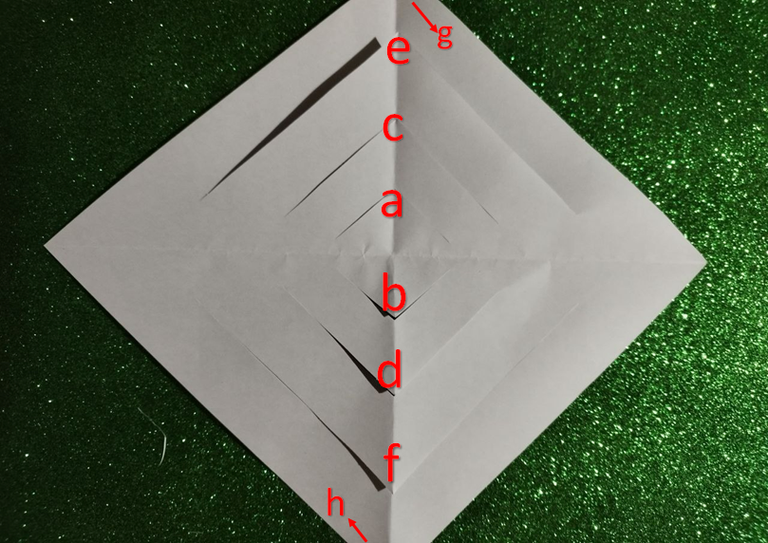
You will notice that concentric squares have been formed. For each vertex of these squares that have been formed, we are going to join them respectively. The procedure will be as follows. Take the points a and b that I marked in the previous image, join them, and with the duct tape glue them together.
Now you will go for the points of square c and d. To work on them, flip the sheet over, one c and d, and then tape them together. Again, flip the sheet over, join tips e and f, and tape them together. And lastly, join ends g and h and tape them together.
On one side of the project you will be left with the joined ends a with b; e with f. And on the other side of the project, you will be left with the ends c with d and g with h.
Podrá notar que se han formado especie de cuadros concéntricos. Cada vértice de estos cuadros que se han formado, vamos a unirlos respectivamente. El procedimiento será el siguiente. Tome los puntos a y b que marqué en la imagen anterior, únalos y con la cinta de embalar péguelos.
Ahora irá por las puntas del cuadro c y d. Para trabajar en ellos, voltee la hoja, una c y d y luego péguelos con cinta de embalar. Nuevamente, voltee la hoja, una las puntas e y f y péguelos con cinta. Y por último las puntas g y h únalas y péguelas con cinta de embalar.
De un lado del proyecto le quedarán las puntas unidas de a con b; e con f. Y del otro lado del proyecto le quedarán las puntas c con d y g con h.
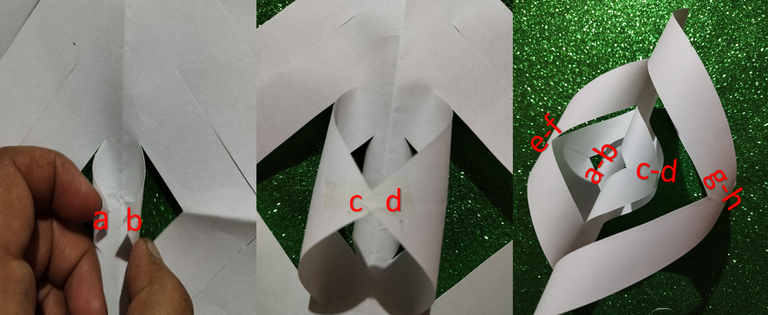
We already have 1/6 of our garland. Now, we must perform the same procedures with the other 5 sheets.
- Fold and cut the excess paper.
- Form the smallest triangle.
- Make the three straight cuts to this triangle.
- Unfold well.
- Join the vertices of the squares formed by these cuts. These joints will be interleaved. Boxes 1 and 3 are joined on one side of the project and boxes 2 and 4 are joined on the other side.
Ya tenemos 1/6 de nuestra guirnalda. Ahora, debemos realizar estos mismos procedimientos con las otras 5 hojas.
- Doblar y cortar el excedente de papel.
- Formar el triángulo más pequeño.
- Realizar los tres cortes rectos a este triángulo.
- Desdoblar bien
- Unir los vértices de los cuadros que se formaron gracias a estos cortes. Estas uniones serán intercaladas cuadro 1 y 3 se unen por un lado del proyecto y los cuadros 2 y 4 se unen por el otro lado.
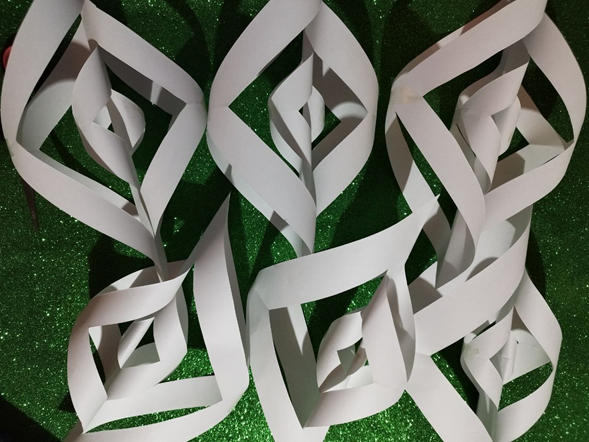
After having the 6 parts of our garland made, we will proceed to join them together.
To do this, take 3 of these parts and proceed to staple them together by one of the pointed sides.
Then these three structures can be comfortably joined together by their sides. A good staple should be more than enough to join them together.
Luego de tener las 6 partes de nuestra guirnalda hecha, vamos a proceder a unirlas.
Para ello, tome 3 de estas partes y proceda a engraparlas juntas por uno de los lados puntiagudos.
Luego estas tres estructuras pueden ser unidas cómodamente por sus lados. Con una buena grapa debe ser más que suficiente para unirlos.
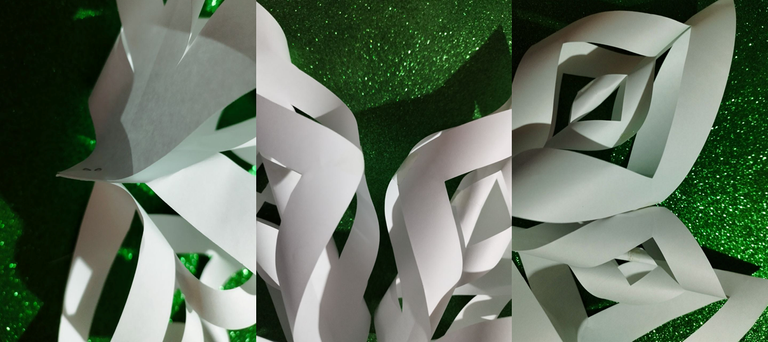
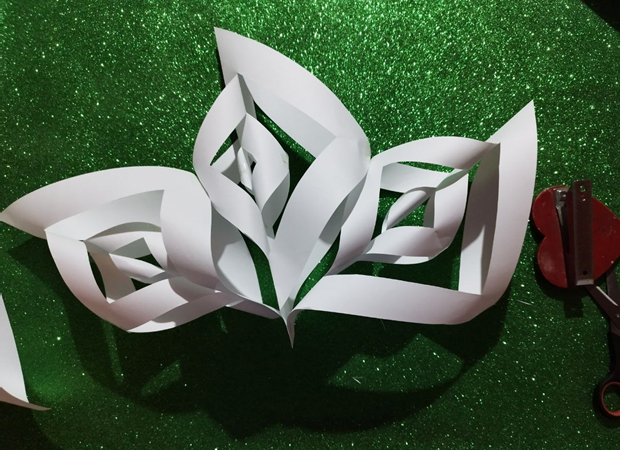
At the same time, this procedure will be performed on the remaining 3 structures. The three are joined by the most pointed side of the structures and then each side is stapled to join them better.
After having the two parts ready, we proceeded to join them on the same pointed side that we had already stapled. What remains is to join the missing sides, which separate the two structures also with staples and we have our garland ready to decorate the environment.
Al mismo tiempo, este procedimiento se realizará a las 3 estructuras restantes. Se unen las tres por el lado más puntiagudo de las estructuras y luego se engrapan cada lado para unirlas mejor.
Luego de tener las dos partes ya listas, procedemos a unirlas por el mismo lado puntiagudo que ya habíamos engrapado. Lo que resta es unir los lados faltantes, que separan las dos estructuras también con grapas y ya hemos tenemos listo nuestra guirnalda para decorar el ambiente.
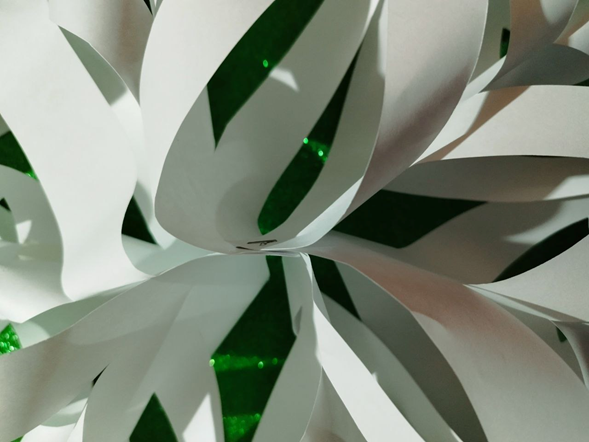
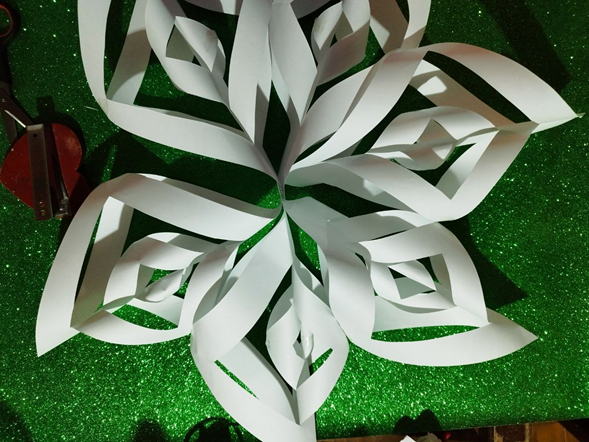
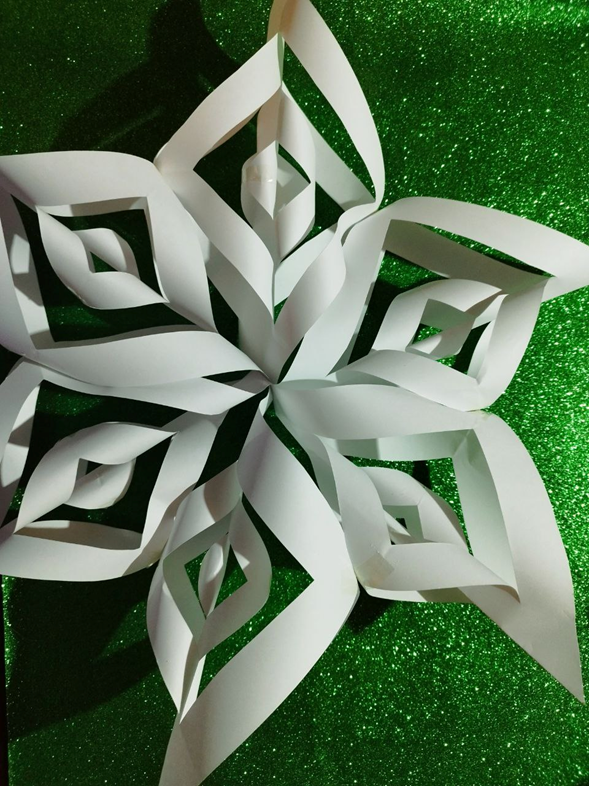
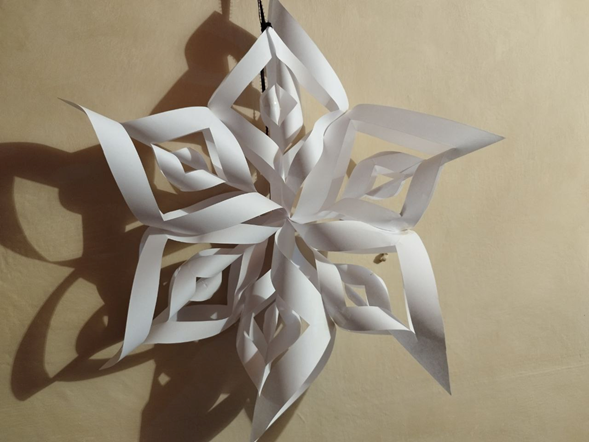
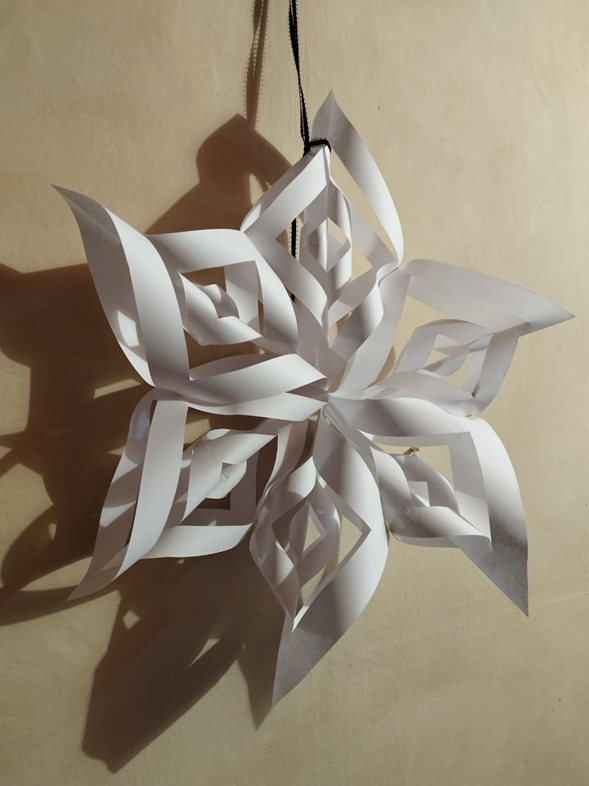
There is nothing more to do, just look for the right place you want to decorate. I left it next to the wall next to the door, so my mother could see it and take it to work. She liked it so much that she decided to put it in the middle of the living room. Now come the people in the house.
Thanks for stopping by my post
Ya no queda más que hacer, sólo buscar el sitio indicado que quieras decorar. Lo dejé al lado de la pared contigua a la puerta, para que mi madre lo viera y pudiera llevarselo a su trabajo. Le gustó tanto que decidió colocarlo en el medio del salón. Ahora vienen los de la casa.
Gracias por pasarte por mi post
A post created for the DIYHub community
Un post creado para la comunidad de DIYHub
