

Hello friends, I hope you are feeling very well, this time I want to participate in the contest carried out by DiyHub in collaboration with Liketu, where it is about showing something that is a reference to the terrifying Halloween party. My participation is a small scarecrow made with materials that can be recycled, inspired by the traditional pumpkin, the steps are very simple to carry out and it can be made of any size. I hope you like it.
Hola amigos, espero que se encuentren muy bien, en esta oportunidad quiero participar en el concurso llevado a cabo por DiyHub en colaboración con Liketu, donde se trata de mostrar algo que tenga como referencia a la aterradora fiesta de Halloween. Mi participación se trata de un pequeño espantapájaros realizado con materiales que se pueden reciclar, inspirado en la tradicional calabaza, los pasos son muy sencillos de realizar y puede hacerse de cualquier tamaño. Espero les guste.
Materials and tools to use:
- Recycled carton
- School glue
- Small balloons
- Thread
- Scissors and Razor
- Acrylic paint
- Brushes
Materiales y herramientas a utilizar:
- Cartón reciclado
- Pegamento escolar
- Globos pequeños
- Hilo
- Tijeras y Navaja
- Pintura Acrílica
- Pinceles
First step:
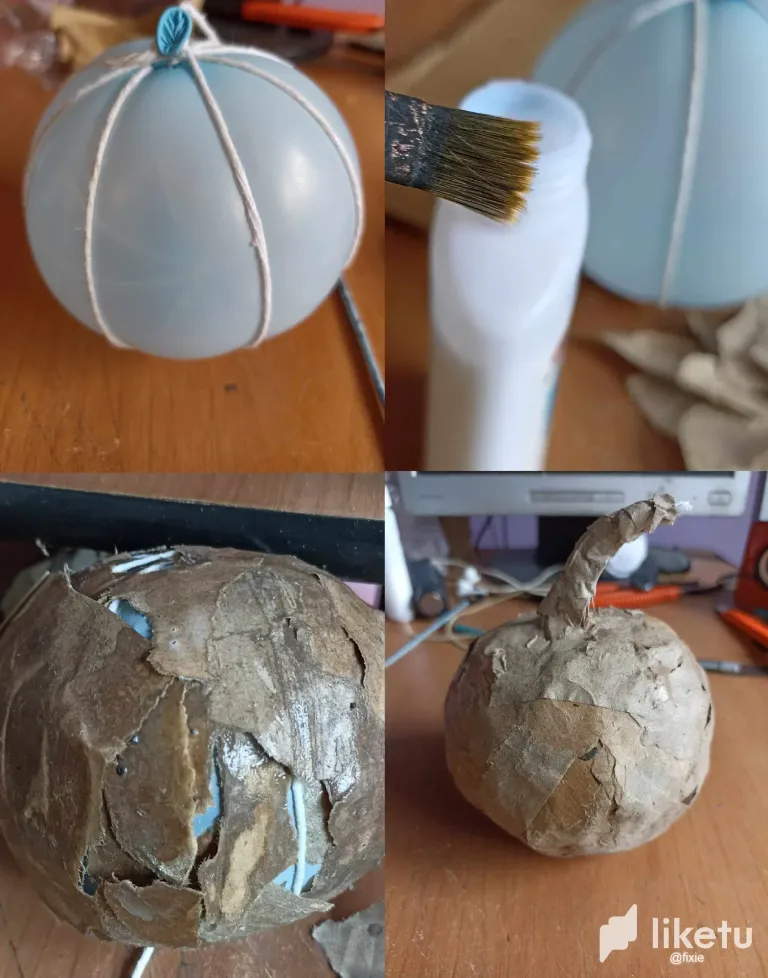
I take a small balloon and inflate it with air, then with thread I tie it on 8 sides, this is to make the pumpkin shape. Then I take the cardboard and crumble it to take a small brush and begin to apply the glue. Little by little I glue cardboard to the entire balloon until it is completely covered, then let it dry so that the cardboard hardens and the shape of the balloon is ready. the pumpkin.
Primer Paso
Tomo un pequeño globo y lo inflo con aire, luego con hilo la voy atando por 8 lados, esto es para hacer la forma de calabaza. Luego tomo el cartón y le desmenuzo para tomar una pequeña brocha y comenzar a colocar el pegamento, Poco a poco ir pegando cartón a todo el globo hasta cubrirlo por completo, después se deja secar para que el cartón se endurezca y tener lista la forma de la calabaza.
Second step:
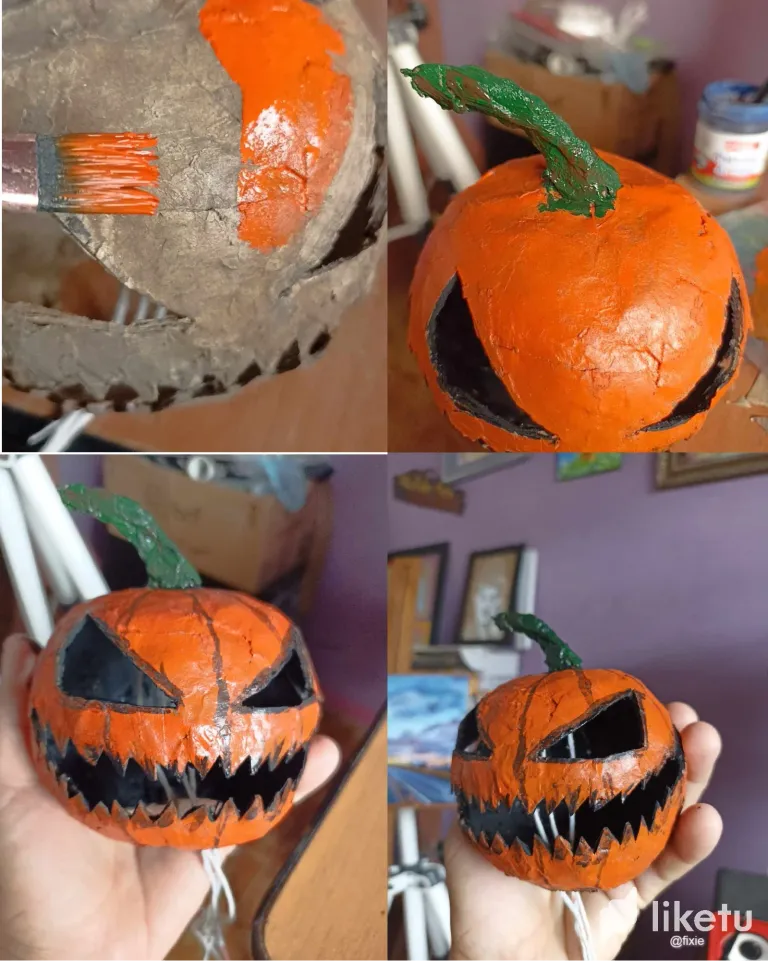
Once some time has passed and the cardboard is hardened, we make the eyes and mouth of the model and shape we want, I made the eyes like triangles and the very long and macabre smile full of sharp teeth. With a knife and scissors I cut out all the parts.
Segundo Paso:
Una vez haya pasado un tiempo y el cartón esté endurecido hacemos los ojos y la boca del modelo y forma que queramos, yo hice los ojos como unos triángulos y la sonrisa muy larga y macabra llena de afilados dientes. Con una navaja y tijeras fui cortando todas las partes.
Third step
Next I start to paint the pumpkin, first the orange color that goes in most of it, I use acrylic paint, in the same way I paint the inside but with black paint. Then I use the color black to decorate the pumpkin, make divisions and also many shadows and give it a more macabre appearance. Without forgetting to paint the small branch it has.
Tercer Paso
Seguidamente comienzo a pintar la calabaza, en primer lugar el color naranja que va en la mayor parte, utilizo pintura acrílica, de la misma forma pinto el interior pero con pintura negra. Después utilizo el color negro para decorar la calabaza, hacer divisiones y también muchas sombras y darle una apariencia más macabra. Sin olvidar pintar la pequeña rama que tiene.
Fourth step
Fourth step
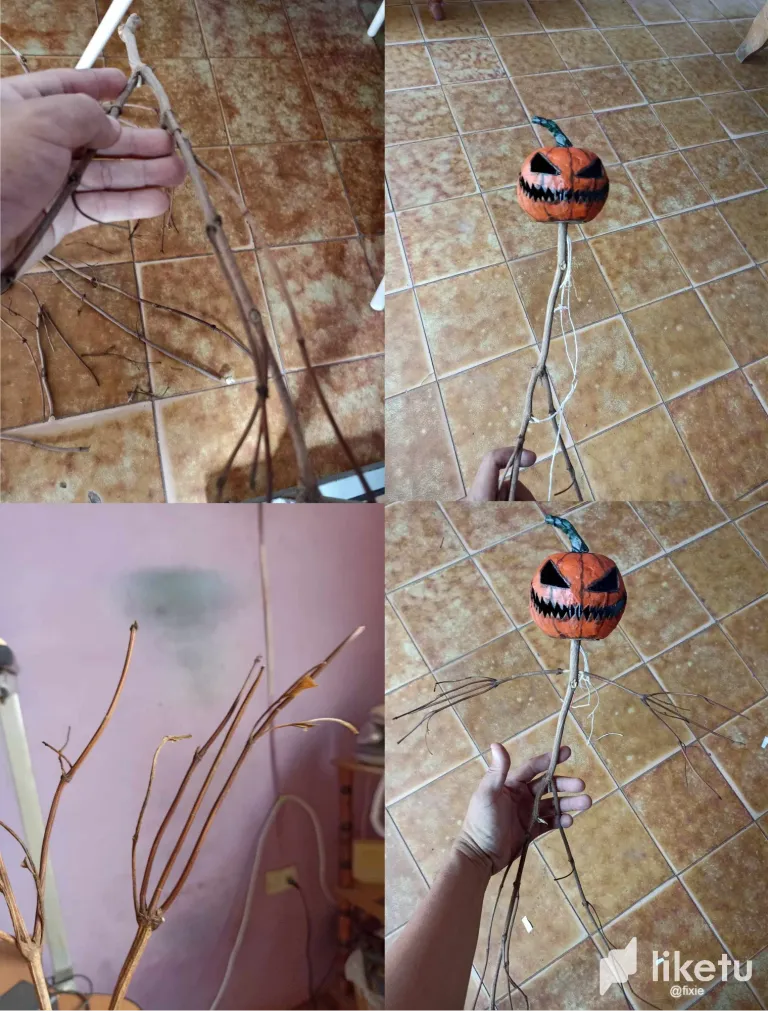
Then I start to assemble the body of the scarecrow, at first I was thinking of just making a pumpkin light but then I wanted to add more things to it. So to make the body I looked for many dry branches of plants that I wanted to make, I found some perfect ones, I just removed the leaves and left the dry branches exposed so that it would look more terrifying. I joined the branches that were separated with glue and then attached them to the head.
Cuarto Paso
Luego comienzo a armar el cuerpo del espantapájaros, en un principio pensaba hacer solo una luminaria d calabaza pero luego quise agregarle más cosas. Así que para hacer el cuerpo busque muchas ramas secas de plantas las cuales pusiera hacer, encontré algunas perfectas, solo quite las hojas y dejé las ramas secas al descubierto para que así luciera más aterrador. Uní las ramas que estaban separadas con pegamento y luego las uní a la cabeza.
Last step
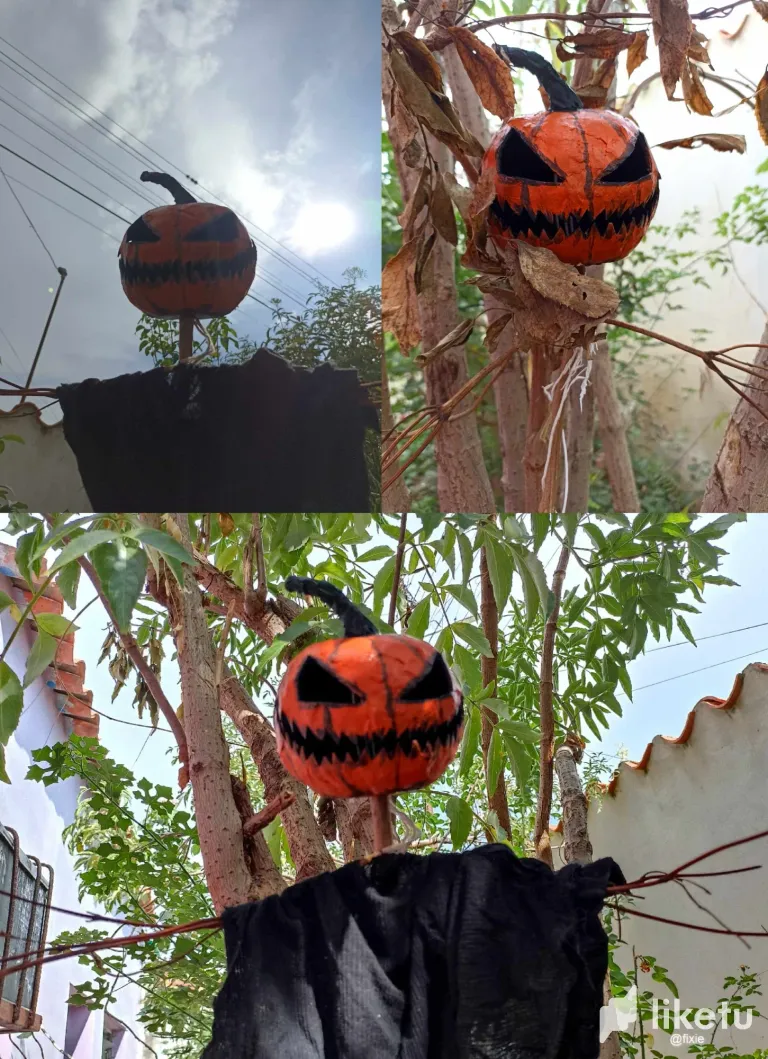
To give it an even more macabre tone I put clothes on it, which consisted of an old black fabric, I opened some holes in it and put it on little by little, I wanted to make a small hat but I didn't have enough material. However, it turned out very cool to me. This is how I finished.
Último paso
Par darle un tono aún más macabro le puse ropaje, que consistía en una tela vieja de color negro, le abrí algunos agujeros y la fui poniendo poco a poco, quise hacer un pequeño sombrero pero no me alcanzó el material. Sin embargo así me quedó muy genial. de esta forma finalicé.
The process was a little longer but I think I summarized it very well. Try to put the photos where each part of the process as well as the final result would best be seen. I took those photos using different lamps that I have made before and playing with the colors of the lights to make it a true Halloween creature. I hope you liked it, it has been a pleasure for me to be able to participate, if I have time I will try to make a mask. For now I say goodbye to you, see you soon!
El proceso era un poco más extenso pero creo que lo resumí muy bien. Trate de poner las fotos donde se viera mejor cada parte del proceso así como el resultado final. Esas fotos las tomé utilizando distintas lamparas que he realizado antes y jugando con los colores de las luces para que sea una verdadera criatura de Halloween. Espero que les haya gustado, ha sido un gusto para mi poder participar, si el tiempo me alcanza trataré de hacer una máscara. Por ahora me despido de ustedes, hasta pronto!
For the best experience view this post on Liketu


