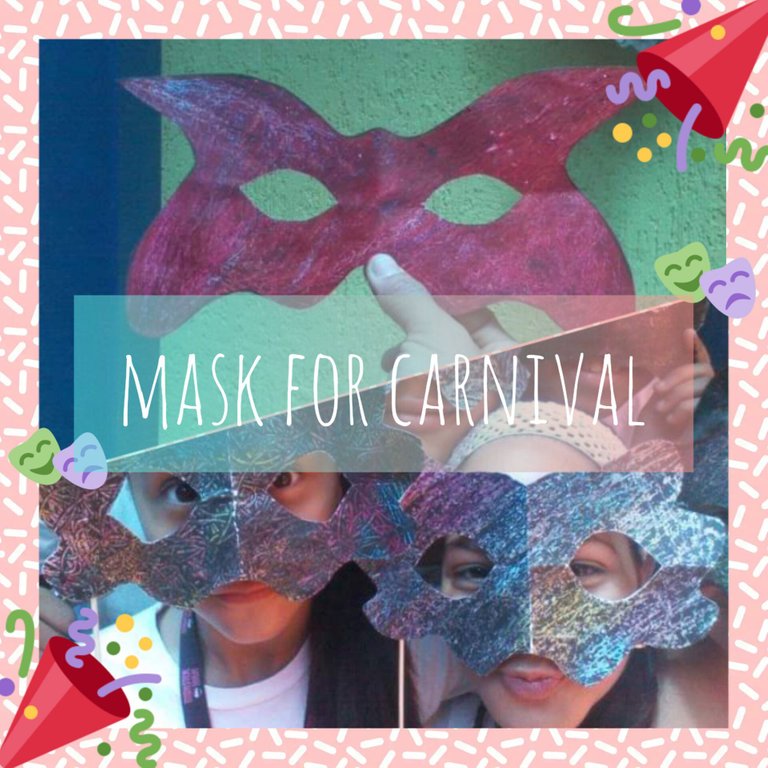
Saludos apreciados lectores hoy doy vida y amor a mi blog ♥️ con otro arte para niños centrado en el carnaval próximas fechas a celebrar y darnos un respiro en virtud de todo el torbellino de acontecer en los ultimos días, que para mi a sido una fuerte sacudida en especial por el factor económico 🤯 una ¡locura!
Son fechas en que los padres y maestros buscamos alternativas para ahorrar y por lo general reciclamos trajes viejos para volverlo a usar como disfraz. Entonces desde lo factible comparto hoy una forma de hacer antifaz muy sencilla que permite recrear la imaginación para ir a la fiesta de carnaval más cercana.
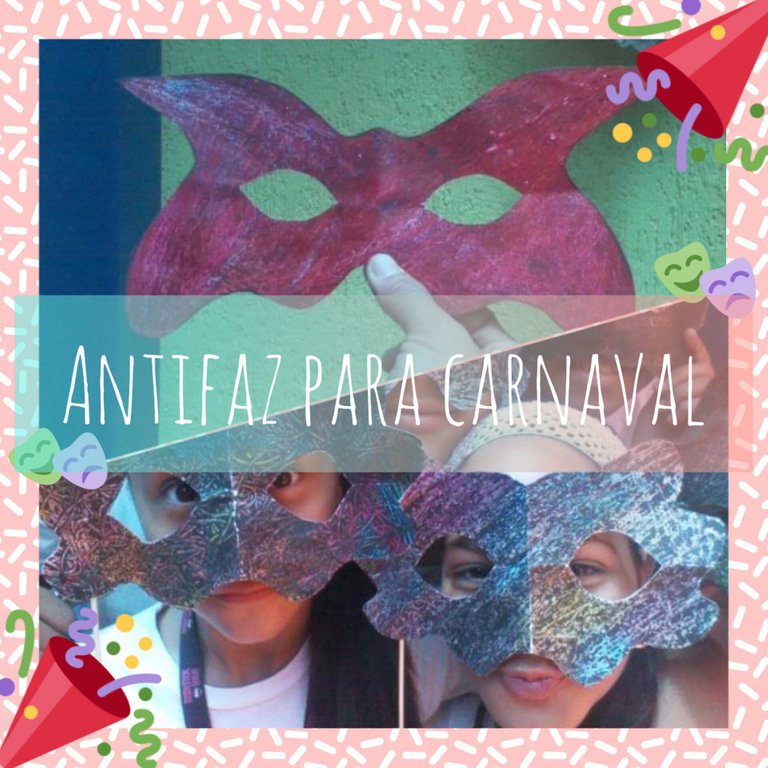
A través de una plantilla de cualquier antifaz es posible realizar otros con diversidad de formas y colores. Asi logré que un grupo de estudiantes 1ero a 6to grado lograrán realizar un antifaz a su gusto y con simples materiales.
Obviamente que al ser un arte para niños siendo elaborados por ellos mismo, el resultado es muy particular, la importancia que le doy a éste proceso, es el disfrute estético donde se puede recrear la imaginación e invitar al niño a expresarse de lo lindo.
Es por eso que hoy presento éste sencillo arte que en casa es posible aplicarle otros detalles para disfrutar los carnavales de este año con un toque divertido y personal. Asi que aquí comparto el paso a paso:
Materiales
- Tijera.
- Carpeta de cartulina gruesa en desuso.
- Un molde de algún antifaz.
- Pintura de agua.
- Creyones de cera.
- Pega blanca líquida.
- Palillo de altura.
PASO 1
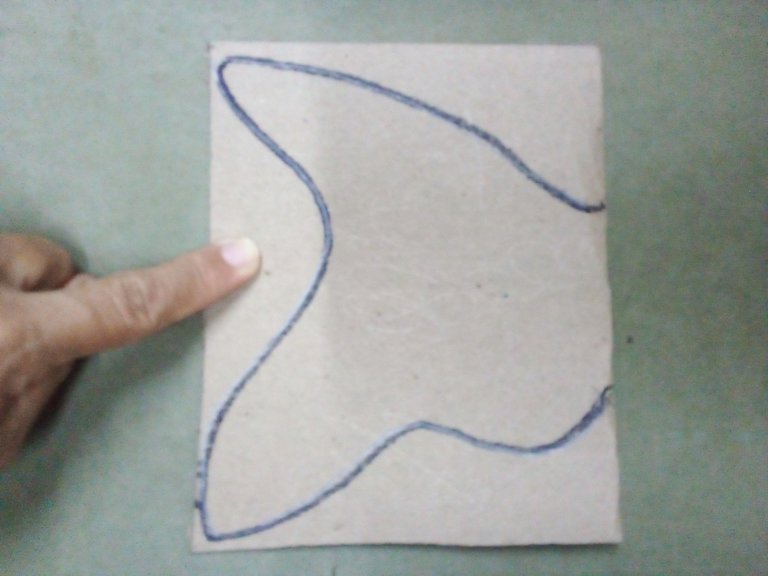
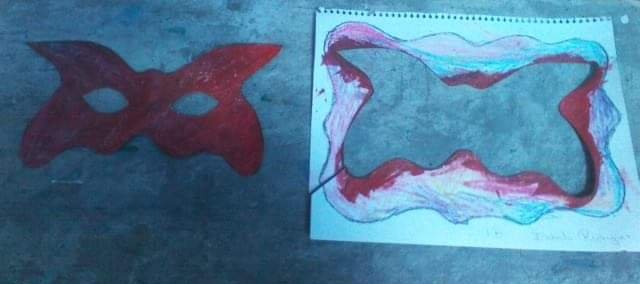
En un trozo de cartulina cortada en forma rectangular lo dividi a la mitad y dibujé en una las caras desde el centro a los extremos una línea curva de forma continua dejando un aproximado 6cm desde donde empecé el trazo hasta donde llegué.
PASO 2
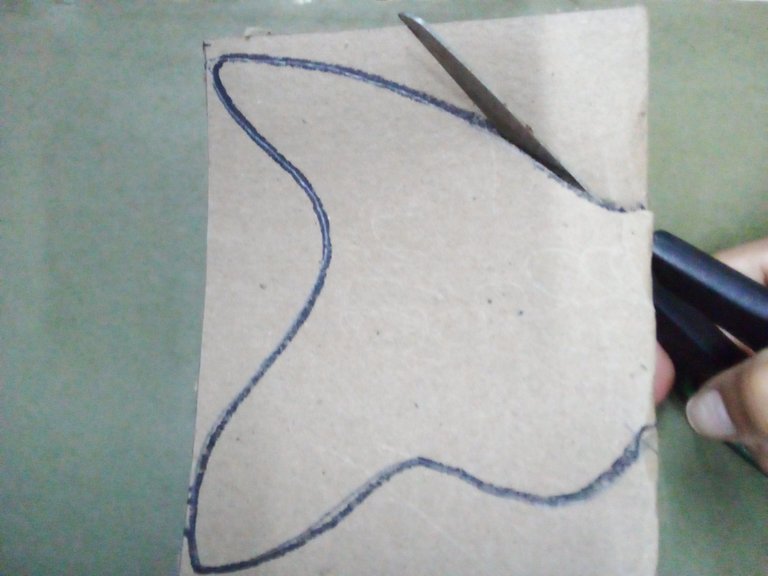
Con la cartulina doblada por la mitad corté la línea dibujada para obtener la misma forma de ambos lados.
PASO 3
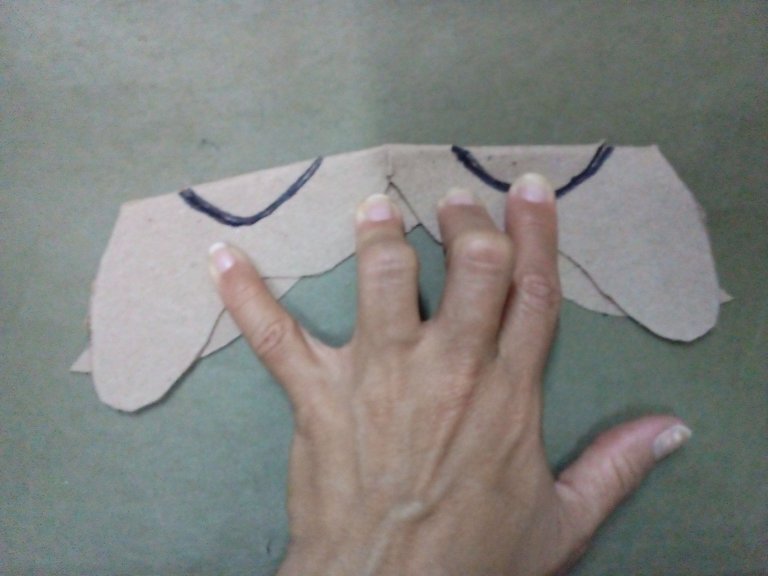
De forma horizontal doble el antifaz por la mitad dejando aproximadamente 4cm en el centro para dibujar dos ovalos en cada lado que serian la abertura para los ojos.

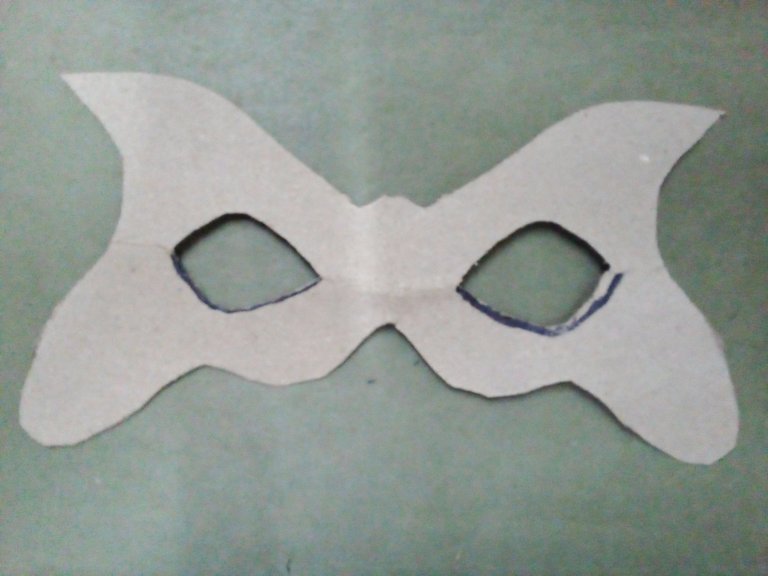
Con este modelo que sirve de plantilla pueden salir muchos otros antifaz reproducido la misma técnica en cualquier cartulina unicolor o previamente decorada. En el siguiente paso el molde paso de niño en niño para lograr decorar el antifaz con la técnica del esgrafiado donde un toque más artístico.
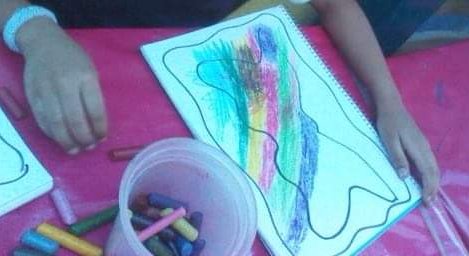
PASO 5
Después de dibujar sólo el contorno del antifaz se agregó múltiples creyones de cera hacia la dirección deseada.
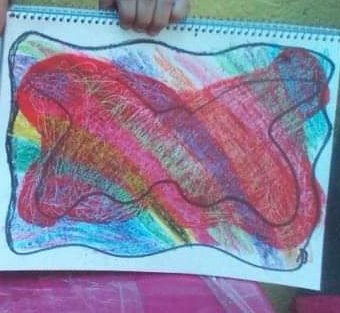
PASO 6
Posteriormente se le agrego una capa de pintura del color deseado en este caso teniamos rojo. Lo ideal sería negro para que resalten los colores del fondo pero en este caso era con lo que contabamos para este grupo de pequeños, considerando que quedó igual de interesante.
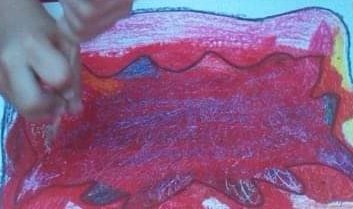
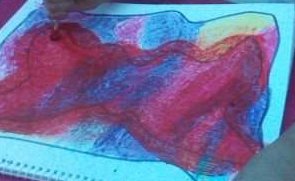
PASO 7
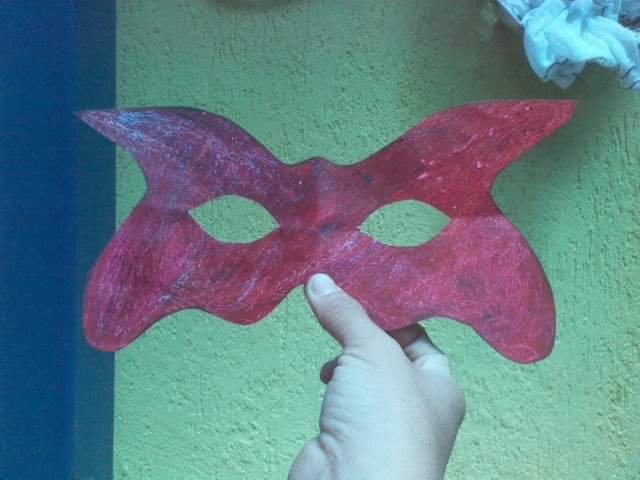
Sin dejar secar la pintura con un palillo de altura empiezamos a rastrillar la superficie hasta que se empezó a mostrar los colores del fondo.
PASO 8
Una vez completamente seco por una esquina de la cartulina, cuidadosamente cortamos la figura logrando extraerla con mucho cuidado y de alli ya dispuesta para agregarle una capa de pega blanca líquida y cualquier otro ascensor como: escarcha, plumas, lentejuelas o elemento decorativo a considerar que no sea pesado, incluyendo por supuesto la liga o Palillo para sostener con una mano, como lo hicieron los niños más grande.

Espero haya sido útil este arte para el carnaval 2023 que esta en puerta ¡felices días!
Greetings dear readers, today I give life and love to my blog ♥️ with another art for children focused on the carnival, upcoming dates to celebrate and give us a breather due to all the whirlwind of events in the last days, which for me has been a strong shock especially because of the economic factor 🤯 crazy!
These are dates when parents and teachers look for alternatives to save money and generally we recycle old suits to reuse them as costumes. So from what is feasible I share today a very simple way to make a mask that allows you to recreate your imagination to go to the nearest carnival party.
Through a template of any mask it is possible to make others with a variety of shapes and colors. This is how I managed to get a group of students from 1st to 6th grade to make a mask to their liking and with simple materials.
Obviously, being an art for children being made by themselves, the result is very particular, the importance that I give to this process, is the aesthetic enjoyment where the imagination can be recreated and invite the child to express himself beautifully.
That is why today I present this simple art that at home it is possible to apply other details to enjoy this year's carnivals with a fun and personal touch. So here I share the step by step:
Materials
- Scissors.
- Thick cardboard folder in disuse.
- A mold of some mask.
- Water paint.
- Wax crayons.
- Liquid white paste.
- Stick height.
STEP 1
On a piece of cardboard cut in a rectangular shape, I divided it in half and drew a continuous curved line on one of the faces from the center to the ends, leaving approximately 6cm from where I started the line to where I got to.
STEP 2
With the cardboard folded in half, I cut the drawn line to obtain the same shape on both sides.
STEP 3
Horizontally fold the mask in half leaving approximately 4cm in the center to draw two ovals on each side that would be the opening for the eyes.
With this model that serves as a template, many other masks can be produced using the same technique on any unicolor or previously decorated cardboard. In the next step, the mold goes from child to child to decorate the mask with the technique of graffiti where a more artistic touch is given.
STEP 5
After only drawing the outline of the mask, multiple wax crayons were added in the desired direction.
STEP 6
Later, a layer of paint of the desired color was added, in this case we had red. The ideal would be black so that the background colors stand out, but in this case it was what we had for this group of children, considering that it was just as interesting.
STEP 7
Without letting the paint dry with a toothpick, we began to rake the surface until the background colors began to show.
STEP 8
Once completely dry by a corner of the cardboard, we carefully cut the figure, managing to extract it very carefully and from there already ready to add a layer of liquid white glue and any other elevator such as: glitter, feathers, sequins or decorative element to consider that don't be heavy, including of course the rubber band or toothpick to hold with one hand, as the older children did.
I hope this art has been useful for the 2023 carnival that is at the door. Happy days!