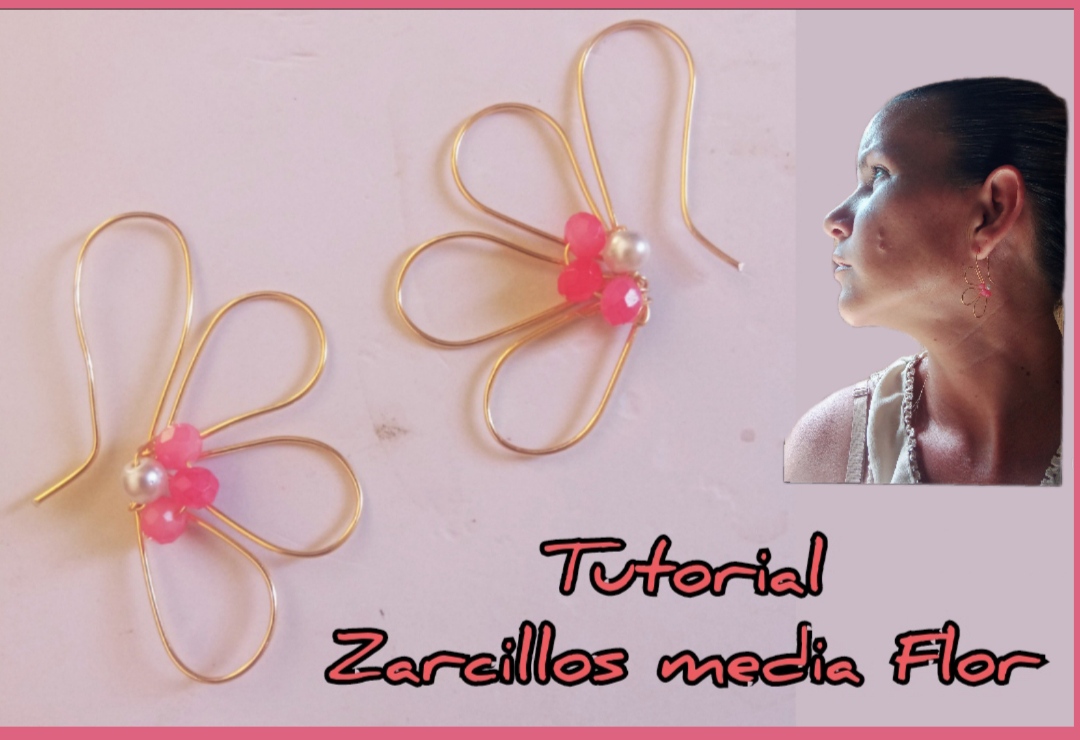
feliz y bendecido día tengan todos ustedes mis queridos y apreciados amigos el día de hoy quiero compartir con ustedes un sencillo tutorial donde paso a paso elaboraremos un hermoso diseño de zarcillos con la técnica del alambrismo, a estos bellos zarcillos quise darle la forma de media flor y son súper fácil y rápido de elaborar. Te invito a Acompañarme en este paso a paso.
Happy and blessed day to all of you my dear and appreciated friends, today I want to share with you a simple tutorial where step by step we will make a beautiful design of tendrils with the wire technique, I wanted to give these beautiful tendrils the shape half flower and are super easy and quick to make.
I invite you to join me in this step by step.
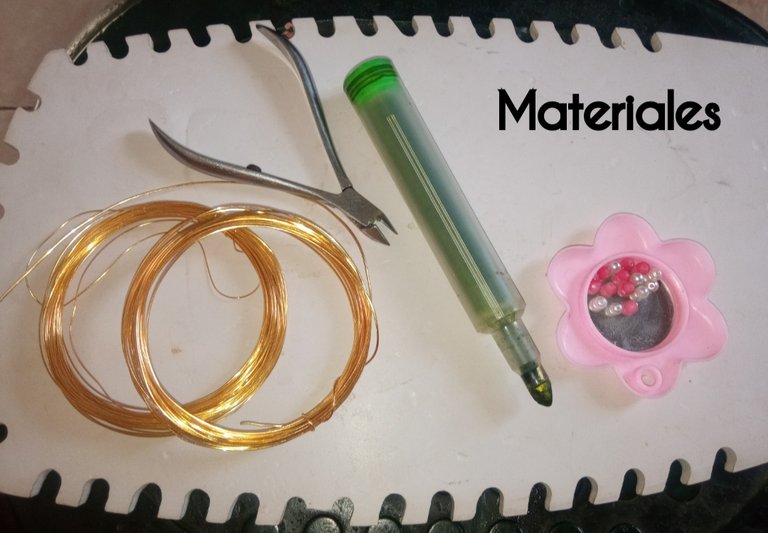
- alambre de bisutería calibre 20.
- alambre de bisutería calibre 26.
- cristales rosados.
- piedras perladas.
- pinza de bisutería.
- 20 gauge jewelry wire.
- 26 gauge jewelry wire.
- pink crystals.
- pearl stones.
- jewelry clamp.
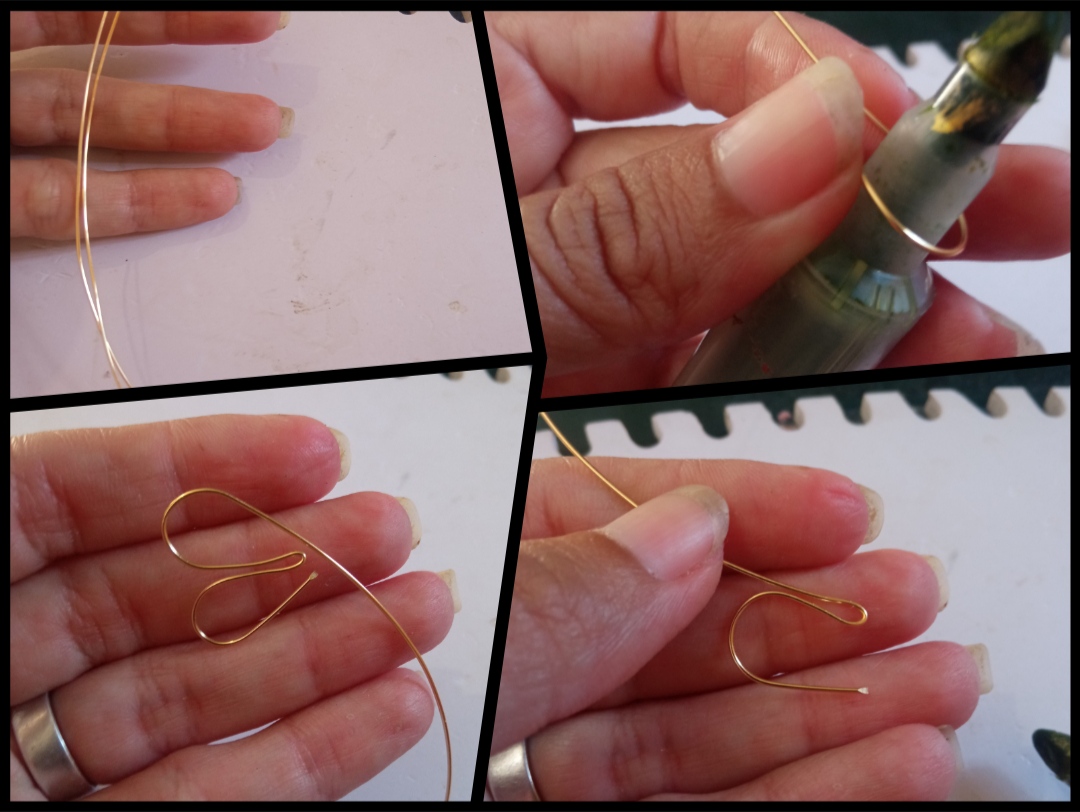
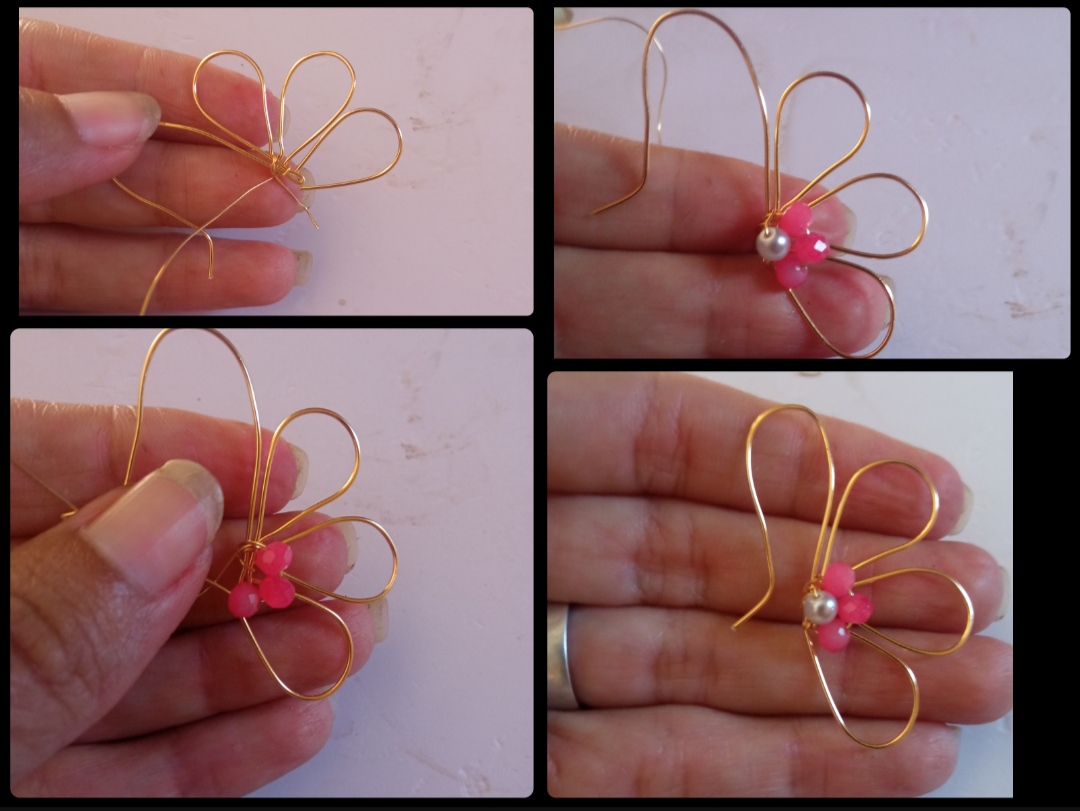
⭐ Paso 1: para iniciar la elaboración de este hermoso diseño lo primero que debemos hacer es tomar el alambre de bisutería calibre 20 y picaremos dos pedazos de alambre de aproximadamente 30 cm, e iniciaremos nuestra elaboracion apoyándonos con un objeto cilindrico, en mi caso usé un marcador dañado comenzaremos a moldear el alambre dando forma dw pétalos alargados.
⭐ Step 1: to begin the elaboration of this beautiful design, the first thing we must do is take the 20 gauge jewelry wire and we will cut two pieces of wire of approximately 30 cm, and we will begin our elaboration supporting ourselves with a cylindrical object, in In my case I used a damaged marker. We will begin to shape the wire into elongated petals.
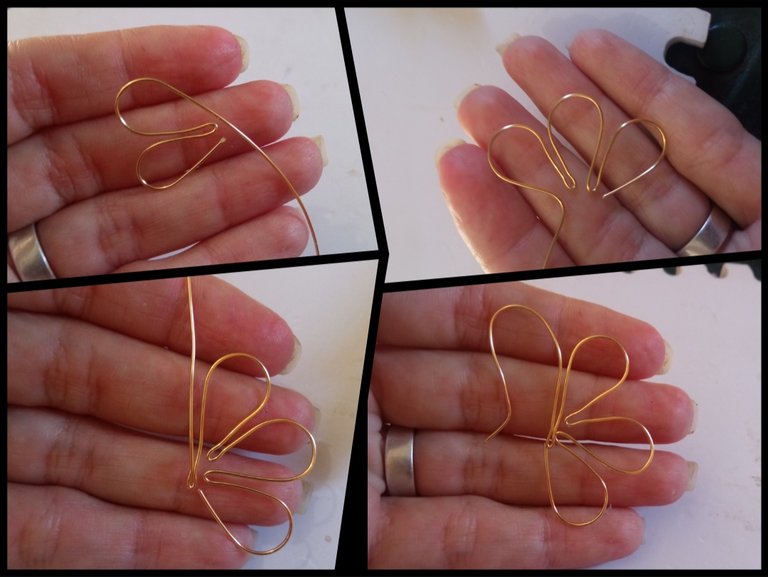
⭐ Paso 2: Siguiendo el mismo procedimiento elaboraremos tres pétalos iguales con una pequeña separación tal cual pueden observar en la fotografías y para finalizar la base del diseño elaboraremos un cuarto petalo el cuan sela un poco más alto y en su parte final con el extremo que los queda de alambre le doblaremos una pequeña punta hacia afuera y dejaremos la separación en el centro de este pétalo, ya que este sera el gancho o anzuelo para colgar nuestro zarcillo. Y así tendremos la base principal de nuestra primera pieza.
⭐ Step 2: Following the same procedure we will make three equal petals with a small separation as you can see in the photographs and to finish the base of the design we will make a fourth petal which is a little higher and in its final part with the end that remains of wire. We will bend a small tip outwards and leave the separation in the center of this petal, since this will be the hook or hook to hang our tendril. And thus we will have the main basis of our first piece.
⭐ Paso 3: para culminar decoraremis el centro de nuestra media Flor, para ello tomaremos un pedazo de alambre de bisutería calibre 26 y lo uniremos a la parte central de los pétalos y por este introduciremos tres cristales rosados los cuales moldearemos en el centro de los pétalos en forma de "C" o media luna y luego introduciremos una piedra perlada la cual llevaremos al centro de las piedras rosadas y con el alambre lo cruzaremos hacia atrás y así sujetaremos la forma deseada. Ya así tenemos nuestra primera pieza, solo debemos repetir los pasos para elaborar el par, pero recuerden que este lo decoraremis del lado contrario.
⭐ Step 3: to finish decorating the center of our half Flower, to do this we will take a piece of 26 gauge jewelry wire and we will attach it to the central part of the petals and through this we will introduce three pink crystals which we will mold into the center of the petals in the shape of a "C" or half moon and then we will introduce a pearl stone which we will take to the center of the pink stones and with the wire we will cross it back and thus hold the desired shape.
Now we have our first piece, we just have to repeat the steps to make the pair, but remember that we will decorate this one on the opposite side.
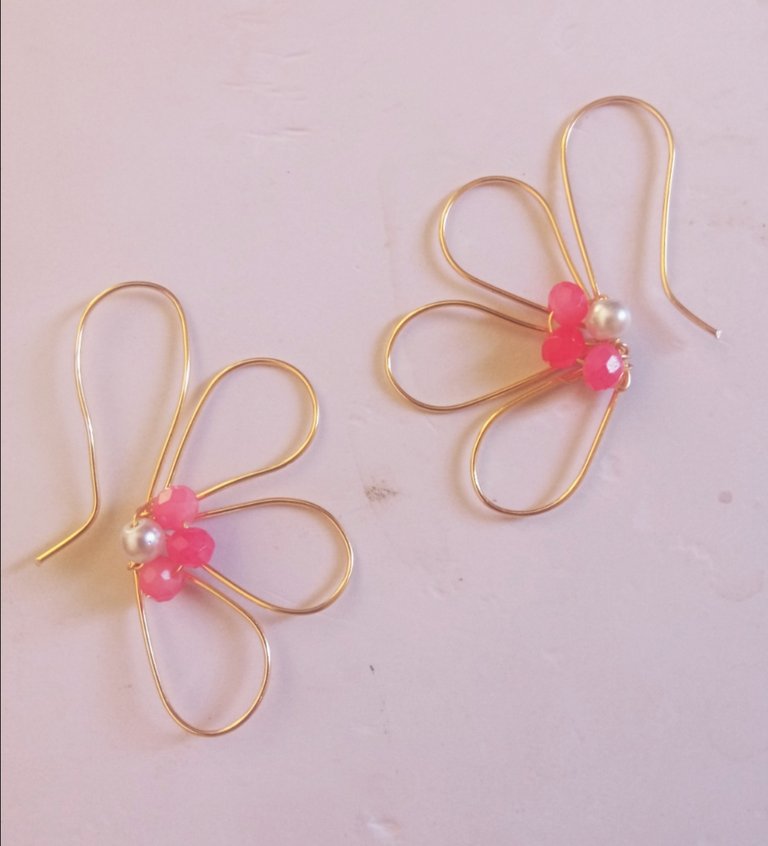
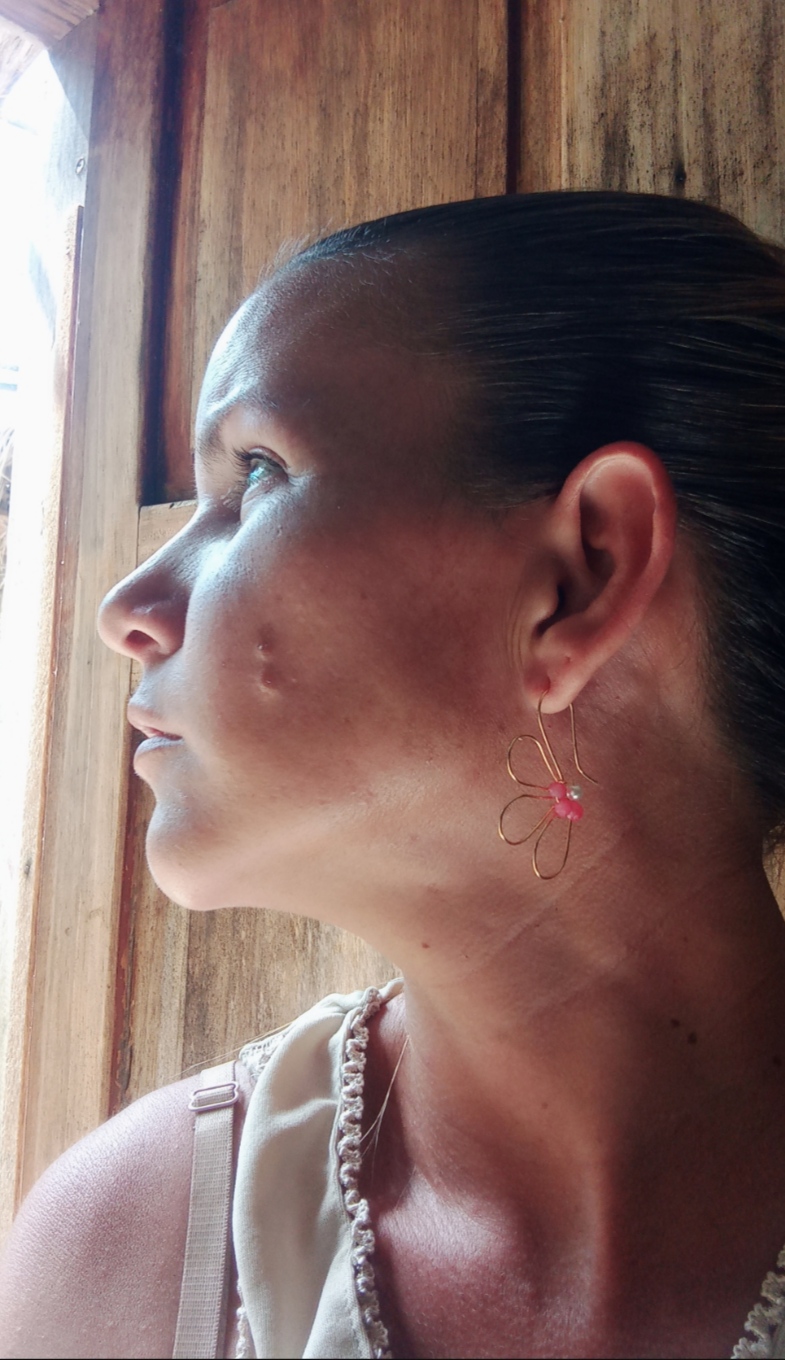
Todas las Fotos son de mi autoría y fueron tomadas con mi Celular Redmi 9.And so in this very simple way we will be able to create a very beautiful design of super beautiful and elegant tendrils, and of course you can adapt it to your taste by changing the color and size if you wish. I say goodbye for this opportunity. I hope that this tutorial can be useful to you.
All Photos are my authorship and were taken with my Redmi 9 Cellphone


