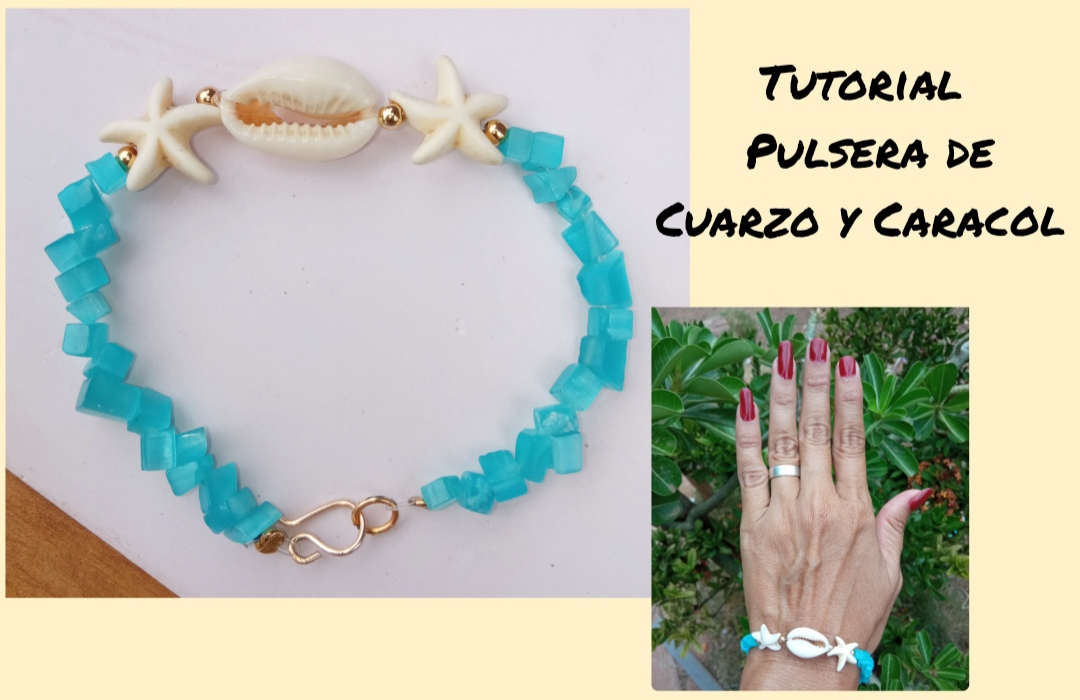
feliz y bendecido día tengan todos ustedes, es un gran placer para mí el pasar en esta nueva semana para compartir con ustedes otro sencillo tutorial, en esta ocasión elaboraemos una linda y creativa pulsera con un toque playero, pero que podemos usar en la ocadion que deseen. Este es un diseño que puedes ajustar a tu gusto y preferencia, pues puedes elegir el color de los cuarzos de tu gusto o combinarlos, pues está bellas piedras vienen de muchos colores y diseños.
Have a happy and blessed day all of you, it is a great pleasure for me to spend this new week to share with you another simple tutorial, on this occasion we will make a cute and creative bracelet with a beachy touch, but that we can use on the occasion we wish.
This is a design that you can adjust to your taste and preference, as you can choose the color of the quartz to your liking or combine them, as these beautiful stones come in many colors and designs.
I invite you to join me in this tutorial and step by step create this beautiful design together.
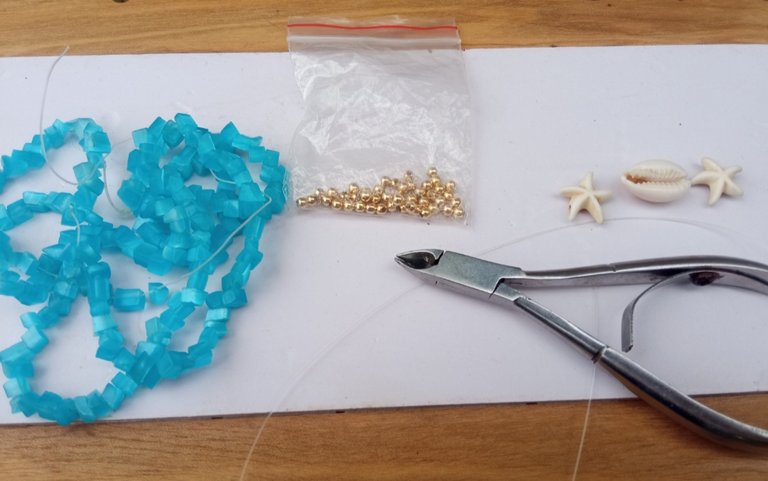
- Alambre de bisutería calibre 20.
- nylon fino.
- un caracol.
- piedra de Estrella de mar.
- Piedras cuarzos azules.
- balín dorado.
- pinza de bisutería.
- 20 gauge jewelry wire.
- thin nylon.
- a snail.
- Starfish stone.
- Blue quartz stones.
- golden pellet.
- jewelry clamp.
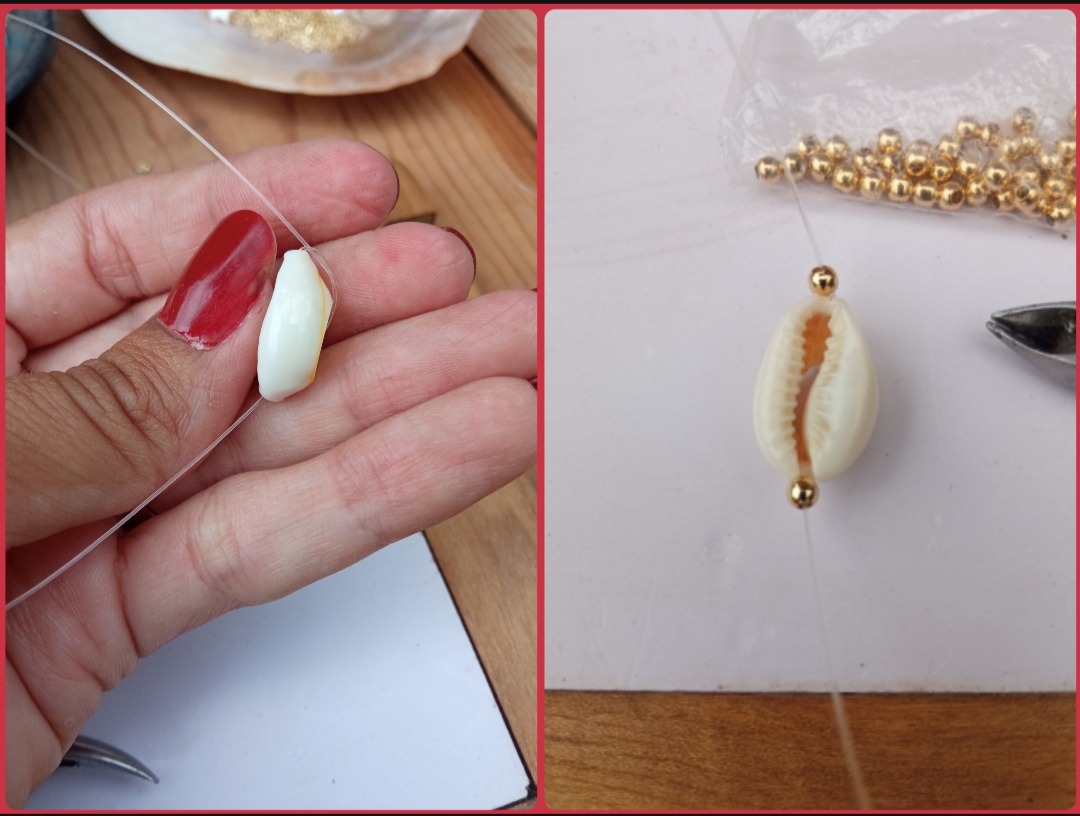
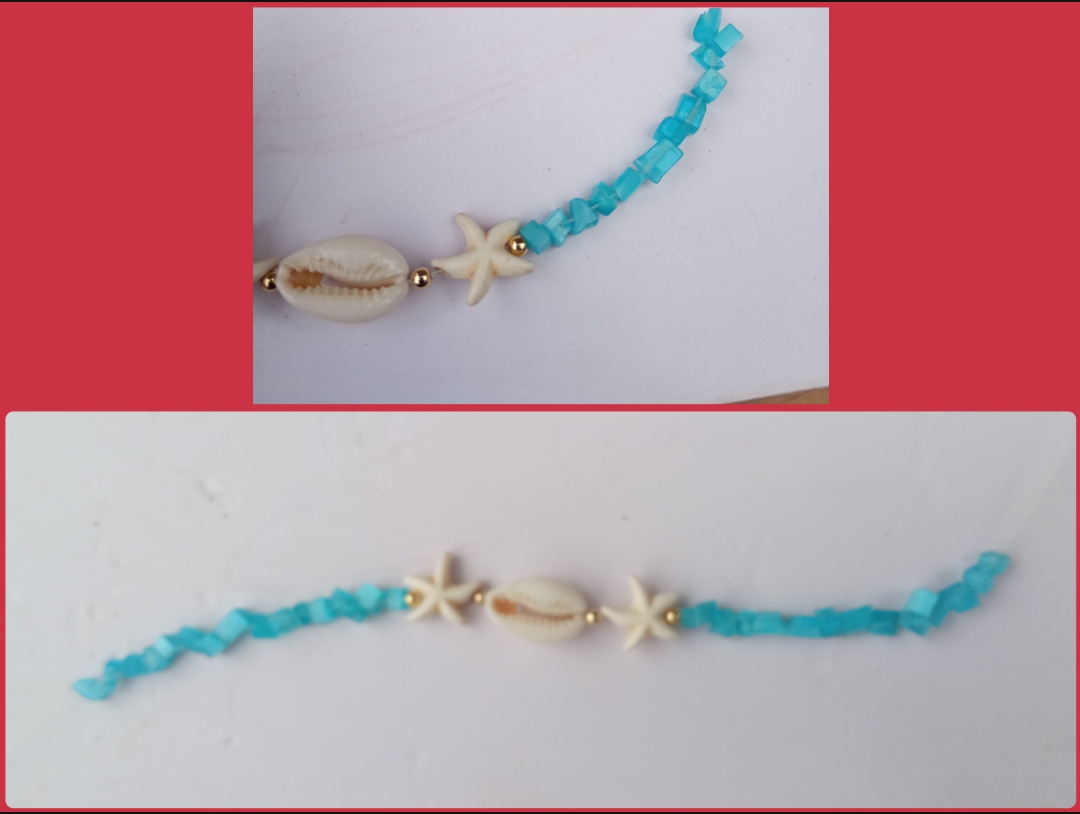
⭐ Paso 1: para iniciar la elaboración de este hermoso diseño primeramente tomaremos un pedazo de nylon de aproximadamente 20 cm y procederemos a iniciar la elaboración de nuestra pulsera, para ello introduciremos el caracol por el nilón llevándolo hasta la parte central y cruzaremos el mismo nylon por dentro del Caracol para evitar el caracol se mueva de su lugar y seguidamente de cada lado introduciremos un pequeño balín dorado tal cual pueden observar en las siguientes imágenes.
⭐ Step 1: to start making this beautiful design, we will first take a piece of nylon of approximately 20 cm and proceed to start making our bracelet. To do this, we will insert the snail through the nylon, taking it to the central part and cross the same nylon inside the Snail to prevent the snail from moving from its place and then on each side we will insert a small golden ball as you can see in the following images.
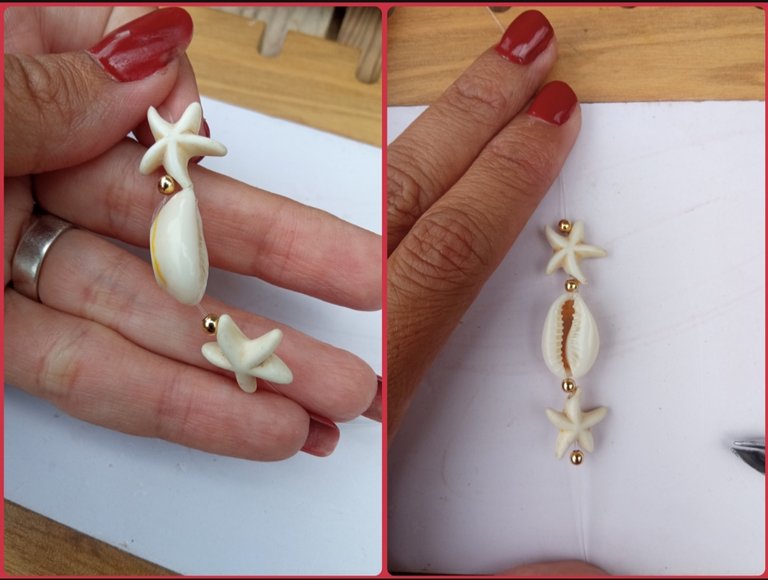
⭐ Paso 2: seguidamente introduciremos una estrellita marina de cada lado hasta llevar a la parte central y luego un balín de cada lado, para así darle más vistosidad a nuestra parte central de la pulsera, como pueden observar en nuestro siguiente paso.
⭐ Step 2: next we will introduce a sea star on each side until we reach the central part and then a ball on each side, in order to give more attractiveness to our central part of the bracelet, as you can see in our next step.
⭐ Paso 3: ahora iniciaremos a ingresar las piedras de cuarzo por cada extremo del nylon hasta obtener el tamaño deseado. Los cuarzos son piedras con una belleza y forma singular, pues son diferentes en su forma y tamaño.
⭐ Step 3: now we will begin to insert the quartz stones into each end of the nylon until we obtain the desired size.
Quartzs are stones with a unique beauty and shape, as they are different in their shape and size.
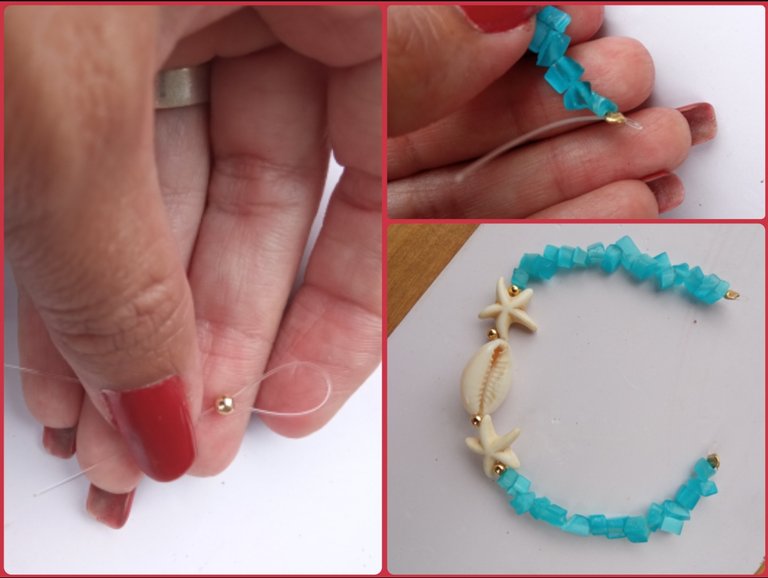
⭐ Paso 4: una vez ya tengamos el tamaño deseado , de cada lado introduciremos una piedra cerrado, doblaremos el nylon y la volvemos a introducir por la piedra cerrador dejando una pequeña argolla y cerramos la piedra aplastándola con la pinza de bisutería. Este procedimiento lo elaboraremos en ambos lados.
⭐ Step 4: once we have the desired size, on each side we will insert a closed stone, we will fold the nylon and we will insert it again through the closing stone, leaving a small ring and we close the stone by crushing it with the jewelry tweezers. We will carry out this procedure on both sides.
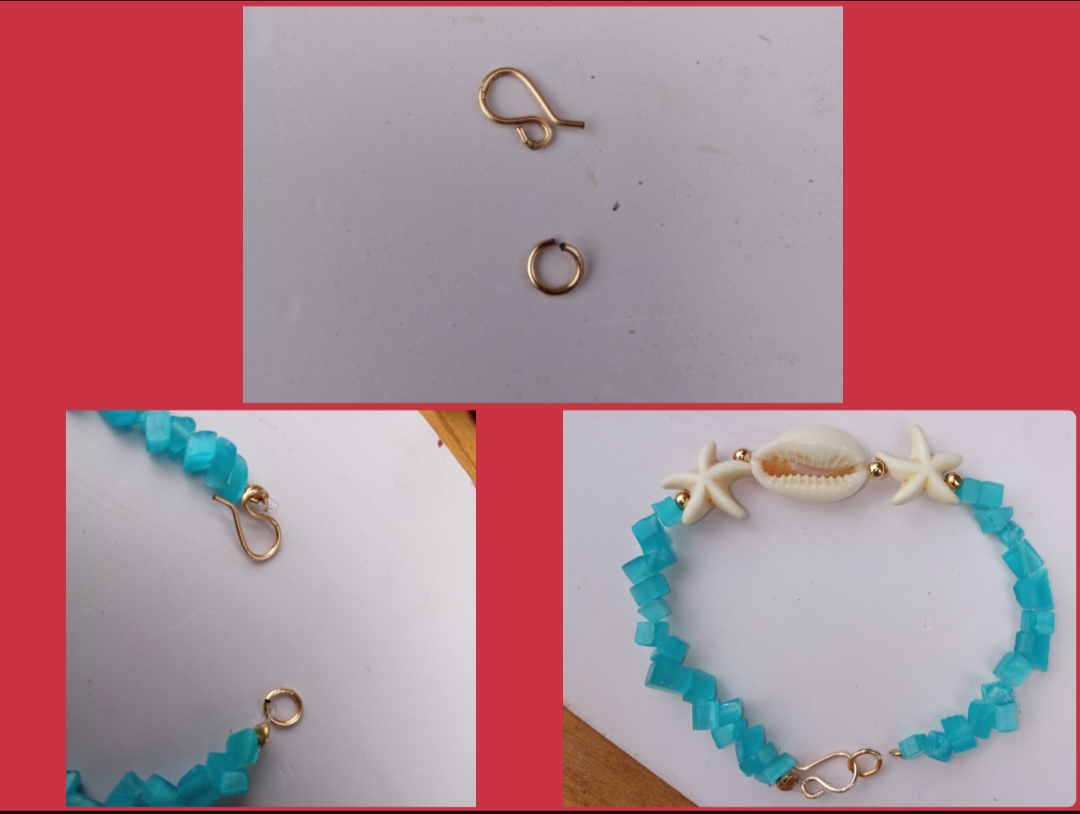
⭐ Paso 5: por último con el alambre de bisutería calibre 20 y ayuda de la pinza realizaremos una pequeña argolla circular y una en forma de gancho y la colocaremos en los extremos de la pulsera y así terminamos está hermosa elaboración.
⭐ Step 5: finally with the 20 gauge jewelry wire and the help of the tweezers we will make a small circular ring and one in the shape of a hook and we will place it at the ends of the bracelet and thus we finish this beautiful creation.
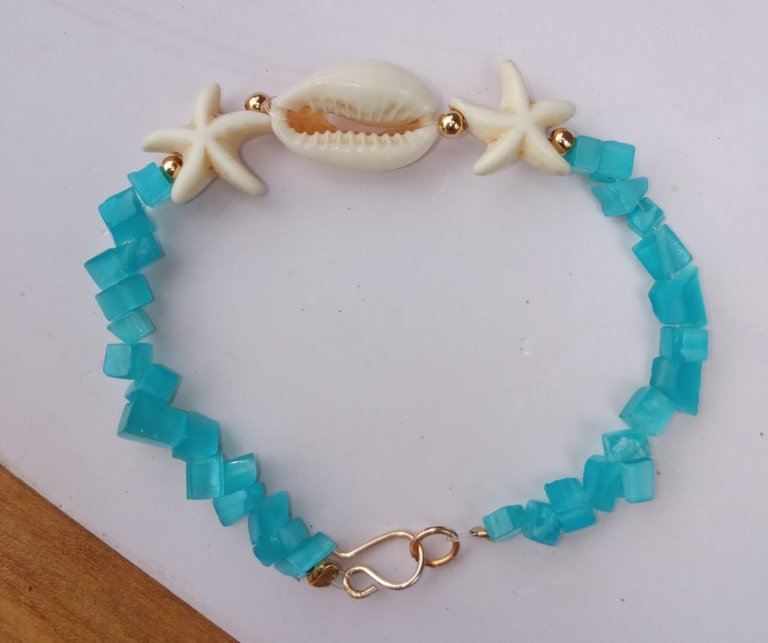
Todas las Fotos son de mi autoría y fueron tomadas con mi Celular Redmi 9.And so my dear and appreciated friends, in this easy, fast, economical and simple way we will make a very beautiful bracelet, practical, comfortable and durable, ideal to wear on any occasion.
I say goodbye hoping that you like this design and that this tutorial can be useful to you.
All Photos are my authorship and were taken with my Redmi 9 Cellphone

