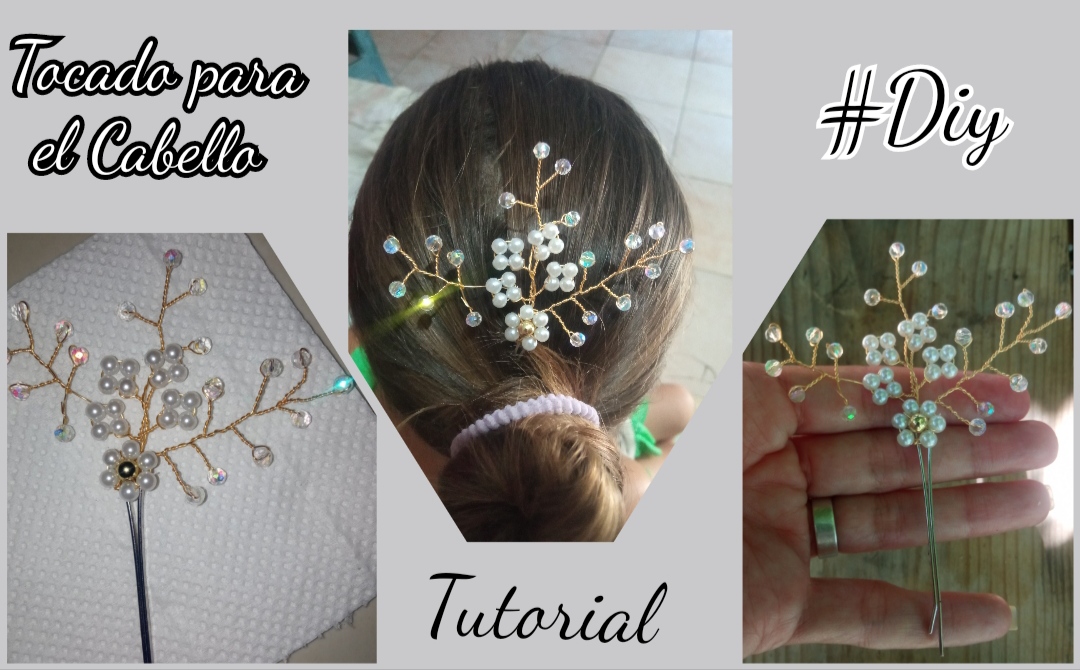
feliz y bendecido día tengan todos ustedes el día de hoy, es para mí un gran placer es pasar nuevamente por esta creativa y hermosa comunidad en esta ocasión para regalarles un muy sencillo tutorial para la elaboración de un hermoso tocado elegante para nuestro cabello que nos hará lucir súper hermosas y como princesas, este diseño consiste simplemente en la decoración de un gancho de pelo utilizando la técnica del alambrismo y decorándolo con hermosa pedrería. Los invito a acompañarme en este sencillo tutorial esperando que sea de su agrado.
Happy and blessed day to all of you today, it is a great pleasure for me to go through this creative and beautiful community again on this occasion to give you a very simple tutorial for making a beautiful elegant headdress for our hair that will make us look super beautiful and like princesses, this design simply consists of decorating a hair clip using the wire technique and decorating it with beautiful rhinestones.
I invite you to join me in this simple tutorial, hoping that you like it.
This headdress is special to decorate our hair when we create a hairstyle and we need to give it shine and showiness. On this occasion I wanted to make one for my little girl which I share with you below.
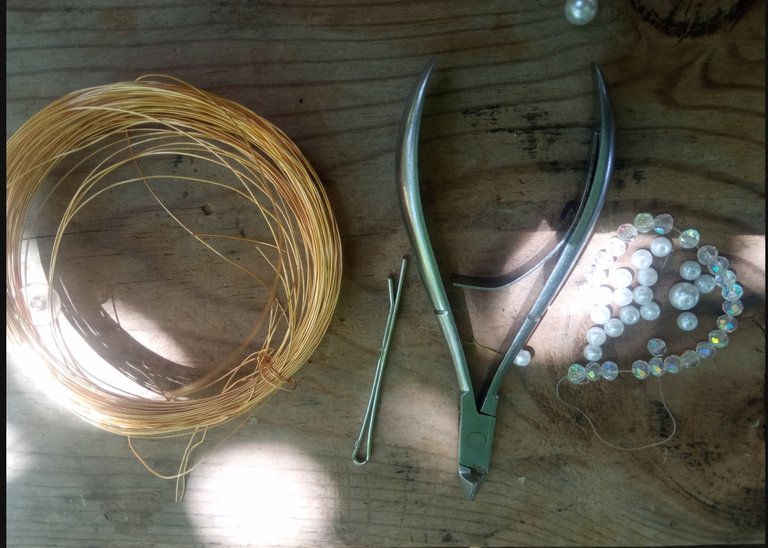
- gancho de pelo, ganchera u orquillas.
- alambre de bisutería calibre 26.
- piedras perladas blancas.
- cristales blancos
- balines dorados.
- Pinza de bisutería.
- hair clip, crochet hook or hairpins.
- 26 gauge jewelry wire.
- white pearl stones.
- white crystals
- golden pellets.
- Jewelry clamp.
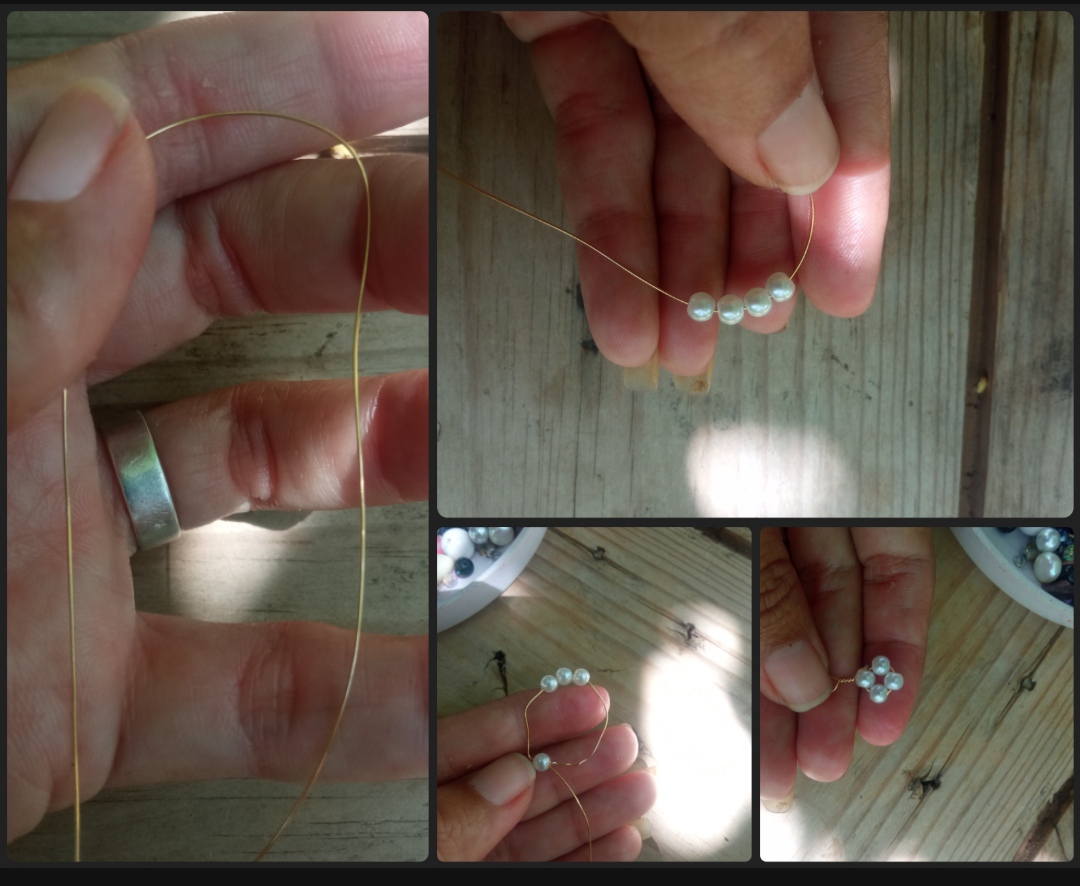
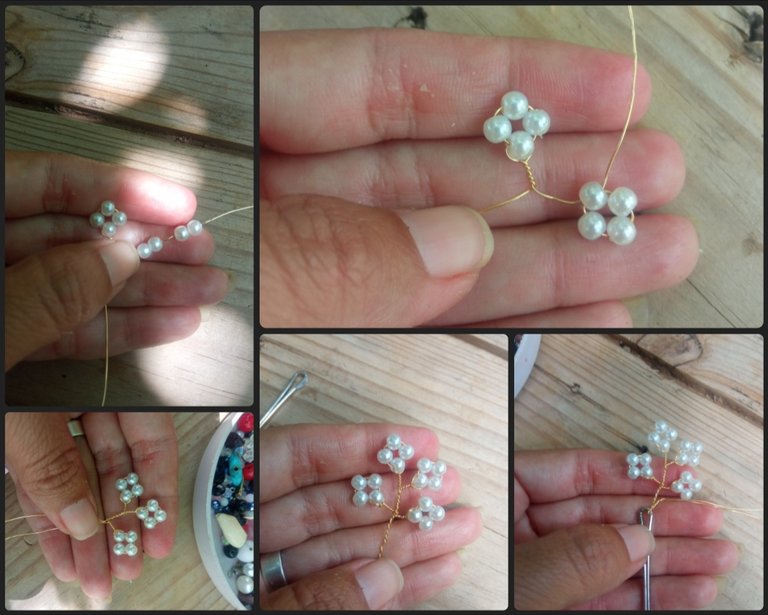
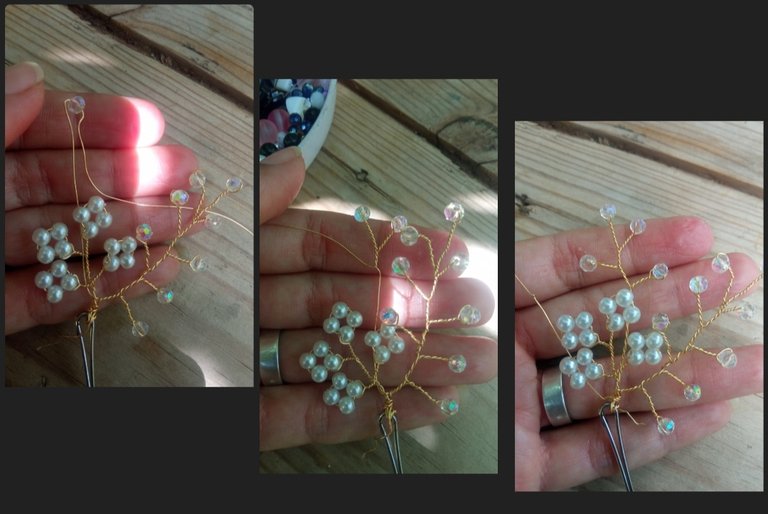
⭐ Paso 1: para iniciar la elaboración de esta bella decoración lo primero que debemos hacer es cortar un pedazo de bisutería calibre 26 de aproximadamente unos 50 cm e iniciaremos nuestra elaboración introduciendo cuatro piedras perladas pequeñas y llevándolas aproximadamente hasta 10 cm del alambre seguidamente introduciremos una punta de alambre por la última piedra perlada y hablaremos ambos extremos del alambre para formar una pequeña florecita de perla como pueden observar en las siguientes imágenes y para sostener la forma con nuestros dedos comenzaremos a entorchar el alambre que queda por la parte posterior de esta flor. De igual manera introduciremos cuatro piedritas más de uno de los extremos del alambre y realizando el mismo procedimiento introduciremos el extremo de este alambre por la primera piedra perlada que introducimos y hablando extremos formaremos una pequeña florecita a la cual entorcharemos el alambre que queda por la parte posterior y uniremos este alambre con el otro para entorcharlo nuevamente en una sola. De esta misma manera realizaremos dos pequeñas florecitas más una de cada lado como pueden ver en las siguientes imágenes esto lo llevaremos hasta el gancho que hemos seleccionado para nuestra elaboración y lo sujetaremos realizando dos vueltas para sujetarlo en la parte superior de nuestra gancheta.
⭐ Step 1: to start making this beautiful decoration, the first thing we must do is cut a piece of 26 gauge jewelry approximately 50 cm long and we will begin our making by introducing four small pearlized stones and taking them approximately 10 cm from the wire.
Next we will insert a tip of wire through the last pearl stone and we will speak both ends of the wire to form a small pearl flower as you can see in the following images and to hold the shape with our fingers we will begin to twist the wire that remains on the back of this flower. In the same way we will insert four more stones from one of the ends of the wire and carrying out the same procedure we will insert the end of this wire through the first pearl stone that we introduce and speaking ends we will form a small flower to which we will twist the wire that remains on the side. back and we will join this wire with the other to twist it again into one. In this same way we will make two small flowers plus one on each side as you can see in the following images.
We will take this to the hook that we have selected for our production and we will hold it by making two turns to hold it on the upper part of our hook.
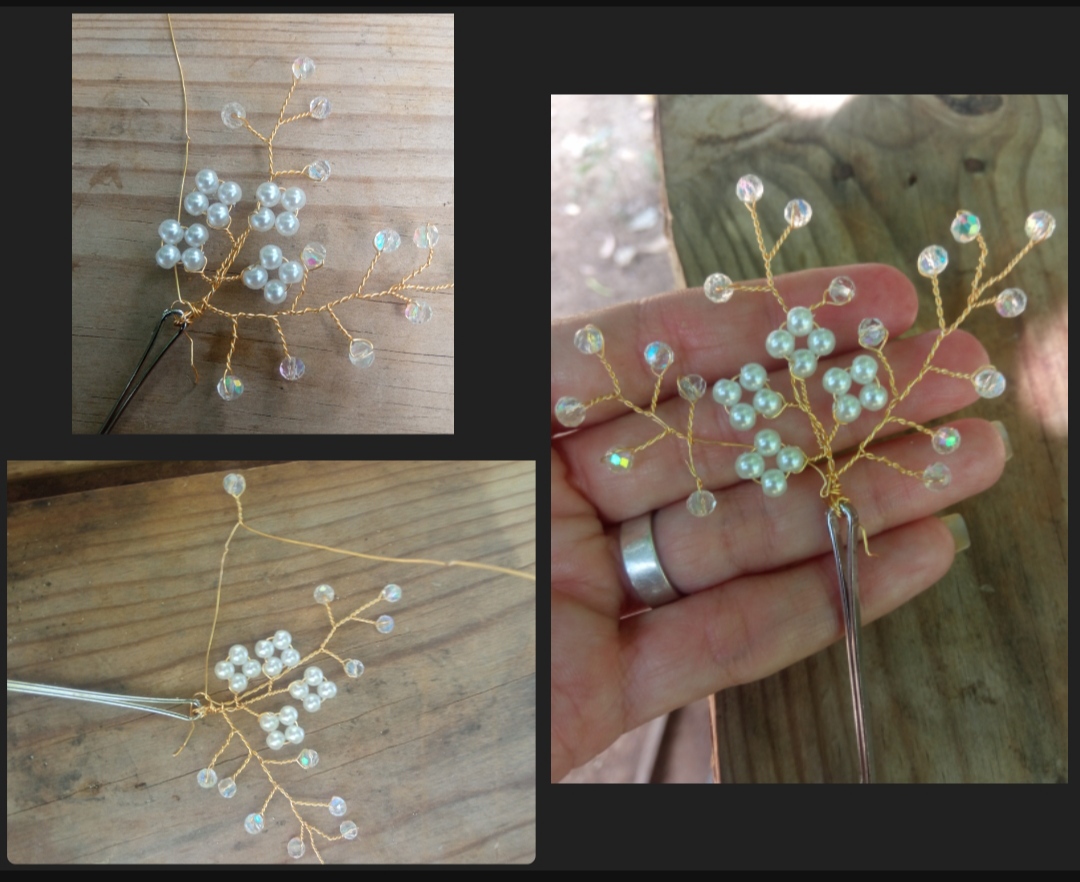
⭐ Paso 2: para continuar tomaremos el exceso de alambre de bisutería calibre 26 y lo doblaremos hacia la parte derecha de nuestra elaboración y subiéndolo dejando un espacio de unos 15 cm lo doblaremos hacia la parte de abajo e introduciremos una pequeña piedra de cristal transparente la cual entorcharemos el alambre para sujetarla en la punta de este. Seguidamente introduciremos un segundo cristal y dejando un pequeño espacio de dos centímetros entorcharemos nuevamente el alambre quedando pequeñas ramitas decoradas así elaboraremos varias ramitas decoradas con cristales transparentes de un lado y otro como pueden observar en las siguientes imágenes hasta lograr llegar nuevamente a la base de nuestra gancheta, donde nuevamente elaboraremos un par de vueltas del alambre en la base de la ganchita para sujetar las formas.
⭐ Step 2: to continue, we will take the excess 26 gauge jewelry wire and bend it towards the right side of our creation and going up, leaving a space of about 15 cm, we will bend it towards the bottom and insert a small stone. transparent glass which we will twist the wire to hold at the end of it.
Next we will introduce a second crystal and, leaving a small space of two centimeters, we will twist the wire again, leaving small decorated twigs. Thus, we will make several twigs decorated with transparent crystals on one side and the other, as you can see in the following images until we reach the base of our tree again. hook, where again we will make a couple of turns of the wire at the base of the hook to hold the shapes.

⭐ Paso 3: seguidamente el alambre que nos excede por la parte central encima de las pequeñas florecitas elaboradas en El primer Paso Y de igual manera introduciremos un cristal transparente y entorcharemos un poco el alambre para sujetarlo en la parte superior luego introduciremos otro cristal transparente y lo entorcharemos hacia uno de los lados y así de un lado y otro por encima del ramillete de flores una vez lleguemos hasta la parte posterior del ramillete entorcharemos el alambre y lo llevaremos nuevamente hacia la base de la gancheta.
⭐ Step 3: then the wire that exceeds us in the central part above the small flowers made in The first Step And in the same way we will introduce a transparent crystal and we will twist the wire a little to hold it in the upper part then we will introduce another transparent glass and we will twist it towards one of the sides and so on from one side and the other above the bouquet of flowers. Once we reach the back of the bouquet we will twist the wire and take it again towards the base of the hook.
⭐ Paso 4: para continuar con el mismo procedimiento del paso número 2 elaboraremos un tercer ramillete del lado izquierdo de nuestra decoración tal cual pueden observar en las siguientes imágenes.
⭐ Step 4: to continue with the same procedure as step number 2, we will make a third bouquet on the left side of our decoration as you can see in the following images.
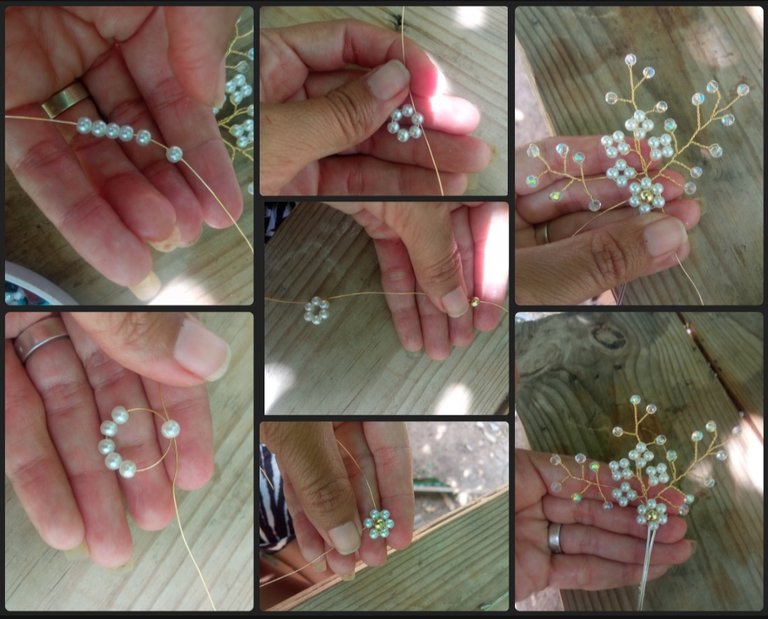
⭐ Paso 5: para culminar tomamos un pedazo de alambre de bisutería calibre 26 e introduciremos seis piedras perladas llevándolas hasta la parte central de este alambre y cruzando el alambre por la última piedra perlada para formar así una forma circular entre las piedras luego por uno de los extremos este alambre introduciremos un balín dorado el cual llevaremos hasta la parte central de nuestra forma circular y así le daremos forma y vida a una hermosa flor. Esta linda flor la llevaremos hacia nuestra elaboración y la sujetaremos con el exceso de este alambre en la parte posterior de nuestra decoración exactamente en la punta superior del gancho y así culminaremos nuestra hermosa decoración.
⭐ Step 5: to finish, we take a piece of 26 gauge jewelry wire and introduce six pearl stones, taking them to the central part of this wire and crossing the wire through the last pearl stone to form a circular shape between the stones then At one end of this wire we will introduce a golden ball which we will take to the central part of our circular shape and thus we will give shape and life to a beautiful flower.
We will take this pretty flower to our creation and secure it with the excess of this wire on the back of our decoration exactly at the upper tip of the hook and thus we will complete our beautiful decoration.
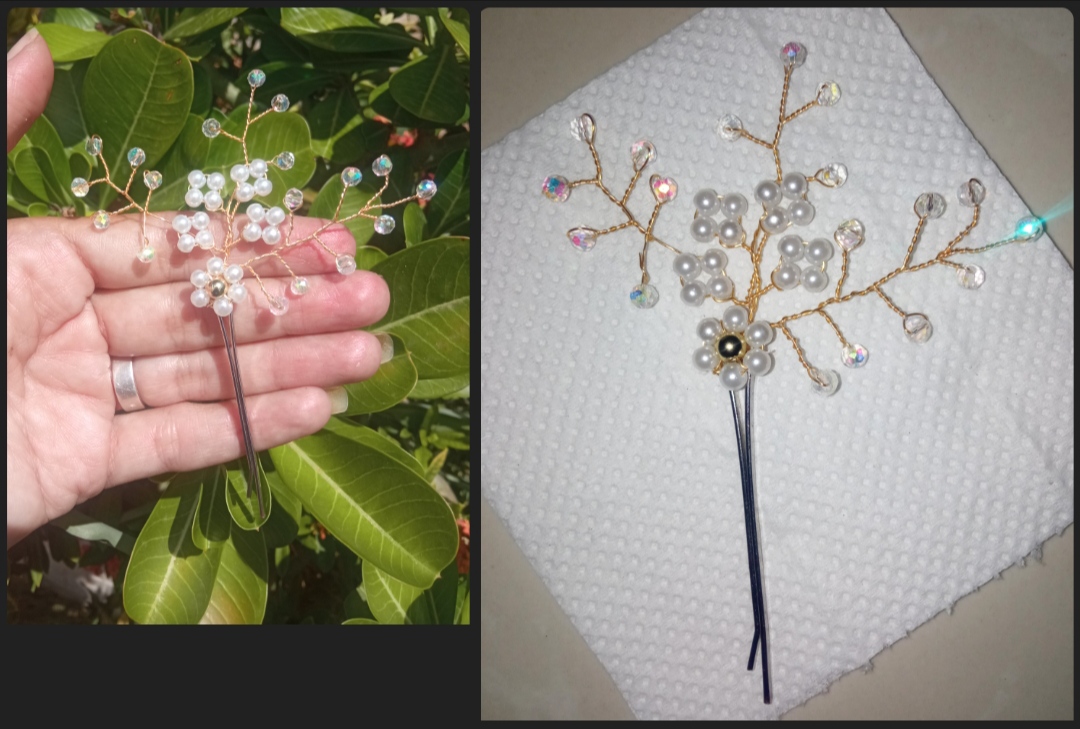
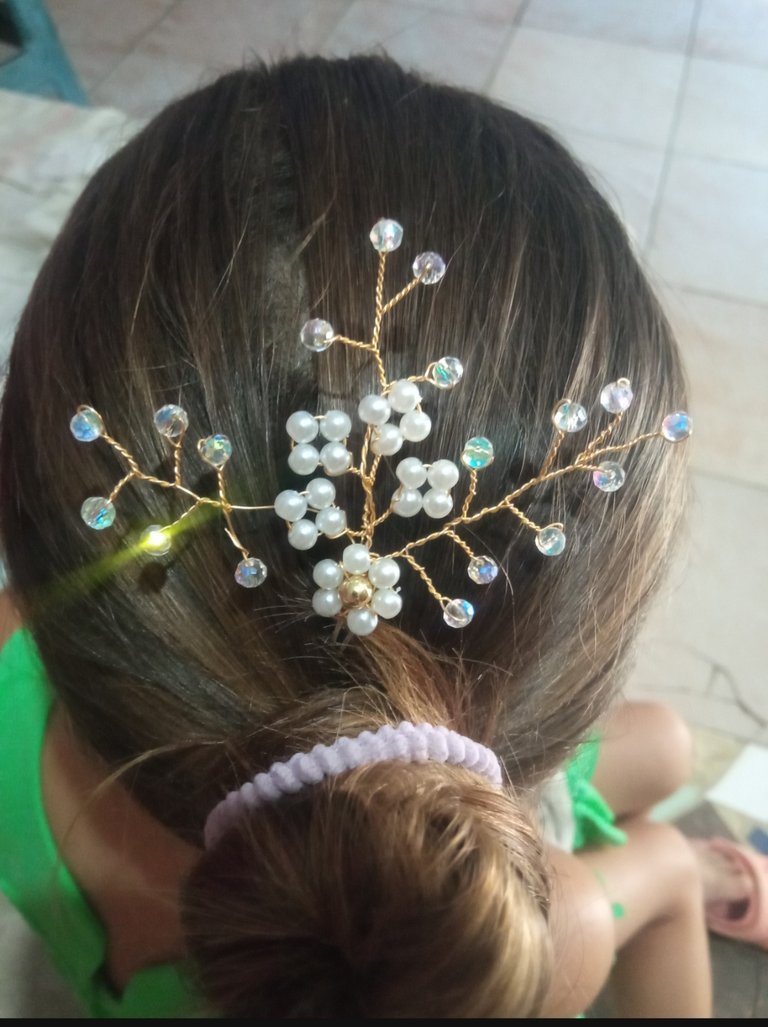
Todas las Fotos son de mi autoría y fueron tomadas con mi Celular Redmi 9.And so my dear friends we will make a very beautiful headdress for the ideal hair to look on a special occasion, because the use of white pearl stones and transparent bright crystals give it an elegance and also allows us to use it with any type of clothing.
This has been my elaboration today to share with all of you which I hope is from your total pleasure I say goodbye thanking your company in this tutorial.
All Photos are my authorship and were taken with my Redmi 9 Cellphone


