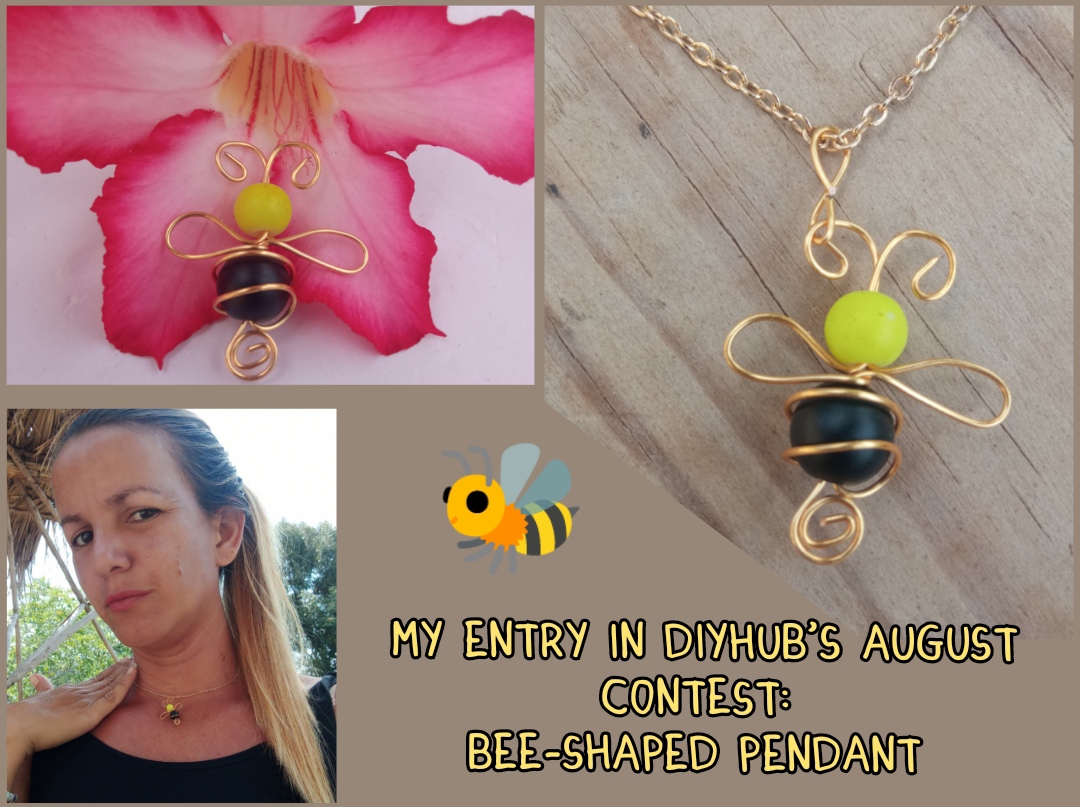
feliz y bendecido día tengan todos ustedes mis queridos y apreciados amigos, como siempre y cada semana es un gran placer para mí el pasar por esta hermosa comunidad y compartir una vez más con todos ustedes en esta ocasión es un honor el poder traerles mi participación en el concurso del mes de agosto que nos trae esta hermosa comunidad cuyo tema es el Día mundial de las abejas. Como ya muchos me conocerán esta comunidad me encanta trabajar con la técnica del alambrismo en la elaboración de accesorios por ello quise adaptar mi participación con un lindo accesorio destinado a este tema.
Happy and blessed day to all of you my dear and appreciated friends, as always and every week it is a great pleasure for me to pass through this beautiful community and to share once again with all of you on this occasion it is an honor to be able to bring you my participation in the August contest brought to us by this beautiful community whose theme is World Bee Day.
As many of you in this community will already know me, I love working with the wire technique in making accessories, so I wanted to adapt my participation with a nice accessory intended for this topic.
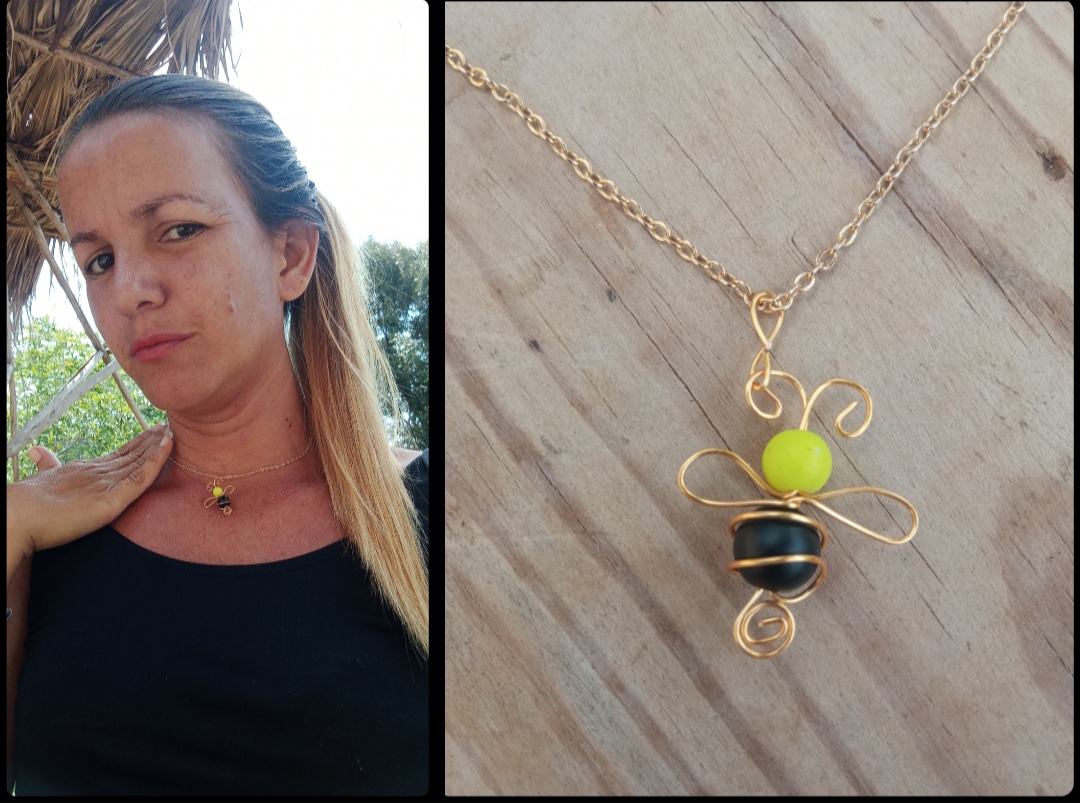
So for today I made a very cute pendant or pendant in the shape of a small bee which we can hang on our chain or leatherette according to our taste and thus show off a unique and incredible accessory.
I invite you to join me in this simple step by step and let's make this beautiful accessory together.
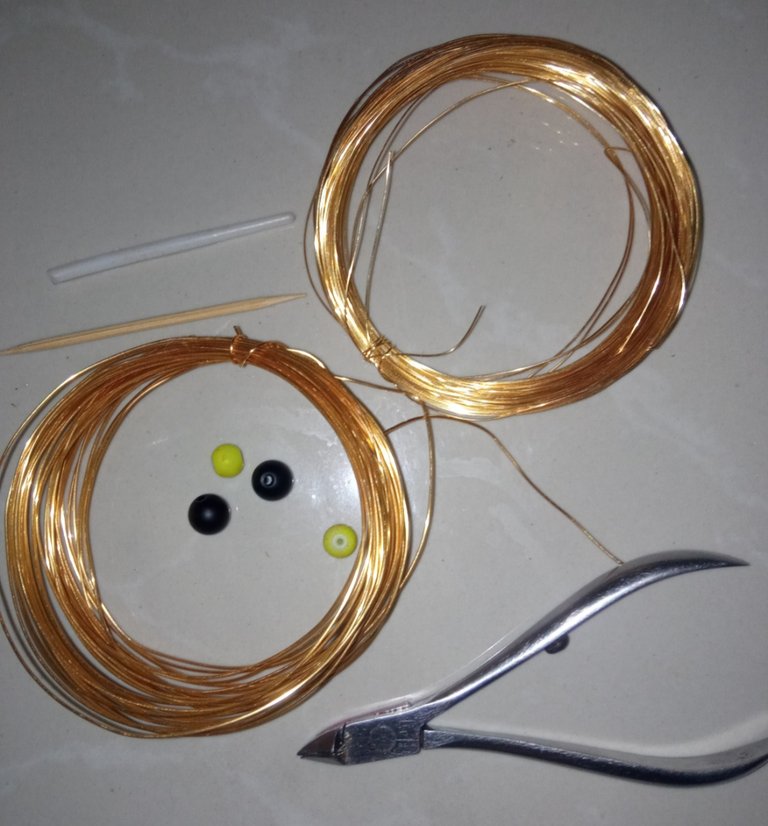
- alambre de bisutería calibre 20.
- una piedra amarilla y una negra.
- medio metro de cadena de bisutería o cuerina.
- palillo.
- pinza de bisutería.
- 20 gauge jewelry wire.
- a yellow stone and a black one.
- half a meter of jewelry or leather chain.
- toothpick.
- jewelry clamp.
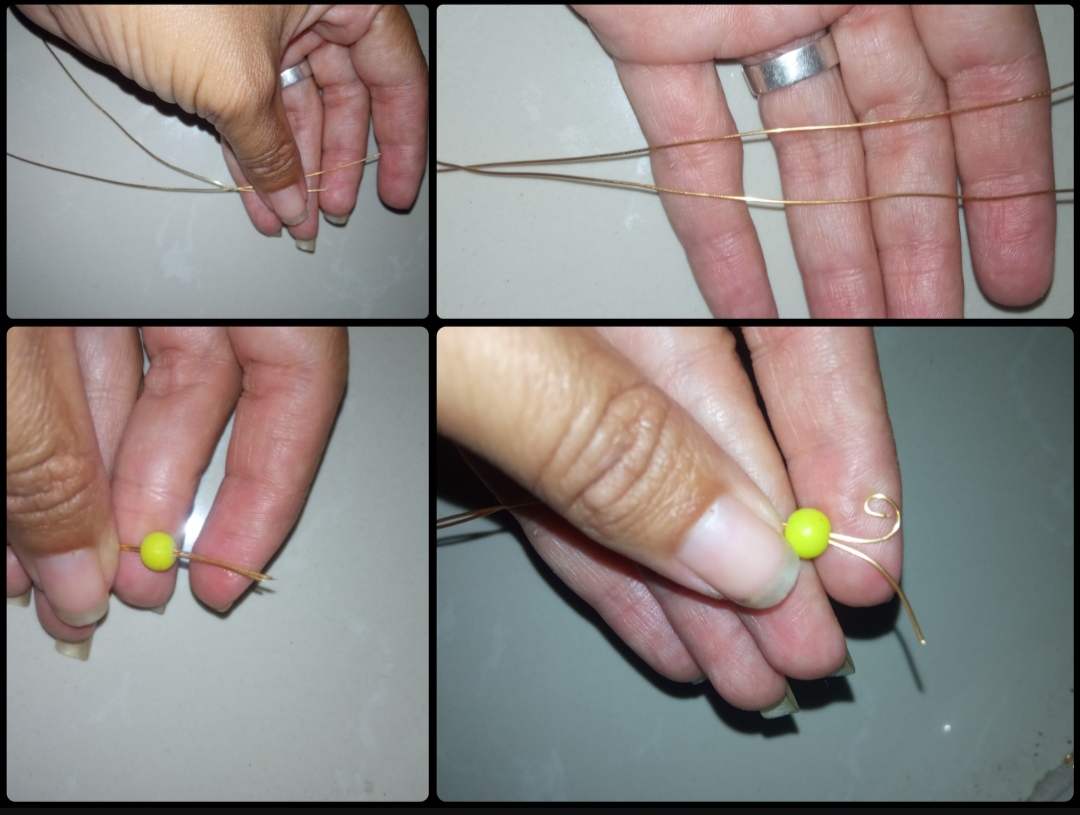
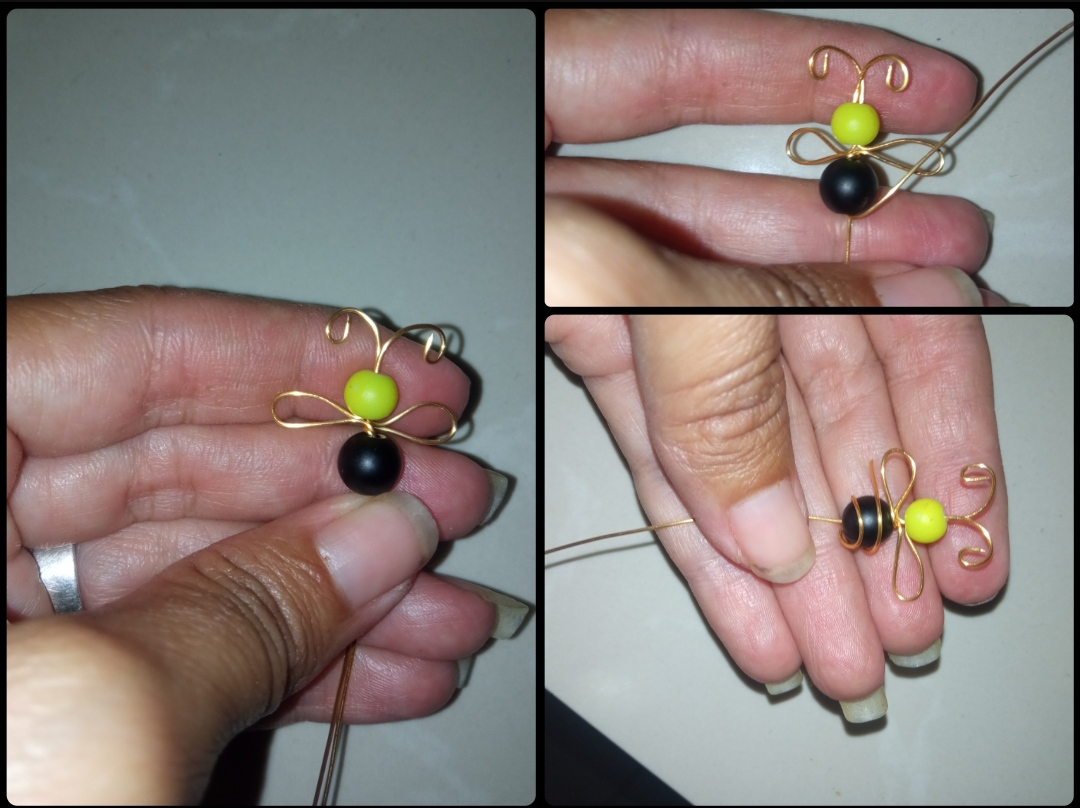
⭐ Paso 1: para iniciar la elaboración de este hermoso diseño lo primero que debemos hacer es tomar el alambre de bisutería calibre 20 y cortaremos con ayuda de la pinza de bisutería un pedazo de alambre de aproximadamente 30 cm de largo el cual seguidamente doblaremos en dos partes iguales como pueden verlo En las siguientes imágenes y por ambas puntas introduciremos primeramente la piedra más pequeña la cual es de color amarilla y dejaremos la punta de alambre hacia la parte de adelante de 4 cm aproximadamente. A continuación apoyándonos en la pinza y con nuestros dedos en las dos puntas que nos quedan por delante de la pedrería realizaremos un pequeño doblez en forma de espiral dándole forma a una pequeña antena lo mismo elaboraremos con la segunda punta del lado contrario tal cual pueden observar en las imágenes. Y pues así evitaremos que la piedra se salga hacia la parte de adelante y ya tendremos la cabecita y las antenas de nuestra pequeña abeja.
⭐ Step 1: to start making this beautiful design, the first thing we must do is take the 20-gauge jewelry wire and, with the help of the jewelry pliers, we will cut a piece of wire approximately 30 cm long, which we will then We will fold it into two equal parts as you can see. In the following images and through both tips we will first introduce the smallest stone which is yellow and we will leave the wire tip towards the front of approximately 4 cm.
Next, leaning on the tweezers and with our fingers on the two tips that remain in front of the rhinestones, we will make a small spiral-shaped fold, giving shape to a small antenna. We will do the same with the second tip on the opposite side, as you can see. in the images.
And this way we will prevent the stone from coming out to the front and we will have the head and antennas of our little bee.
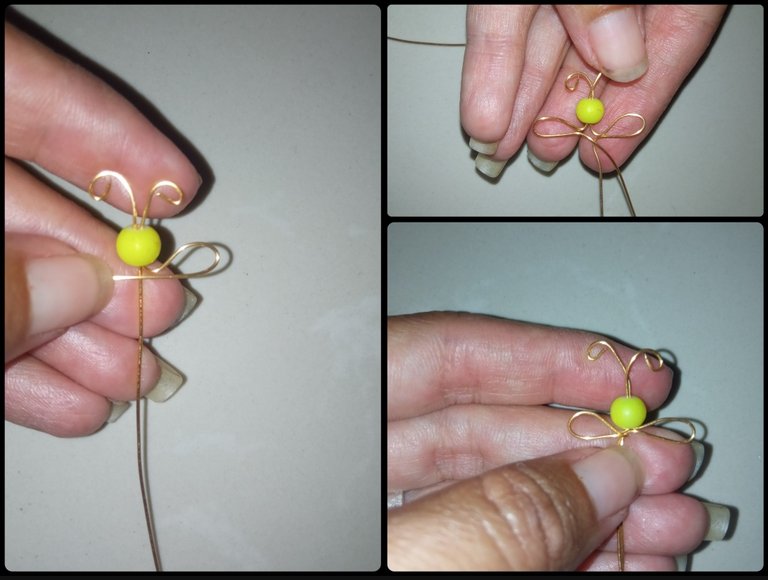
⭐ Paso 2: para continuar trabajaremos con el alambre que nos queda hacia la parte posterior de la piedra amarilla para ello doblaremos cada lado del alambre realizando una pequeña forma como pueden observar en las imágenes dándole así forma a las pequeñas alas de las abejas esto le elaboraremos una de cada lado Así sujetaremos exactamente la piedra amarilla en su lugar pues no puede salir ni hacia arriba ni hacia abajo luego de elaborar las dos pequeñas alas moldeándolo con nuestros dedos para así darle un poco más de la forma deseada uniremos las dos piezas de alambre y realizaremos un pequeño doblez entre ellas para sostener la forma de las alas.
⭐ Step 2: to continue we will work with the wire that remains towards the back of the yellow stone. For this we will bend each side of the wire making a small shape as you can see in the images, thus giving shape to the small wings of the stones. bees, this we will make one on each side. This way we will hold the yellow stone exactly in place because it cannot come out either up or down. After making the two small wings, molding it with our fingers in order to give it a little more of the desired shape, we will join the two pieces of wire and we will make a small bend between them to support the shape of the wings.
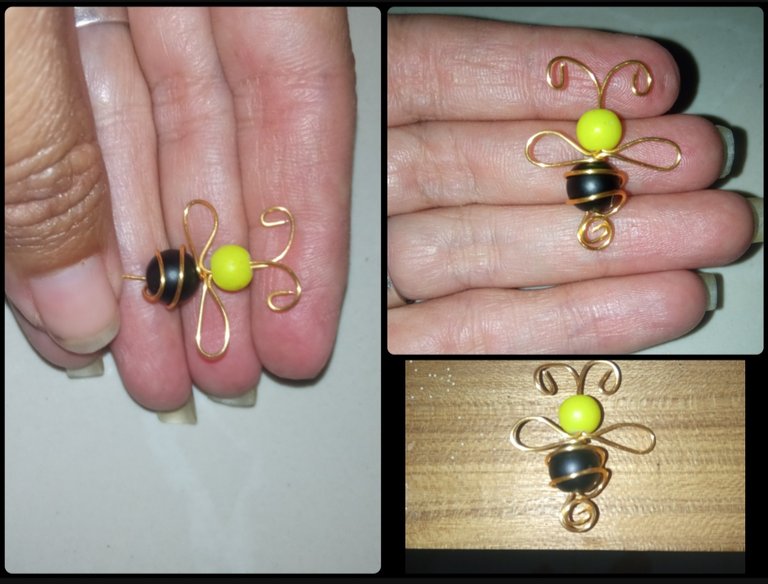
⭐ Paso 3: ahora cortaremos la unión del alambre ya que deben ser dos tiras de alambre e introduciremos la pedrería que debe ser un poquito más grande que la anterior y de color negra y la llevaremos hasta pegarla de las alas ahora separaremos las dos hebras de alambre y una la subiremos hacia arriba y la entorcharemos encima de la piedra negra para así darle la forma de rayas encima de la parte de abajo del cuerpo de la abeja como pueden observar en las imágenes. Con la segunda pieza de alambre que nos sobra la comenzaremos a enrollar desde la punta hacia adentro realizando un pequeño espiral hasta llegar a donde está la pedrería negra esta será la colita o más bien su aguijón. Y así tendremos la forma de nuestra hermosa abejita.
⭐ Step 3: now we will cut the connection of the wire since there must be two strips of wire and we will introduce the rhinestones that must be a little larger than the previous one and black in color and we will take it until we glue it to the wings. Now we will separate the two strands of wire and one we will raise upwards and twist it on top of the black stone to give it the shape of stripes on the lower part of the bee's body as you can see in the images. With the second piece of wire that we have left over, we will begin to roll it from the tip inwards, making a small spiral until we reach where the black rhinestones are, this will be the tail or rather its sting. And so we will have the shape of our beautiful little bee.
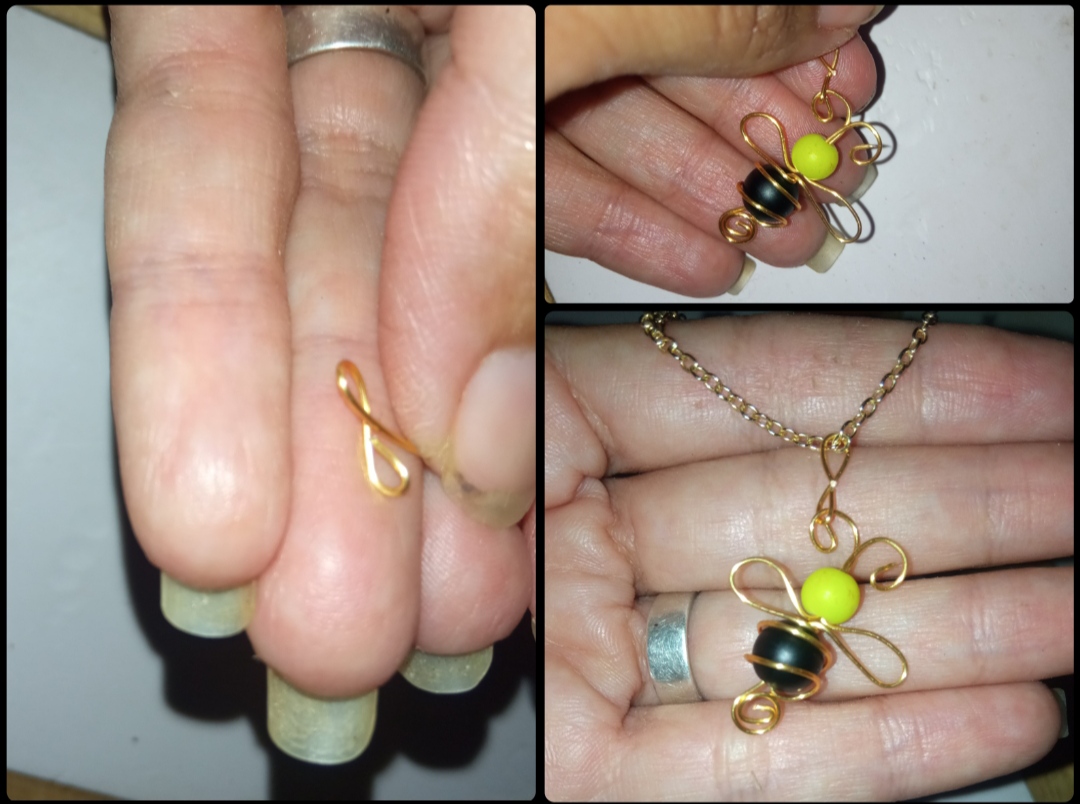
⭐ Paso 4: Por último con un pedacito de 3 cm de alambre de bisutería calibre 20 elaboraremos un pequeño ganchito con doble doblez colocaremos enganchando un doblez en una de las antenas de la abejita y el otro nos servirá para introducir la cadena de bisutería que hemos seleccionado para colgar este hermoso dije o colgante para cadenas. Y así tendremos listo nuestro hermoso collar.
⭐ Step 4: Finally, with a 3 cm piece of 20 gauge jewelry wire we will make a small hook with a double bend, we will place one bend on one of the bee's antennas and the other will serve to introduce the chain of jewelry that we have selected to hang this beautiful charm or pendant for chains. And so we will have our beautiful necklace ready.
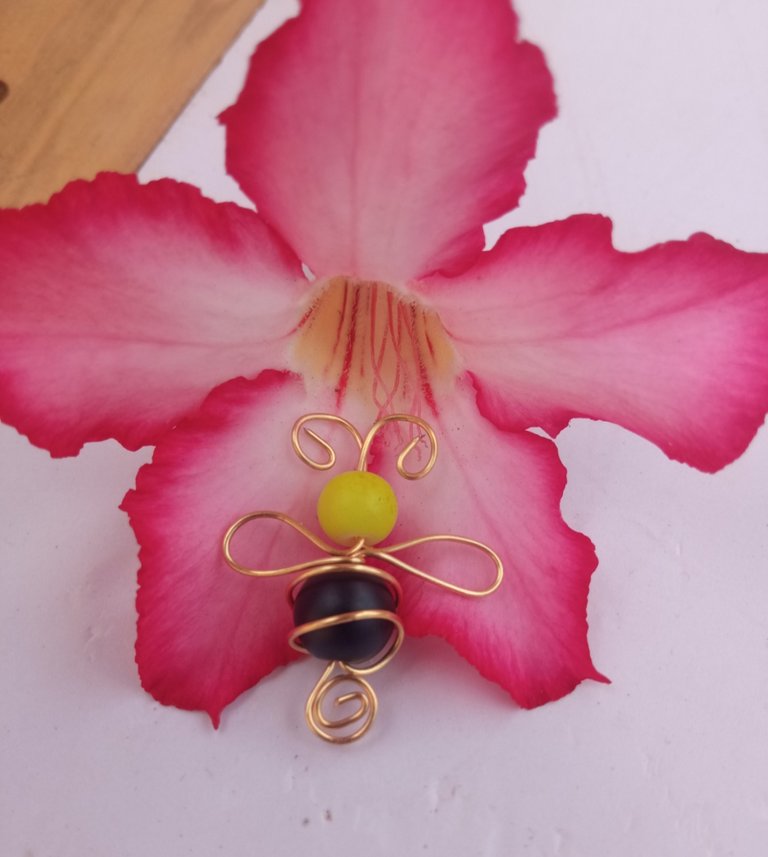
Todas las Fotos son de mi autoría y fueron tomadas con mi Celular Redmi 9.And so my dear and prices, we can make very easy or very nice accessory on this occasion giving life and recreating this beautiful little bird which is despite being very small of great importance for our natural ecosystem. I hope that this design has been your total pleasure now to say goodbye, I would like to invite friends @eumelysm and @venusl19 to join and show us their creative participation on this topic of the month of August.
All Photos are my authorship and were taken with my Redmi 9 Cellphone
