Hola queridos amigos, espero se encuentren muy bien.En algún momento estoy segura que les ha pasado que se les dañe el canal del cierre, esto sin duda puede lograr desesperación porque siempre se nos daña ese pantalón favorito. 💔

Así que he dedicado este espacio para mostrar un paso a paso muy sencillo para cambiar el cierre de un pantalón. Siganme los buenos...💖
Materiales que utilicé
- Homilía
- cierre nuevo o en buen estado
- Tijera
- Maquina de coser
- Alfileres
Paso a Paso
1
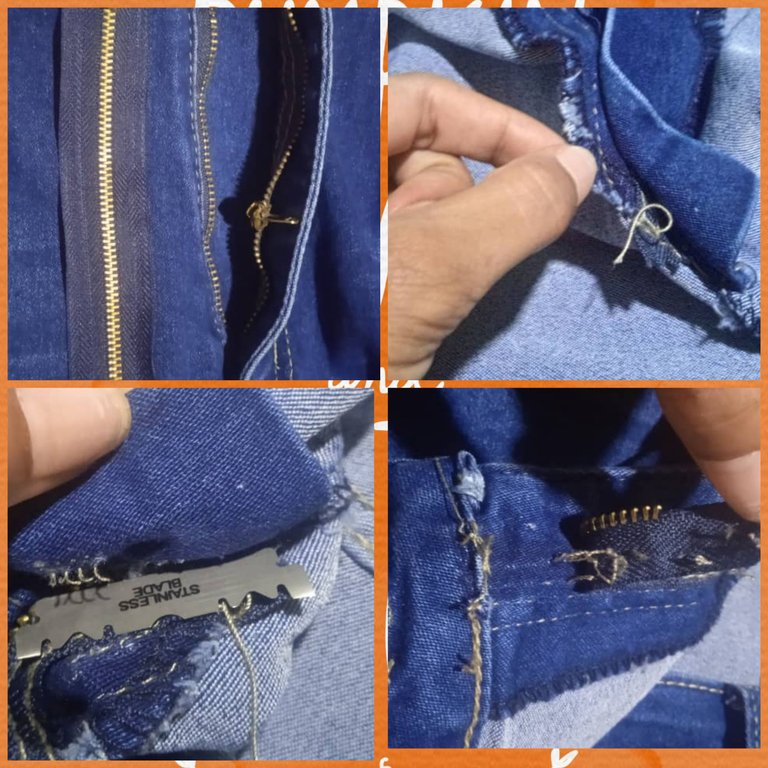
Lo primero que debemos realizar es quitar el cierre que se encuentra dañado, para ello debemos tomar la Homilía y cortar la costura del cierre, con mucho cuidado para no herir nuestros deditos.
2
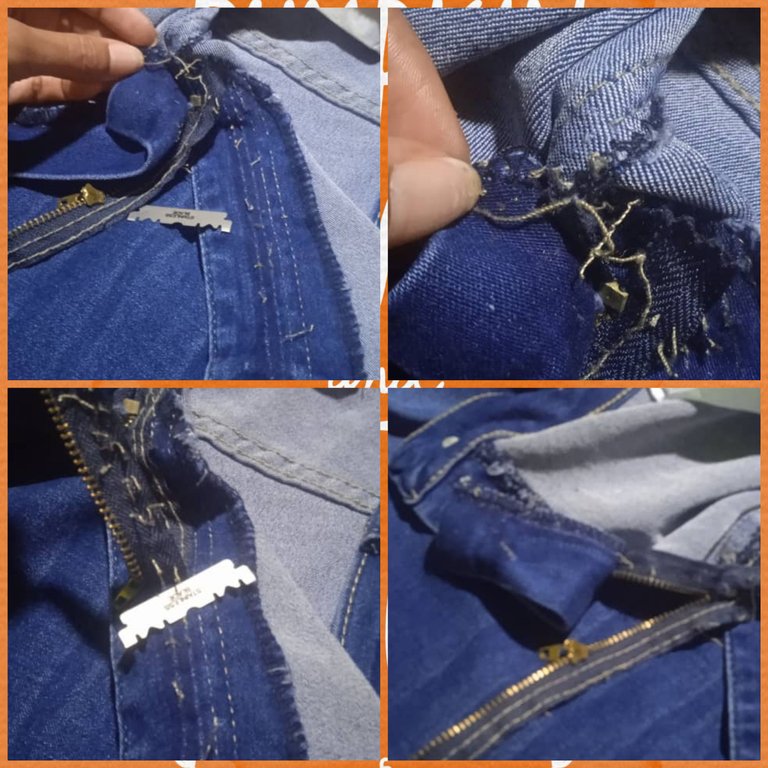
Realizamos el mismo procedimiento del lado izquierdo y sacamos el cierre dañado, nos quedaría el canal del pantalón de la forma en la que pueden apreciar.
3
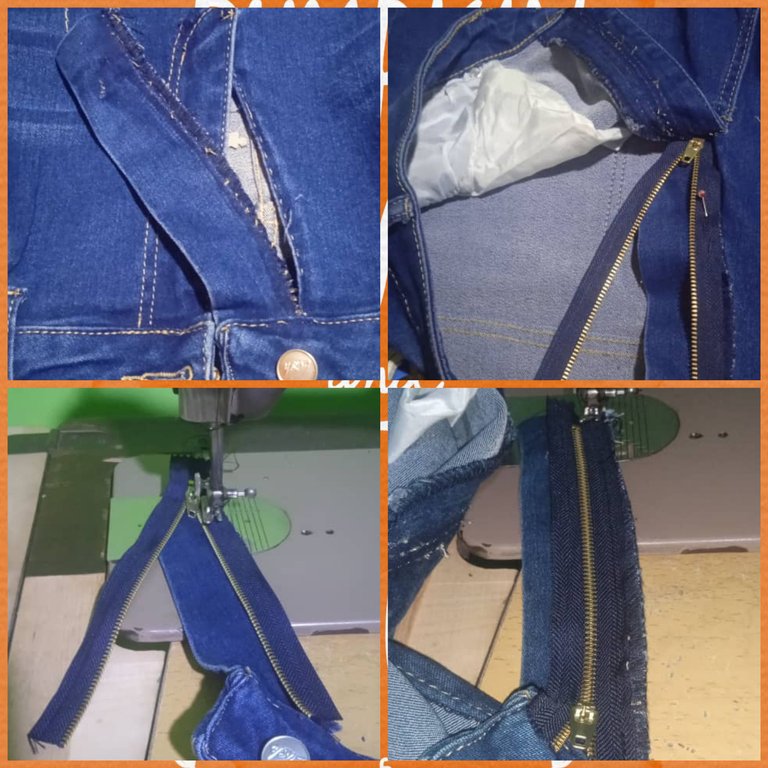
Tomamos el cierre nuevo e iniciamos a coser por el lado del extremo del pantalón que tiene el botón. Nos sudamos del alfiler para evitar que este se mueva y cosemos con la máquina con el canal del cierre cerrado.
4
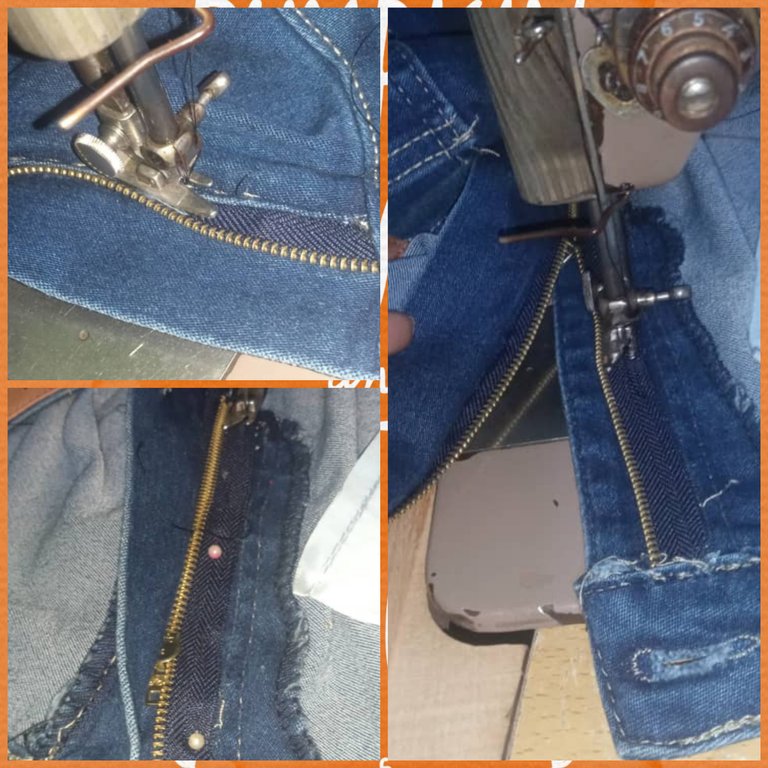
Luego que se fija ese extremo, nos vamos al otro extremo y metemos la punta del cierre por dentro de la abertura superior del pantalón. Y procedemos a coser con el canal del cierre abierto.
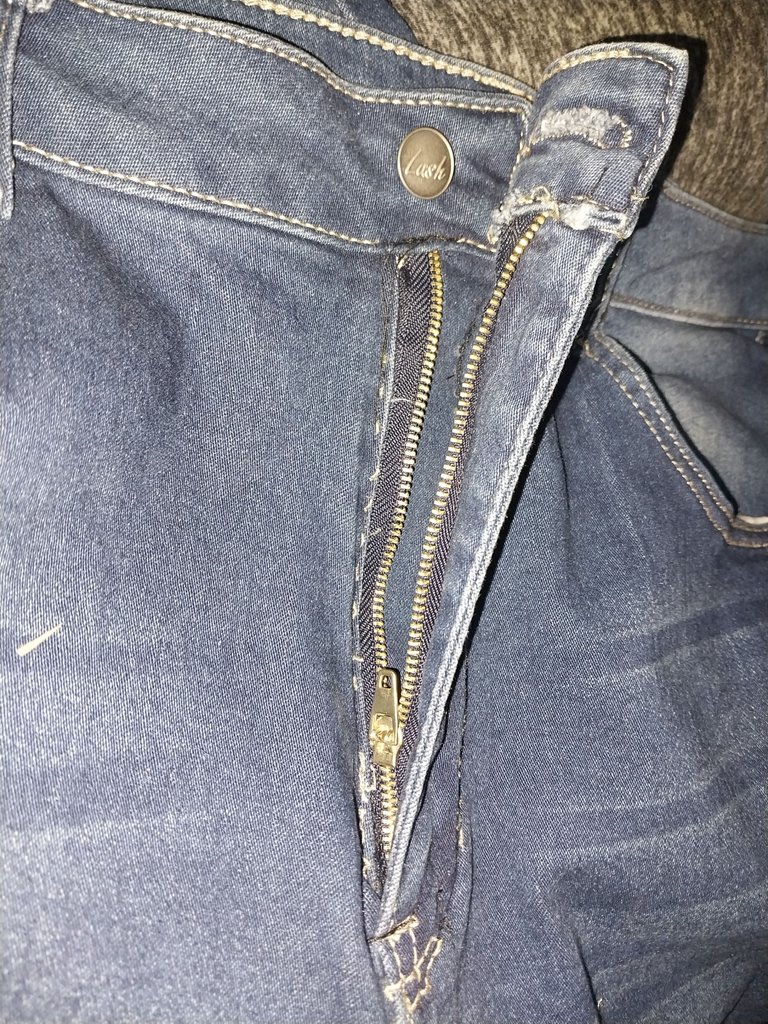
Hemos terminado...
Y yo tengo pantalón nuevo!
Gracias amigos! Saludos.
- Las imágenes me pertenecen
- Traductor: Deelp traslator
- Edicion: Canva
Hello dear friends, I hope you are very well.At some point I am sure it has happened to you that the zipper channel is damaged, this can certainly achieve despair because we are always damaged that favorite pants. 💔

So I have dedicated this space to show a very simple step by step to change the zipper of a pair of pants. Follow me good guys...💖
Materials I used.
- Homily
- New or good condition zipper
- Scissors
- Sewing knife
- Pins
Step by Step
1

The first thing we must do is to remove the zipper that is damaged, for this we must take the Homily and cut the seam of the zipper, very carefully so as not to hurt our little fingers.
2

We perform the same procedure on the left side and remove the damaged zipper, we would have the trouser channel as you can see.
3

We take the new zipper and start sewing on the side of the end of the pants that has the button. We sweat the pin to prevent it from moving and sew with the machine with the zipper channel closed.
4

After that end is fixed, we go to the other end and put the end of the zipper inside the top opening of the pants. And proceed to sew with the zipper channel open.

We have finished...
And I have new pants!
Thanks friends! Greetings
- Images belong to me
- Translator: Deepl Traslator
- Editing: Canva
