Hola, hola amigos creativos de @Diyhub reciban un caluroso abrazo 🤗
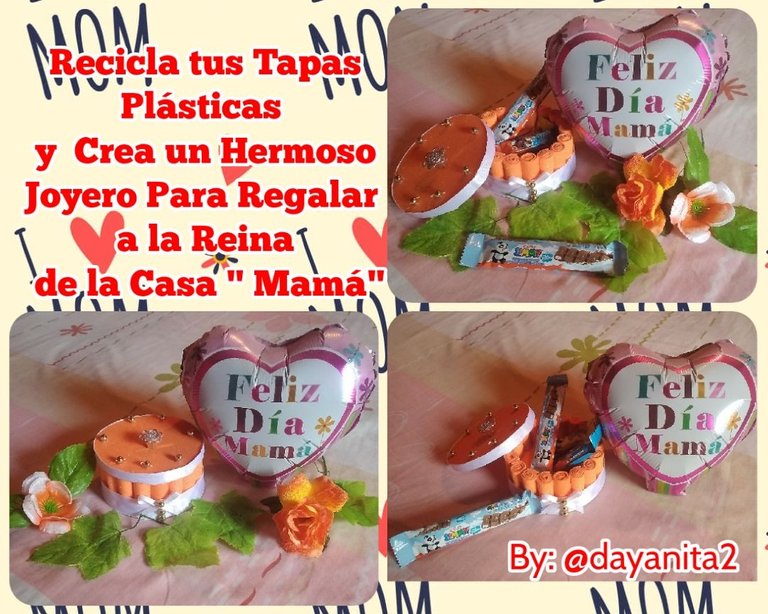
Hoy les traigo un lindo proyecto que realice por el día de las madres para obsequiar a la mía, ya que observe que le hacia falta un joyero, por eso quise realizarle uno donde puse todo mi amor y creatividad ella merece esto y mucho más por ser la mejor madre del mundo 🤗.
Este joyero es super sencillo y no amerita gran cantidad de materiales, por eso me gustaría que me acompañaran a este paso a paso.
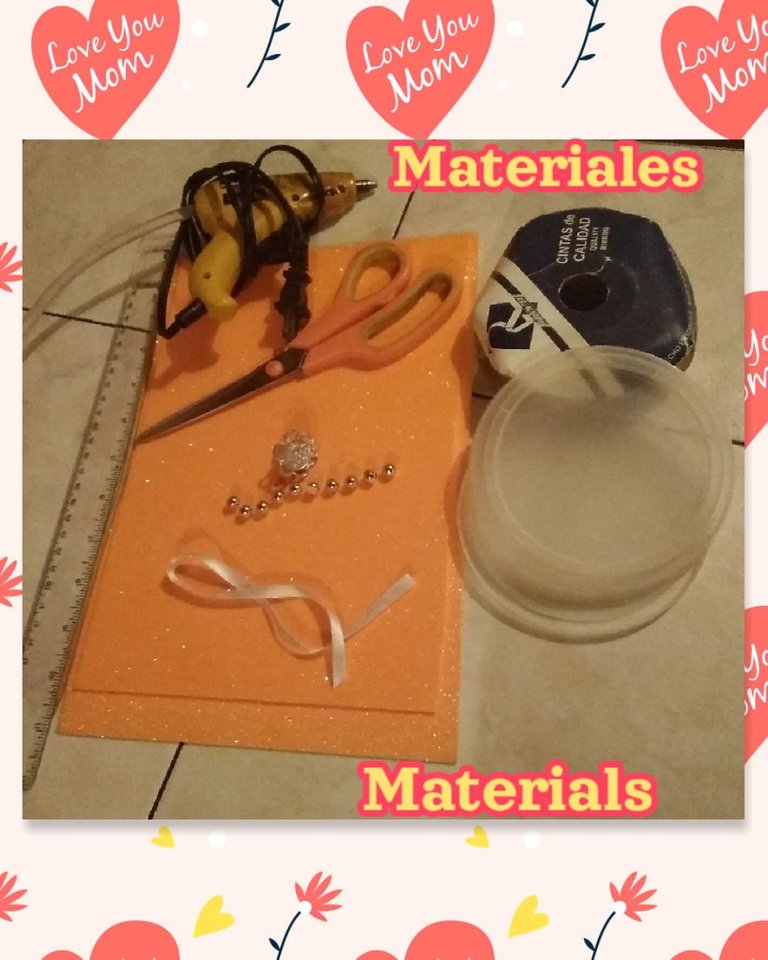
Materiales📝
💎 2 Foami (goma eva) tamaño carta naranja escarchado
💎 Cinta de raso blanca delgada y gruesa de dos dedos de ancho
💎 2 Tapas plásticas de potes de mantequilla
💎 Perlas doradas medianas y un botón en forma de flor
💎 Regla, tijera y pistola de silicón
Hello, hello creative friends of @Diyhub receive a warm hug 🤗
Today I bring you a nice project that I did for Mother's Day to give to mine, since I noticed that she needed a jewelry box, that's why I wanted to make one where I put all my love and creativity, she deserves this and much more for being the best mother in the world 🤗.
This jewelry box is super simple and does not require a large amount of materials, which is why I would like you to accompany me through this step by step.
Materials📝
💎 2 Foami (eva rubber) letter size frosty orange
💎 Thin and thick white satin ribbon two fingers wide
💎 2 plastic lids for pots of butter
💎 Medium golden pearls and a flower-shaped button
💎 Ruler, scissors and silicone gun
Paso 1
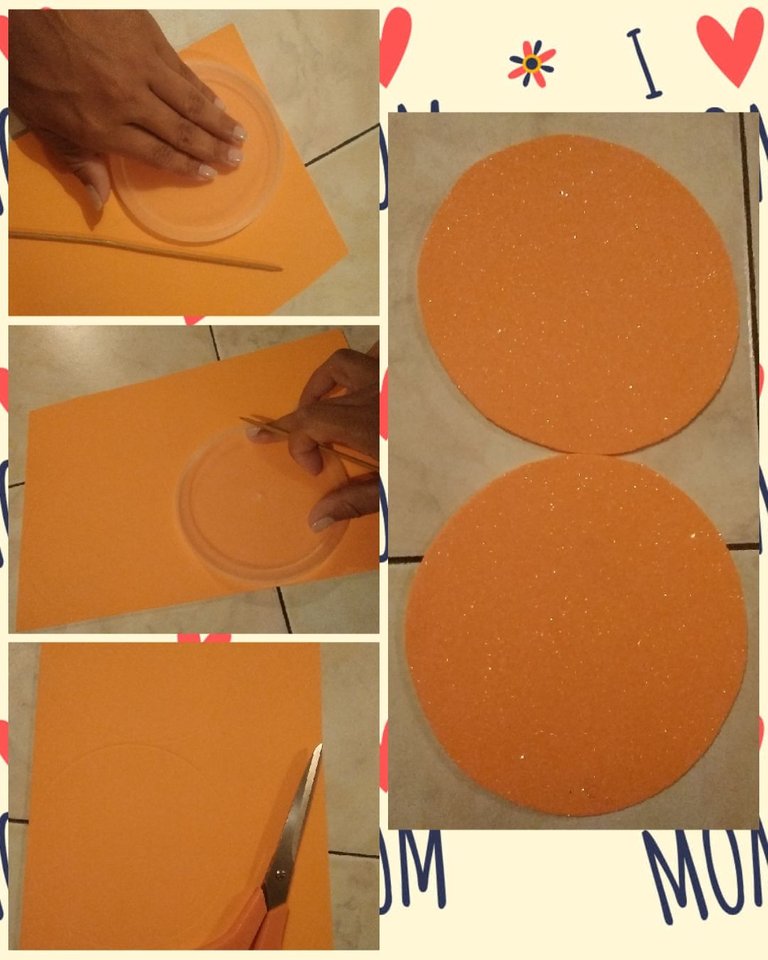
Tomar las tapas plásticas y el foami (goma eva) y con el palito de altura se marcaran ambos círculos, luego se recortaran tratando de hacerlo con precisión para que nuestro trabajo se vea impecable.
Step 1
Take the plastic lids and the foami (eva rubber) and with the height stick both circles will be marked, then they will be cut out trying to do it with precision so that our work looks impeccable.
Paso 2
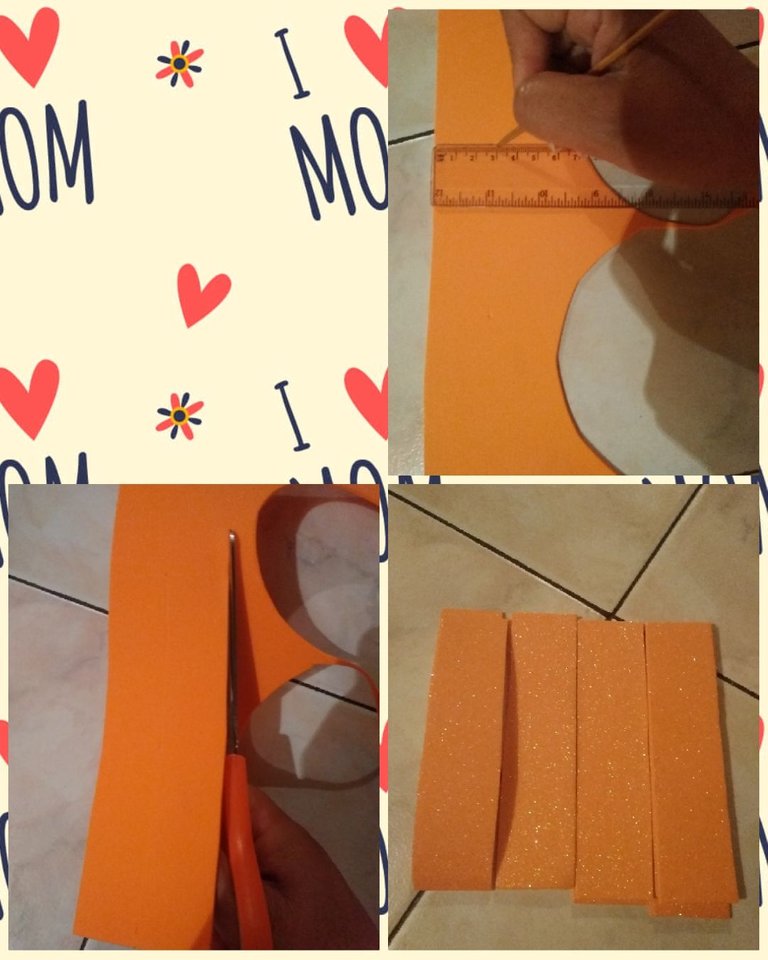
En el foami (goma eva) Marcaremos 17 rectángulos de 6cm de largo X 3cm de ancho, luego recortaremos cada uno de ellos.
Step 2
In the foami (eva rubber) we will mark 17 rectangles of 6cm long X 3cm wide, then we will cut each one of them.
Paso 3
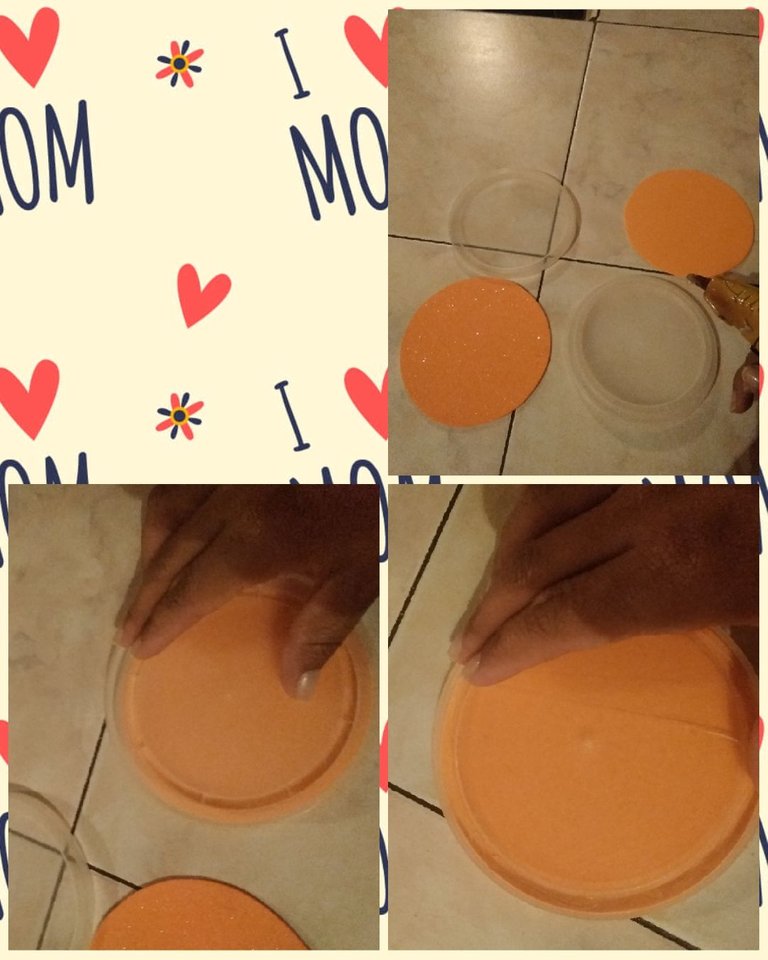
💎 Tomaremos la pistola de silicón y se le colocara a las tapas para luego colocar encima los círculos que recortamos en foami (goma eva).
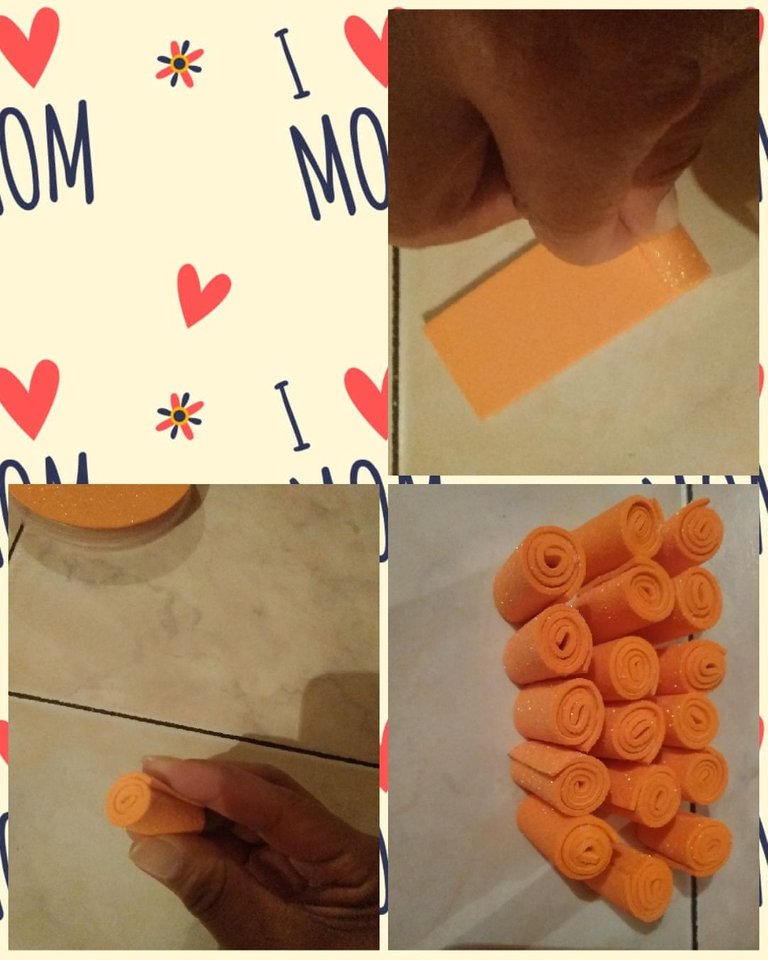
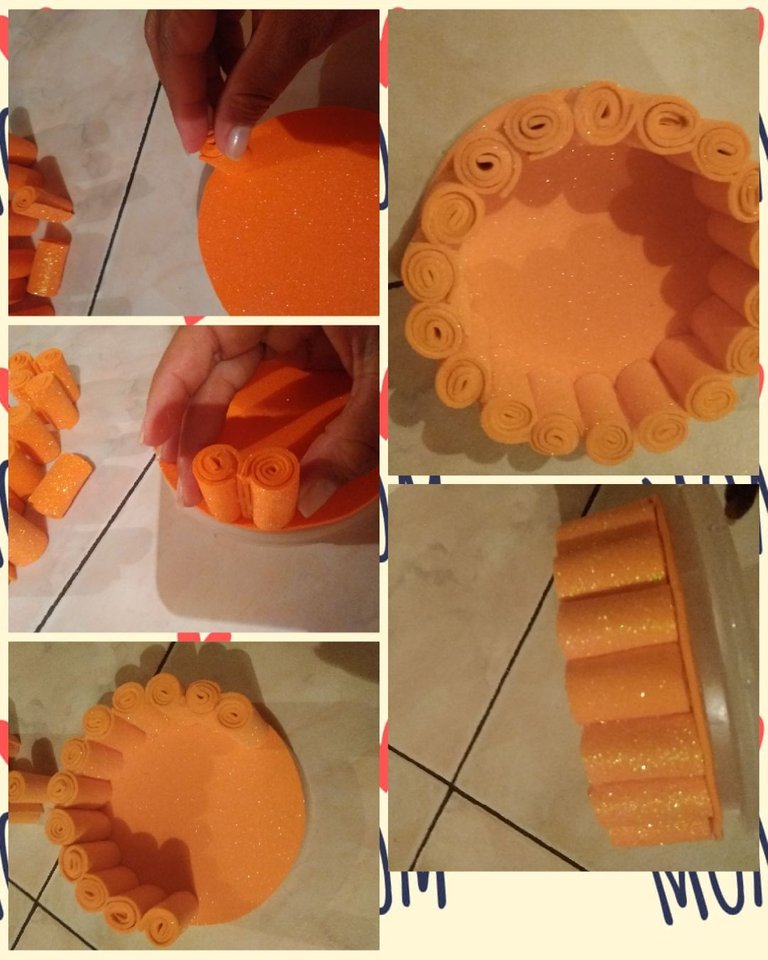
💎 Ahora vamos a comenzar armar los rollitos, se toma un rectángulo y se comienza a enrollar desde la punta, al finalizar se le coloca silicón para sellar, este proceso se realizara con cada uno de los rollitos.
Step 3
💎 We will take the silicone gun and it will be placed on the lids and then placed on top of the circles that we cut in foami (eva rubber).
💎 Now we are going to start assembling the rolls, take a rectangle and begin to roll it from the tip, at the end silicone is placed to seal, this process will be carried out with each of the rolls.
Paso 4
Se toma una de las tapas plásticas que forramos con el foami (goma eva), comenzamos a pegar los rollitos en la punta del círculo, cuando se va a pegar el segundo rollito se le coloca silicón abajo y a los lados para que todos los rollitos queden bien pegaditos uno al lado de otro, este procedimiento se repetira hasta completar todo el círculo.
Step 4
Take one of the plastic lids that we lined with foam (eva rubber), we begin to glue the rolls at the tip of the circle, when the second roll is going to be glued, silicone is placed below and on the sides so that all the rolls remain well glued one next to the other, this procedure will be repeated until the entire circle is completed.
Paso 5
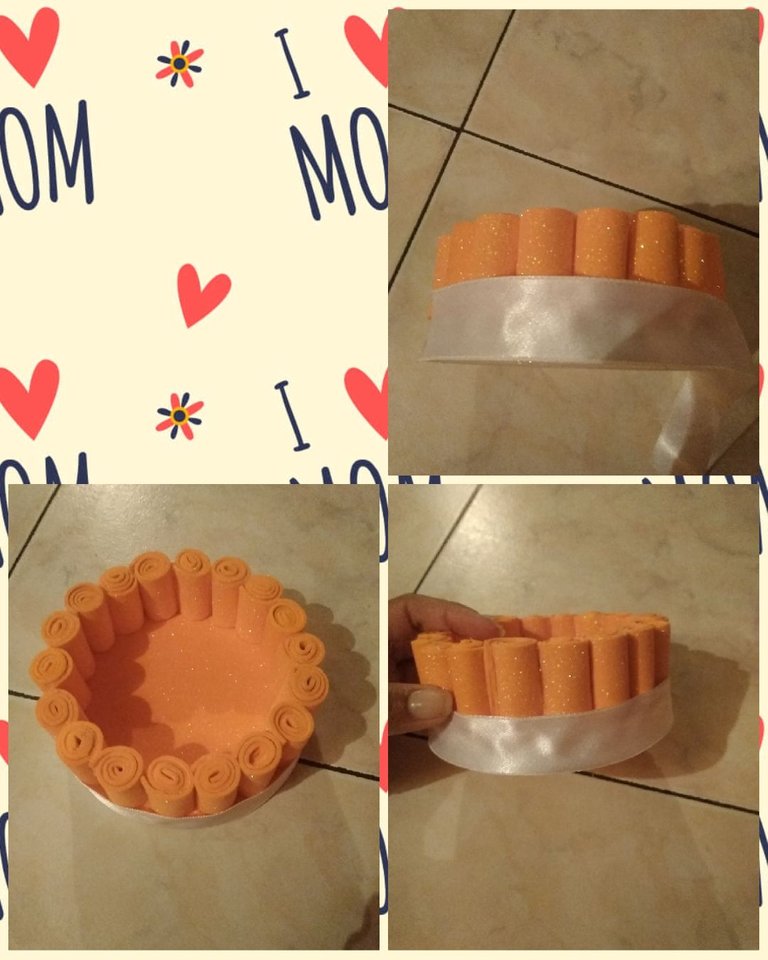
Ahora vamos a pegar la cinta de raso gruesa en la parte de abajo de la estructura que armamos en el paso anterior, para ello usaremos silicón, se pegara todo alrededor hasta llegar hasta la otra punta.
Step 5
Now we are going to glue the thick satin ribbon at the bottom of the structure that we made in the previous step, for this we will use silicone, it will stick all around until it reaches the other end.
Paso 6
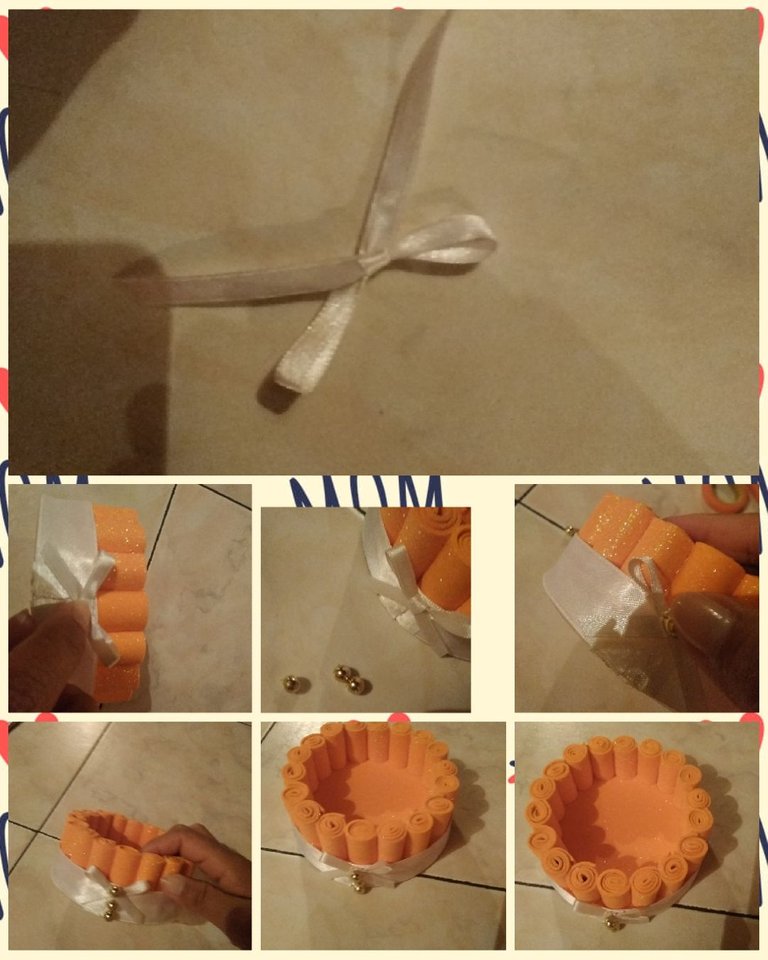
Con la cinta de raso delgada haremos un lazito, para pegarla en donde se unen las puntas de la cinta que pegamos en e paso anterior, luego tomaremos tres perlas doradas una se pegara en el centro del lazo y las dos que faltan debajo de la anterior dejando una pequeña distancia.
Step 6
With the thin satin ribbon we will make a bow, to glue it where the ends of the ribbon that we glued in the previous step meet, then we will take three golden pearls, one will be glued in the center of the bow and the two that are missing below the previous one leaving a small distance.
Paso 7
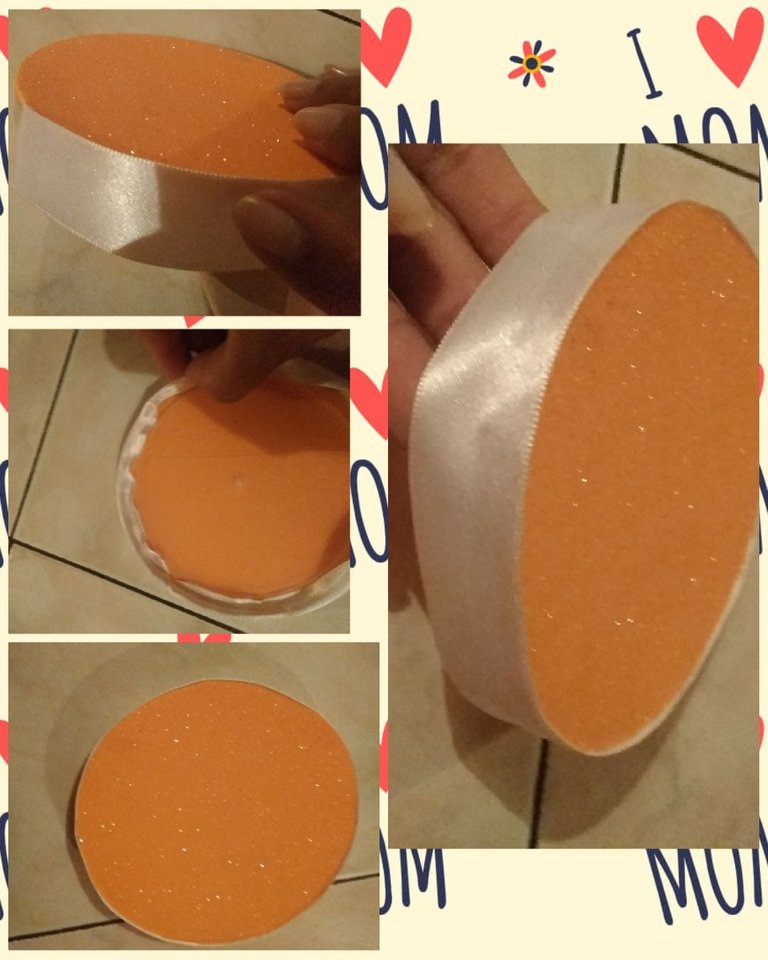
💎 La otra tapa plástica que forramos con foami (goma eva) le pegaremos en la orilla la cinta de raso gruesa con silicón, para sellar los bordes, volteamos la tapa y el sobrante de la cinta se doblara y se pegara hacía adentro.
💎 Como último paso en la tapa le peagaremos con silicón el botón en forma de flor, buscando que nos quede en el centro de la tapa, para decorarla aún más le pegaremos perlas doradas alrededor dejando una distancia la una de la otra.
Step 7
💎 The other plastic cover that we cover with foami (eva rubber) we will glue the thick satin tape with silicone on the shore, to seal the edges, we turn the cover over and the excess of the tape will fold and stick inside.
💎 As the last step on the lid, we will glue the flower-shaped button with silicone, looking for it to fit in the center of the lid, to decorate it even more, we will glue golden pearls around it, leaving a distance from each other.
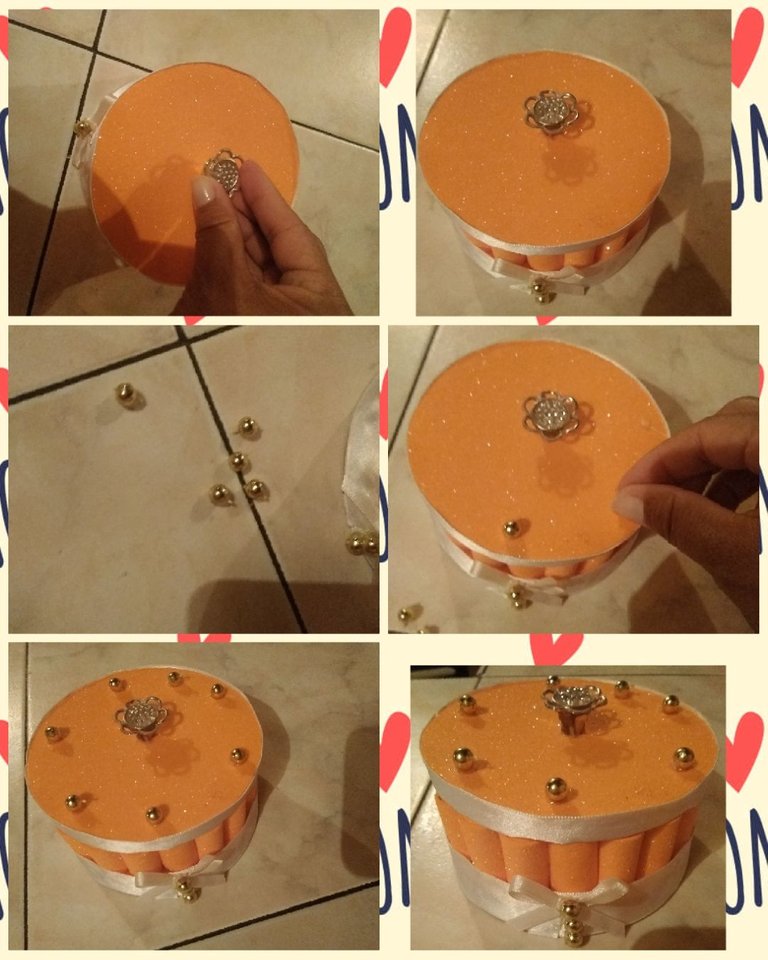
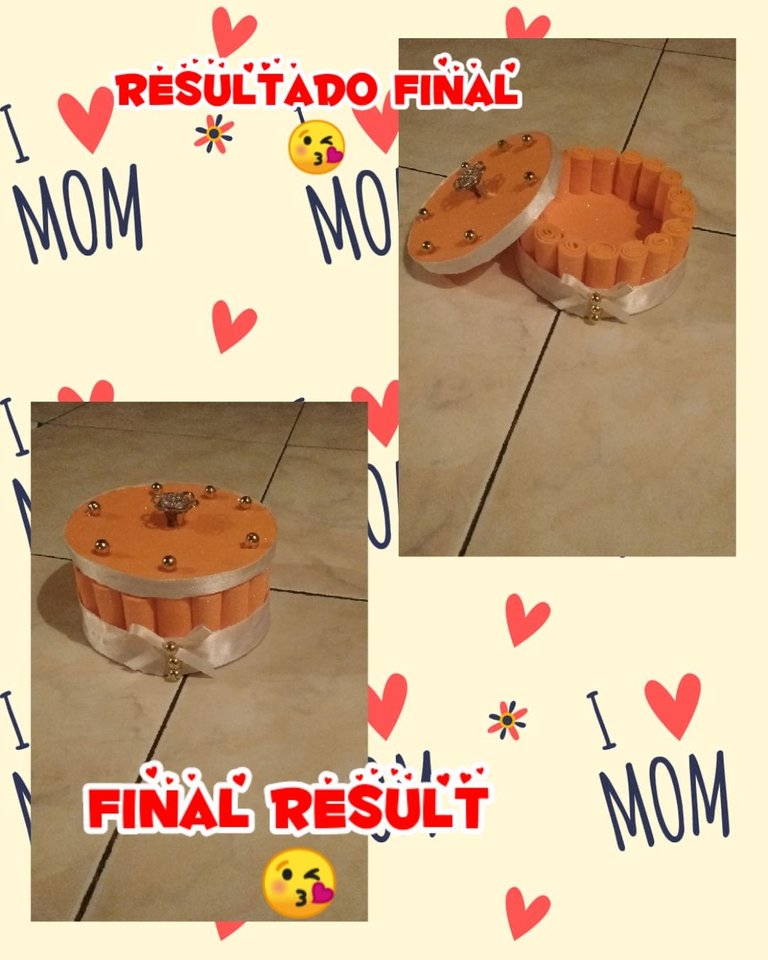
Y bien amigos aquí les dejo este lindo resultado, un joyero realizado para mi mamá en mi caso le coloque chocolates ya que ella es chocolatera 😄 como yo, le encanto este detalle ya que fue realizado con mis propias manos y con todo el amor, mi madre es el ser más importante para mí, es mi amiga,consejera, la mejor del mundo y si volviera a nacer la volvería a elegir ❤️.
Ahora la invitación es para que tú también te animes a realizar la tuya, este joyero se puede obsequiar en cualquiera ocasión y para mí que mejor ocasión que el día de las madres.
Gracias a ti que te detienes a leer cada uno de mis post, recibe un abrazo cargado de energías positivas 🤗 ✨.
Las fotos fueron tomadas y editadas con mi celular
use la aplicación "Foto Collage"
La traducción la realice con el traductor de google
Hasta un Próximo Encuentro!!!
🤗😘
And well, friends, here I leave this beautiful result, a jewelry box made for my mom, in my case I put chocolates on it since she is a chocolatier 😄 like me, she loved this detail since it was made with my own hands and with all the love, my Mother is the most important being for me, she is my friend, counselor, the best in the world and if she were to be born again I would choose her again ❤️.
Now the invitation is for you to also be encouraged to make yours, this jewelry box can be given as a gift on any occasion and for me what better occasion than Mother's Day.
Thanks to you who stop to read each of my posts, receive a hug full of positive energies ✨ 🤗.
The photos were taken and edited with my cell phone.
use the "Photo Collage" app
The translation is done with google translator
Until a Next Meeting!!!
🤗😘
