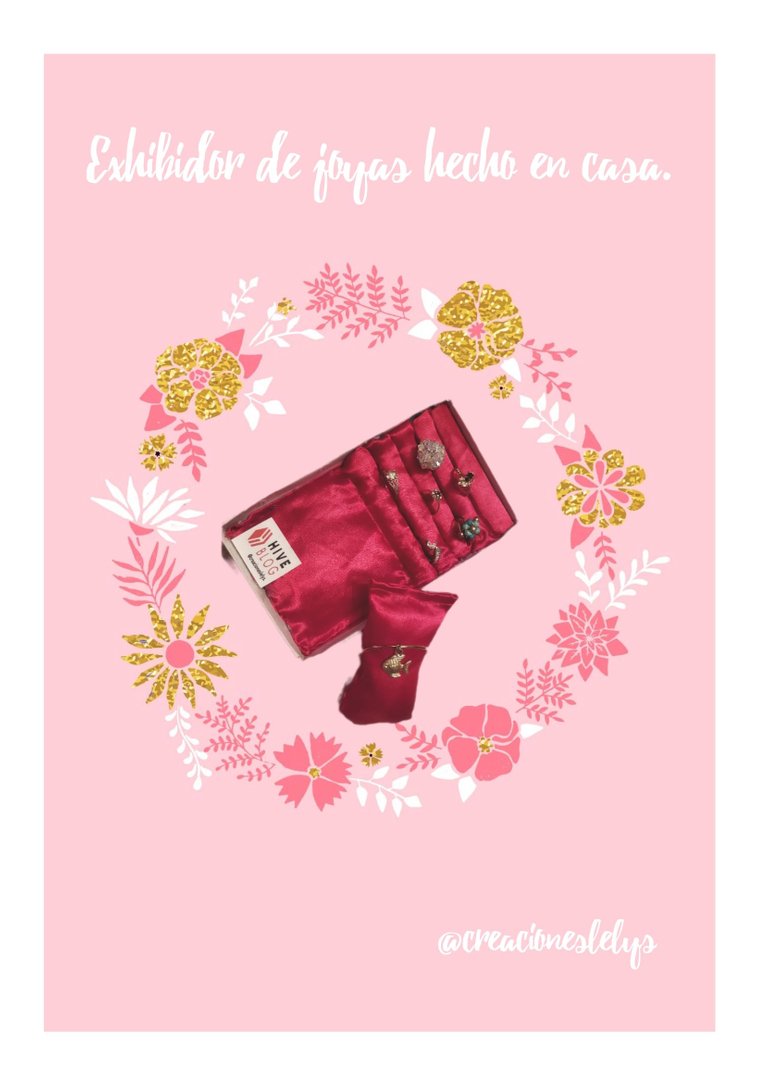
Hola amigos. Espero que estén muy bien. Yo estoy muy bien gracias a Dios. 🙏 En estos días fui a casa de mi hermana, la encontré realizando lindísimos y variados modelos de anillos, todos me encantaron. Mientras conversamos se me ocurrió la idea de hacer un exhibidor de anillos con la finalidad de tener un muestrario móvil que a la vez sirva para proteger y organizar los anillos.
Para ser sincera cuando lo pensé me pareció muy fácil. Incluso creí que en pocas horas lograría hacerlo. Contaba con tener tela de fieltro suficiente para realizar un modelo que vi en una revista, pero no fue así. Igual quise intentar hacer uno con los materiales que tenía disponibles.
Siempre trato de hacer estas creaciones sin seguir ningún patrón ni tutorial. Mi intención es crear sin copiar. Si fuera necesario, para mejorar buscaría una guía o tutorial. En este caso quise tratar de hacer un exhibidor siguiendo las ideas que en mi mente se habían formado.
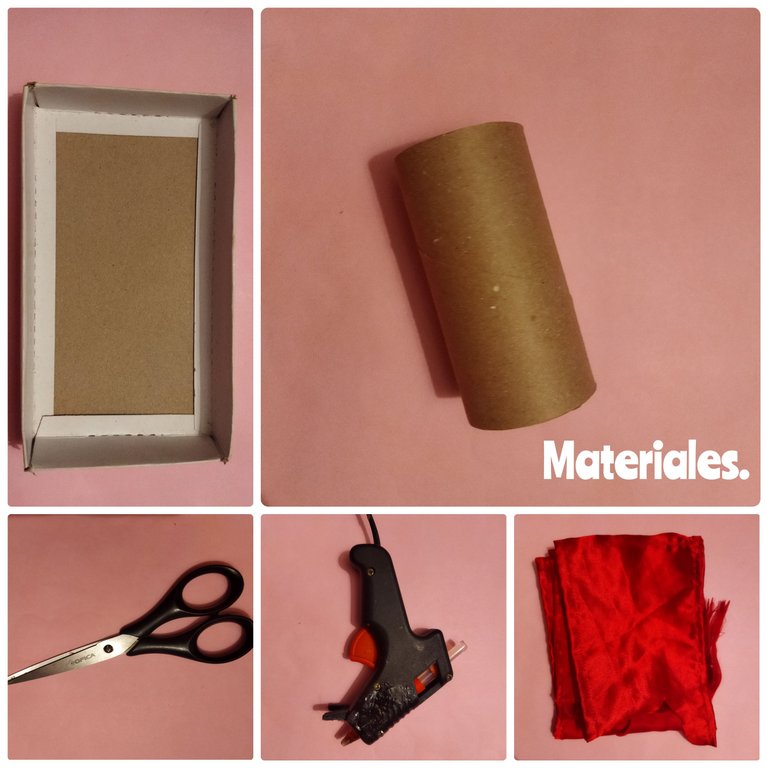
Apenas conseguí un retazo de tela satinada color rojo, dos rollos de cartón, silicón en barra, pistola para silicón, caja de cartón reciclada. Esta caja de cartón trae su tapa, la obtuve de una compra que hice, allí vinieron unos carretos de hilos de coser. También usé las tijeras.
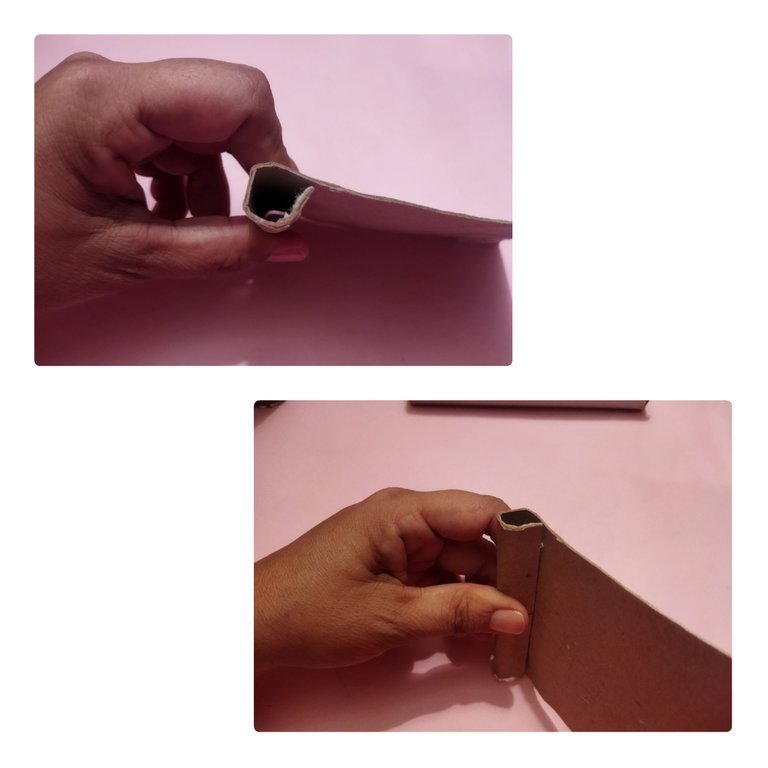
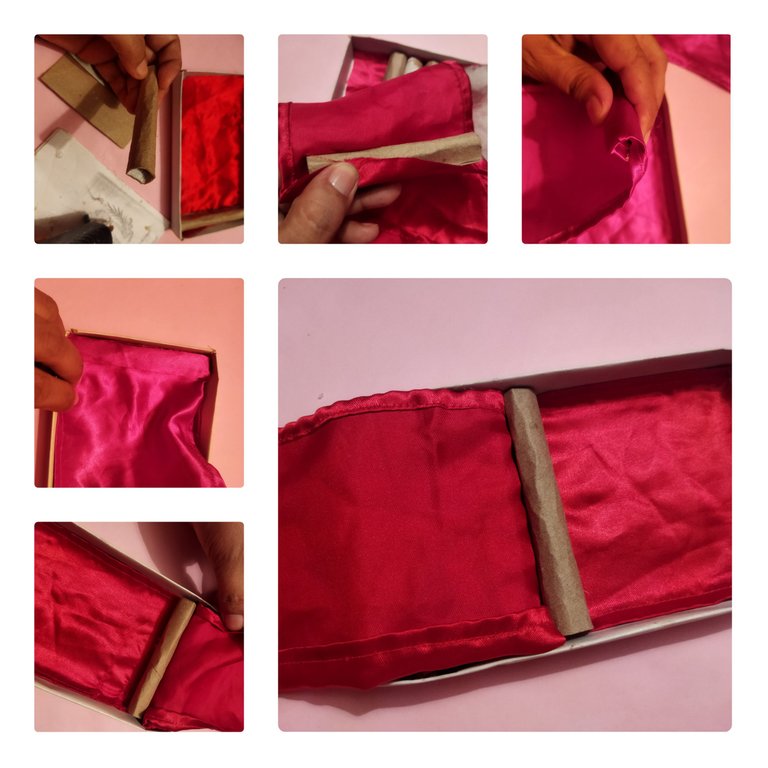
Lo primero que hice fue cortar y enrollar varios trozos de cartón. Para mi suerte ☘️ el largo de cada rollo coincide con el ancho de la cajita. Fue difícil enrollar este cartón porque debía quedar de 1,5 cm de diámetro. De esta forma realicé 5 tubitos. Los extremos los pegué con silicón caliente.
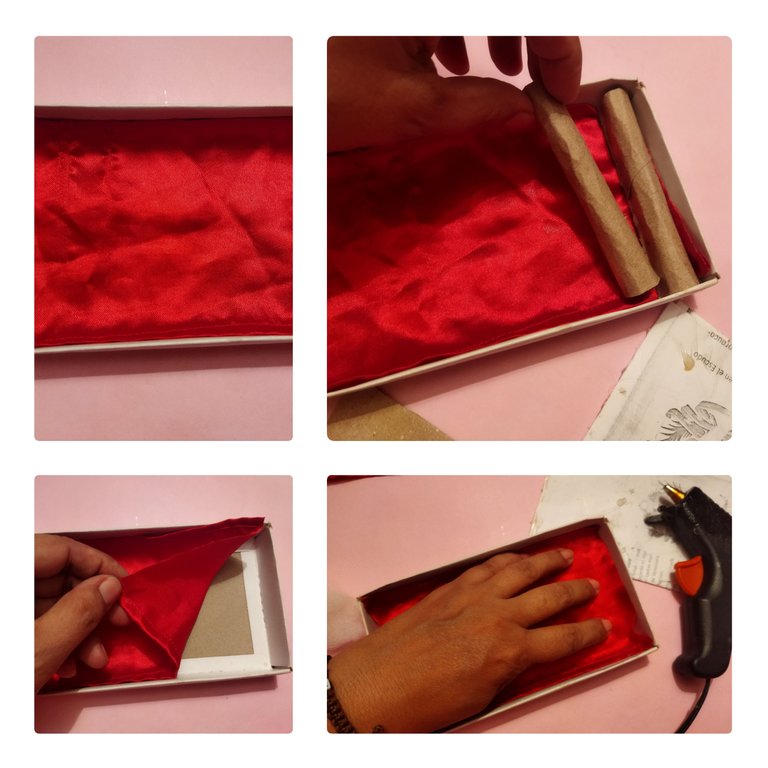
Después tomé las medidas de la caja y corté en la tela un rectángulo para colocar de forro dentro de la caja. Este forro lo pegué también con silicón. Seguidamente empecé a forrar el primer tubo. Lo forré completo tomando un trozo largo de tela roja satinada, con un extremo de la tela forré ese primer tubo y dejé tela sobrando para ir pegando uno por uno los otros cuatro tubos. Este paso fue complicado. Al tener el primer tubo forrado lo pegué en la base de la cajita. Después metí el segundo tubo, lo enrollé y lo pegué justo al lado del primero. Así fui pegando los demás.
💍💍💍💍💍💍💍💍💍💍💍💍💍💍💍💍
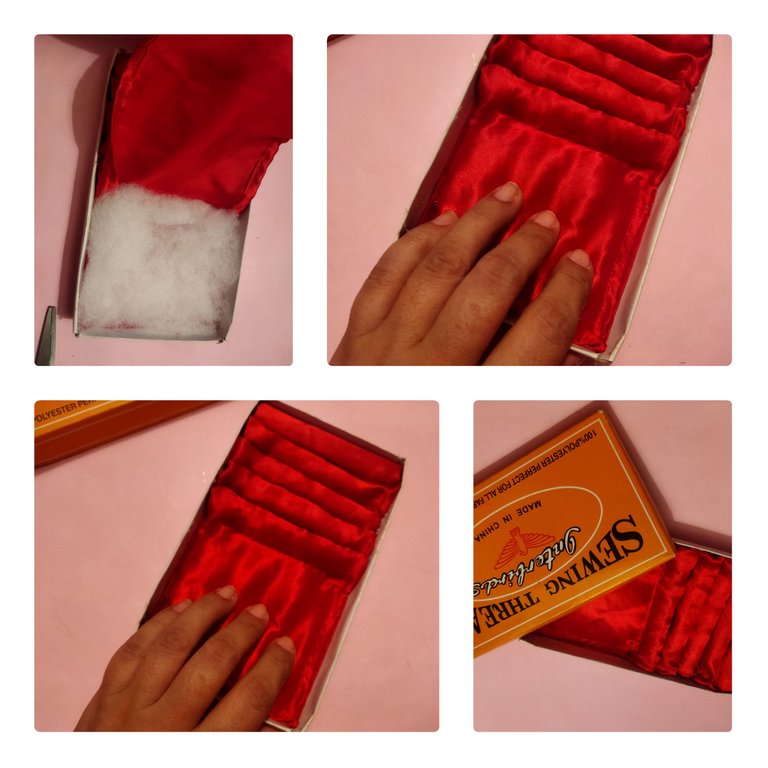
Con la tela que me sobró realicé dentro de la cajita una almohada, le coloqué un poco de algodón para rellenar y luego fui pegando por los bordes de la cajita la tela. Este paso me gustó porque creé un modelo diferente al que originalmente tenía. Ahora el exhibidor tiene otro espacio para mostrar otras prendas como aretes o zarcillos. Antes de finalizar coloqué la tapa de la caja para comprobar la altura de trabajo interior. Sin ningún obstáculo la caja cerró perfecto.
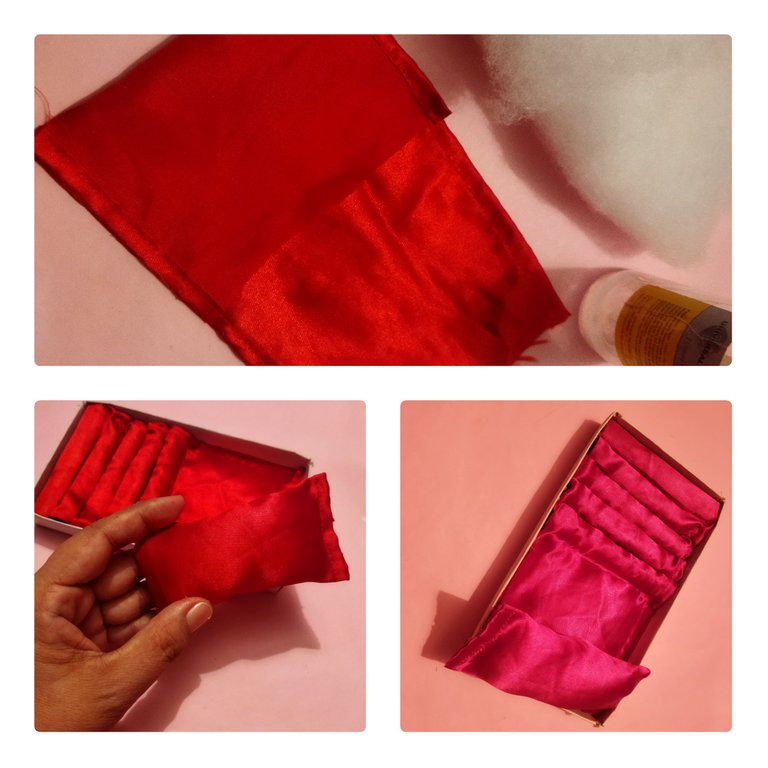
El resultado me gustó, sin embargo puedo mejorarlo. Sigo pensando que hay una forma más sencilla de hacerlos. Simplemente enrollando pedazo de fieltro y pegando en la base interna de la caja. Para cuando tenga las telas lo haré de nuevo. Si quieres haz los tuyos y me muestras como te han quedado. Adicional hice una almohadita para exhibir los brazaletes o pulseras.

Todas las fotos son de mi propiedad. Edité con Polish. Usé el traductor de DeepL. Hasta una próxima idea creativa amigos. Bendiciones.
English.
Hello friends. I hope you are doing very well. I am very well thanks to God. 🙏 These days I went to my sister's house, I found her making very nice and varied models of rings, I loved them all. While we were talking I came up with the idea of making a ring display with the purpose of having a mobile display case that at the same time serves to protect and organize the rings.
To be honest, when I thought about it, it seemed very easy. I even thought I could do it in a few hours. I was counting on having enough felt fabric to make a model I saw in a magazine, but it wasn't like that. I still wanted to try to make one with the materials I had available.
I always try to make these creations without following any pattern or tutorial. My intention is to create without copying. If necessary, to improve I would look for a guide or tutorial. In this case I wanted to try to make a display following the ideas that in my mind had formed.
I just got a piece of red satin fabric, two rolls of cardboard, silicone stick, silicone gun, recycled cardboard box. This cardboard box comes with its lid, I got it from a purchase I made, there came some spools of sewing threads. I also used the scissors.
The first thing I did was to cut and roll up several pieces of cardboard. To my luck ☘️ the length of each roll matched the width of the little box. It was difficult to roll this cardboard because it had to be 1.5 cm in diameter. In this way I made 5 little tubes. I glued the ends with hot silicone.
Then I took the measurements of the box and cut a rectangle in the fabric to place as a lining inside the box. I also glued this lining with silicone. Then I started to line the first tube. I lined it completely by taking a long piece of red satin fabric, with one end of the fabric I lined that first tube and left some fabric left over to glue one by one the other four tubes. This step was complicated. Once I had the first tube lined, I glued it to the base of the box. Then I put the second tube in, rolled it up and glued it right next to the first one. I glued the rest of the tubes.
💍💍💍💍💍💍💍💍💍💍💍💍💍💍💍💍
With the leftover fabric I made a pillow inside the box, I put some cotton to fill it and then I glued the fabric around the edges of the box. I liked this step because I created a different model than the one I originally had. Now the display has another space to show other garments such as earrings or earrings. Before finishing I placed the lid on the box to check the working height inside. Without any obstacles the box closed perfectly.
I liked the result, however I can improve it. I still think there is a simpler way to make them. Just roll up piece of felt and glue to the inside base of the box. By the time I get the fabrics I will do it again. If you want to make your own and show me how they turned out. Additionally I made a little pillow to display the bracelets.
All photos are my property. I edited with Polish. I used the translator from DeepL. Until next creative idea friends. Blessings.


