Decorating Christmas cookies (Tutorial) / Christmas wreath

in #hive-1896412 years ago

To enjoy delicious and eye-catching cookies, you don't need to be an artist. Just put in a little love, and the result is wonderful. I'm telling you that I'm not good at drawing and I have a trembling pulse 😄.

IMG_20221219_154220_Snapseed.jpg

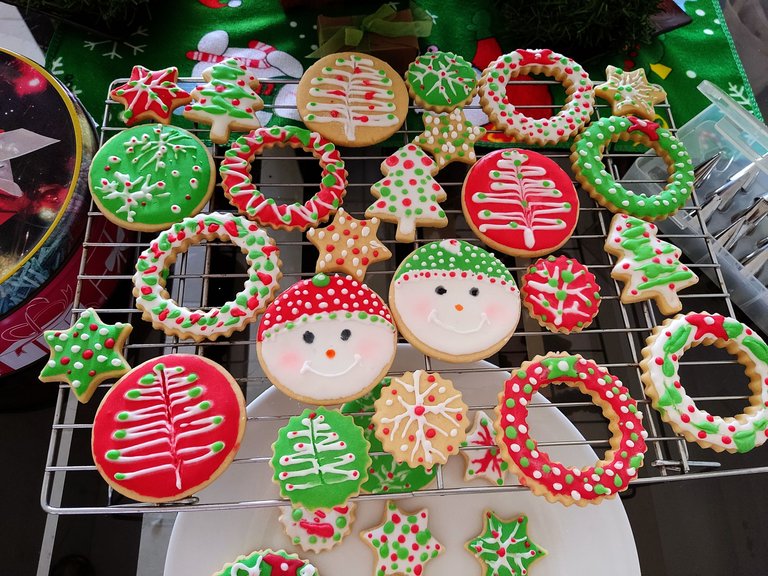
If you want to surprise your family and friends this Christmas, today I share with you how to decorate cookies in the shape of a Christmas wreath with simple techniques that you can do with the little ones at home.

IMG_20221219_193010_Snapseed.jpg

cintillo_flores-removebg-preview (1).png

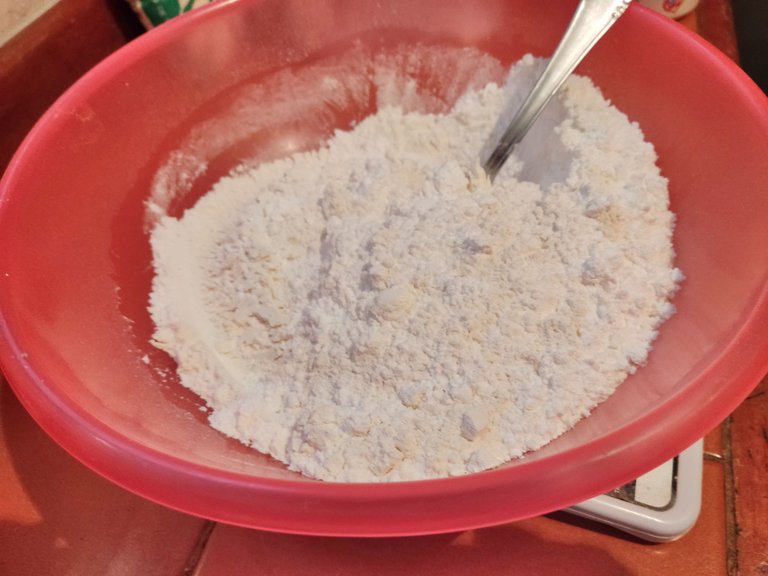
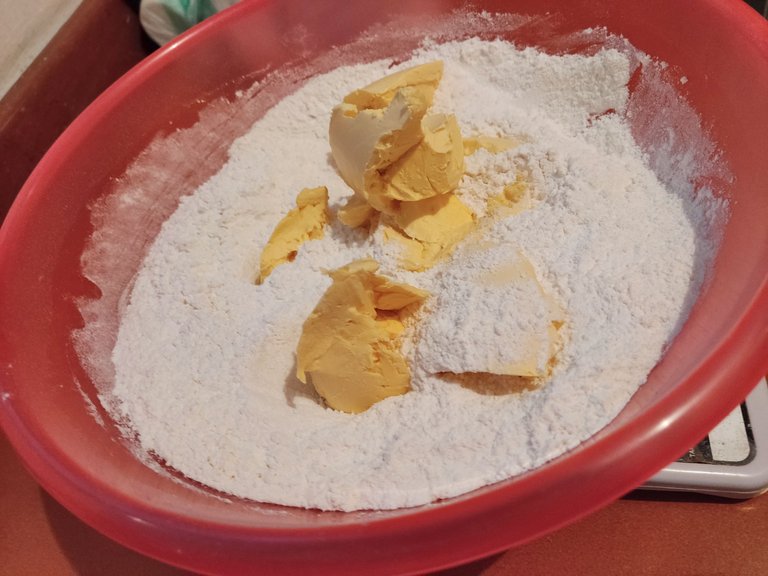
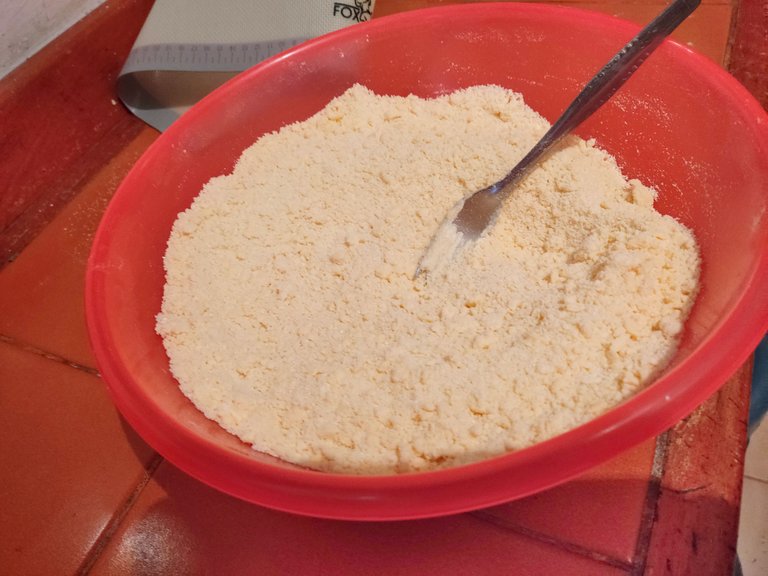
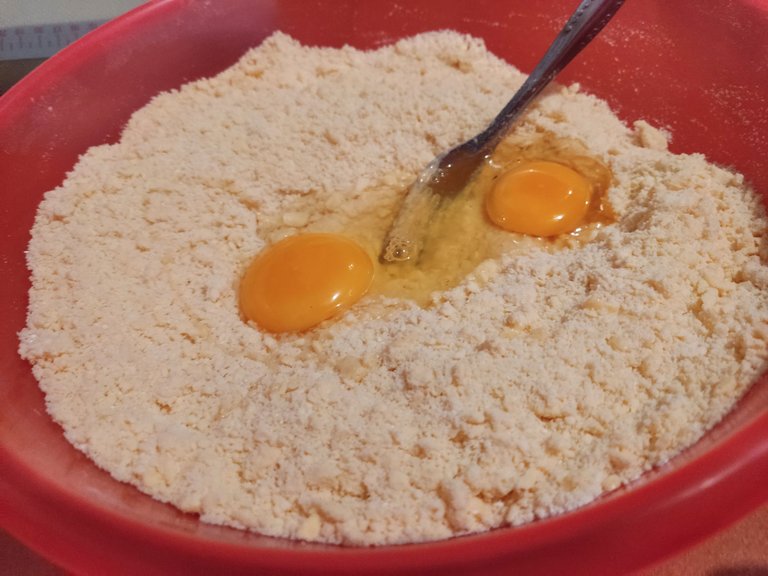
Whenever I want to decorate cookies, I always use my classic shortbread cookie recipe. This is a recipe that allows me to make firm dough cookies that are golden brown when baked and do not get moist easily with the icing from the decoration.

To make the shortbread cookies, you must have on hand:
1 cup of wheat flour
3/4 cup powdered sugar
1/4 cup unsalted butter
1 egg

This recipe yields 20 medium-sized cookies. If you want more cookies, just double or triple the quantities.

cintillo_flores-removebg-preview (1).png

Making dough


1
In a bowl, mix flour and powdered
sugar.

IMG_20221218_180447_Snapseed.jpg


2
Add unsalted margarine to dry ingredients.

IMG_20221218_180841_Snapseed.jpg


3
Stir in the butter with a fork until a sandy texture is obtained.

IMG_20221218_191904_Snapseed.jpg


4
Add the egg to bind the ingredients together. The photo shows 2 eggs since the recipe was doubled.

IMG_20221218_191953_Snapseed.jpg


5
Form a homogeneous dough and roll it out on a non-stick surface, making sure it is half a centimeter thick.

IMG_20221218_194033_Snapseed.jpg


6
Cut the dough with the 6 cm diameter cookie cutter and then use the 4 cm cookie cutter. It is how the wreath shape will look like.

IMG_20221218_194117_Snapseed.jpg


Place all the cookies on a tray and bake for 25 minutes at 180ºC.

cintillo_flores-removebg-preview (1).png

Toolkit

Before continuing with this step-by-step guide to decorate cookies, it is important to have some basic tools that will make your work easier.


Pastry bag tips


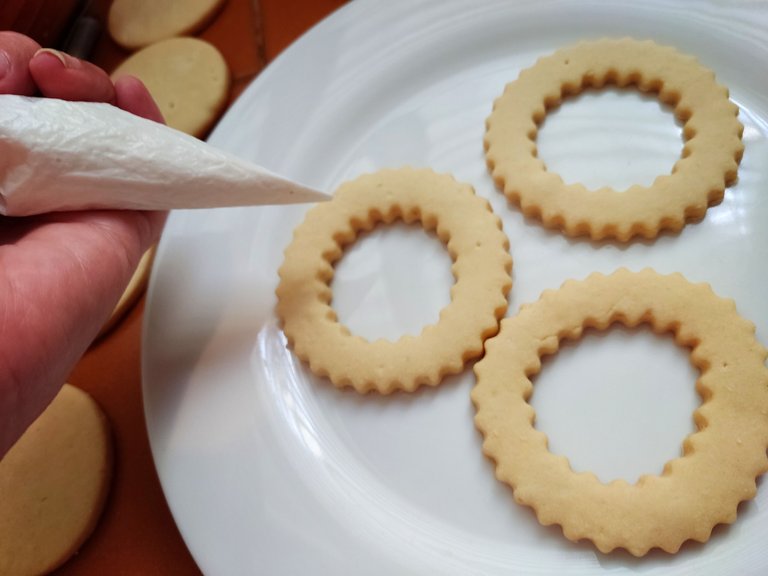
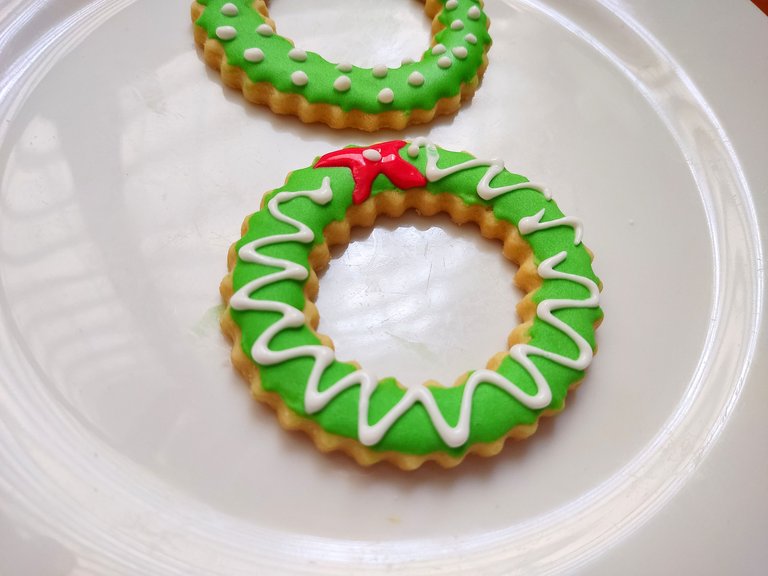
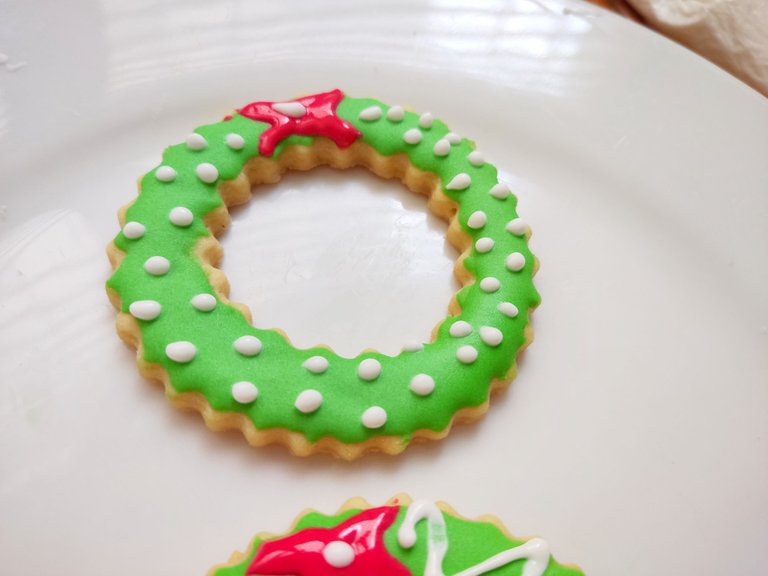
Try to use 1 small-hole smooth nozzle and 1 medium-hole smooth nozzle. The small one is for piping frosting around the edge of the cookies, and the medium one is for filling.

IMG_20221220_093311_Snapseed.jpg


IMG_20221219_104517_Snapseed.jpg


Pastry sticks

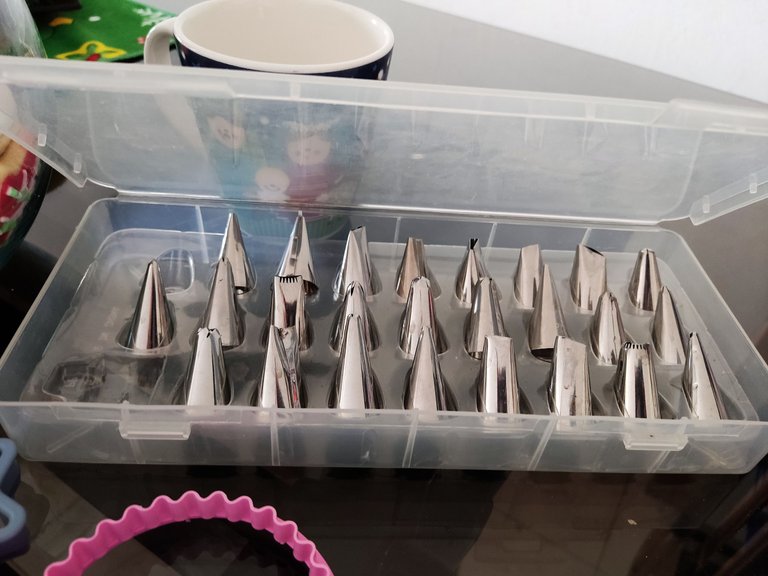
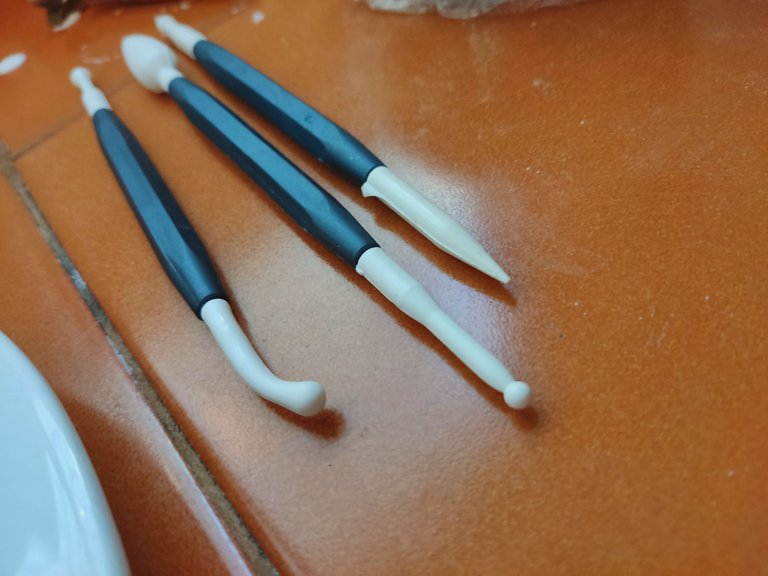
These tools are very useful, especially those with blunt and rounded tips. They are essential for spreading the icing on the cookies. You can also use fine-tipped ones for decorating details.


Cookie cutters


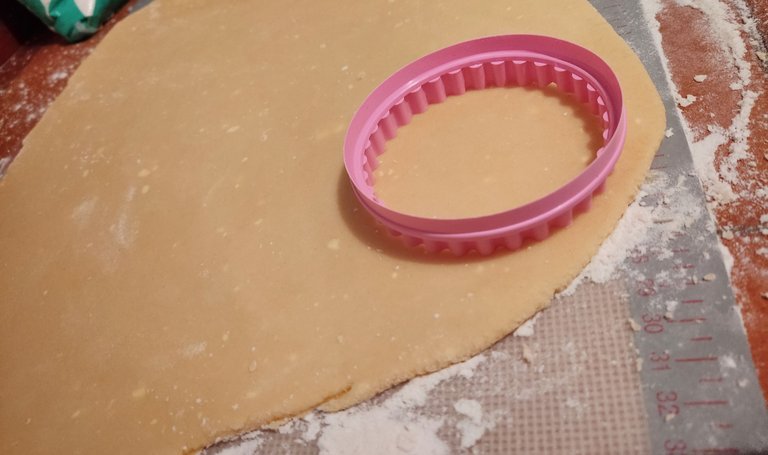
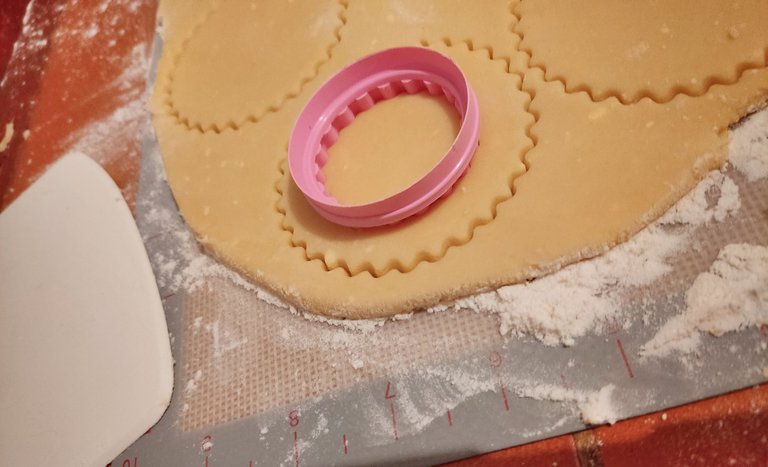
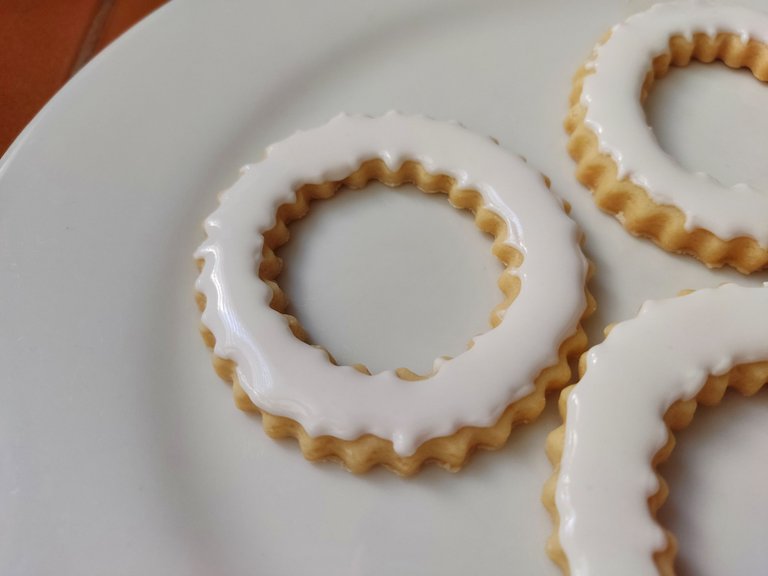
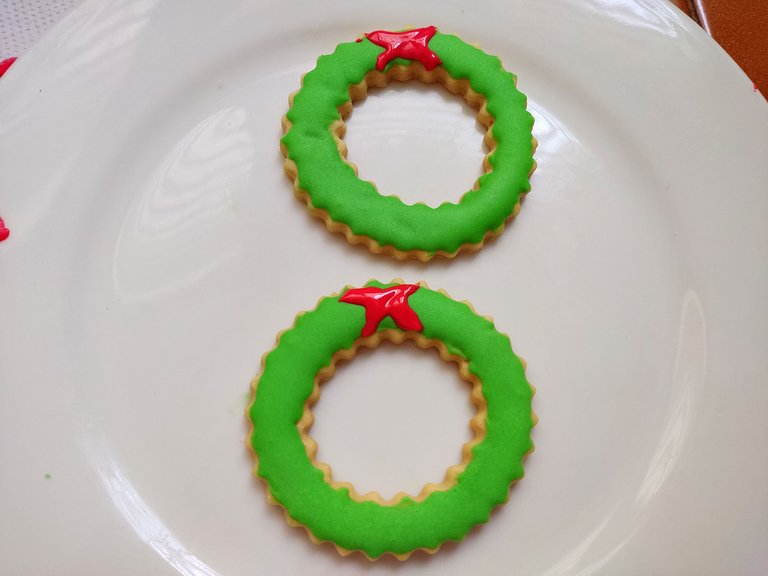
To give the dough the Christmas wreath shape, you can use curved cutters. You can use one of 6 cm in diameter and another of 4 cm.

IMG_20221220_093323_Snapseed.jpg


IMG_20221219_103139_Snapseed.jpg


Pastry piping bags

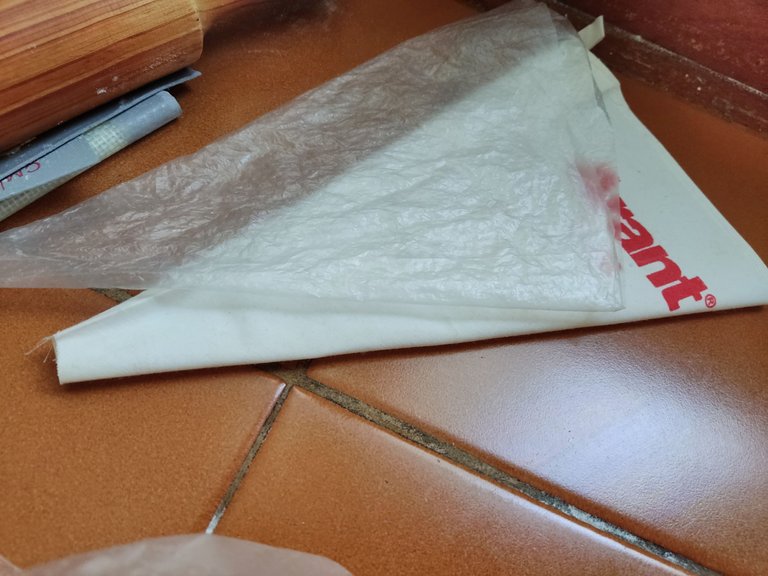
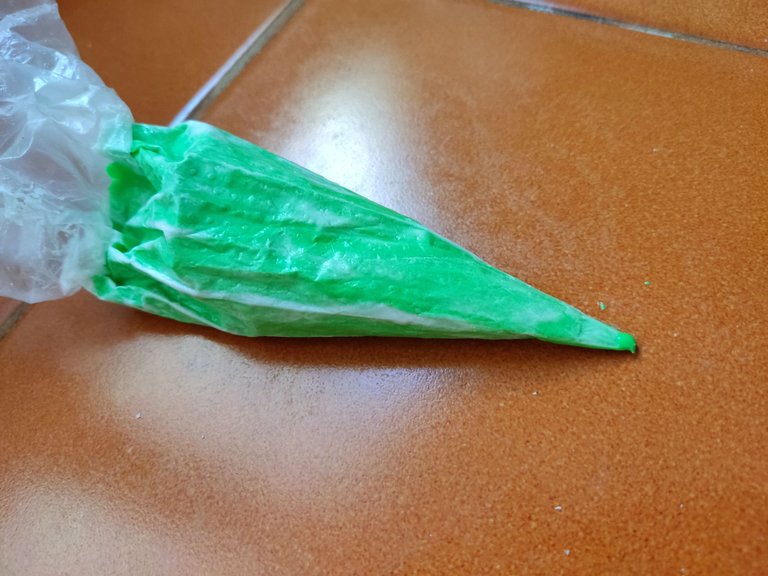
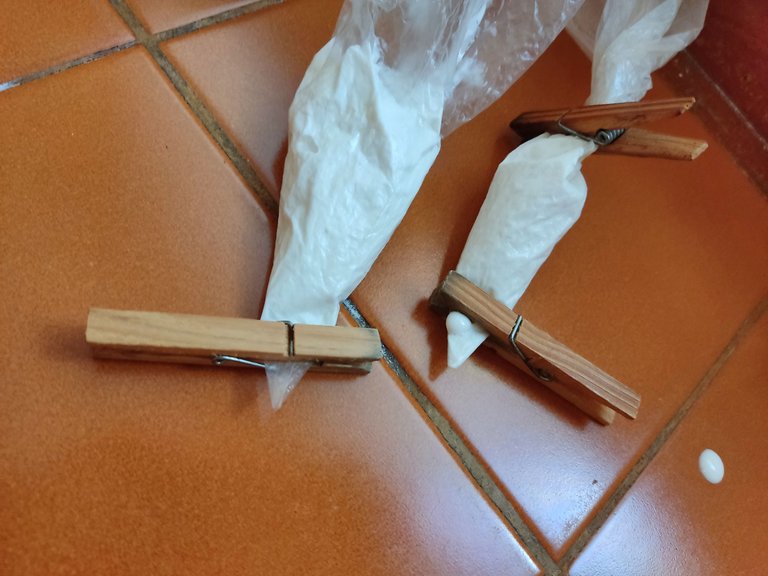
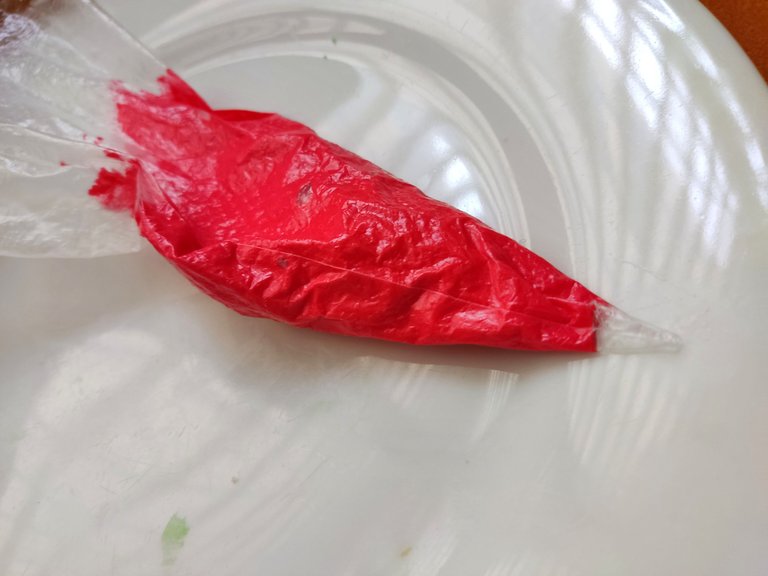
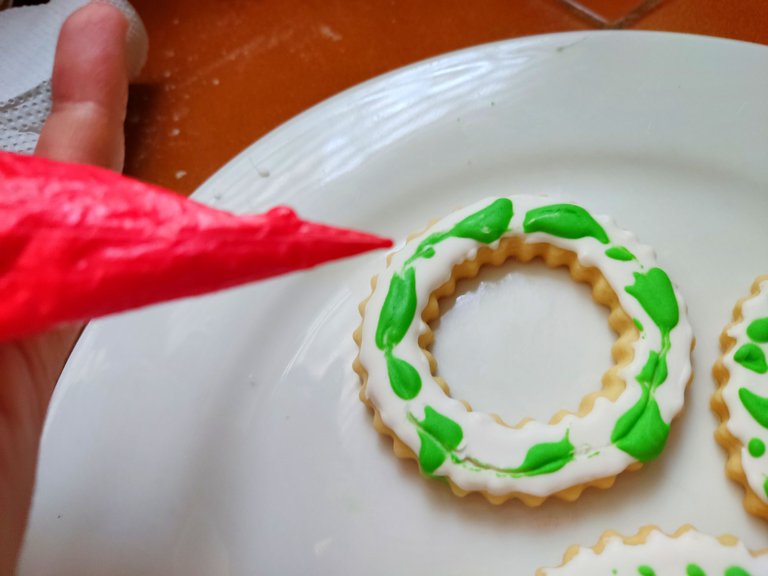
Try to have several piping bags to pipe the icing. If they are small, it is better since they are easier to handle. You should also have edible coloring, but we will talk about that later.

cintillo_flores-removebg-preview (1).png

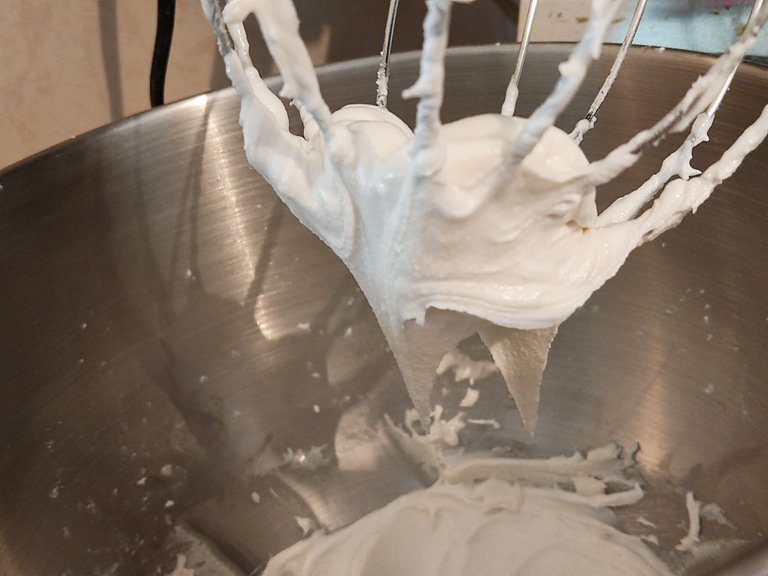
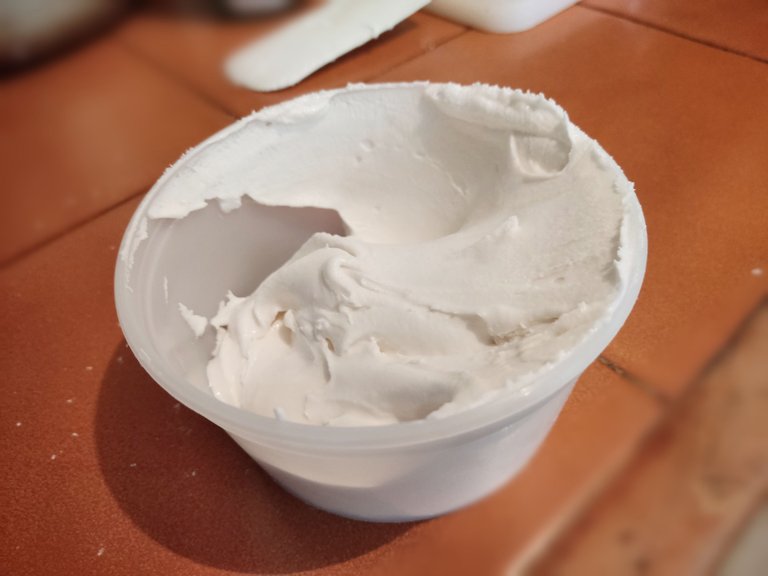
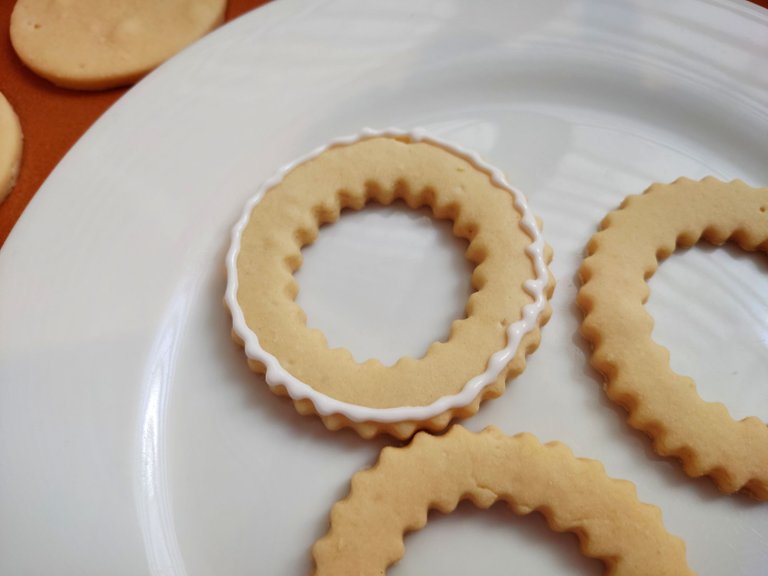
The icing for decorating the cookies is one of the most important preparations in this post, as it is what will allow an easy-to-dry decoration that does not moisten the cookie dough.

Making the icing


1

Place 1 egg white in a container along with 1/4 cup powdered sugar and 1 tablespoon lemon juice- Beat at medium speed.

IMG_20221219_094525_Snapseed.jpg


2

Gradually add 3/4 cup of powdered sugar. Continue beating until a paste of consistent texture is formed peaks will form in the whisk.

IMG_20221219_095219_Snapseed.jpg


3
Verify that everything has been mixed homogeneously.

IMG_20221219_095214_Snapseed.jpg


4
Remove the icing from the container and store it in a covered plastic container.

IMG_20221219_095555_Snapseed.jpg

cintillo_flores-removebg-preview (1).png

Coloring the icing

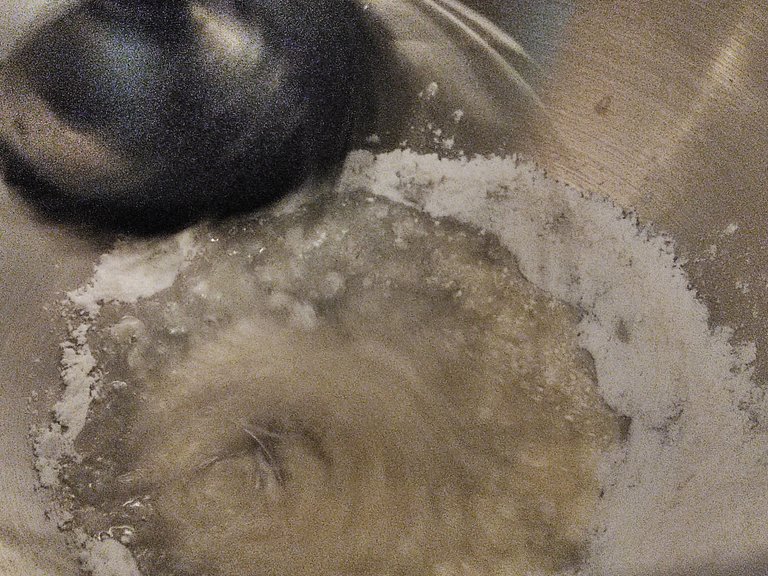
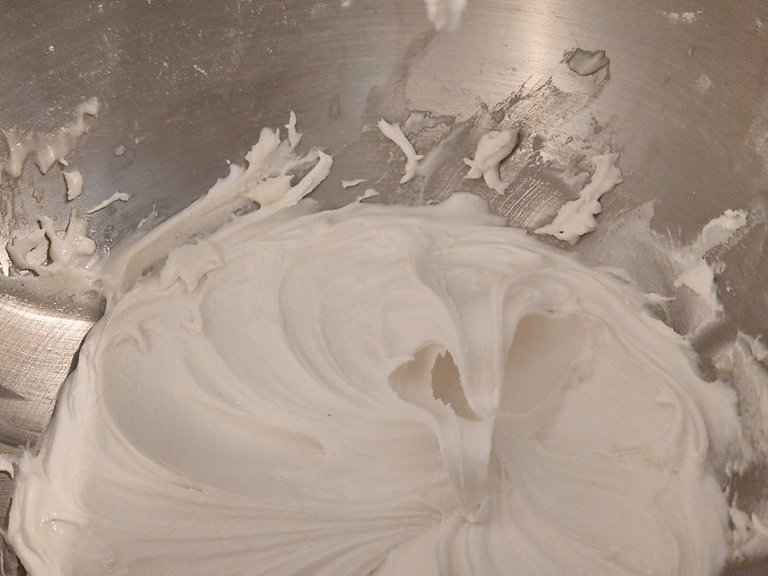
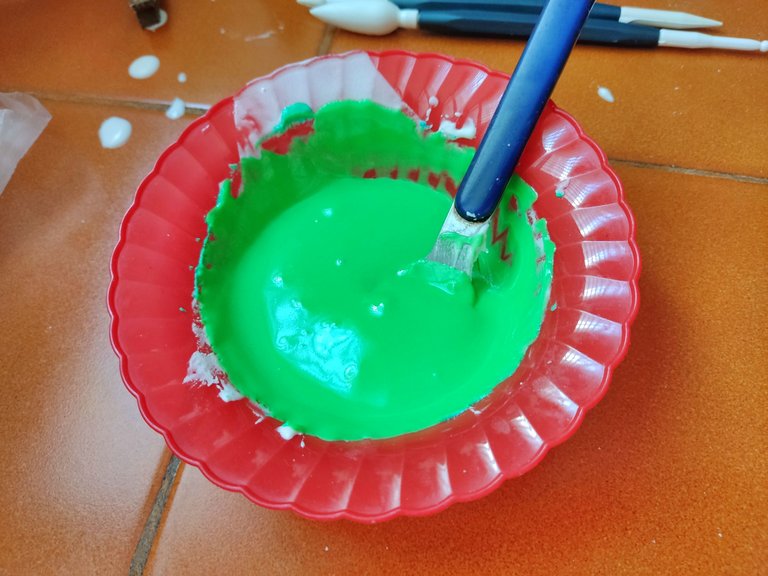
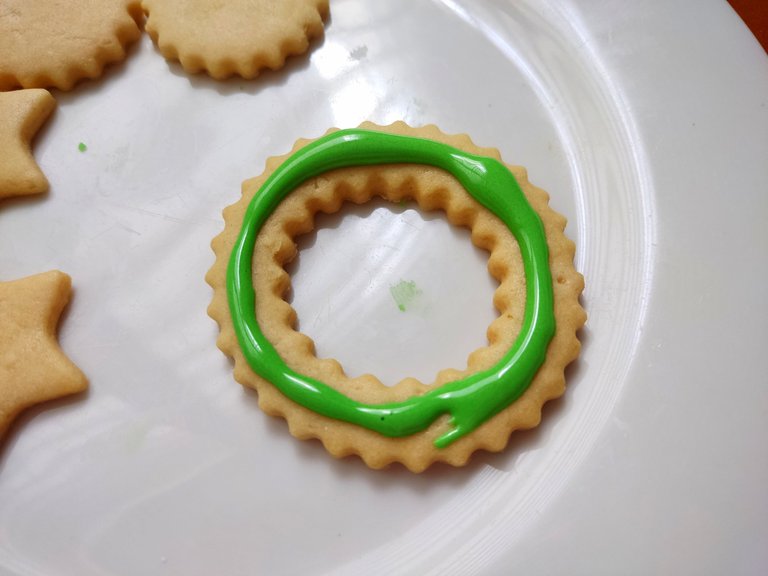
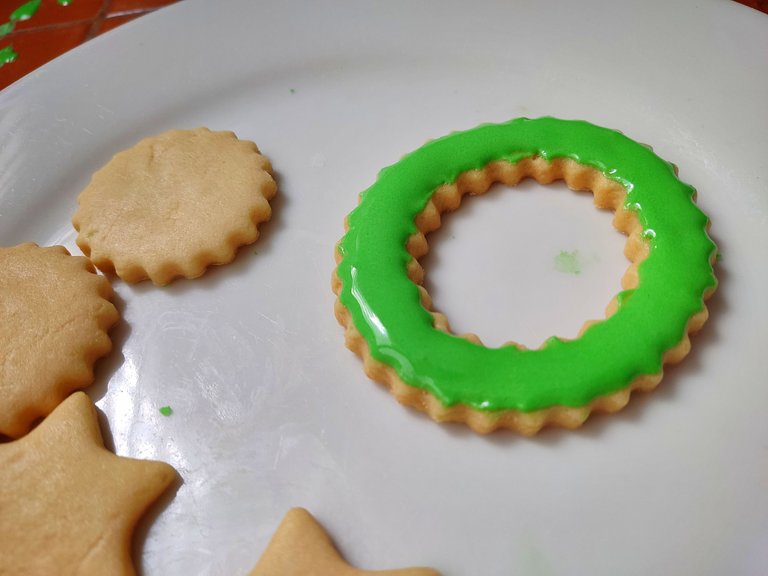
Each time you use the icing, take a portion and add a few drops of water until you get a fluid texture for decorating.

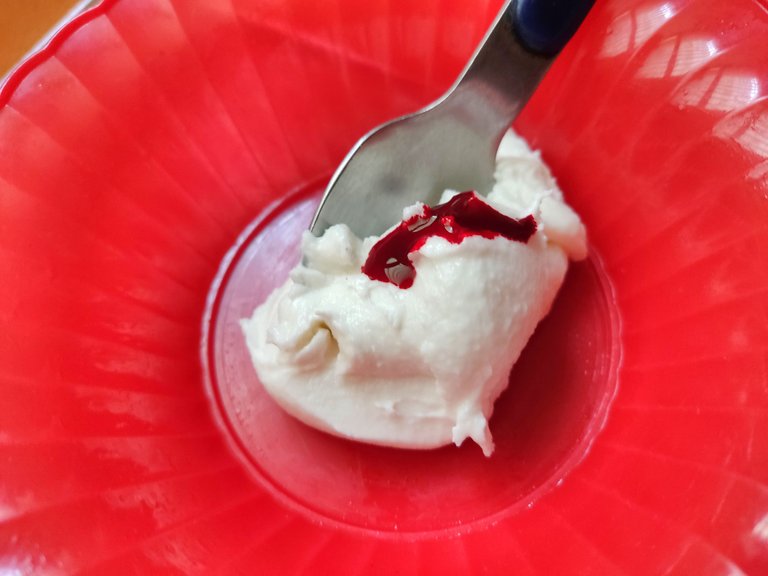
To achieve a snow-white icing, add a few drops of white food coloring. The color will be uniform and will cover the cookies very well.

IMG_20221219_102733_Snapseed.jpg

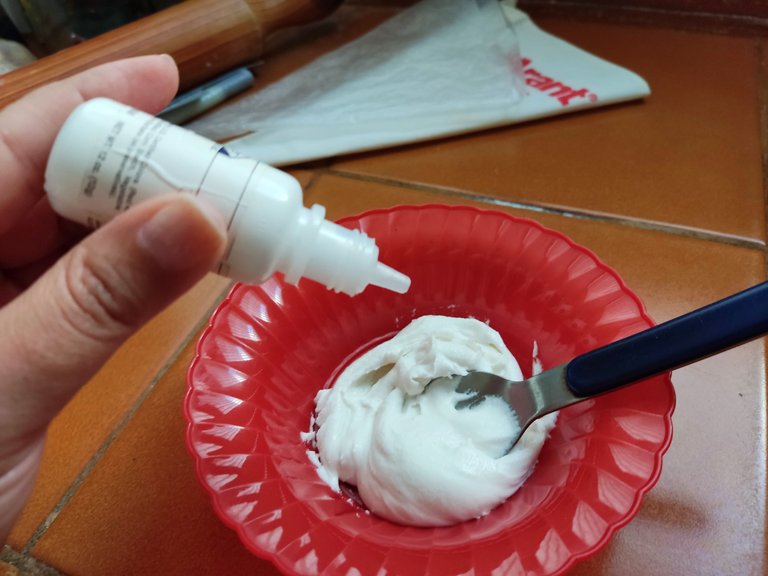
In the decoration allusive to Christmas, the predominant colors are green and red. Therefore, use these colors in the tones you like the most. It is easy to use liquid colorants since they can be well portioned. Gel colorants are also optimal for this purpose.

IMG_20221219_110355_Snapseed.jpg

IMG_20221219_111111_Snapseed.jpg

IMG_20221219_123126_Snapseed.jpg

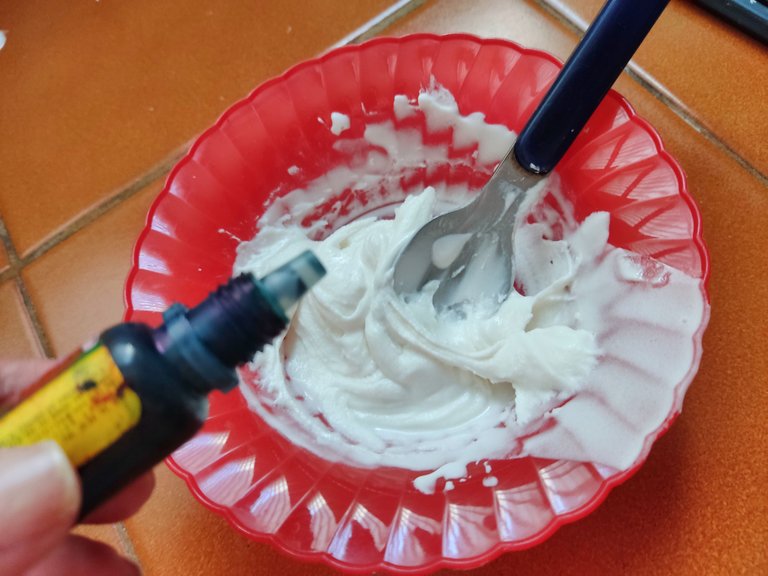
Once you have colored all the icing portions, place them immediately into piping bags to prevent them from hardening.

IMG_20221219_111702_Snapseed.jpg

You can use hooks to close the sleeves to prevent air from entering.

IMG_20221219_154912_Snapseed.jpg

IMG_20221219_123730_Snapseed.jpg

cintillo_flores-removebg-preview (1).png

Decorating Christmas Wreath Cookies

1

Take the piping bag with the white icing and carefully pipe the icing around the outer edge of the cookie.

IMG_20221219_103844_Snapseed.jpg


2

Once you've piped the outside of the cookie with frosting, proceed to the inside edge of the cookie.

IMG_20221219_103935_Snapseed.jpg


3

Fill the inside of the cookie with the white icing. Spread evenly with a pastry stick.

IMG_20221219_104650_Snapseed.jpg


4

Place the cookies on a flat surface.
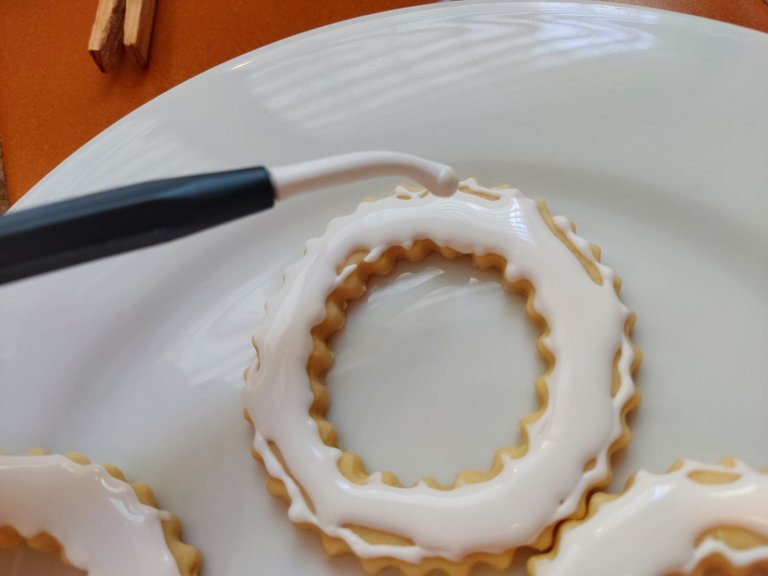
Let dry for 15 minutes.

IMG_20221219_105015_Snapseed.jpg


5

We can contrast by using different colored icings.

IMG_20221219_111804_Snapseed.jpg


6

A simple way to decorate is to make small points.

IMG_20221219_112238_Snapseed.jpg


7

With a wooden stick, you can place on each point and make a slight movement to make the shape of the leaves.

IMG_20221219_112402_Snapseed.jpg


8

You can also make irregular strokes with green icing. They can be thicker strokes. Let your imagination run wild.

IMG_20221219_111927_Snapseed.jpg

With the same white background in the Christmas wreaths, we can have several different designs.

IMG_20221219_112747_Snapseed.jpg


9
Finally, we will use the red icing to highlight our Christmas wreath.

IMG_20221219_123856_Snapseed.jpg


10
In the white spaces, we make red dots, and at the top, you can make a bow.

IMG_20221219_193107_Snapseed.jpg

You can decorate with other colors. Here is a Christmas wreath with a red background and white and green points.

IMG_20221219_154204_Snapseed.jpg

cintillo_flores-removebg-preview (1).png

Here is another design in green color. Let's go through the steps again:


A
Place a portion of icing on the surface of the cookie.

IMG_20221219_114546_Snapseed.jpg


B
Spread the glaze evenly with a pastry stick.

IMG_20221219_114746_Snapseed.jpg


C
On the top of the wreath, place some icing and make a bow.

IMG_20221219_125400_Snapseed.jpg


D
You can make zig-zag lines with white icing.

IMG_20221219_125557_Snapseed.jpg

You can also decorate with points for a flirty and elegant Christmas wreath.

IMG_20221219_125559_Snapseed.jpg

cintillo_flores-removebg-preview (1).png

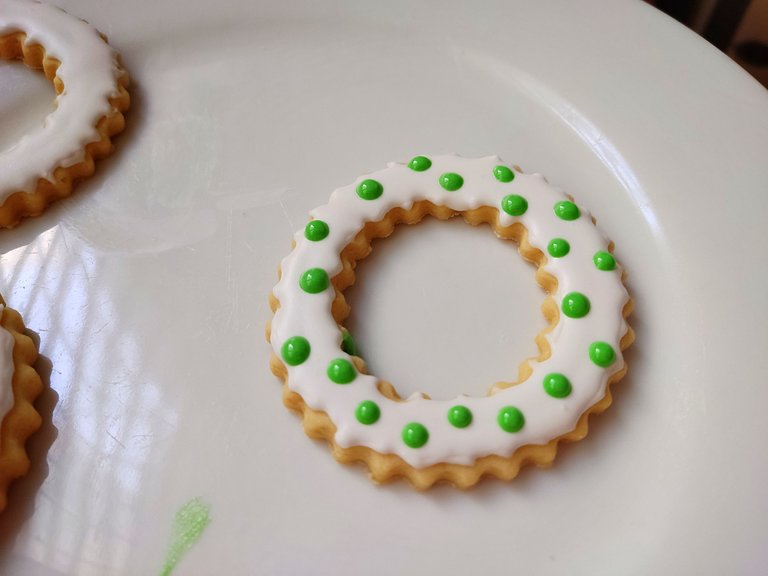
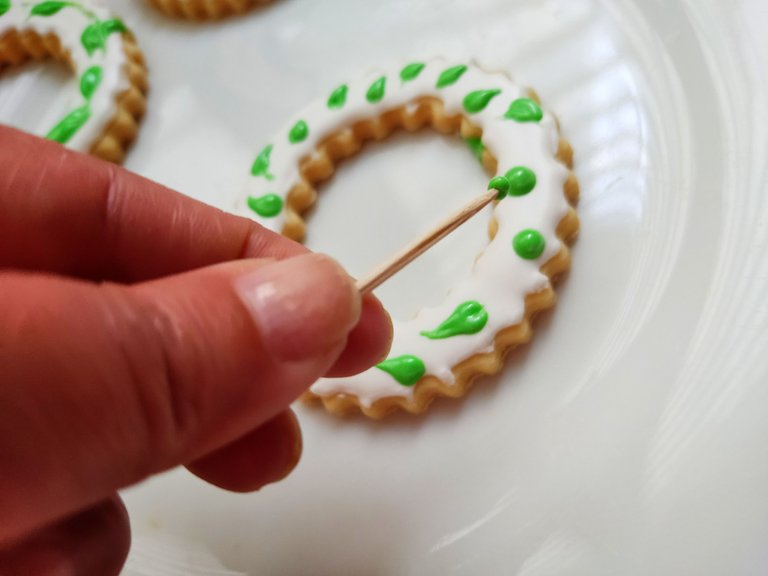
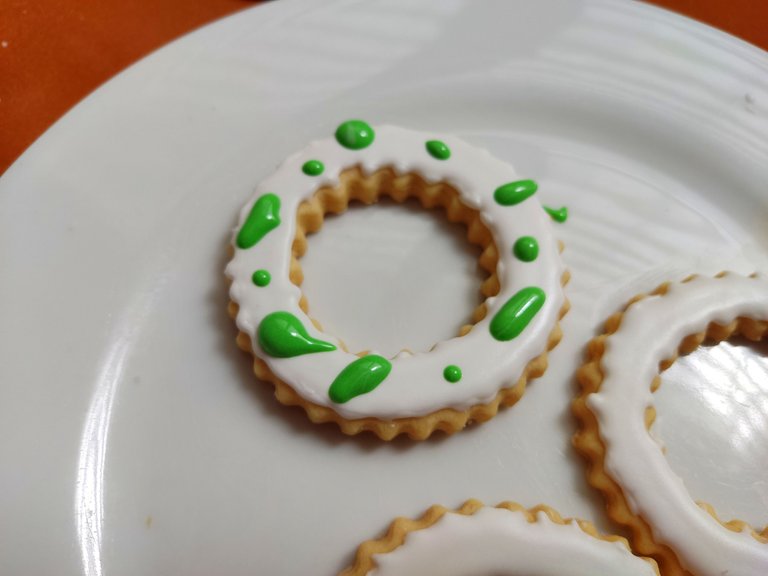
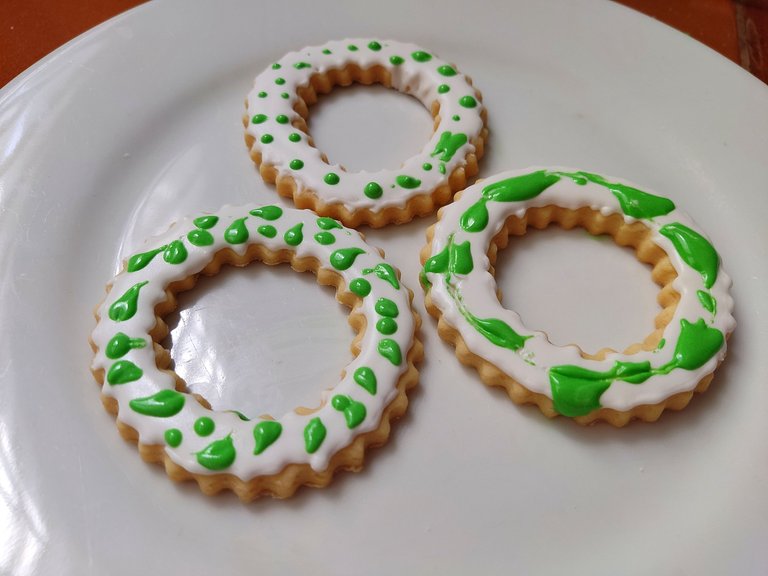
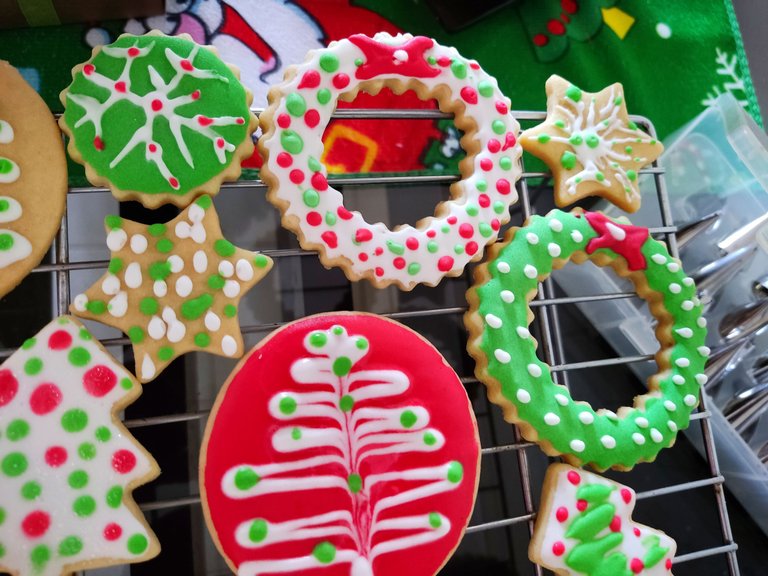
As you can see, it is easy to decorate your cookies with various designs. You don't need most of the cookies to look the same. You just have to let your imagination run wild and let the spirit of Christmas inspire you.

In a future post, I will show you how to make other decorations to fill your Christmas table with flavor and color. If you liked my cookies, let me know in the comments 😃

IMG_20221219_154246_Snapseed.jpg

IMG_20221219_155544_Snapseed.jpg

cintillo_flores-removebg-preview (1).png

Happy Holidays!
Thanks for reading!

All images are property of the author
(Camera cell phone: POCO X3 Pro, Xiaomi)

cintillo_flores-removebg-preview (1).png

English (2).gif

Sort:  

Dear @chaodietas,
Your support for the current HiveSQL proposal (#138) is much appreciated but the proposal will expire end of December!
May I ask you to review and support the new proposal (#247) so HiveSQL can stay free to use for the community?
You can support it on Peakd, Ecency, Hive.blog or using HiveSigner.

Merry Christmas to you and your family ??

Hi @arcange, It's done!

Happy Holidays!

Thank you for your support @chaodietas, really appreciate it! 👍
Without imposing and as we are in a renewal period for proposals, if you could take a look at the HiveBuzz Proposal Renewal - #248 as well 😁

Sure, you are my favorites!

Woohoo. Tank you @chaodietas 😊🤗

Thank you for sharing this post in the DIYHUB Community!

Your content got selected by our fellow curator ashikstd & you just received a little thank you upvote from us for your great work! Your post will be featured in one of our recurring compilations which are aiming to offer you a stage to widen your audience within the DIY scene of Hive. Stay creative & HIVE ON!


Please vote for our hive witness <3


The rewards earned on this comment will go directly to the people( @chaodietas ) sharing the post on Twitter as long as they are registered with @poshtoken. Sign up at https://hiveposh.com.

They look really really delicious :)

Thank you 😃🎄

Congratulations @chaodietas! You have completed the following achievement on the Hive blockchain And have been rewarded with New badge(s)

You received more than 90000 upvotes.
Your next target is to reach 95000 upvotes.

You can view your badges on your board and compare yourself to others in the Ranking
If you no longer want to receive notifications, reply to this comment with the word STOP

Check out our last posts:

HiveBuzz World Cup Contest - Prizes from our sponsors
HiveBuzz World Cup Contest - The results, the winners and the prizes
HiveBuzz World Cup Contest - Recap of the Final
The Hive Gamification Proposal Renewal
Support the HiveBuzz project. Vote for our proposal!

Thank you for your support @hivebuzz during all this time. I wish you continue to grow in blockchain and that this 2023 will be favorable to meet your goals. 🎄

You're welcome @chaodietas. Looking forward to you reaching your new target 😅