Buen día, como les comente en mi anterior post, les estaré mostrando las cosas que voy a elaborar para mi negocio, así como también cada detalle del como ambientare con la temática del mes del "AMOR Y LA AMISTAD" ❤️.
Hoy les muestro el paso a paso de una base para exhibir algunos cosméticos de mi tienda.
Les muestro...
Good morning, as I mentioned in my previous post, I will be showing you the things that I am going to elaborate for my business, as well as every detail of how I will set the theme for the month of "LOVE AND FRIENDSHIP".
Today I show you the step by step of a base to display some cosmetics from my store.I show you...
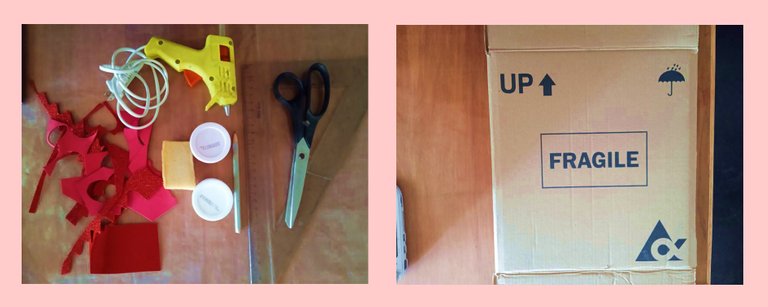
❤️❤️❤️❤️❤️❤️❤️❤️❤️❤️❤️❤️❤️❤️❤️❤️❤️❤️❤️❤️

- ❤️ Caja de Cartón.
- ❤️ Regla.
- ❤️ Lapiz.
- ❤️ Pistola de Silicon.
- ❤️ Silicon Liquido.
- ❤️ Pintura al frio (Blanca).
- ❤️ Pintura al frio (Roja).
- ❤️ Pincel o Esponja.
- ❤️ Tijera.
- ❤️ Exacto.
- ❤️ Pega Blanca.
- ❤️ Cardboard Box.
- ❤️ Rule.
- ❤️ Pencil.
- ❤️ Silicon gun.
- ❤️ Liquid Silicon.
- ❤️ Cold paint (White).
- ❤️ Cold paint (Red).
- ❤️ Brush or Sponge.
- ❤️ Scissors.
- ❤️ Exactly.
- ❤️ White Glue.

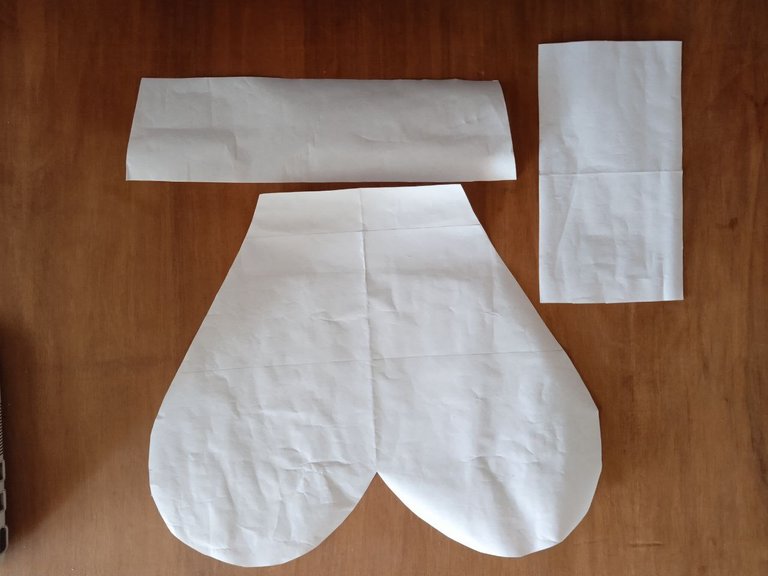
❤️ STEP 1: Draw and cut out the patterns you would use.
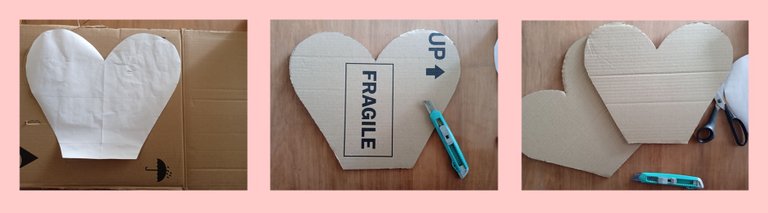
❤️ PASO 2: Corte las cuatro Tapas de mi caja (reciclada) y con ayuda de mis patrones y lápiz, Dibuje y corte 2 piezas de cada patrón, a su vez pegue cada pieza con su otro par.
❤️ STEP 2: Cut the four Lids of my box (recycled) and with the help of my patterns and pencil, Draw and cut 2 pieces of each pattern, in turn glue each piece with its other pair.
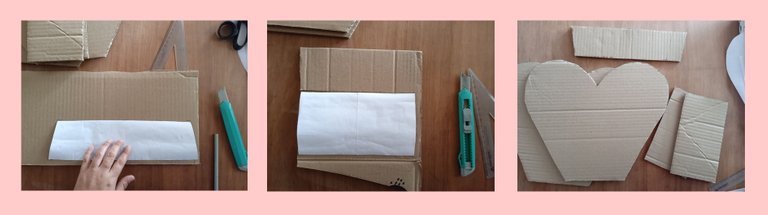
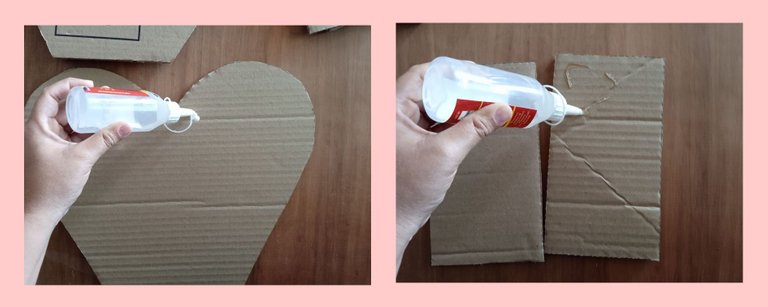
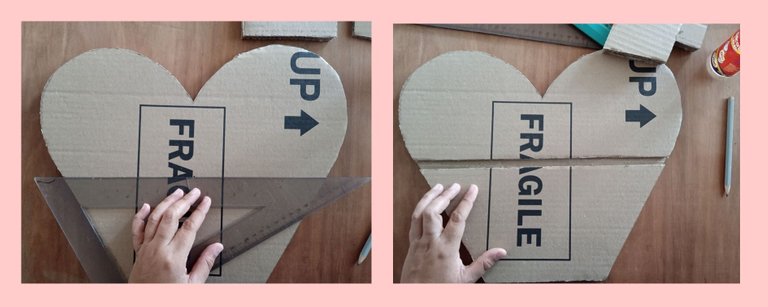
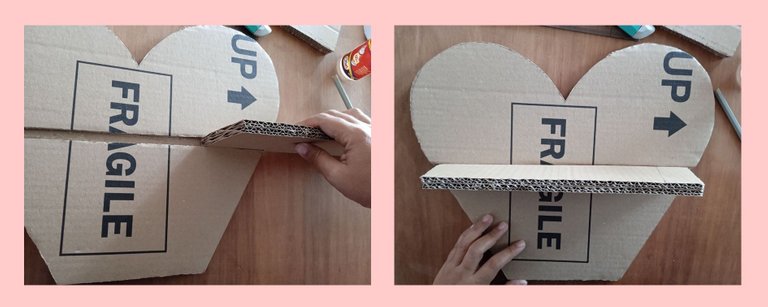
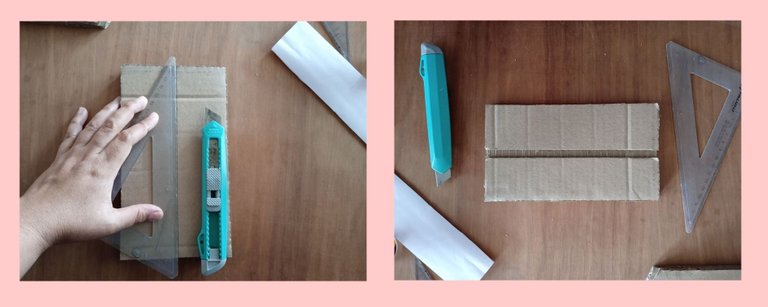
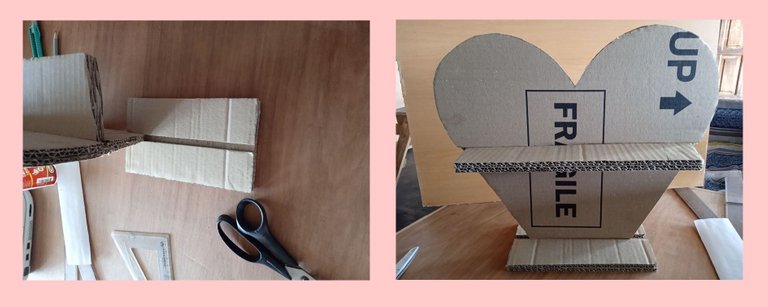
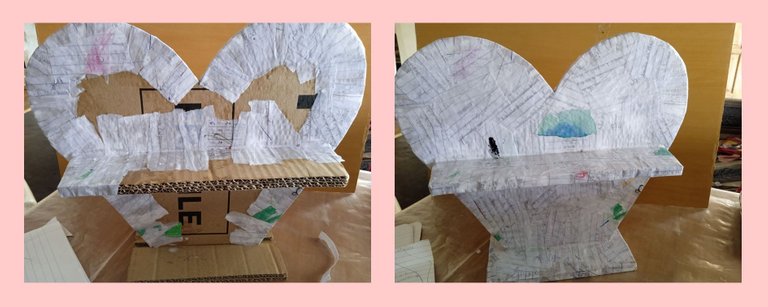
❤️ PASO 3: Con ayuda de mi regla y exacto, corte una ranura lineal en el centro de la pieza grande con forma de corazón. así como también en la pieza pequeña que será la base de toda la estructura, después de cortarlas las encaje pegandola en su lugar y así armar la base completa.
❤️ STEP 3: Using my exact ruler, cut a linear groove in the center of the large heart-shaped piece. as well as in the small piece that will be the base of the entire structure, after cutting them, glue them in place and thus assemble the complete base.
❤️ PASO 4: Teniendo ya mi base armada, tome un recipiente y agregue pega blanca hasta la mitad del mismo así como también le agregue la otra mitad de agua, lo mezcle muy bien para integrar y teniendo esto listo, comencé a pegar pequeños trozos de papel en toda mi base, esto con el fin de darle un acabado mas bonito a la hora de pintarla.
❤️ STEP 4: Having already assembled my base, take a container and add white glue to half of it as well as add the other half of water, mix it very well to integrate and having this ready, I began to glue small pieces of paper all over my base, this in order to give it a nicer finish when painting it.

❤️ PASO 5: Después de que cubrí toda mi base con esta técnica de papel y ya Seca la misma procedí a pintarla con la pintura al frio blanca
❤️ STEP 5: After I covered all my base with this paper technique and it was dry, I proceeded to paint it with white cold paint
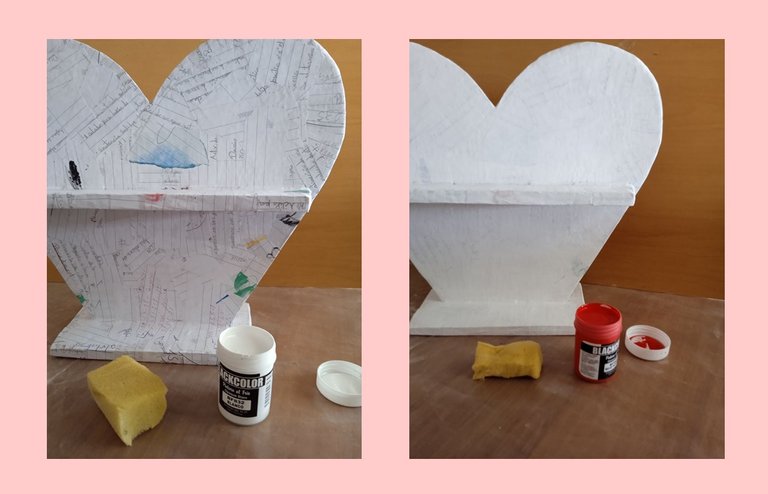
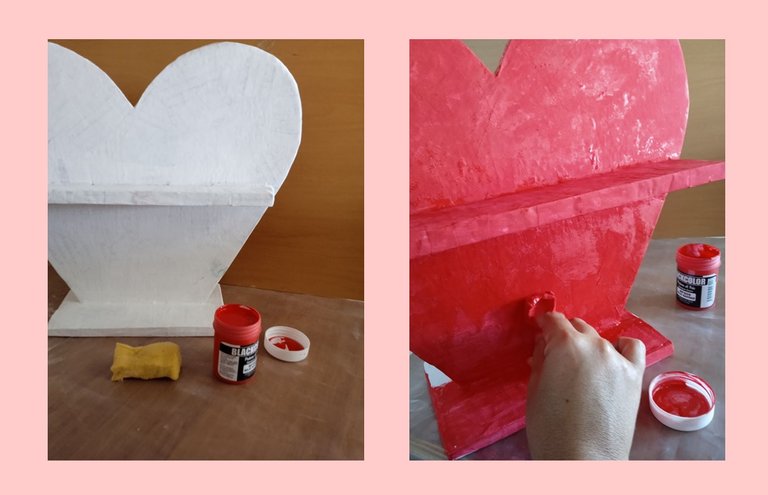
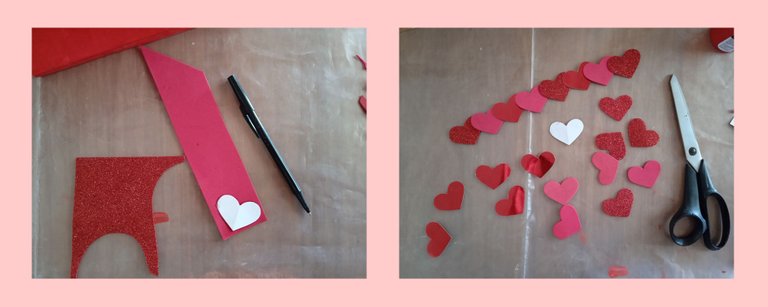
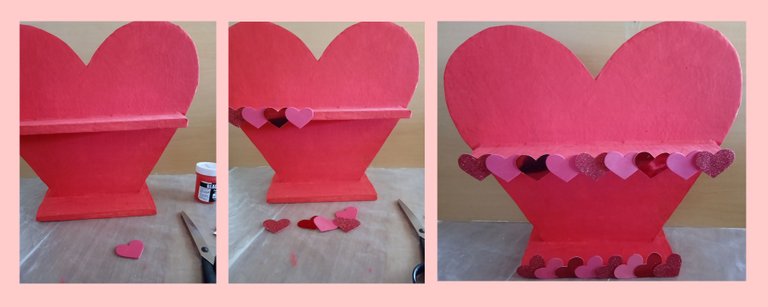
❤️ PASO 6: Una vez seca mi base de nuevo la pinte pero esta vez con la pintura al frio de color rojo, ya seca y con ayuda de un patrón de corazón pequeño corte varios con los foamis de color rojo para darle ese toque final.
❤️ STEP 6: Once my base is dry, I paint it again but this time with cold red paint, already dry and with the help of a small heart pattern, I cut several with the red foams to give it that final touch.
❤️❤️❤️❤️❤️❤️❤️❤️❤️❤️❤️❤️❤️❤️❤️❤️❤️❤️❤️❤️❤️❤️❤️❤️❤️❤️❤️❤️❤️❤️❤️❤️❤️❤️❤️
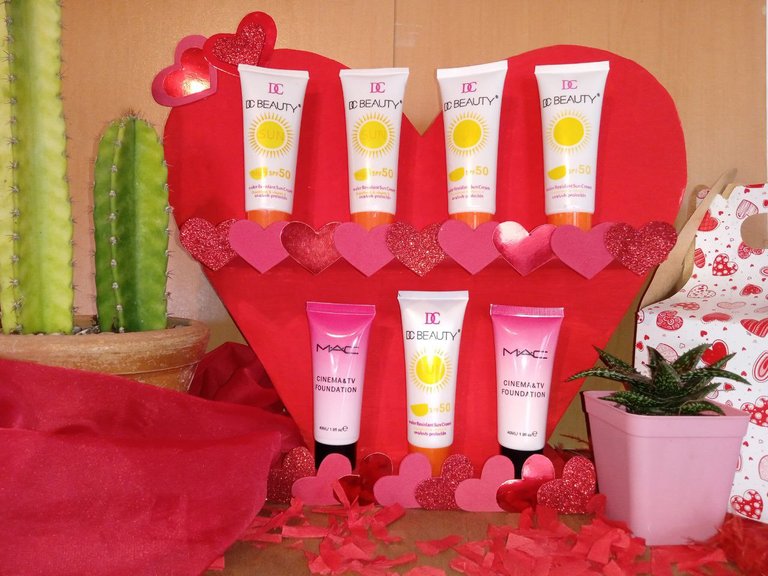
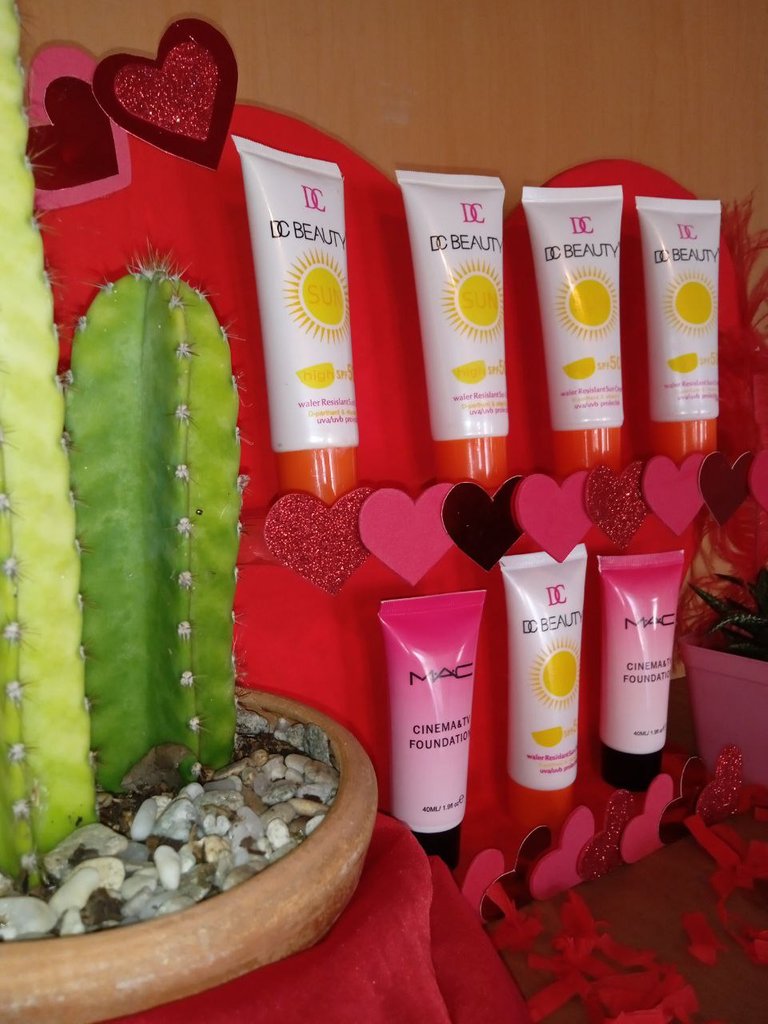
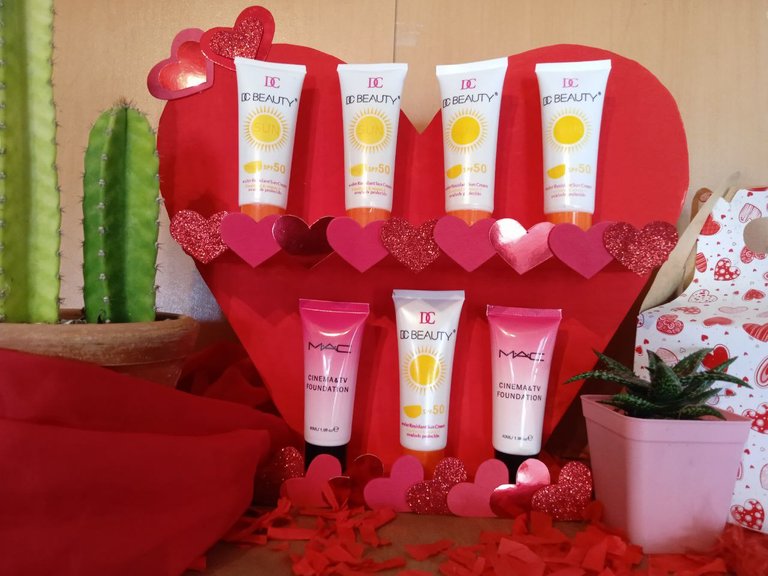
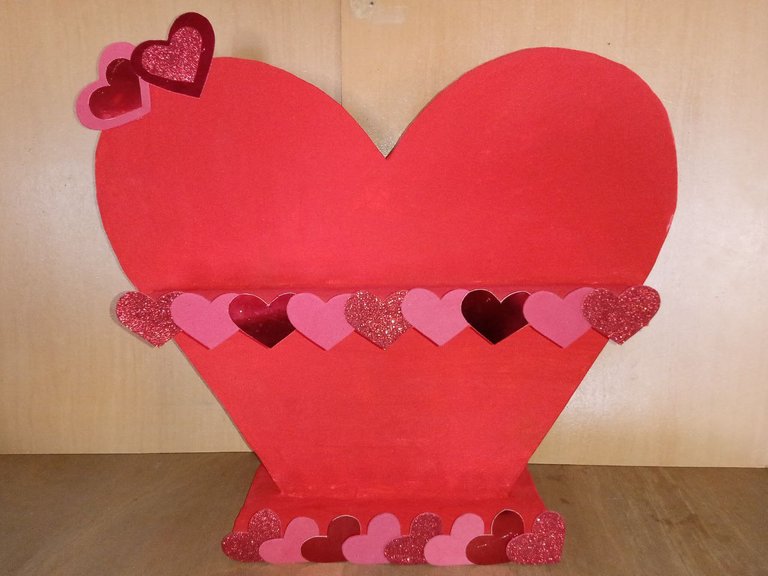
De esta manera quedo mi Base para exhibir Cosméticos de mi pequeño negocio...
Gracias por Leerme!
Espero les guste mi creación
Las fotos son de mi autoria...
Un Gran Abrazo...
Thanks for reading me! I hope you like my creation The photos are my own...