
Too Good To Be True?
What to expect?
The Preview
Before we begin, let me show you what you will be getting visit aboutarun.eu.org, there you will find the template being used as a web profile, I figured that as everyone is getting connected via the Internet it is nice to have a platform to showcase your identity and achievement, also, sending a website along with your CV/Resume will make it possible to add more visual elements and simply helps you add more content. Now, this is not the only use case and really depends on what you want it to be.
Features
- Dark/Light Mode
- Responsive (Works on Mobile, Tablets and PCs.)
- Zero Coding (You people will be using GUI to change images and text)
- Open-Source
- 100% free (No credit card, no catches)
Prerequisite
- GitHub Account
Go to github.com and follow the instructions there to create an account, and yes it's free.
That's it!.
Step 1
- Go to my GitHub page where the source code for our project is hosted and fork it (make a copy of my code into your account), to do it follow the steps below.
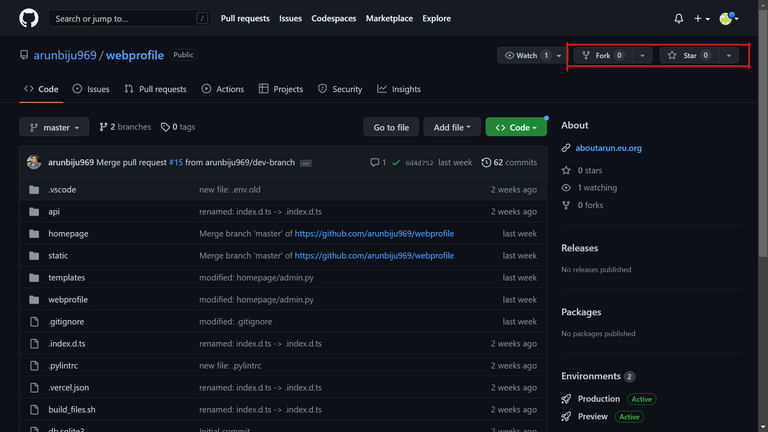
- The landing page should look like this, make sure you are logged in tough, now, if you look at top right you would see two a fork and a start button, while you are up there maybe give me a star?. If you gave me a star thanks 😻, then click the fork button and unlike the star button this is a must-step, that should take you to the following page.
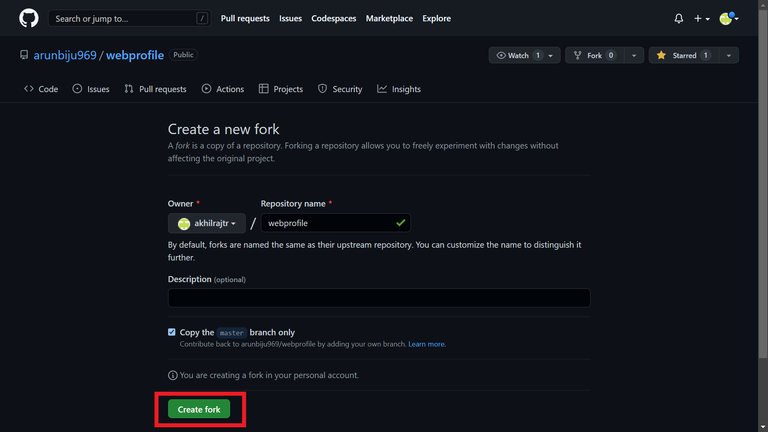
- Click the green "Create fork button", wait a couple of seconds and you should now have a copy of my code in your account, you can verify it by checking the repo name as highlighted below
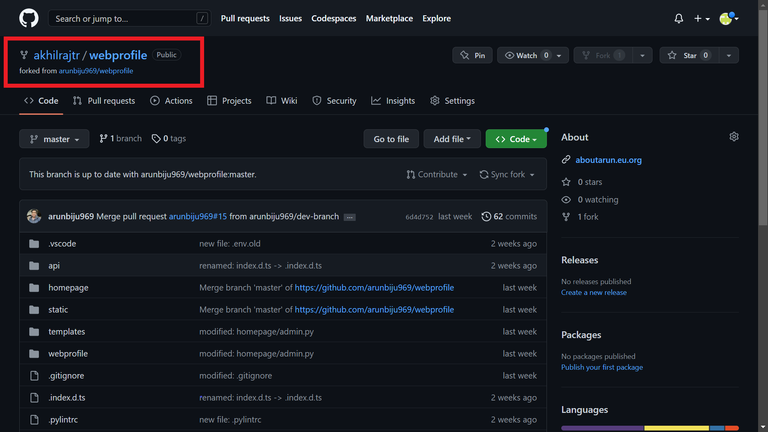
- If you see text like this but with your account username then, you successfully cloned my code.
Step 2
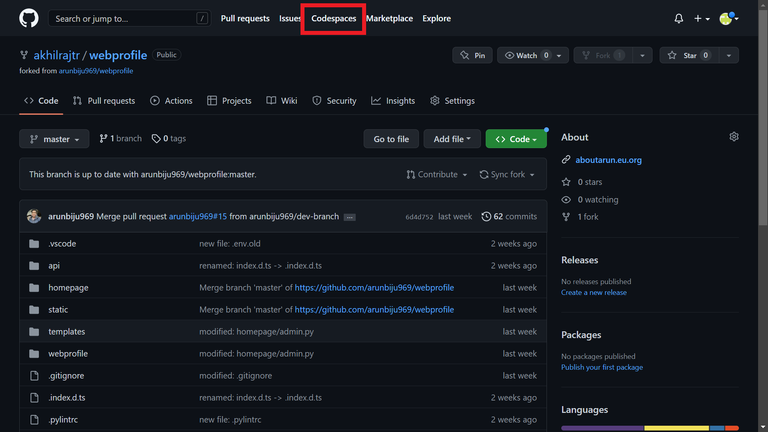
- Now that you have my code and it's time to personalize it, click the codespaces button on top, as shown below.
- Click "New Codespace" button to create a new virtual machine where you will personalize your website.
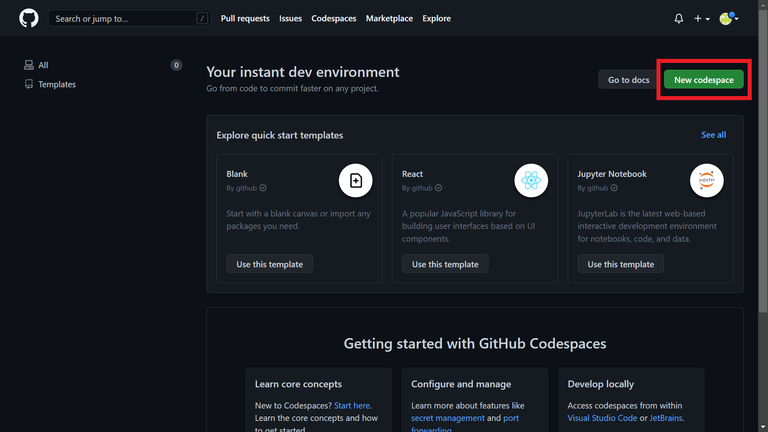
- That should take you to this page where you will have to select a few options, for the first option "Repository" clicking the "Select a repository" it will open a prompt with an option to search your repo and there below the search bar you will see the repo that we just cloned.
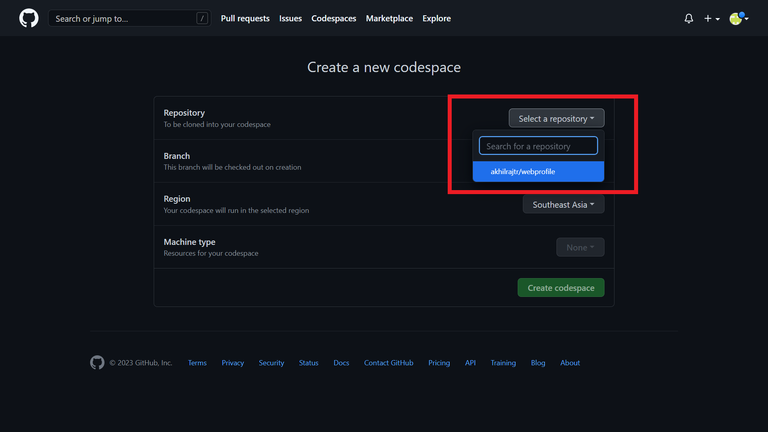
- Click it, leave the branch option as default, and select a "Region" that is close to you, if you don't know where you live ask google, and leave the "Machine type" as default too. After all that your configuration should look like this.
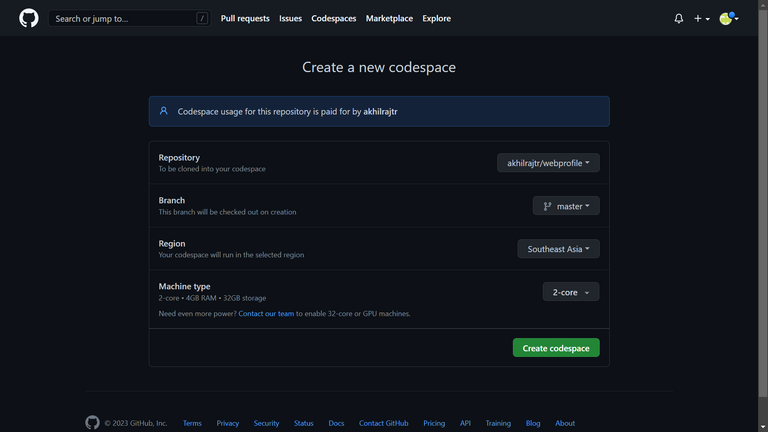
- Click the "Create codespace" button to create the machine, don't worry about the message that says it will be paid for by you, github has a free tier too and everything will be covered in it.
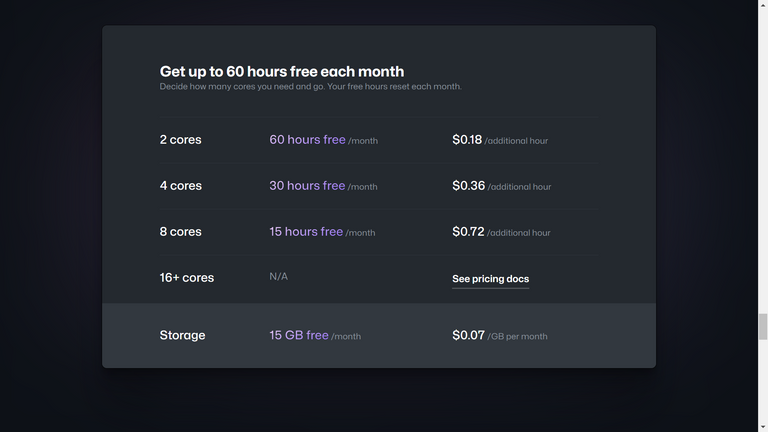
See the free option, we selected the 2-core machine and we have 60 hrs of free usage, don't believe me see for yourself here. Clicking the "Create Codespace would have taken you to a new page, give it a few seconds to load and you should see the following page.
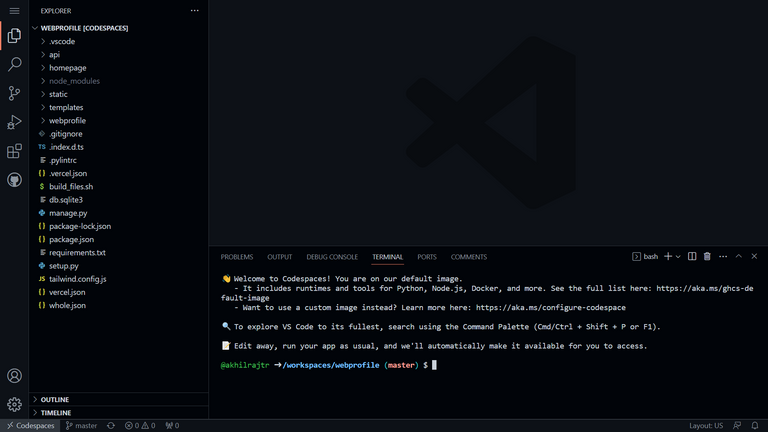
Here, you will find a couple of sections, don't be overwhelmed just move your cursor to the highlighted section and click in front of the word "(master) $" and type this python setup.py check the image below.
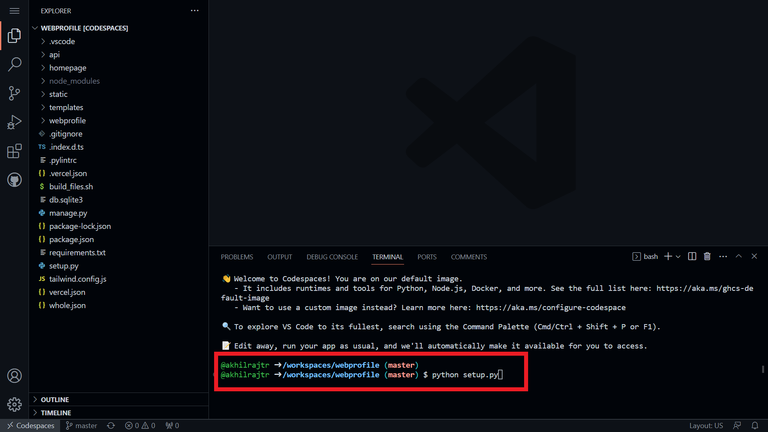
Press 'Enter" to execute the command and it will run some code, and then it will stop and wait for your input like this.
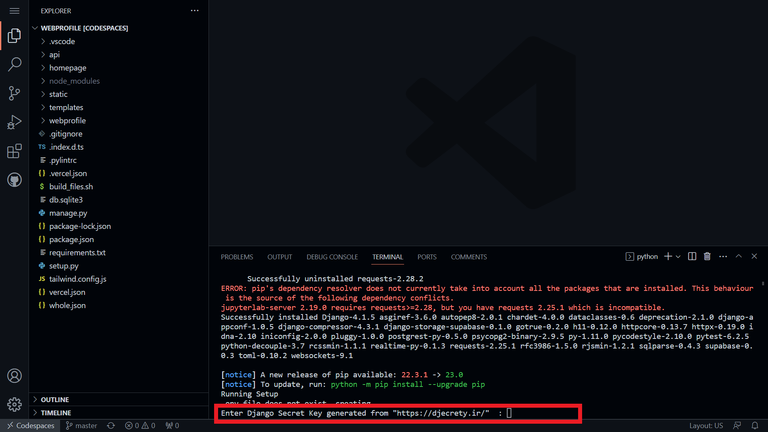
Here we need to enter a Django secret key, that will encrypt your requests and it is important that it is unique for each website, to get a key open a new tab and go to djecrety and click the generate button there, it will automatically get copied when you click generate
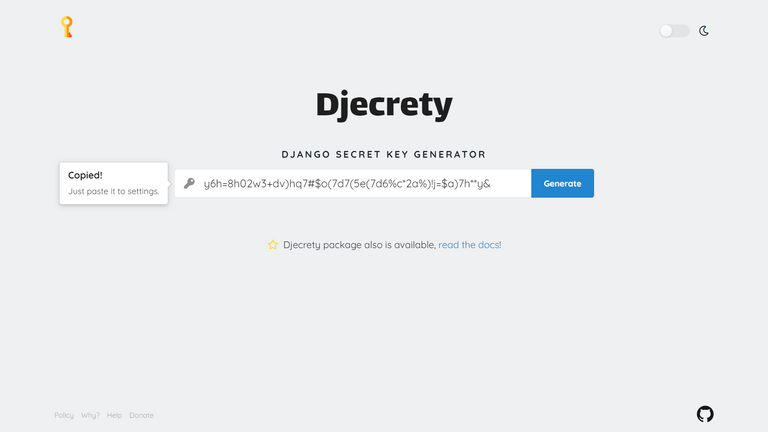
Now, go back to our codespace tab and paste the key that we copied then press "Enter", Now, it is going to as for a DB HOST,
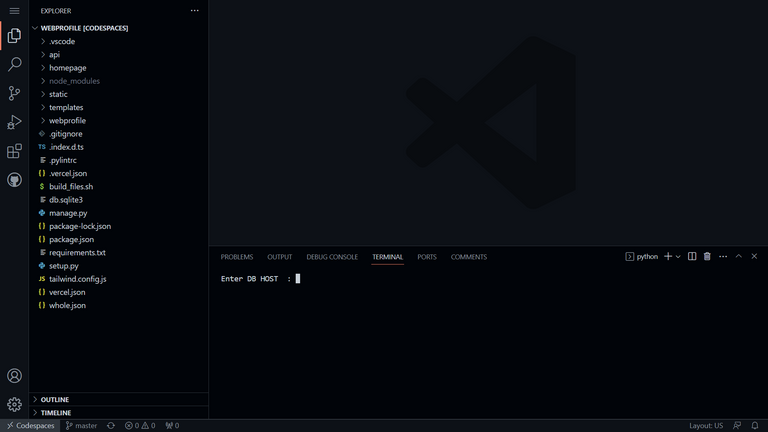
So, the script is basically asking for the link to a database, this is where you will store your data and we need to get this as well, open a new tab and go to supabase and click "Sign in"
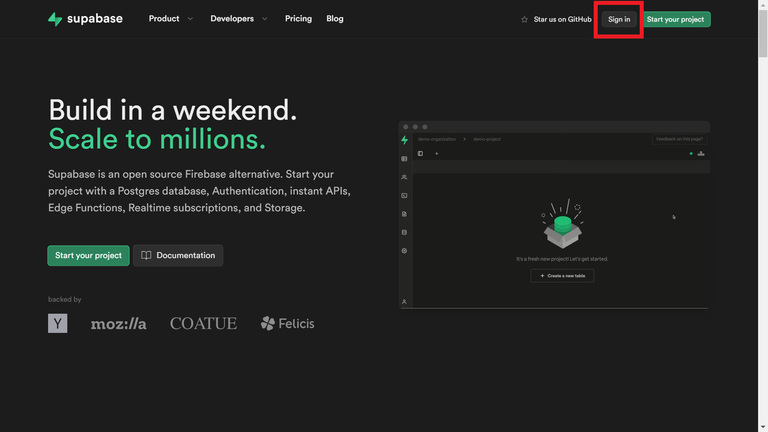
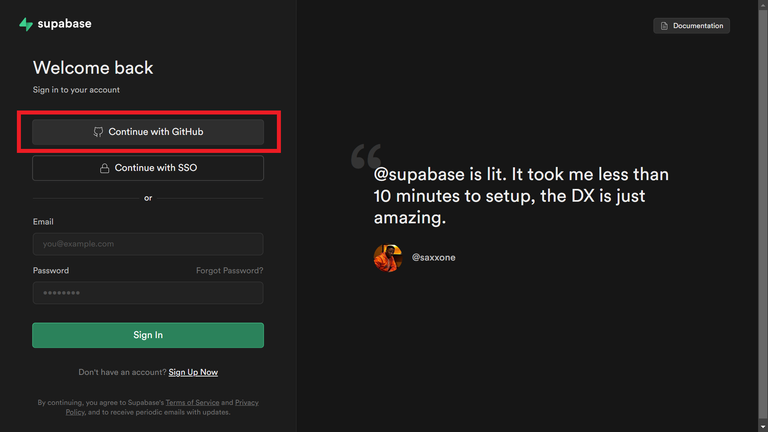
- Click the "Continue with GitHub" button and you should automatically log in, if not simply give your GitHub username and password on the loaded page.
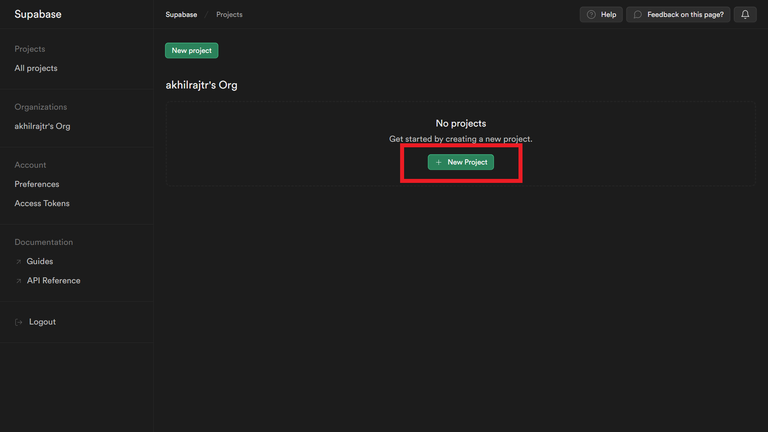
- Upon logging in you will be greeted by this window, click the "New Project" button there.
- There fill in the Name, Database Password, Region, and leave the pricing plan for free, you can use any name and password, it should look like this picture below.
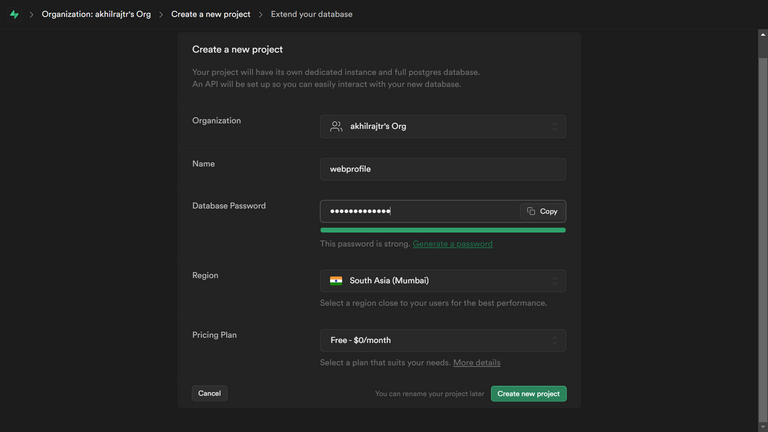
- Click "Create new project" and give it a minute or two to set up and refresh the page, you should see something like this
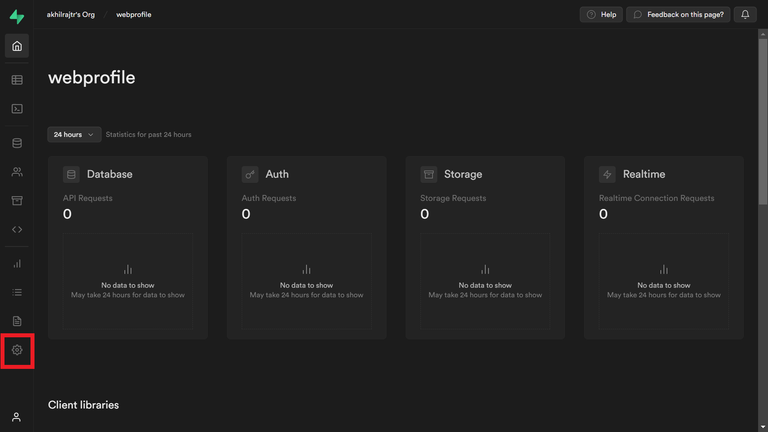
- Click the gear icon to get to the settings section, and, click the database option under Project Settings.
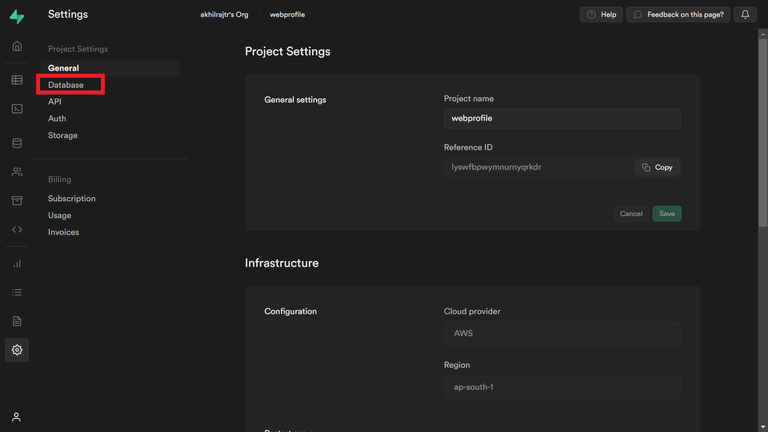
Here, you will find the Host value that we are looking for, click the "Copy" button to copy the value
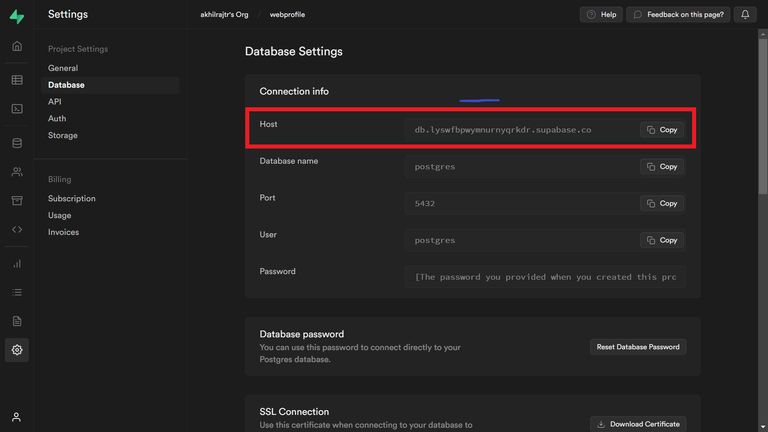
- Go back to our codespace page and paste the value like this
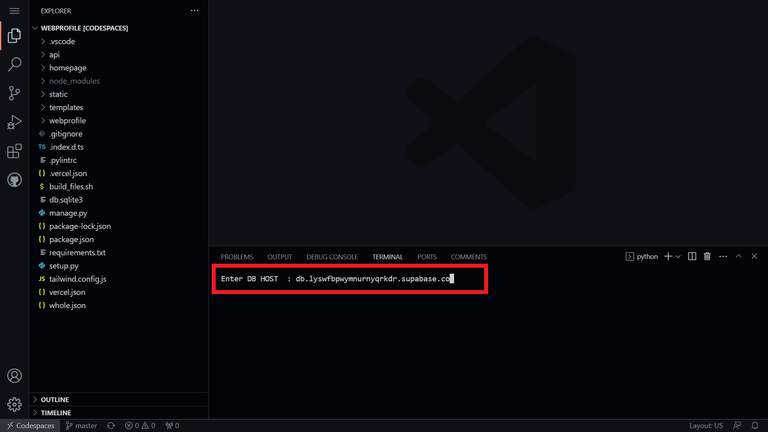
-Press "Enter" and then it will ask for a Database Password.
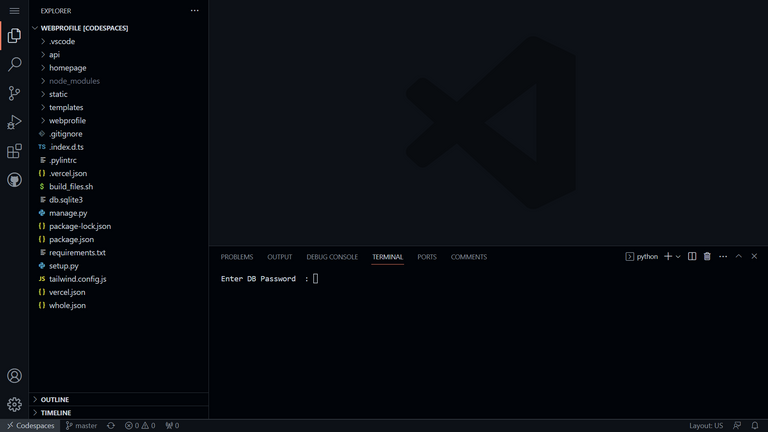
Make sure you enter the password given while creating the database in Supabase and press "Enter", if everything went well it will run some code and in the end, you will see a message like this
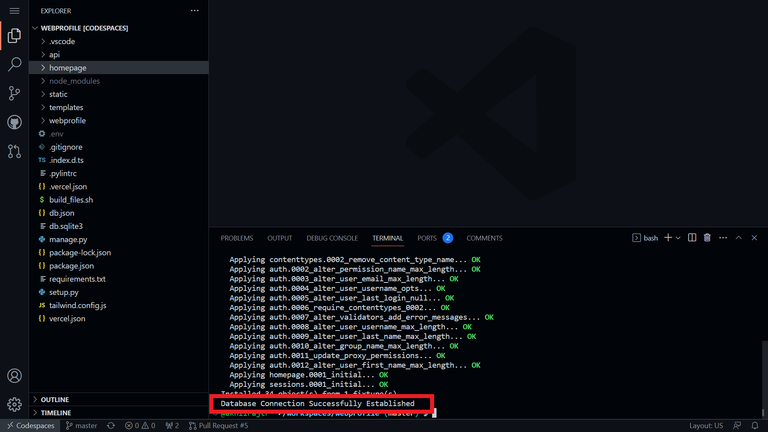
Congrats we successfully set up the project, all you now have to do is to start the server and edit the details as you please, to do that type python manage.py runserver in the command area and press "Enter".
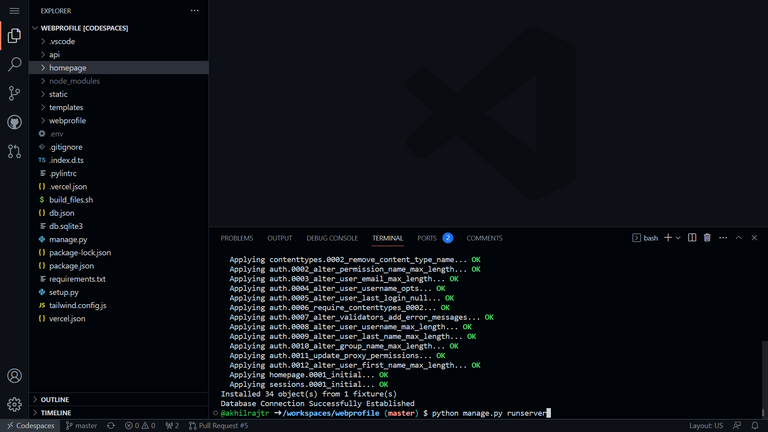
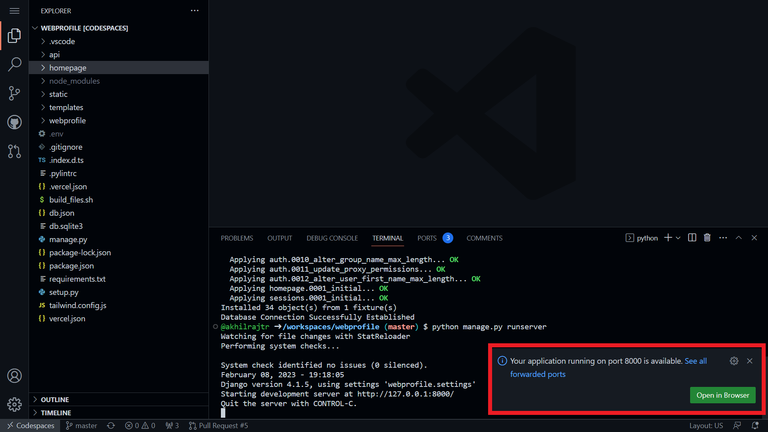
It will start the webserver and you will get a pop-up like this image shown below, click the green button that says "Open in Browser"
This will take you to your webpage, by default I've added my details to help you guys get a reference on what you could change in various sections, to change the photo, site name, and details in various sections go to the address bar and add "/admin" to that URL, check the reference image below
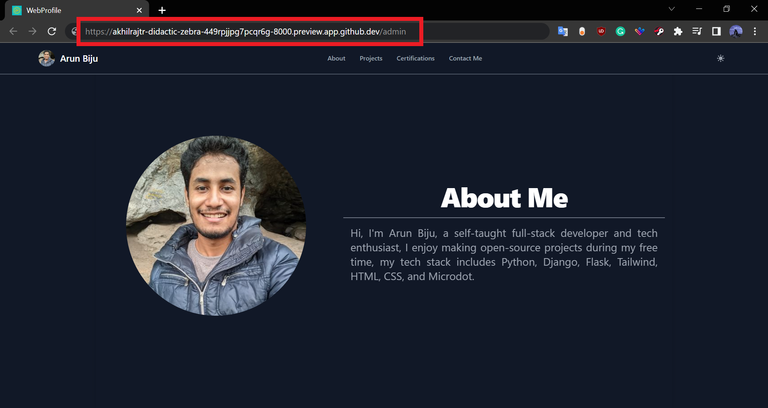
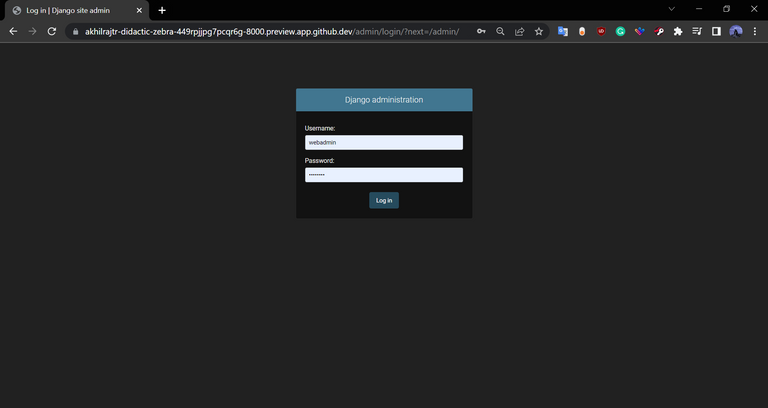
See the "/admin" at the end of the URL, press go or "Enter" to got to the admin page, use webadmin as username and pass@123 as password, and click log in.
Once logged in you will see a section called "Homepage", there click "About"
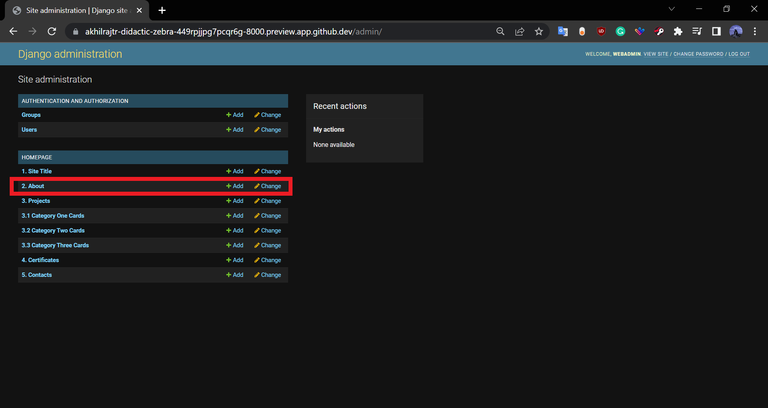
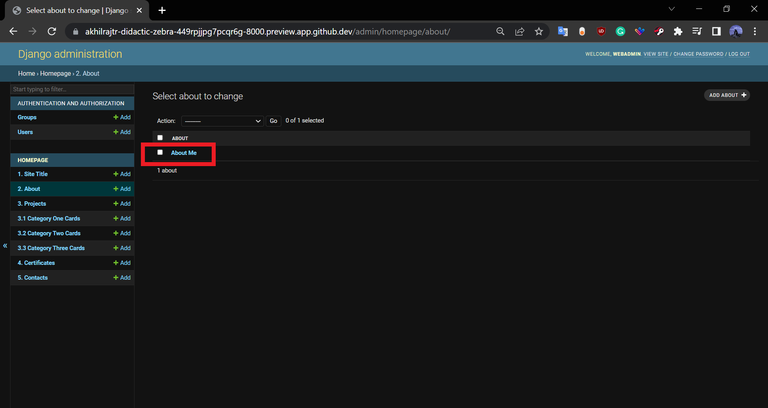
Click "About Me" there
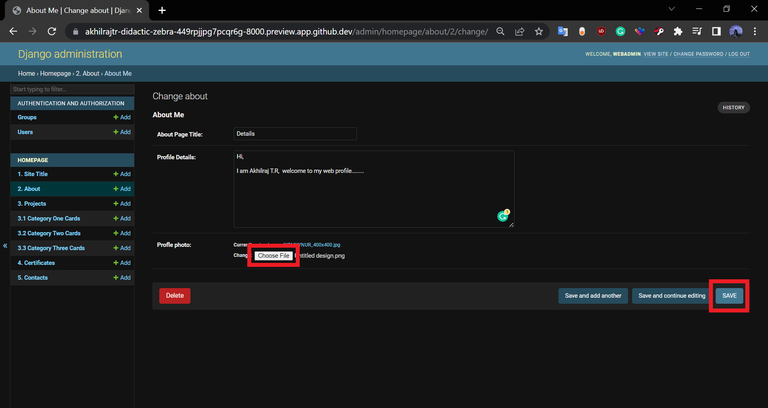
Feel free to edit the details and change the image there by clicking the "Choose File" button in the profile photo section and click the "Save" button located at the right corner.
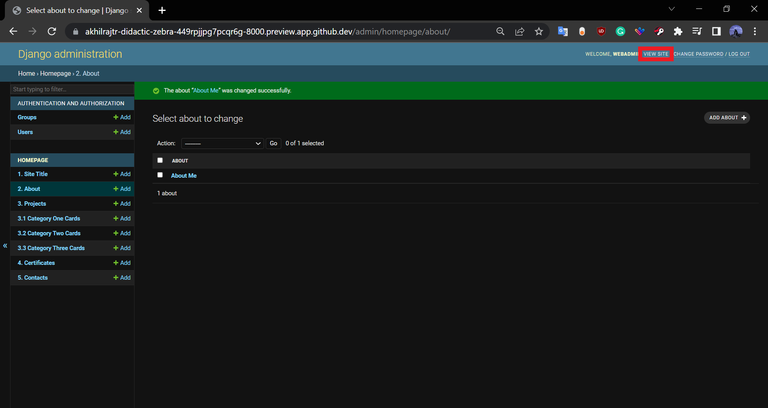
You will get a message saying it changed successfully, now click the "VISIT SITE" button to view your change on the website.
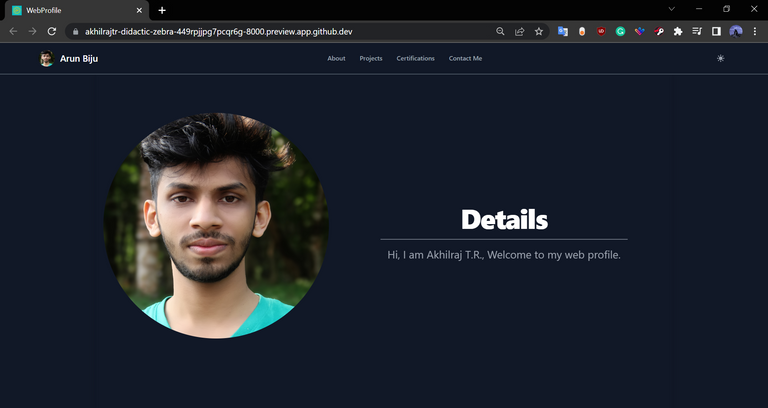
You will see that the website was changed with the details you provided.
Similarly, go to the admin page and change other sections and play around to personalize the whole site, and after finishing the changes we need to push those changes,
Note: Now, this is only needed if you changed an image in the website, modified text is saved directly to the supabase database.
To update the changes go to the "Source Control" section by clicking this button as shown
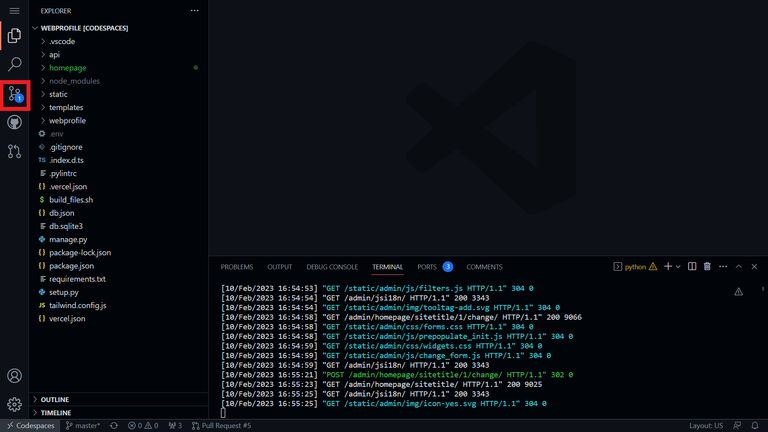
Then click the green "commit" button
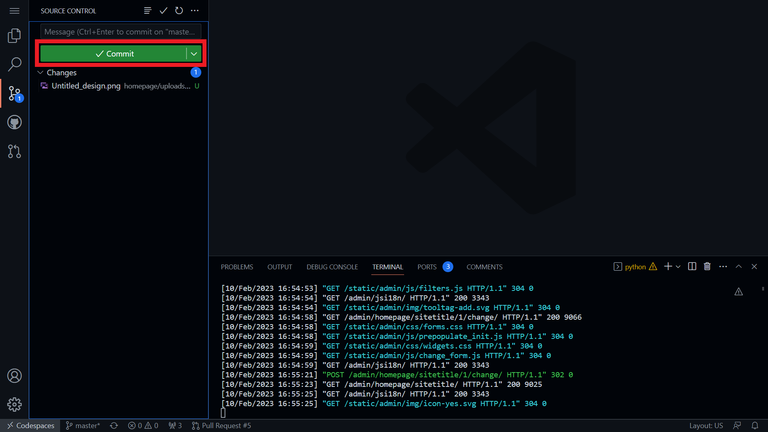
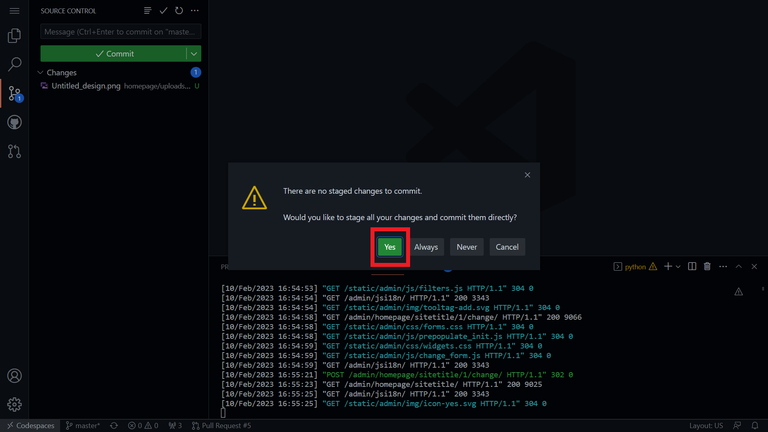
Then click "Yes"
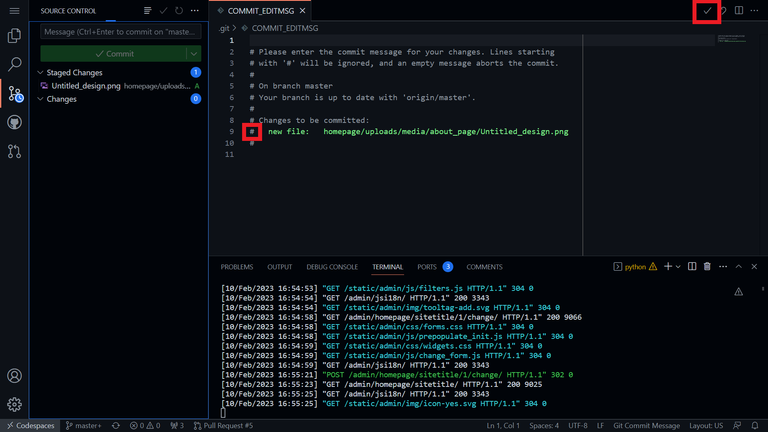
In this page remove the "#" that is in front of the "new file" and click the "check" button, refer image.
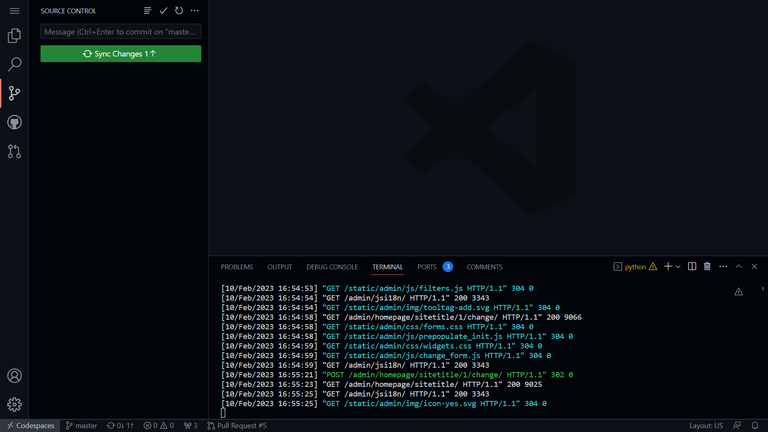
Then click the green "Sync Changes" button and click "Ok", and you are done.
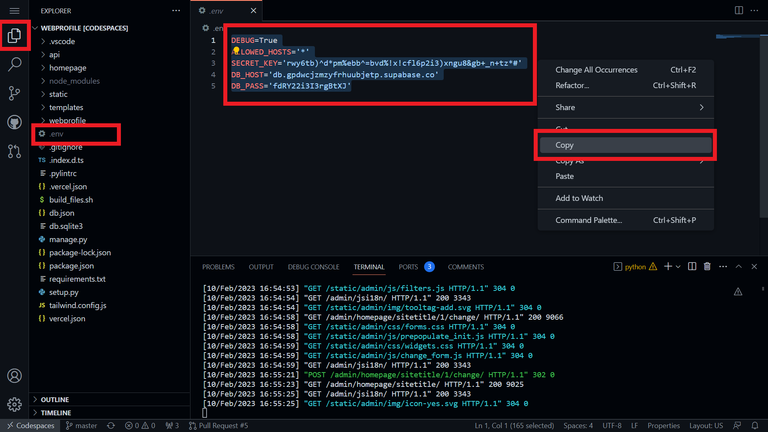
Before moving to the next step we need to copy some values, for that go to the "Explorer" section and click the .env file there and select the whole content and copy it, we need this in the following steps while hosting
Step 3
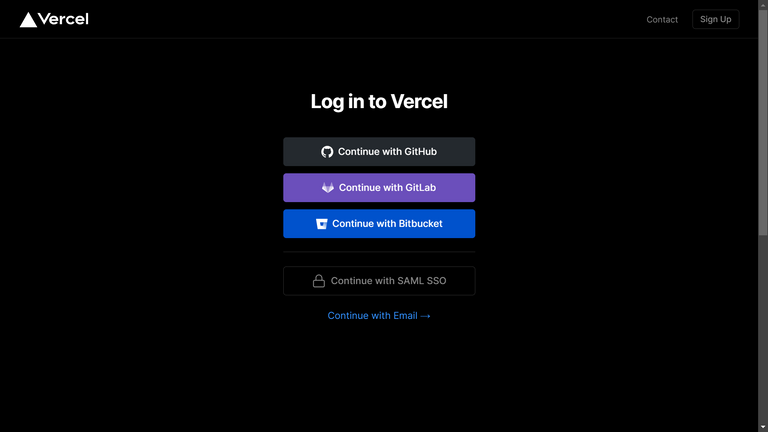
This is the last step, hosting our website on a server, we will use vercel to host our project, go to vercel and click "Continue with Github"
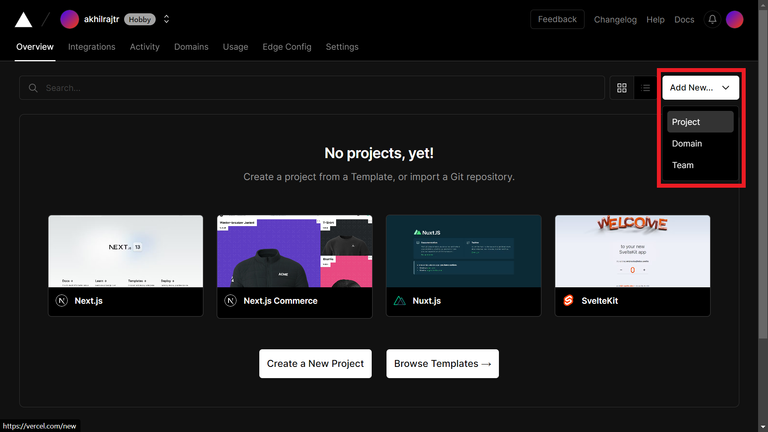
You will load into the following page, here make sure you are in the "Overview" tab and if you are not there already click your name at the top that says "Hobby" near it, and click "Add New" then "Project" from the dropdown.
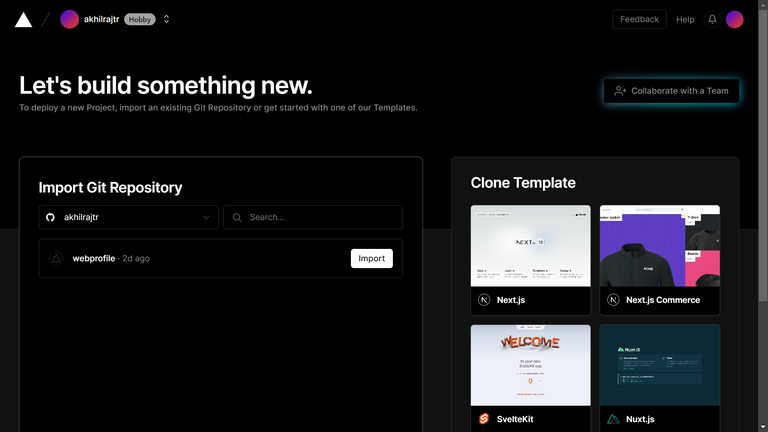
That will take you to this page, where you will see "webprofile" and an "import" button, click the "import" button
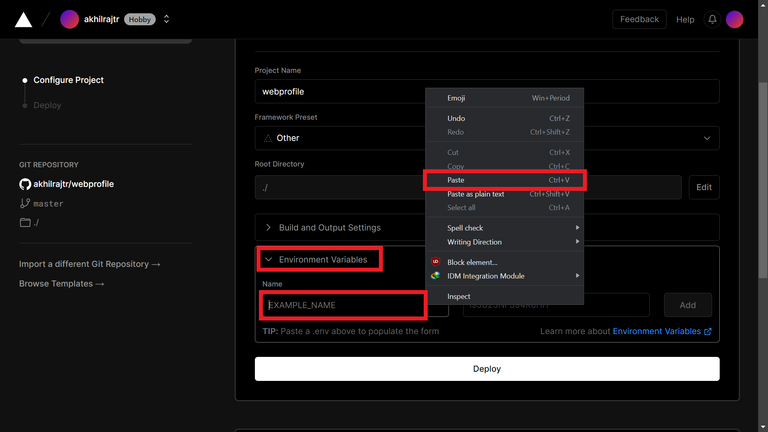
On the next page expand the "Environment Variable" section and paste the entire content of the "'env" file that we copied in the end of the last step
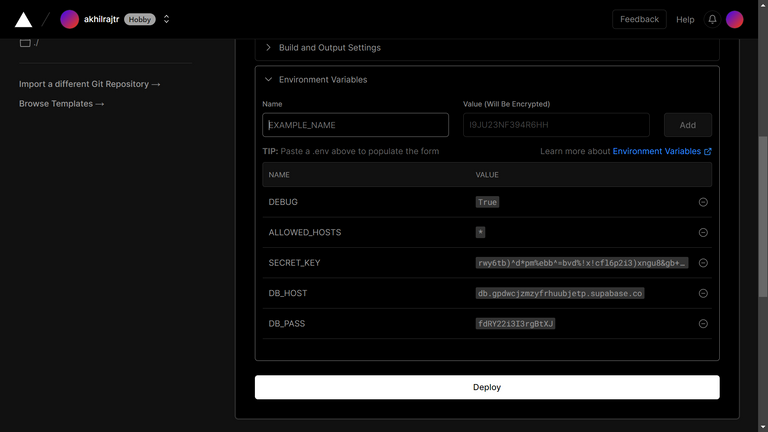
The result should look like the image shown below
Finally, click "Deploy" and wait a minute for the deployment to finish, and you should see a "Congratulations" page and we are done hosting, there click the "Continue to Dashboard" button
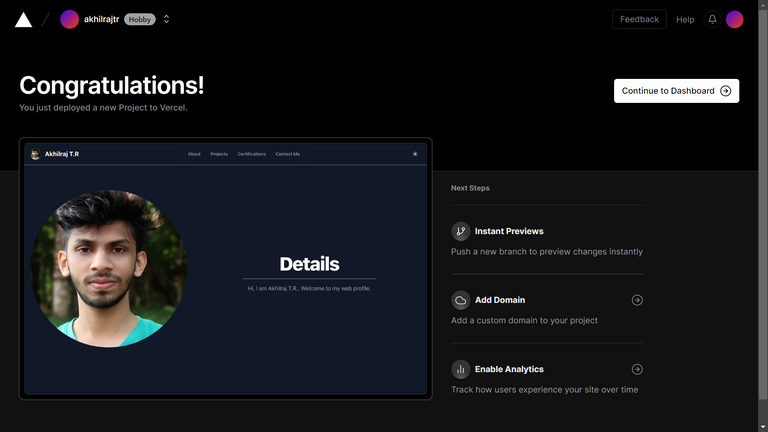
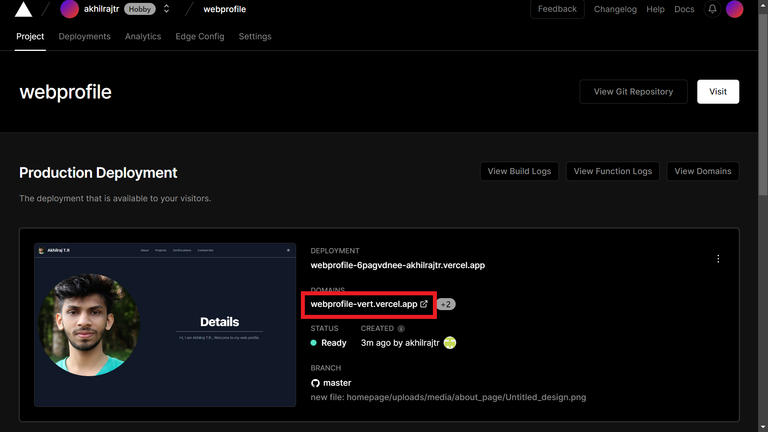
Here, under "Domains" you will get the link to your personal website, if you made it this far you are awesome, enjoy your website
I will be ending this post here cause it's getting a bit too long, I will write a new one that explains about customizing and about optimizing the webpage, if you ran into any issue feel free to comment and I'll be happy to help,
Thank you.


