Mi versión española.
¡Bienvenido a mi blog.!

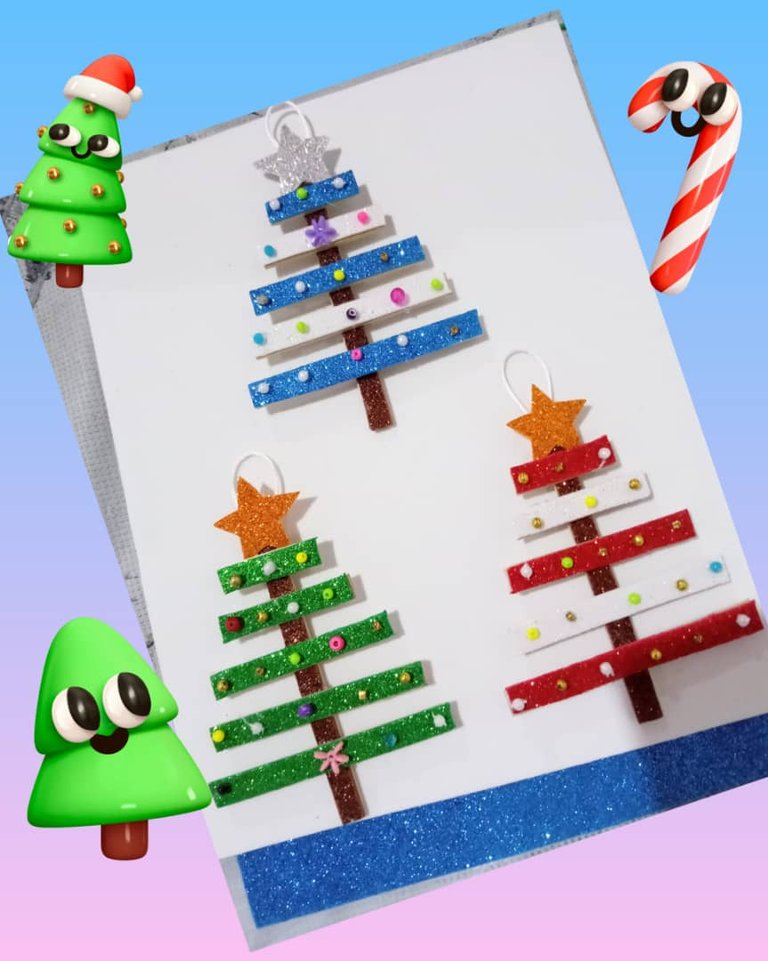
Hola a toda mi gente de esta comunidad, @DIYHub, es un placer regresar a esta linda comunidad, hoy le traigo unos lindos arbolitos de Navideño hecho con paleta de madera y foami. Este lindo adorno navideño lo elaboré con paleta de madera, foami de varios colores, cuencas de varios colores, hilo naylo de color blanco, regla, lápiz, silicona. Son pequeños adornos que son ideales para decorar el árbol de Navidad, colocarlo en la nevera como adorno o hacerle un regalo, alguien de verdad son muy bonito y sencillo de hacerlo, espero que le guste mi diseño.
Vamos a mostrarle los materiales a utilizar y el paso a paso.
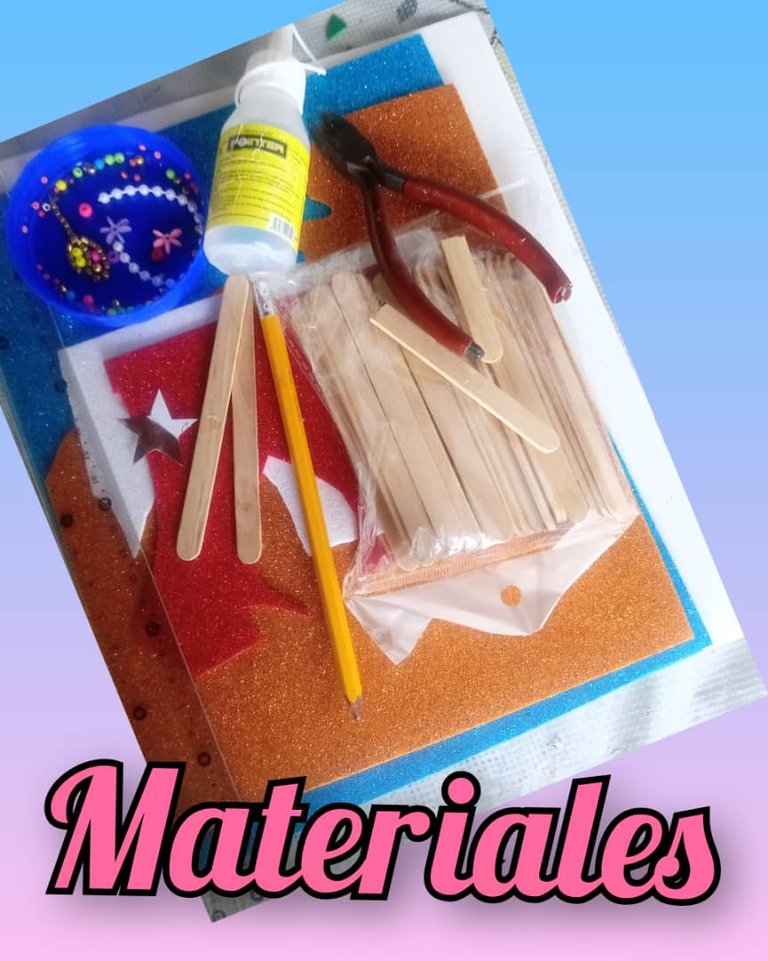
Materiales.
- 1 paquete de paleta de madera.
- Foami de color, azul, rojo, dorado, blanco y verde.
- 1 silicon.
- 1 lapiz.
- 1 pinza.
- Cuencas de varios colores.
Paso.
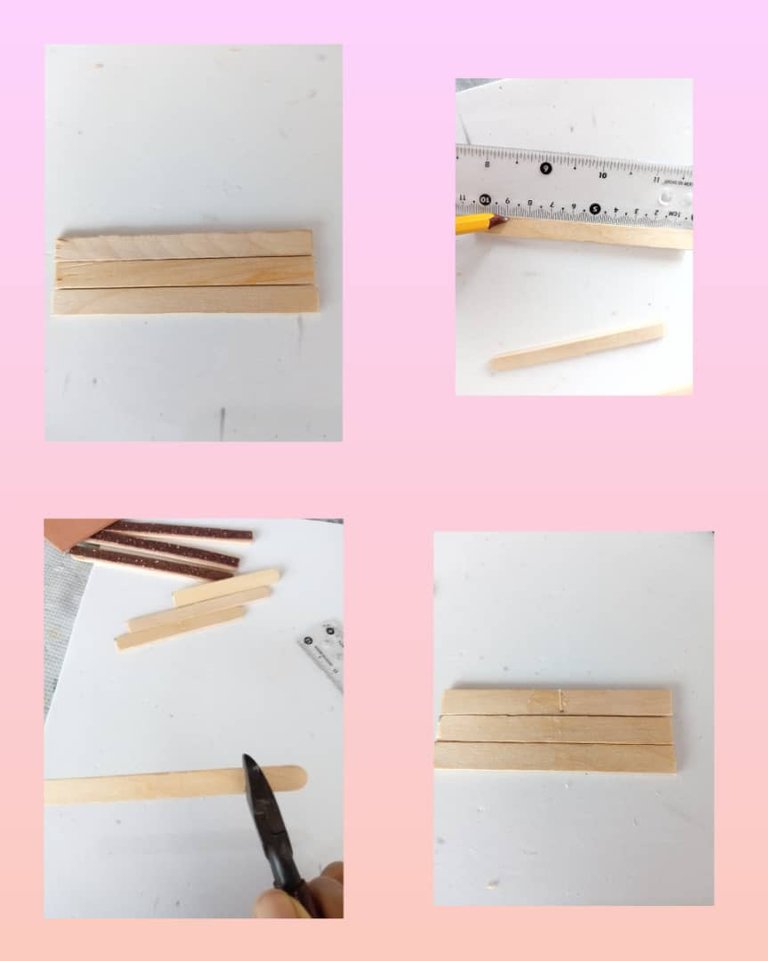
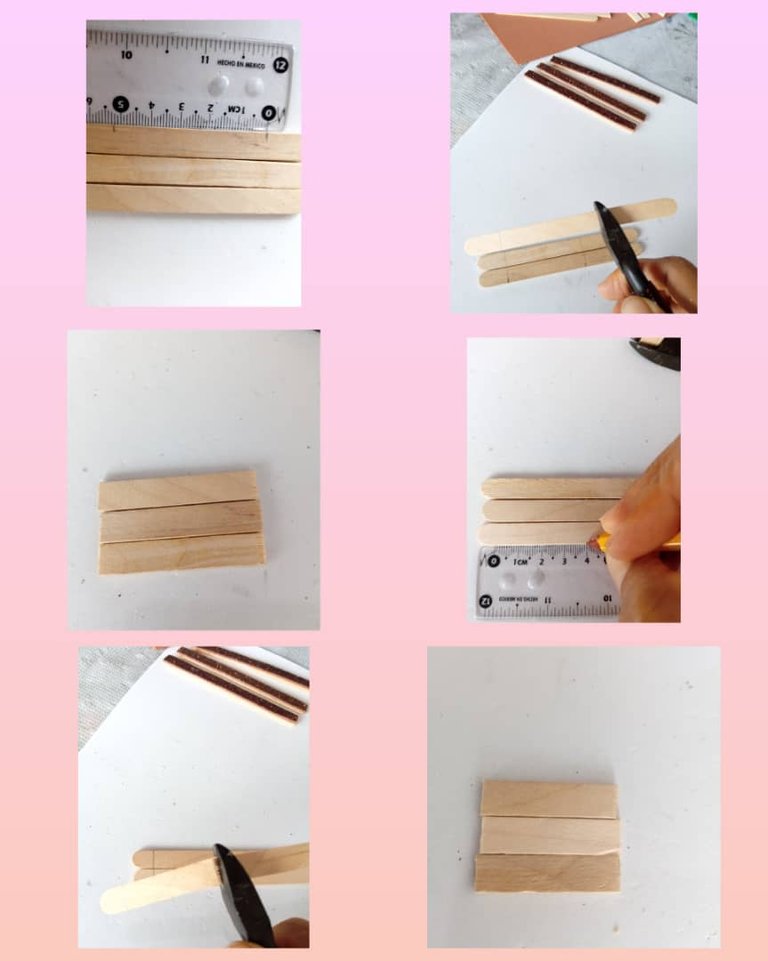
Tomo 3 paletas y la forramos con el foami de color marrón tengo la base del arbolito lista.
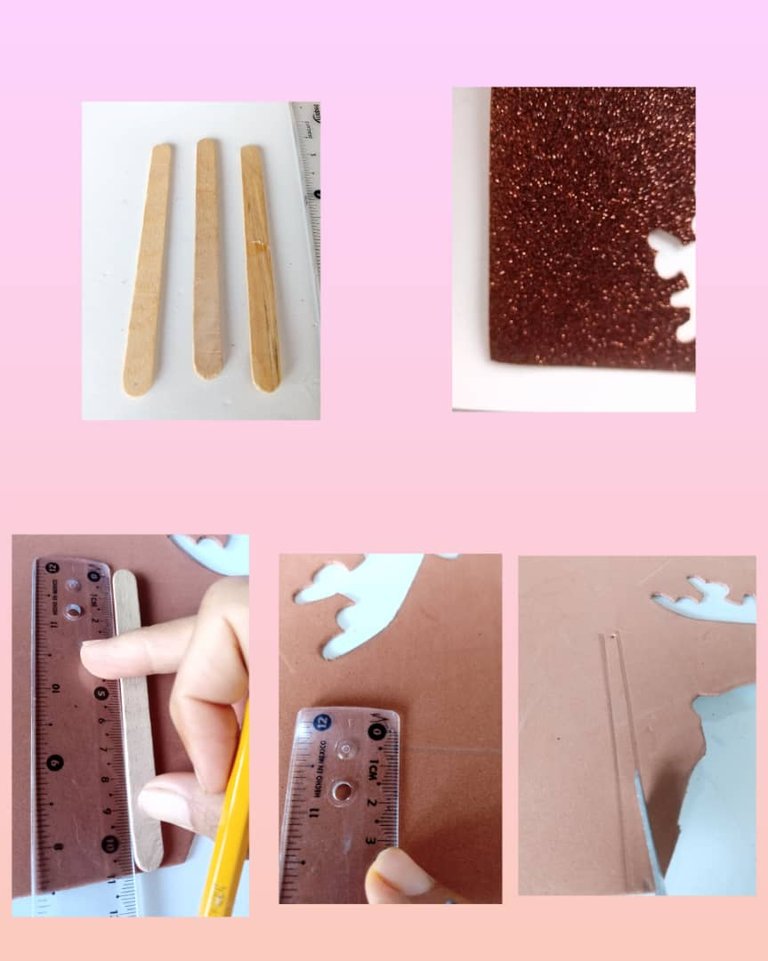
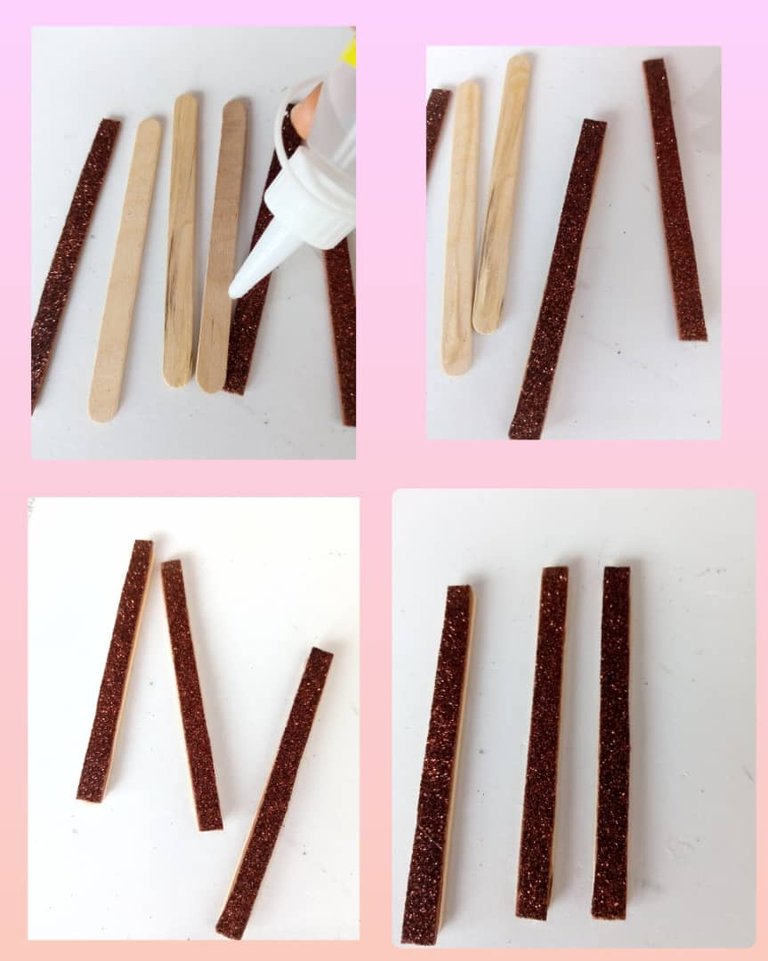
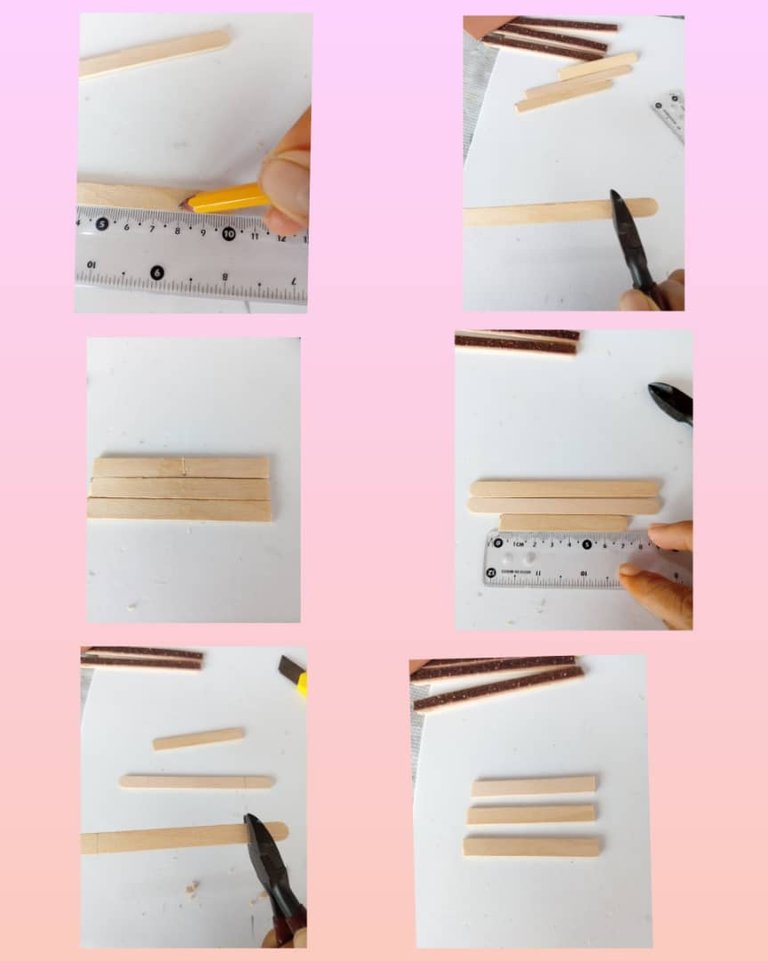
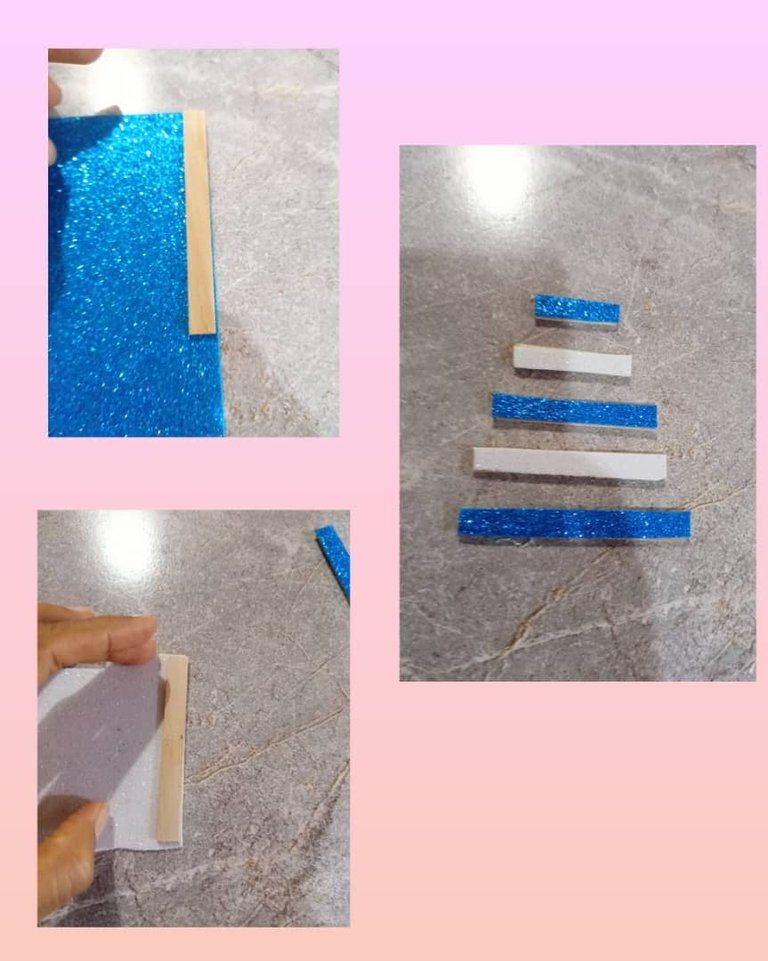
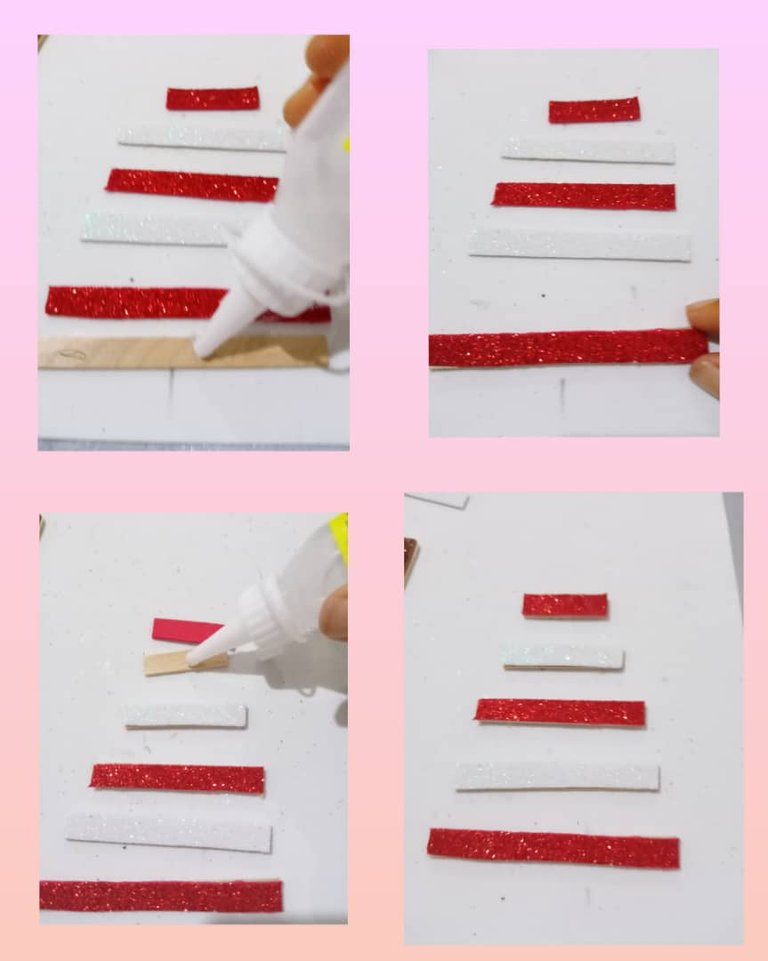
Agarramos 3 paletas y las medimos por 9 centímetros a cada una y después la recortamos con la ayuda de la pinza.
Posteriormente, medimos las otras paletas de madera de 8, 7, 6, 5 hasta forma una bases para el arbolito, la cual va está estructurado con 5 paletas de maderas.
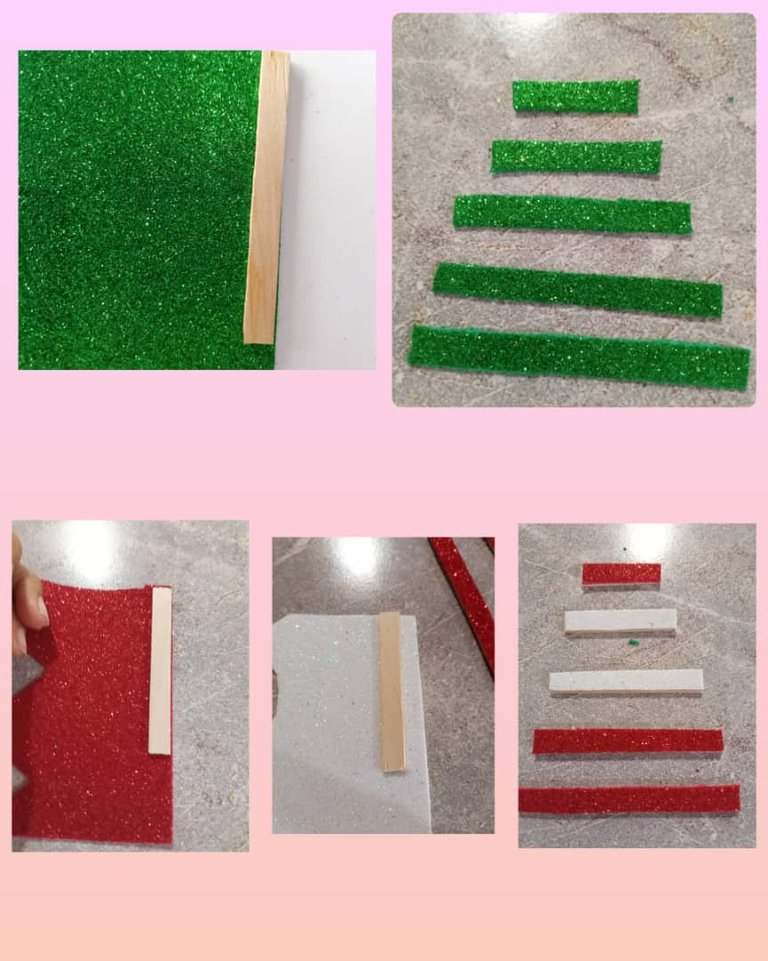
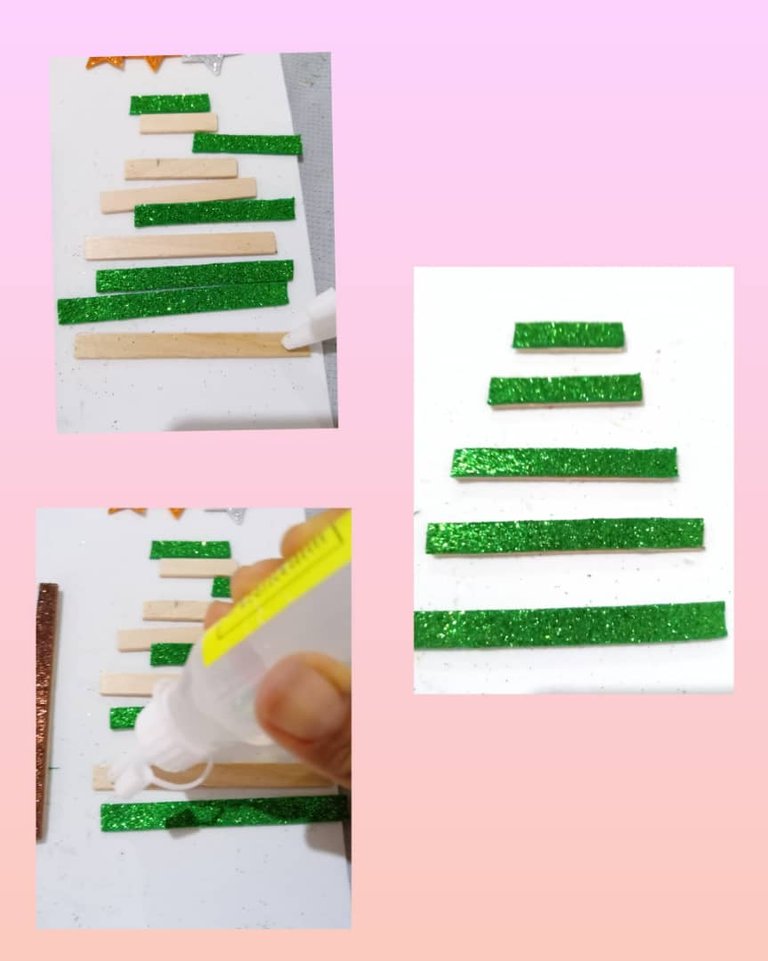
Ahora picamos 5 tiras de color verdes con las medidas que se va a hacer los arbolitos.
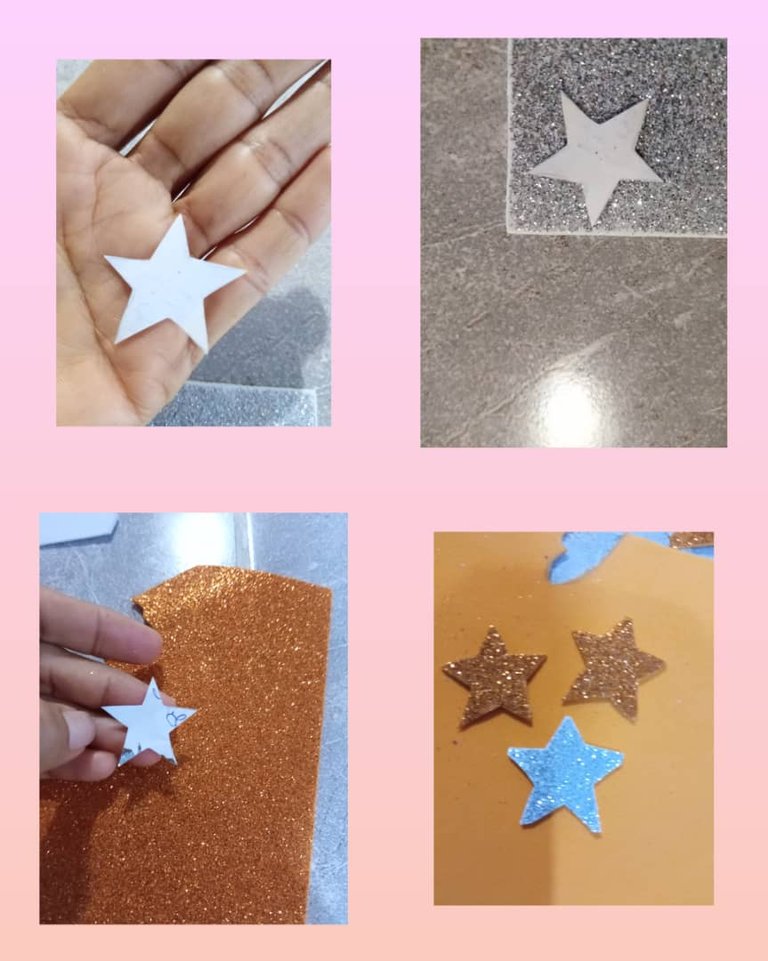
Después picamos las 5 tiras de 3 colores rojo, dos de color blanco, luego las 3 tiras de color azul y dos de color blanco, y por últimos picamos 3 estrellas, una de color plateada, y dos doradas.
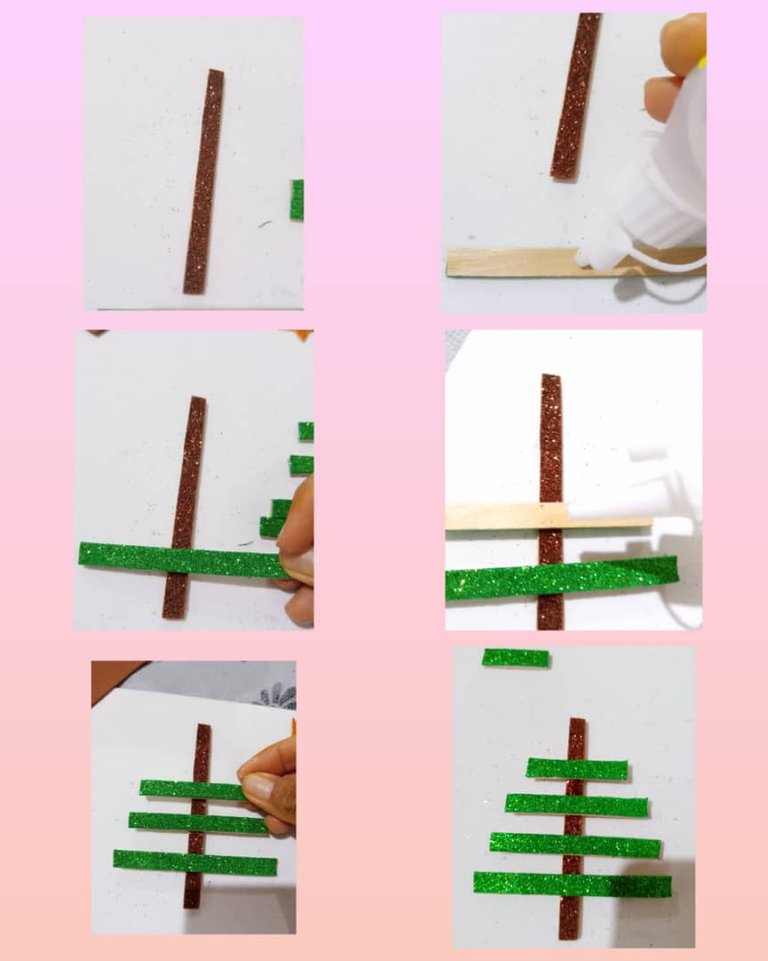
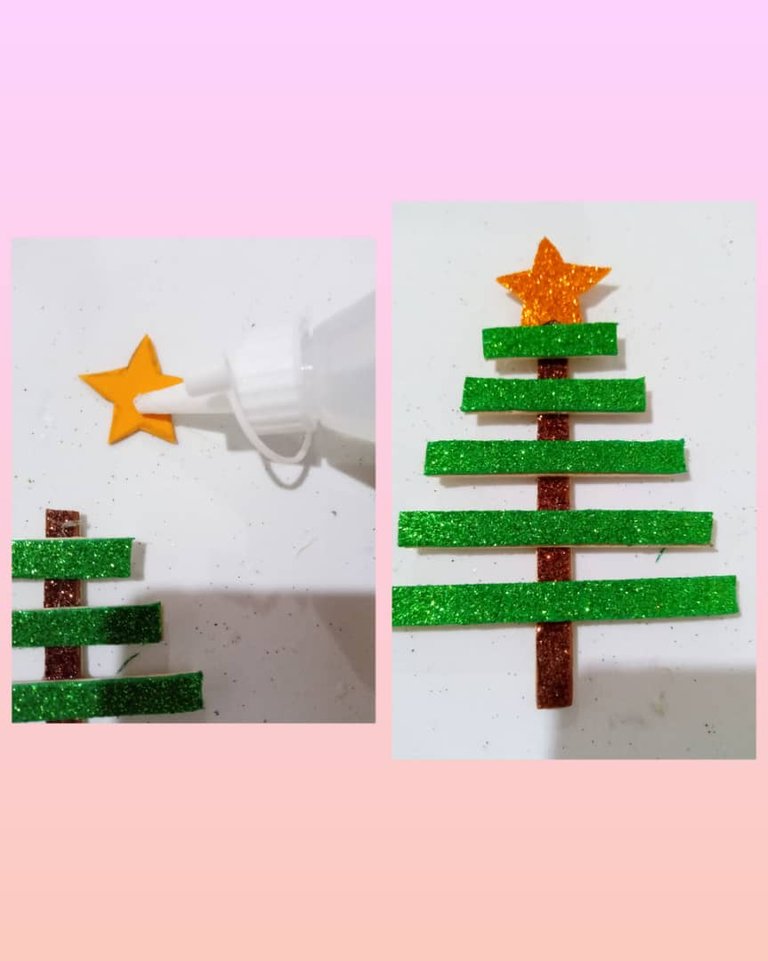
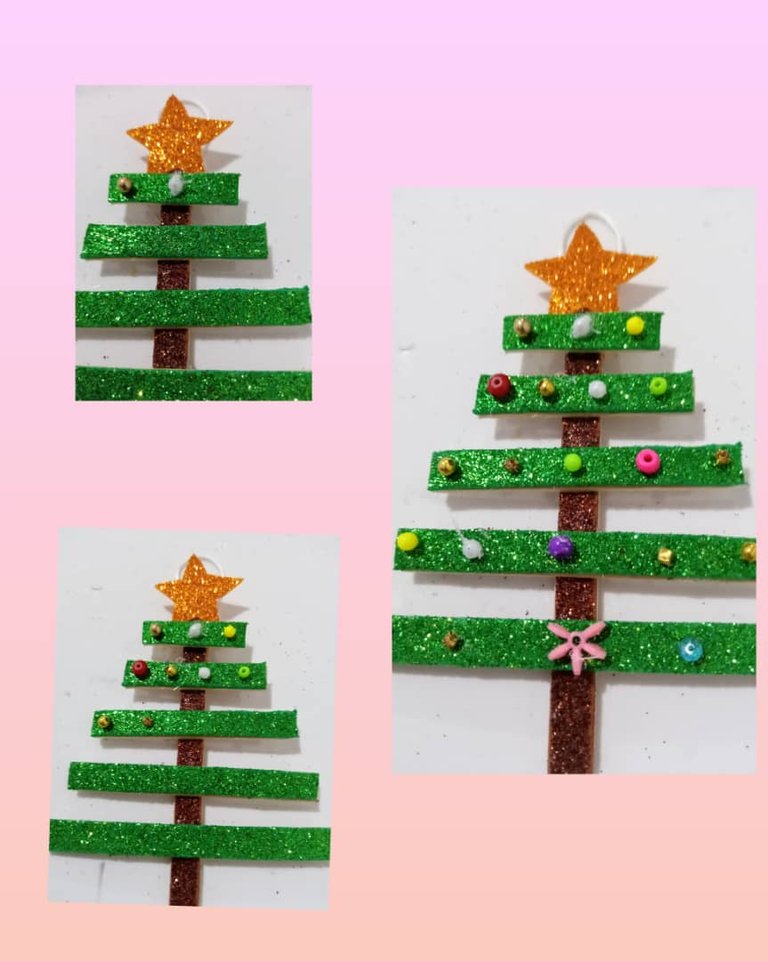
- Empezamos a diseñar el arbolito de color verde, vamos forrando cada paleta, ya forrada, empezamos arma el arbolito, tomo la base, el palito de color marrón lo pongo de forma horizontal, después coloco los otros palitos de color verde de forma vertical lo pegamos desde la parte de abajo hasta llegar arriba al final pegamos la estrella.
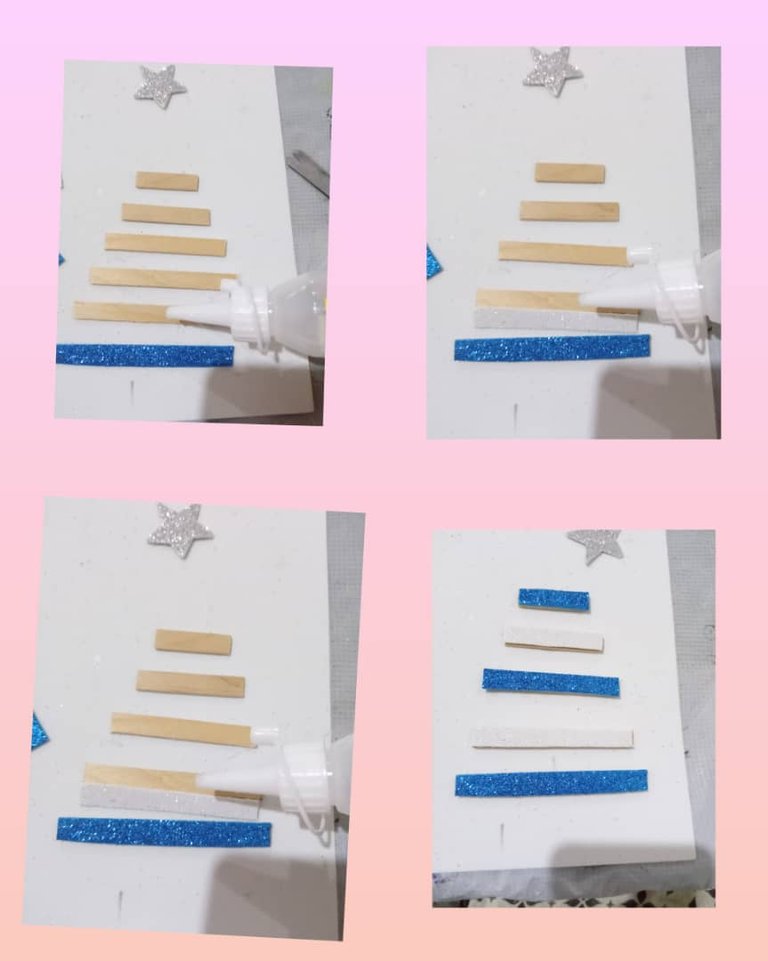
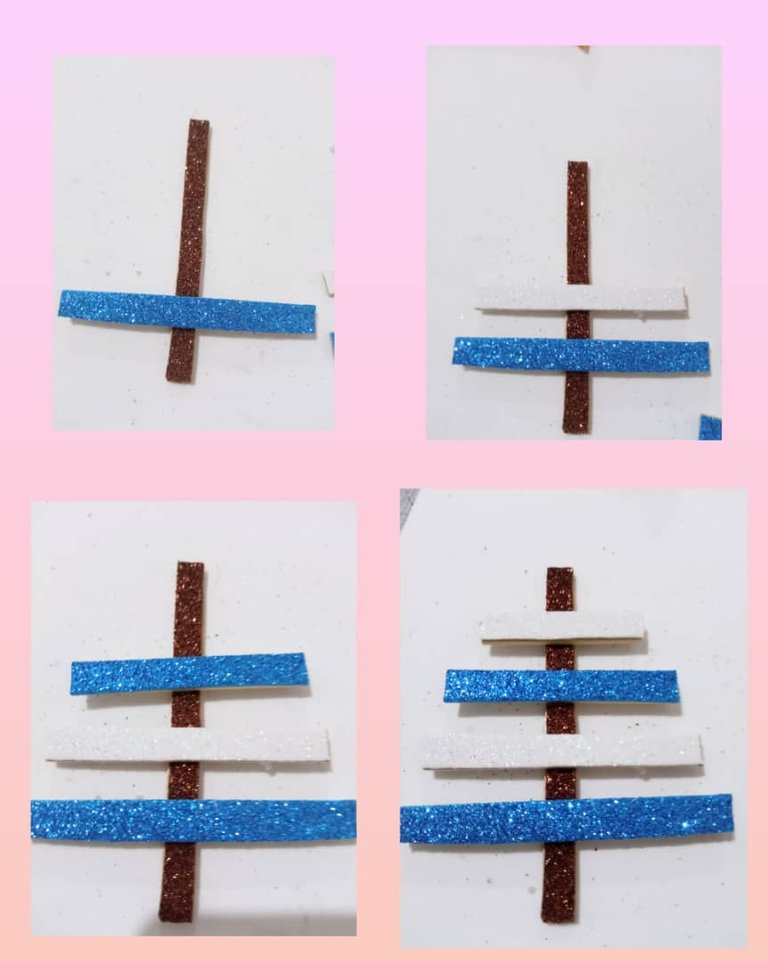
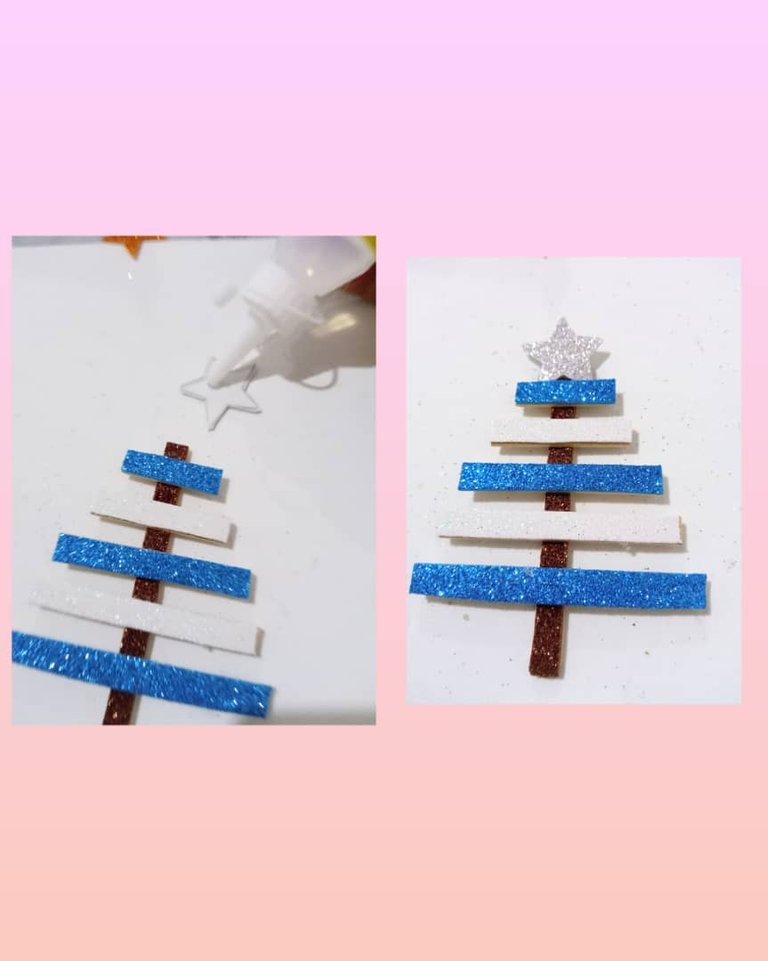
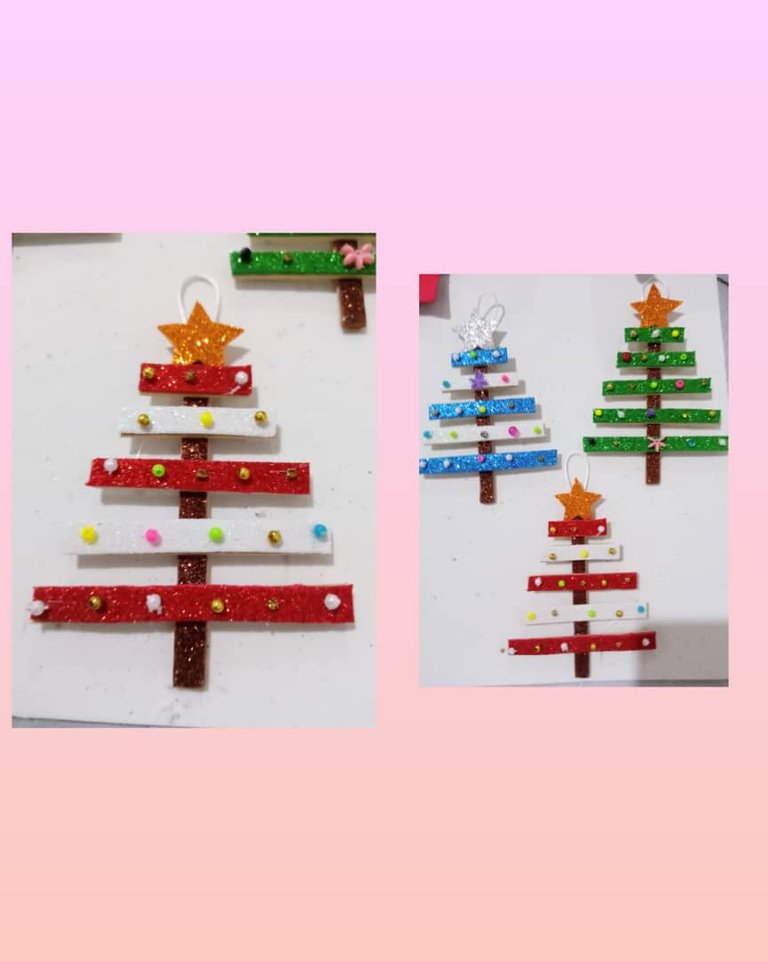
Seguimos con el arbolito número 2 en este caso es el de color azul con blanco, hacemos lo mismo tomo, la base del arbolito lo pongo de forma horizontal y vamos pegando las 5 paletas de mayor hasta llegar al menos utilizando un color intercalado al final pegamos la estrella de color plateada.
Ahora hacemos el mismo proceso en el arbolito número 3 que es el color rojo con blanco, colocando la estrella final de color dorada. Tengo mis tres arbolitos listos.
Por último le colocamos una cuerda en la parte de atrás para colgarlo en el arbolito, si no le pone un imán para adornar la nevera, los adornos con varias cuencas de colores para hacerlos más llamativos y lindo.

Vea el proceso final, me quedo muy lindos mis arbolitos Navideños para decorar mi árbol de Navidad.

Tenga un feliz días y bendecidos para todos, muchas gracias por leer mi post.

Las fotos son mías, tomadas con teléfono, Alcatel, editadas con incollage y traducidas con DeepL.
Mi versión inglesa.
Welcome to my blog!
Hello to all my people of this community, @DIYHub, it's a pleasure to return to this nice community, today I bring you some cute little Christmas trees made with wooden pallet and foami. This cute Christmas ornament I made it with wooden palette, foami of various colors, bowls of various colors, white naylo thread, ruler, pencil, silicone. They are small ornaments that are ideal for decorating the Christmas tree, place it on the fridge as an ornament or make a gift, someone really are very nice and easy to do, I hope you like my design.
Let's show you the materials to use and the step by step.
Materials.
- 1 pack of wooden palette.
- Colored foami, blue, red, gold, white and green.
- 1 silicon.
- 1 pencil.
- 1 tweezers.
- Bowls of various colors.
Step.
I take 3 pallets and line it with the brown foami I have the base of the tree ready.
We grab 3 pallets and measure them by 9 centimeters each and then cut them out with the help of the tweezers.
Subsequently, we measure the other wooden pallets of 8, 7, 6, 5 to form a base for the tree, which will be structured with 5 wooden pallets.
Now we chop 5 strips of green color with the measures that we are going to make the saplings.
Then we chop the 5 strips of 3 red colors, two white, then the 3 strips of blue color and two white, and finally we chop 3 stars, one silver, and two gold.
- We begin to design the little tree of green color, we are lining each pallet, already lined, we begin to assemble the tree, I take the base, the brown stick I put it horizontally, then I place the other sticks of green color vertically we glue it from the bottom until arriving at the top at the end we glue the star.
We continue with the tree number 2 in this case is the blue with white color, we do the same thing I take, the base of the tree I put it horizontally and we are sticking the 5 pallets of major until we reach the least using a color interspersed at the end we glue the silver star.
Now we do the same process in the tree number 3 which is red with white, placing the final star of golden color. I have my three little trees ready.
- Finally we put a string on the back to hang it on the tree, if you do not put a magnet to decorate the fridge, the ornaments with various colored bowls to make them more striking and cute.
- See the final process, I got very nice Christmas trees to decorate my Christmas tree.
Have a happy day and blessed to all, thank you very much for reading my post.
The photos are mine, taken with phone, Alcatel, edited with incollage and translated with DeepL.


