Mi versión española.
¡Bienvenido a mi blog!
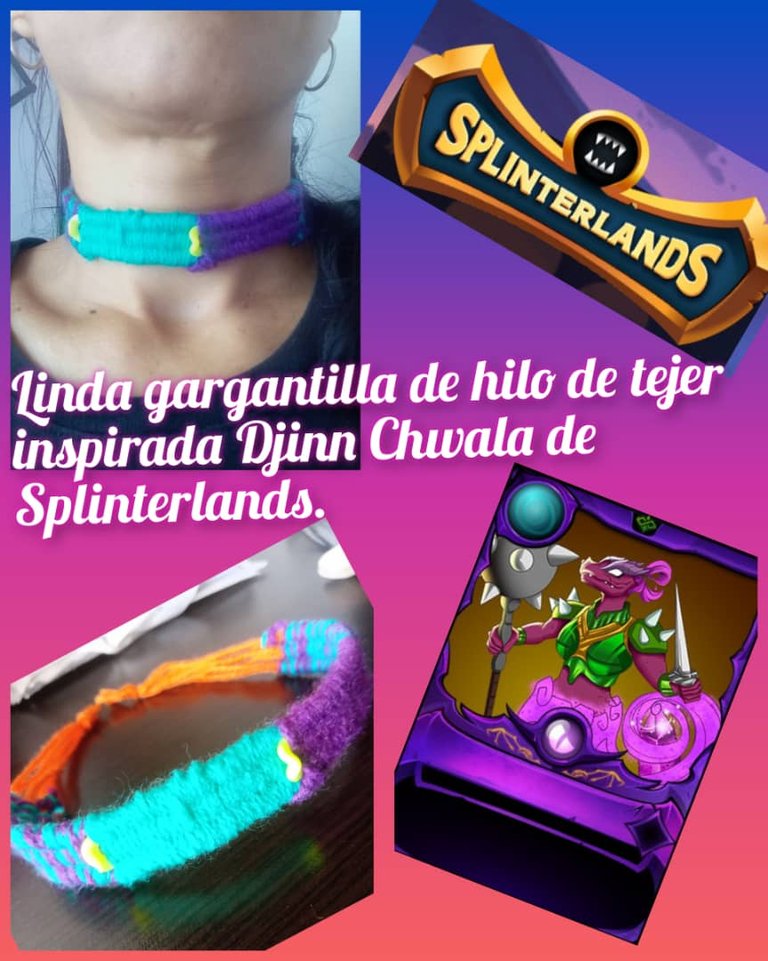
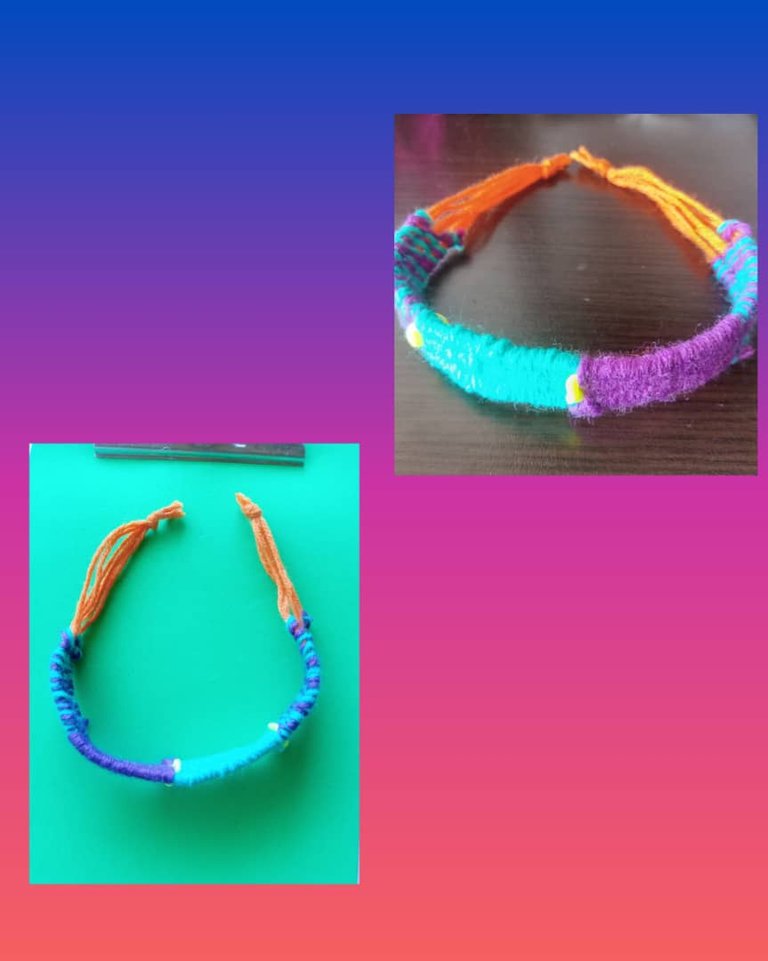
Hola a toda mi gente de esta comunidad, @DIYHub, es un placer regresar a esta linda comunidad, hoy le traigo una bella gargantilla tejida con hilo inspirada en Djinn Chwala de Splinterlands, los djinn son monstruo de dragón, y es de tipo épico se dice que tiempo de después de hacer liberado, la mayoría de ellos veían su cautiverio elemental como una bendición en lugar de maldición, tenían un poder mucho mayor que ante, ahora que estaban trabajando con la fuerza del planeta. Me inspiré en DJINNCHWALA de @Splinterlands por sus colores que trasmite poder y sentirse seguro en cada batalla. Espero que le guste mi, bello accesorio.
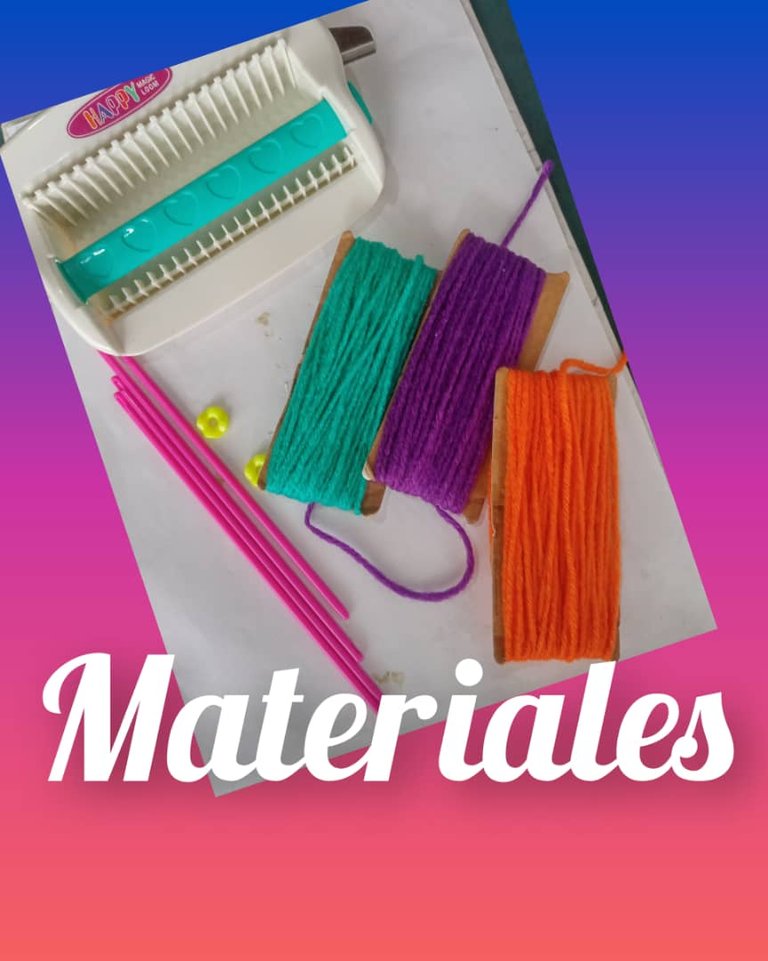
Materiales.
- 4 metros de hilo de color verde.
- 4 metros de hilo de color morado.
- 2 metros de color naranja.
- Una máquina de tejer.
- 1 palillo de tejer.
- 2 cuencas de color amarillo.
- 1 tijera regla.
Paso.
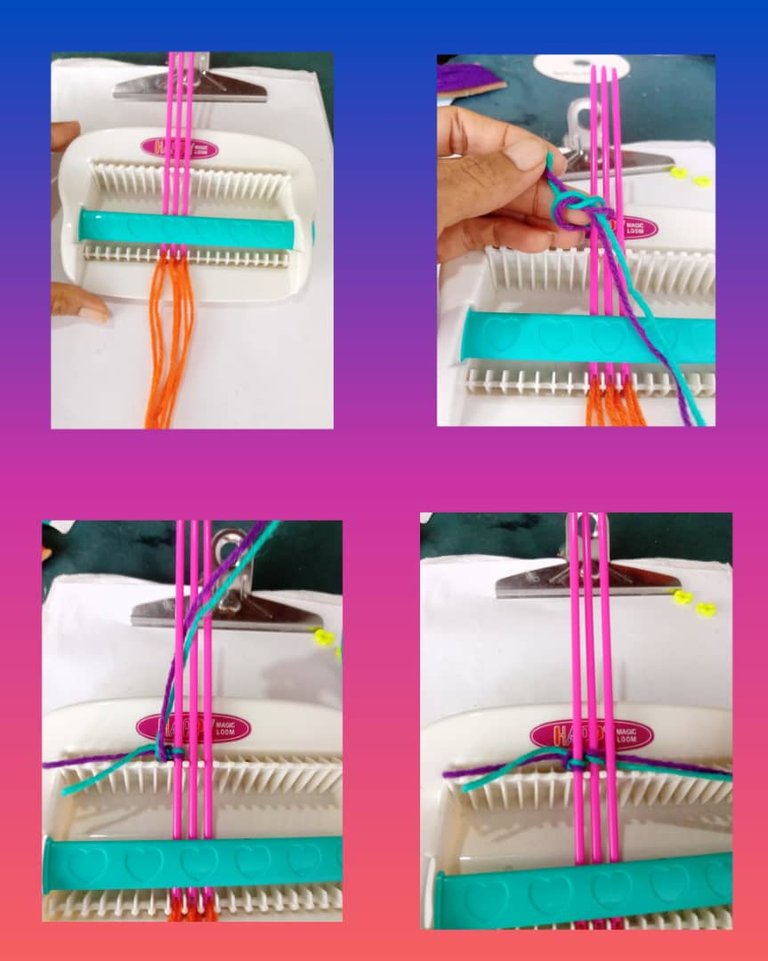
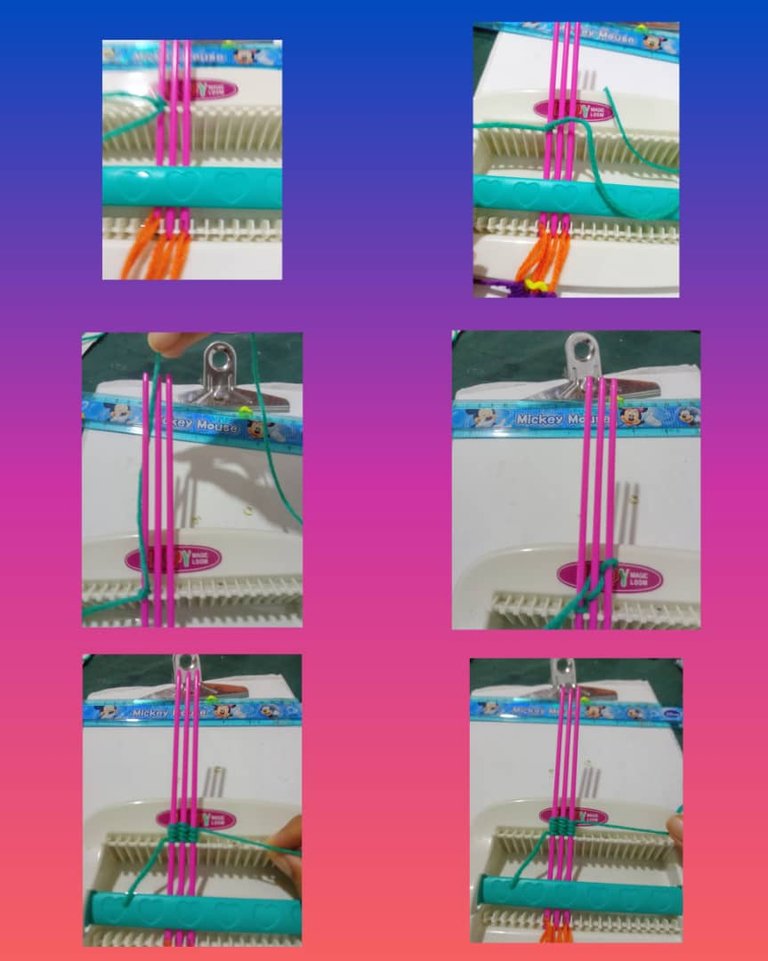
Primero mido 6 metros de hilo de tejer de color amarillo la que va a ir en el centro del tejido y va a ser el cierre de la gargantilla utilizando 2 metros en cada varilla o palillo de tejer.
Después mido 4 metros de color morado y 4 metros de color verde.
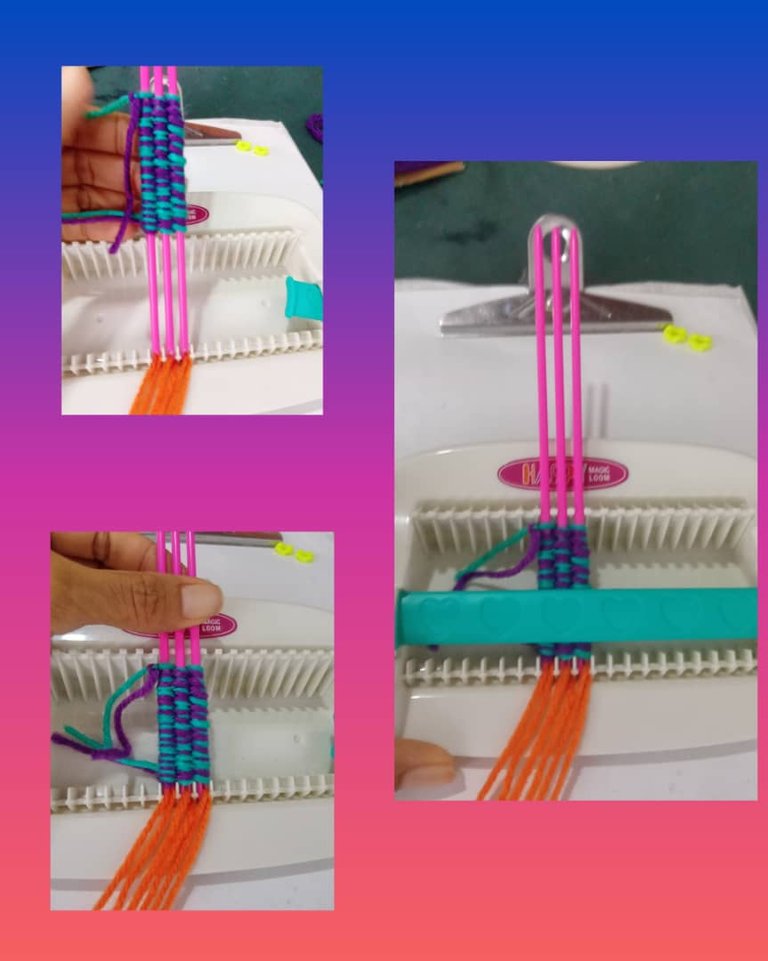
Comienzo introducir el hilo naranja en los 3 palitos y lo colocamos en la máquina, lo adjuntamos para empezar a tejer.
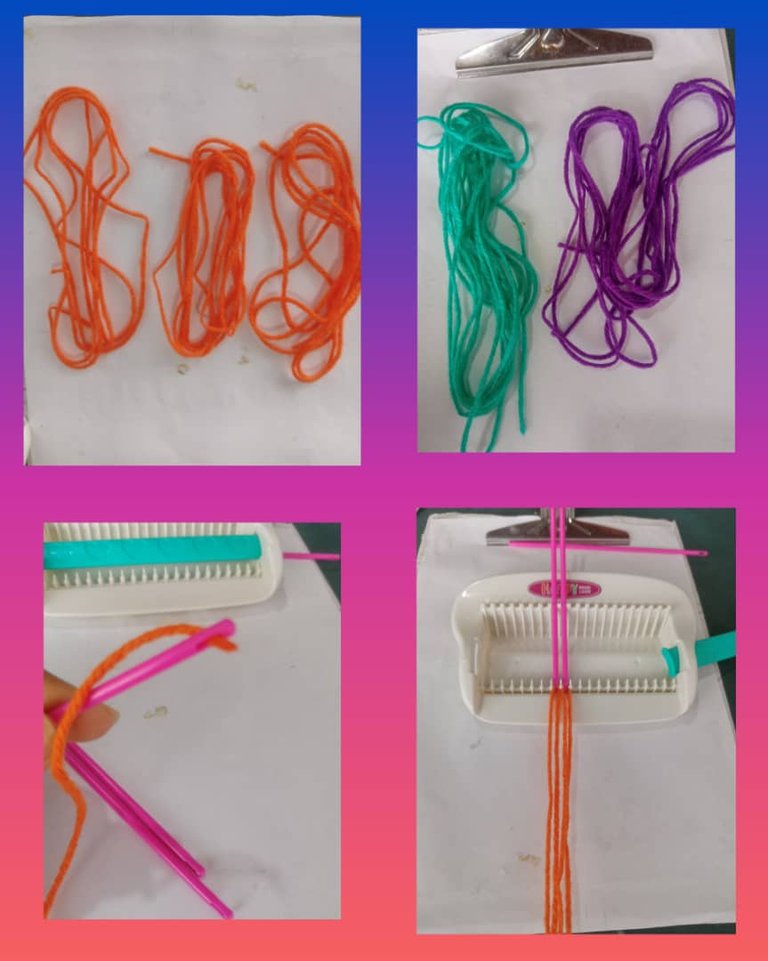
Ahora tomos un metro de color morado, 1 metro de color verde, lo adjuntamos en la varilla o palillo del lado izquierdo para que no se desasga.
Comenzamos a tejer el hilo viendo que ambos hilo va a ir juntos en el primer paso, tomo ambos hilos lo paso por debajo del palillo donde lo ajustamos, lo sacamos por el palillo del medio pasando ambos hilo por arriba lo paso por debajo del palillo del lado izquierdo lo jalamos.
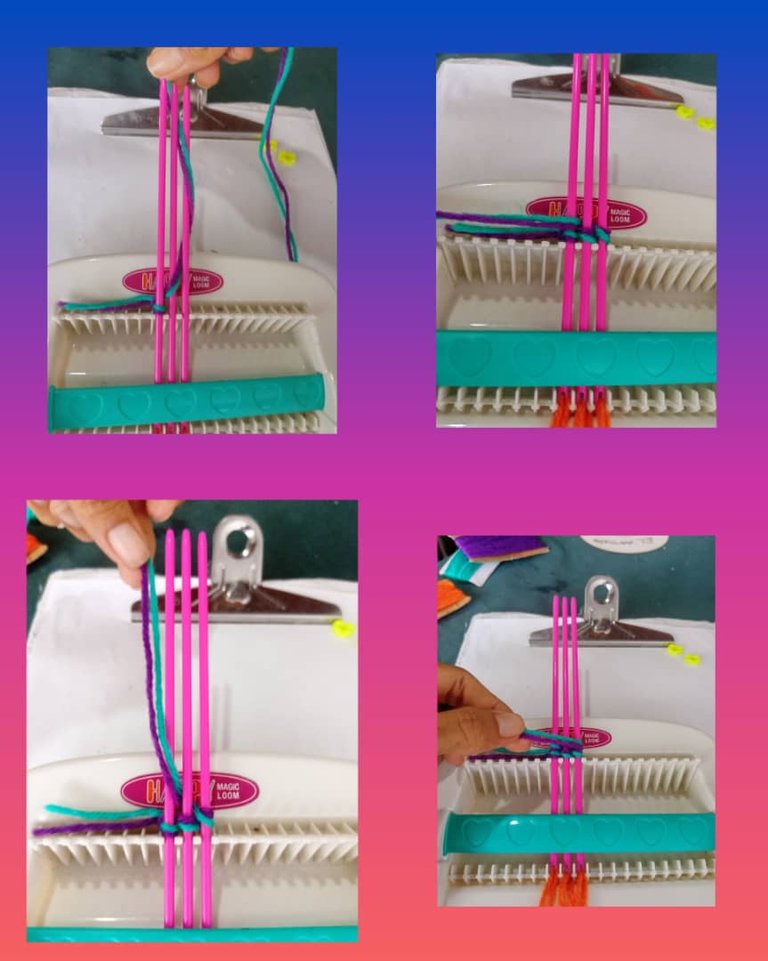
Luego me regreso aplicando el mismo paso, pasamos el hilo por debajo del palillo del lado derecho y lo sacamos por encima del palillo del medio, después sacamos el hilo por debajo del palillo del izquierdo, lo jalamos para ajustar el hilo.
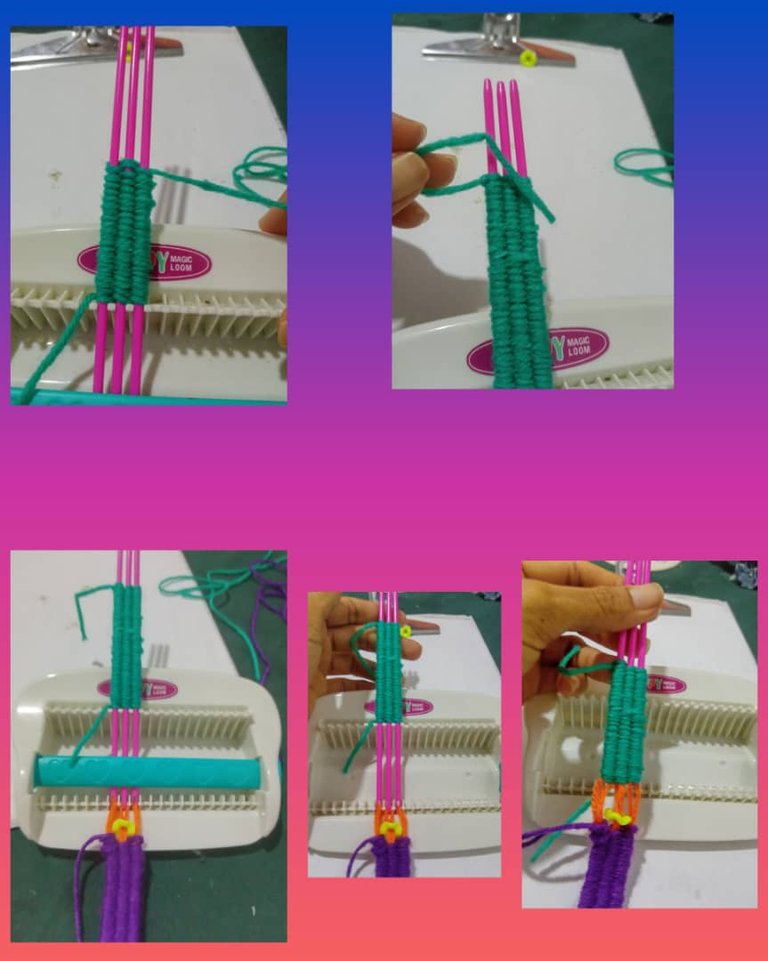
Vuelvo aplicar el mimo paso el hilo por debajo del palillo del lado izquierdo lo sacamos por encima del palillo del medio, luego saco el hilo por debajo del palillo del lado derecho lo jalamos así sucesivamente voy haciendo el tejido hasta tener 21 un punto lo medimos con la regla que tenga 6 centímetros cada color tejido al terminar el tejido se le vuelve hacer un nudo para que no se desasga en la parte izquierda del palillo.
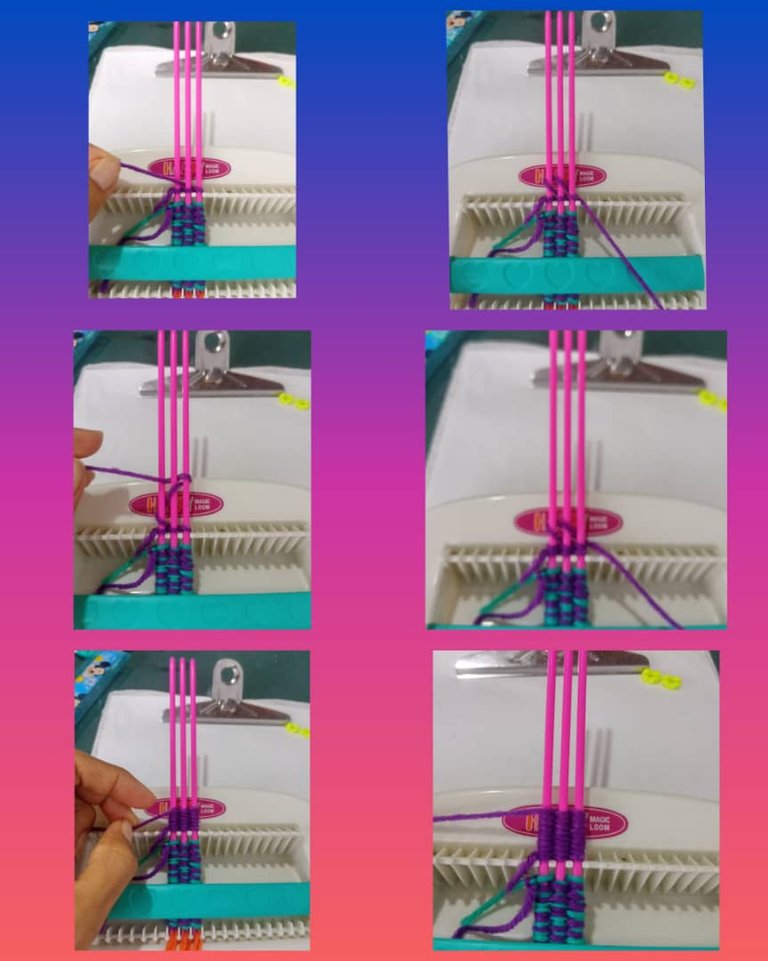
Ya terminada el primer tejido de colores surtidos, vamos bajando el hilo en la parte de debajo de máquina para hacer el otro paso.
.
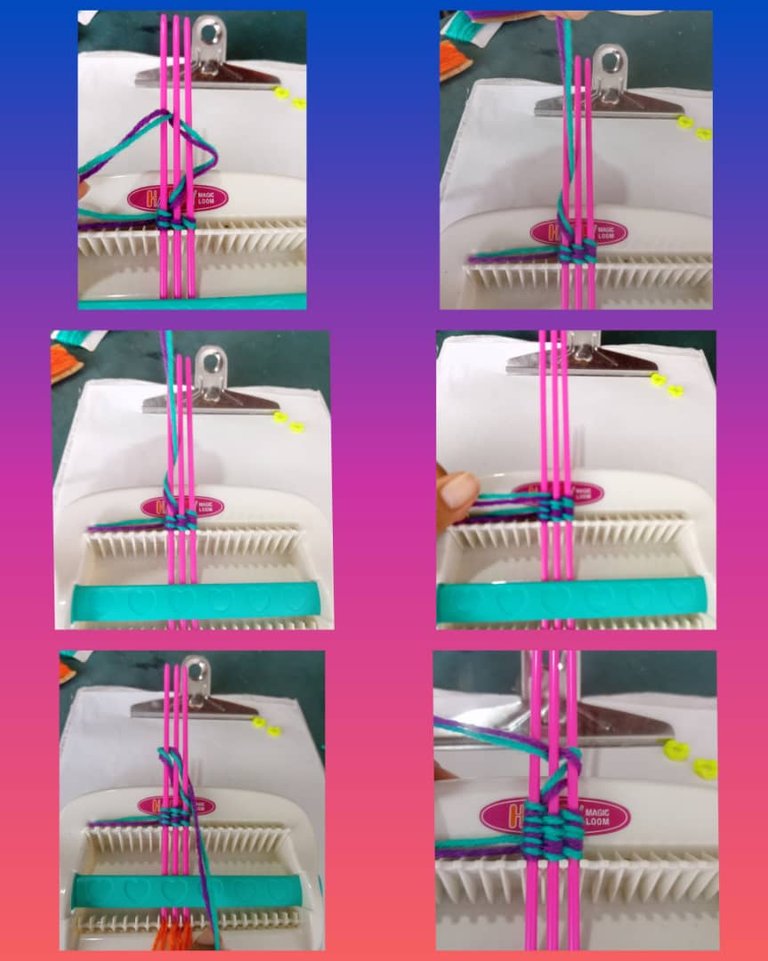
Viene el segundo paso del tejido de color morado, ajustamos el hilo en el palillo de lado izquierdo, volvemos aplicar el mismo procedimiento, pasamos el hilo por debajo del palillo del lado izquierdo, o sacamos el hilo por encima del palillo del lado derecho lo jalamos para ajustarlo.
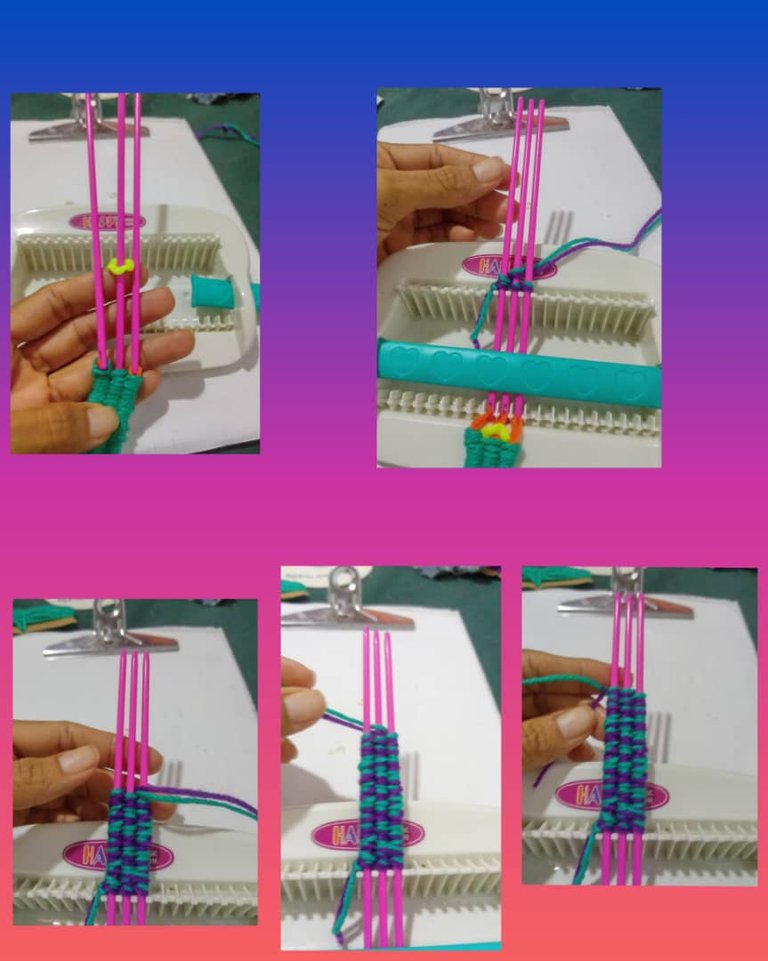
Me regreso del lado derecho paso el hilo por debajo del palillo y lo sacamos por encima del palillo del medio, lo paso por debajo del palillo del lado izquierdo lo jalamos, así voy hasta tener 21 puntos del color morado y mida 6 centímetros sacamos los palillos de la máquina, vamos bajando el tejido en el hilo de color naranja, introducimos una cuenca de color amarilla en el medio del palillo, para empezar hacer el otro tejido de color verde.
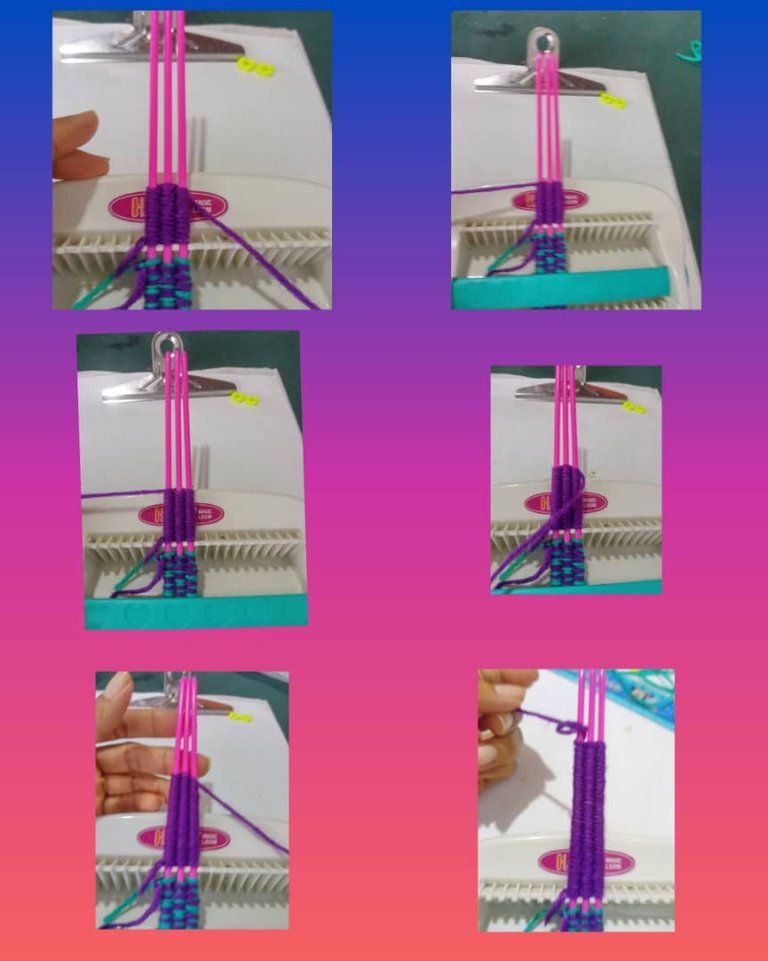
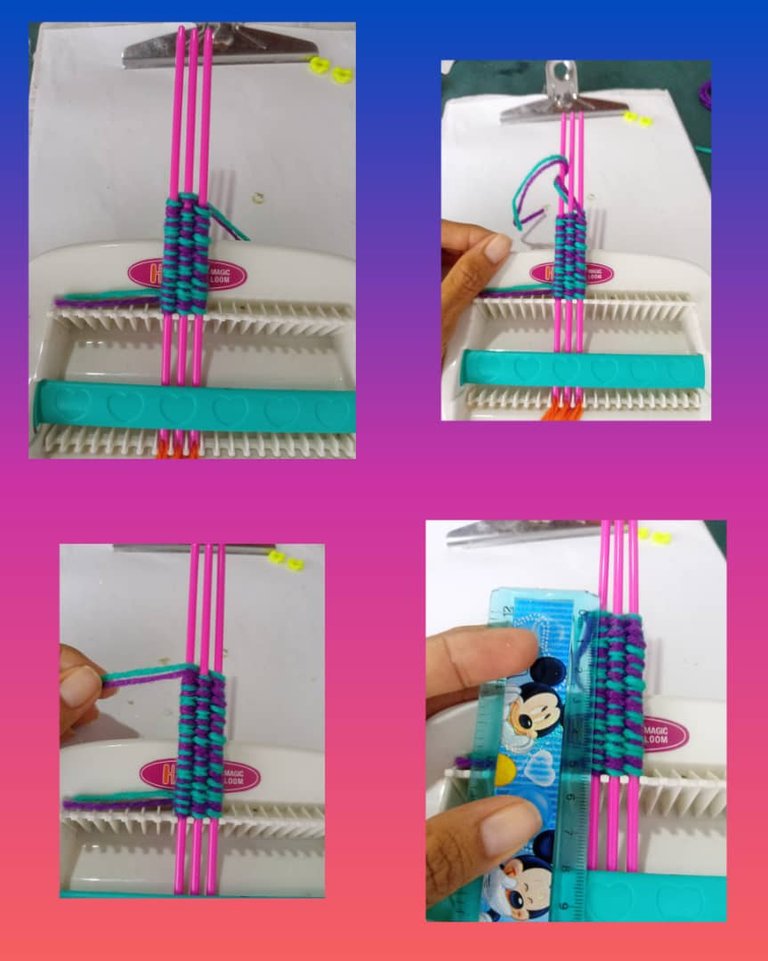
Ahora aplicamos el paso número 3 que es el tejido de color verde, volvemos hacer el mismo procedimiento ajustamos el hilo de color verde en el palillo de color verde, pasamos el hilo por debajo del palillo del lado izquierdo lo sacamos por encima del palillo del medio lo paso por debajo del palillo del lado derecho me regreso haciendo el mismo paso, hasta tener 21 puntos que mida igual 6 centímetros sacamos los palillos de la máquina voy bajando el tejido y jalando el hilo naranja del centro hasta unir los tejidos.
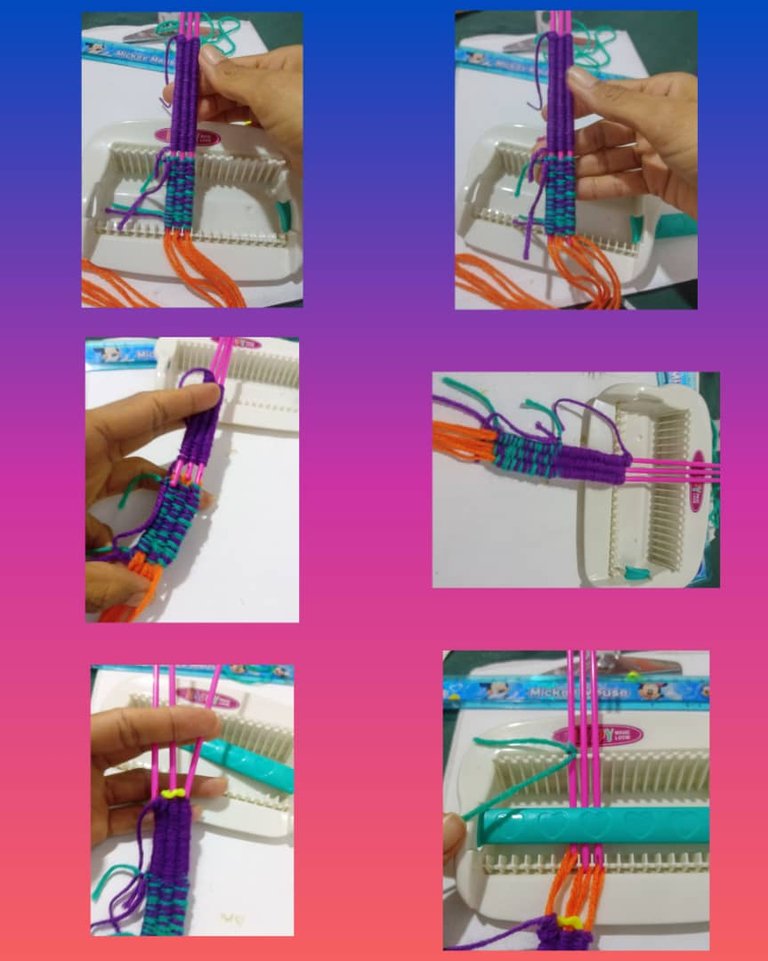
Introducimos la cuenca de color amarilla en el paso número 4 para terminar el tejido volvemos aplicar el mismo paso hasta tener los 21 puntos, sacamos los palillos de la máquina y voy bajando el tejido por el centro del hilo naranja sacando hasta ajustar y terne el cierre de collar cortamos el hilo sobrante y vea como me quedo muy lindo sus colores.
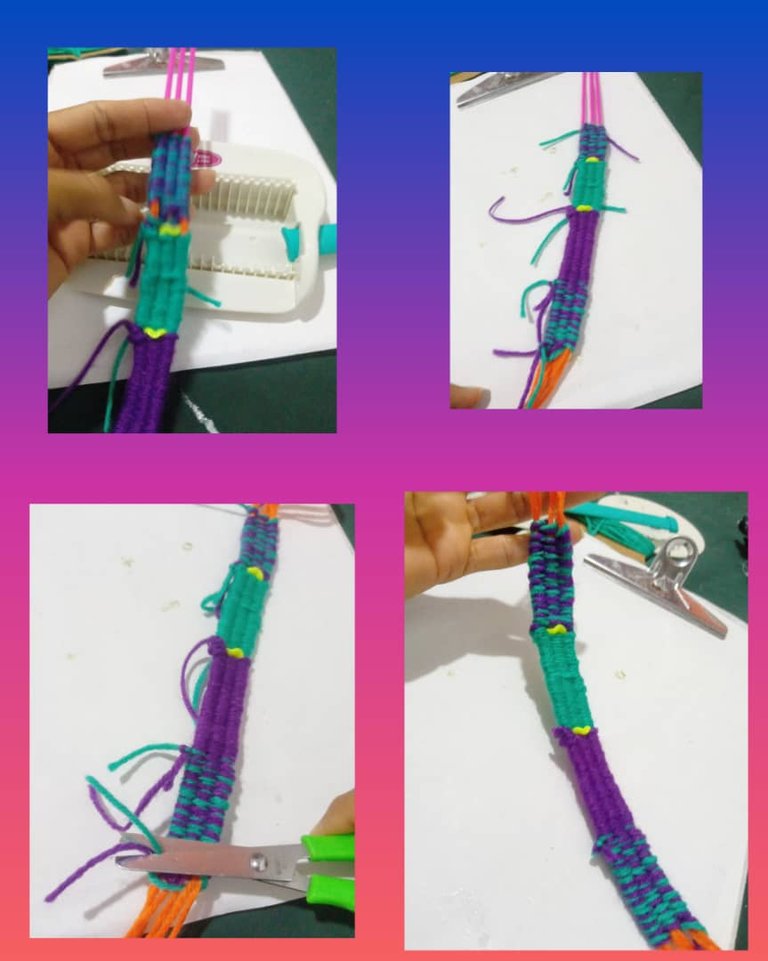
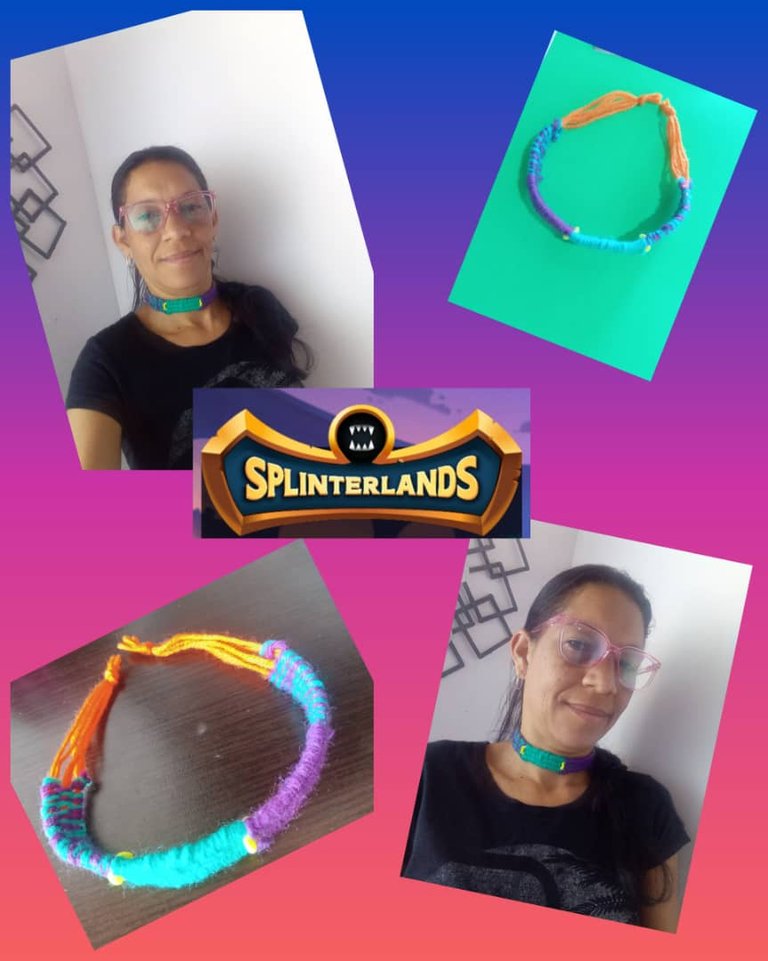
Vea el resultado final, me quedo muy lindo mi gargantilla para usarla en la temporada de vacaciones. Espero que le guste mucho.
Tenga un feliz días y bendecidos para todos, muchas gracias por leer mi post.
Las fotos son mías, tomadas con teléfono, Alcatel, editadas con incollage y traducidas con DeepL.
Mi versión inglesa.
Welcome to my blog!
Hello to all my people of this community, @DIYHub, it is a pleasure to return to this nice community, today I bring you a beautiful choker knitted with yarn inspired by Djinn Chwala from Splinterlands, the djinn are dragon monster, and it is of epic type it is said that time of after making released, most of them saw their elemental captivity as a blessing instead of curse, they had a much greater power than before, now they were working with the force of the planet. I was inspired by DJINNCHWALA from @Splinterlands for its colors that conveys power and feeling confident in every battle. I hope you like my, beautiful accessory.
Materials.
- 4 meters of green thread.
- 4 meters of purple thread.
- 2 meters of orange color.
- A knitting machine.
- 1 knitting stick.
- 2 bowls of yellow color.
- 1 ruler scissors.
Step.
First I measure 6 meters of yellow knitting yarn the one that will go in the center of the weave and will be the closure of the choker using 2 meters on each rod or knitting stick.
Then I measure 4 meters of purple and 4 meters of green.
I start introducing the orange thread in the 3 sticks and we place it in the machine, we attach it to start weaving.
Now we take 1 meter of purple color, 1 meter of green color, we attach it on the rod or stick on the left side so that it does not unravel.
We begin to weave the thread seeing that both threads will go together in the first step, I take both threads I pass it under the stick where we adjust it, we pull it through the middle stick passing both threads through the top I pass it under the stick on the left side we pull it.
Then I go back applying the same step, pass the thread under the right side stick and pull it over the middle stick, then pull the thread under the left side stick, pull it to adjust the thread.
Again I apply the same I pass the thread under the stick on the left side we pull it over the middle stick, then I pull the thread under the stick on the right side we pull it and so on successively I am doing the weaving until we have 21 a point we measure it with the ruler that has 6 centimeters each woven color at the end of the weaving we make a knot so it does not unravel on the left side of the stick.
Once the first weaving of assorted colors is finished, we go down the thread in the part below the machine to make the other step.
.
Now comes the second step of the purple color, we adjust the yarn on the left side stick, we apply the same procedure again, we pass the yarn under the left side stick, or we pull the yarn over the right side stick, we pull it to adjust it.
I return from the right side I pass the thread under the stick and pull it over the middle stick, I pass it under the stick on the left side and pull it, so I go until I have 21 stitches of purple color and measure 6 centimeters we remove the sticks from the machine, we go down the fabric in the orange thread, we introduce a yellow basin in the middle of the stick, to start making the other green fabric.
Now we apply step number 3 which is the green fabric, we return to do the same procedure we adjust the green thread on the green stick, we pass the thread under the stick on the left side we remove it above the stick in the middle I pass it under the stick on the right side I return doing the same step, until we have 21 points that measure equal 6 centimeters we remove the sticks from the machine I go down the fabric and pulling the orange thread from the center to join the fabrics.
Have a happy day and blessed to all, thank you very much for reading my post.
The photos are mine, taken with phone, Alcatel, edited with incollage and translated with DeepL.
