Feliz día para todos las creadoras y creadores de esta comunidad, encantada de realizar otro tutorial de lo más disfruto que es crear con mis manos.
Esta vez realicé unos maxi-zarcillos utilizando la técnica soutache, usé varios colores para que puedan ser muy fáciles de combinar y además tengan un toqué étnico.
Happy day to all the creators of this community, I am happy to make another tutorial of what I enjoy the most which is to create with my hands.
This time I made some maxi earrings using the soutache technique, I used several colors so that they can be very easy to combine and also have an ethnic touch.

Materiales:
- Cordones soutache, 5 colores diferentes.
- Mostacillón y mostacillas.
- Silicón frío.
- Piedras facetadas, planas y redondas.
- Aguja e hilo nylón.
- Tijera.
-Fieltro y bipiel.
Materials:
- Soutache laces, 5 different colors.
- Beads and beads.
- Cold silicone.
- Faceted, flat and round stones.
- Needle and nylon thread.
- Scissors.
- -Felt and bipiel.

Lo primero que hice es pegar la piedra plana en el fieltro con un toque de silicón.
Corté tres cordoncitos, dos azules y uno magenta. Los pego al rededor de la piedra con silicón frío en sentido hacía arriba.
The first thing I did was to glue the flat stone on the felt with a touch of silicone.
I cut three little cords, two blue and one magenta. I glue them around the stone with cold silicone in an upward direction.

Esta parte es opcional pero a mi me gusta ponerle los primeros mostacillones directo al fieltro. Lo pegamos con silicón y seguimos pegando el resto de cordones.
Cortamos dos verdes, uno amarillo y dos rojos. Estos deben ser pegados dejando medio centímetro entre ellos, para poder agregar los mostacillones.
This part is optional but I like to put the first beads directly on the felt. We glue it with silicone and continue gluing the rest of the cords.
We cut two green, one yellow and two red. These should be glued leaving half a centimeter between them, to be able to add the beads.

Al tener esto ya pegado vamos a recortarlo del fieltro. Quitando con cuidado los excedentes para que no nos molesten a la hora de agregar los mostacillones.
Once this is glued, we are going to cut it out of the felt. Carefully removing the excess so that it does not bother us when adding the beads.


Vamos a rodear los mostacillones previamente pegados, ocultado por la parte trasera los hilos azules y el magenta.
Luego colocaremos los mostacillones azul rey y los rodearemos con los hilos verdes amarillo, pegándolos por la parte posterior.
Haremos lo mismo con los dos cordones rojos y dos mostacillones rojos de cada lado.
We are going to surround the previously glued beads, hiding the blue and magenta threads at the back.
Then we will place the king blue beads and surround them with the green and yellow threads, gluing them on the back.
We will do the same with the two red cords and two red beads on each side.
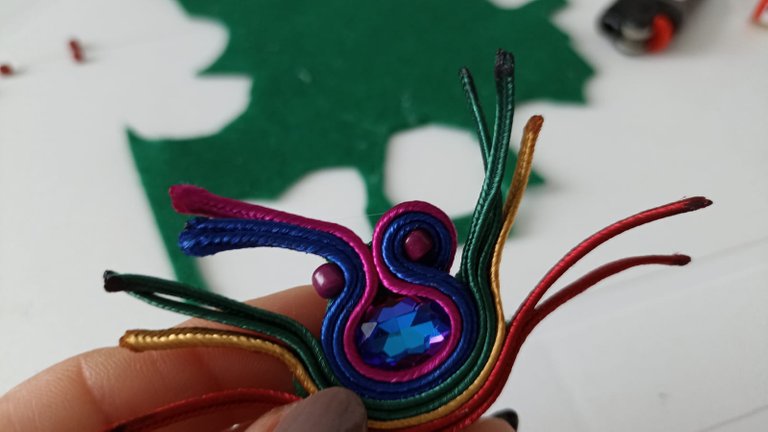


Picaremos tres cordones azules de aproximadamente 2 cm, y vamos a envolver un mostacillón rojo. Esto lo haremos dos veces.
Cuando estén los dos vamos a pegarlos junto nuestro cordón rojo de la pieza que ya trabajamos.
We will chop three blue cords of approximately 2 cm, and we will wrap a red beads. We will do this twice.
When they are both ready, we will glue them together with our red string from the piece we have already worked on.


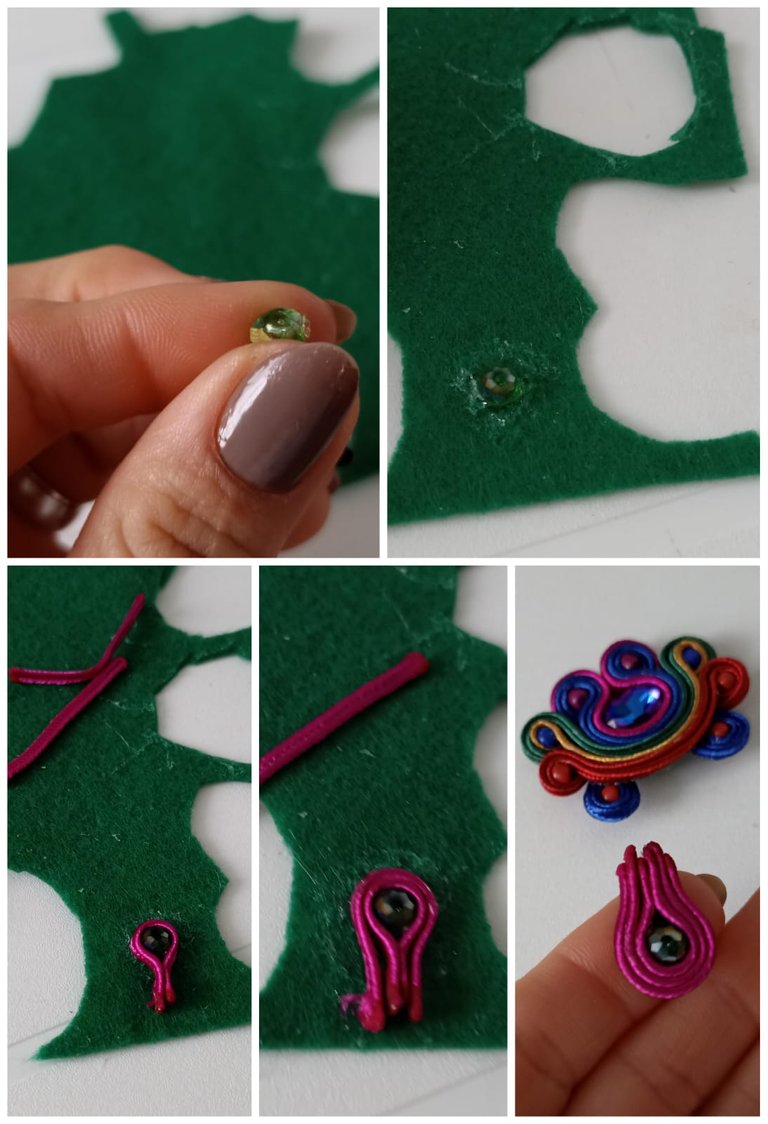
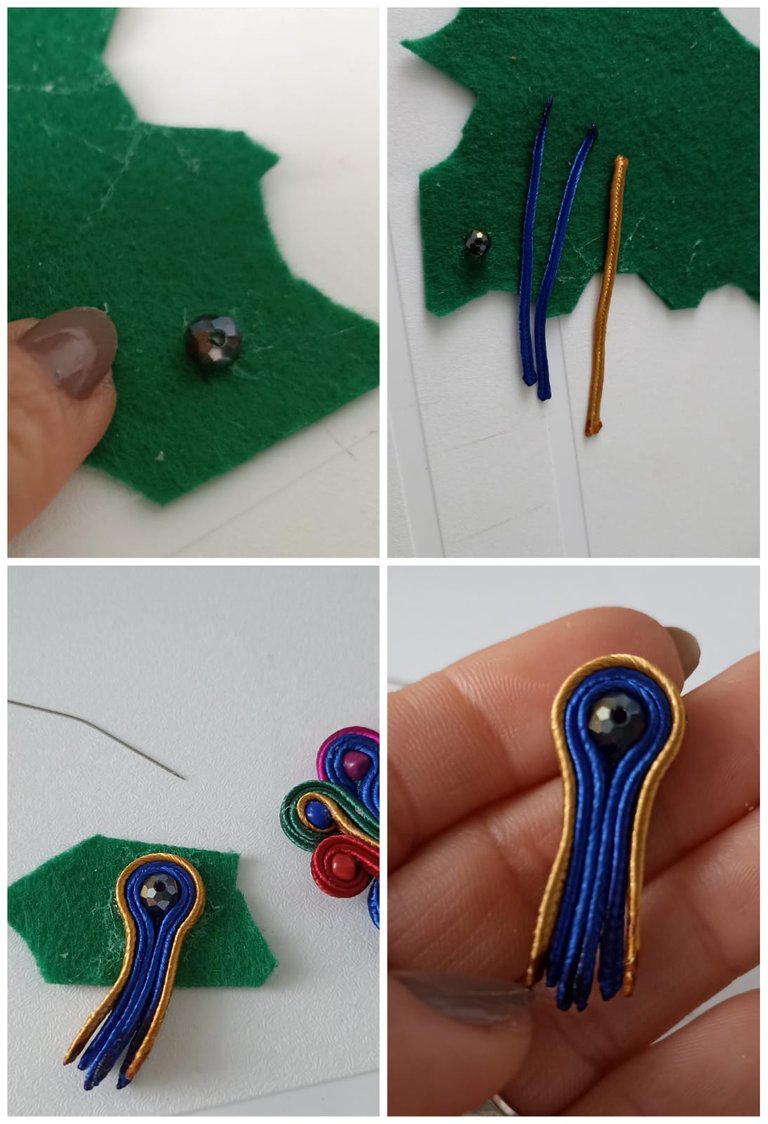
Repetimos el mismo procedimiento con una piedra facetada verde, la vamos a pegar del fieltro y vamos a rodearla con tres cordoncitos de color magenta.
Luego la recortamos y pegamos en el medio de los dos azules que hemos hecho antes.
Repeat the same procedure with a green faceted stone, glue it to the felt and surround it with three magenta cords.
Then we cut it out and glue it in the middle of the two blue ones we made before.

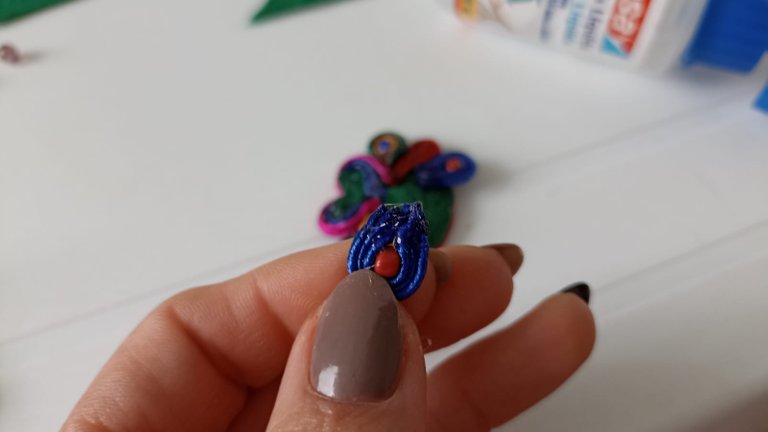
Con aguja e hilo vamos a atravesar la piedra verde por su huequito del centro y vamos a coser una mostacilla plateada en el centro para que le de un lindo toque.
With needle and thread we will pierce the green stone through the hole in the center and we will sew a silver bead in the center to give it a nice touch.

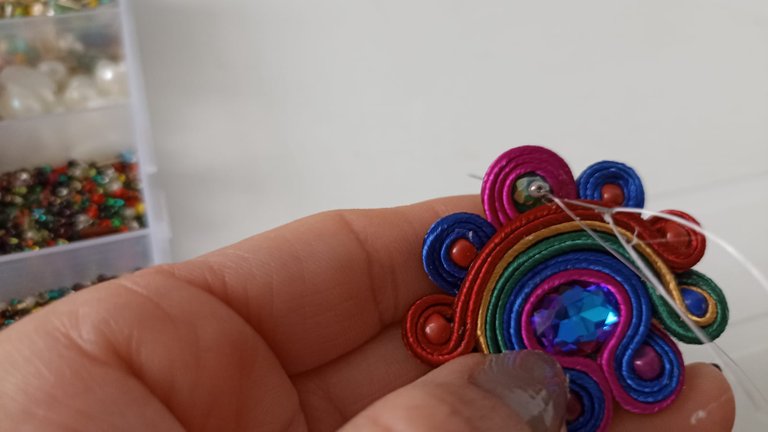

Con este mismo hilo y aguja vamos a bordar al rededor de el hilo externo magenta, vamos a coser de tres en tres cada puntada para salga una especie de decorado en triangulo, usaré mostacillas plateadas.
With this same thread and needle we are going to embroider around the magenta external thread, we are going to sew three by three each stitch to get a kind of triangle decoration, I will use silver beads.


Con esos pasos ya tenemos nuestra parte de abajo lista.
Ahora pegaremos del fieltro la piedra facetada morada, y rodearemos pegando dos cordones azules y uno amarillo y recortamos del fieltro.
With these steps we already have our bottom part ready.
Now we will glue the purple faceted stone to the felt, and we will surround it by gluing two blue and one yellow string and cut it out of the felt.
Los cordones que sobran, los pegaremos por la parte de atrás de nuestra piecita.
The remaining laces will be glued to the back of our little foot.


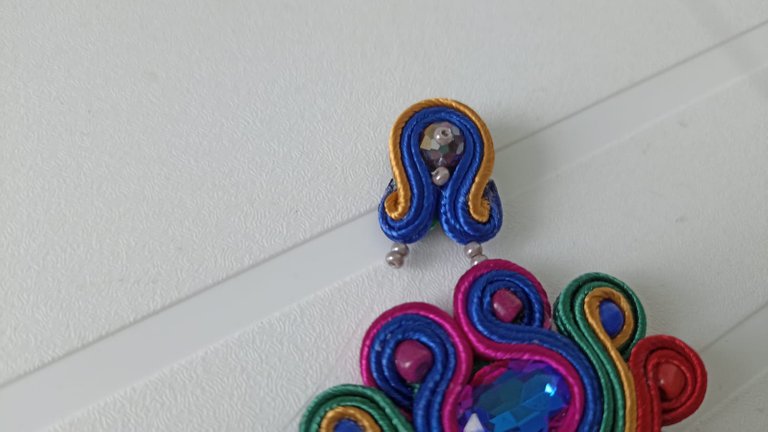
La vamos a unir con dos mostacillas utilizando por supuesto aguja e hilo nylón. Desde los centro de la pieza grande y pequeña.
Además, coseremos una mostacilla en el centro de los hilos azules de la pieza pequeña, y otra en el centro de la piedra morada, luego bajaremos nuevamente hacía la pieza grande con dos mostacillas para terminar de unificar. Siempre cerrando con nudos sencillos cada paso por detrás.
We are going to join it with two beads using of course needle and nylon thread. From the center of the large and small piece.
In addition, we will sew a bead in the center of the blue threads of the small piece, and another in the center of the purple stone, then we will go down again to the large piece with two beads to finish unifying. Always closing with simple knots each step at the back.


Tomaremos hilo y aguja y vamos a bordar de tres en tres dos puntadas de mostacillas en la parte de arriba de nuestra pieza pequeña.
We will take thread and needle and we will embroider in threes two stitches of beads on the top of our small piece.


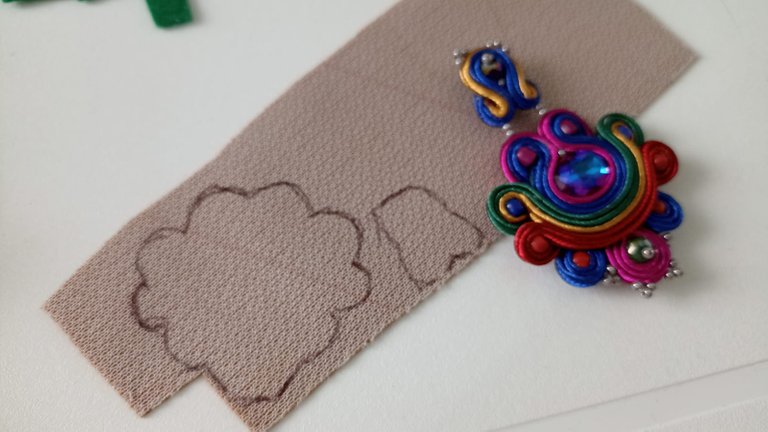
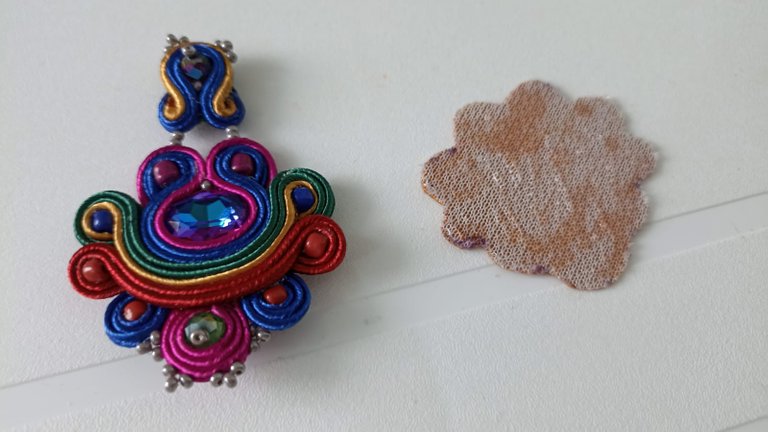
Ya esta listo nuestro arete, vamos a marcar con un lápiz o lapicero la forma de nuestro zarcillo en la bipiel para luego recortarlo, y pegarlo en la parte trasera de nuestro accesorio para que tape todos los procedimientos y la costura.
Cuando vayamos apegar la bipiel en la pieza de arriba agregaremos el topito del zarcillo.
Now our earring is ready, we are going to mark with a pencil or pen the shape of our tendril on the bipiel and then cut it out, and glue it on the back of our accessory so that it covers all the procedures and the stitching.
When we are going to attach the bipiel to the top piece we will add the topito of the tendril.


Así ya hemos terminado unos aretes hermosos, llenos de color, y versatilidad para usar cuando quieras.
Recuerda que un buen accesorio puede impulsar tu look.
So we have finished beautiful earrings, full of color, and versatility to wear whenever you want.
Remember that a good accessory can boost your look.

Todos los trabajos realizados a mano requieren de tiempo y dedicación, pero sin duda al terminarlos tendrás un accesorio hecho con mucho amor.
Espero hayas disfrutado este tutorial, agradezco tu apoyo en mi blog.
All handmade works require time and dedication, but no doubt when you finish them you will have an accessory made with love.
I hope you enjoyed this tutorial, I appreciate your support on my blog.

Fotografías de mi autoría, Redmi 10
Collages realizados con editor Xiaomi
Traducción con Deepl, versión gratuita.
Photographs of my authorship, Redmi 10
Collages made with Xiaomi editor
Translation with Deepl, free version.