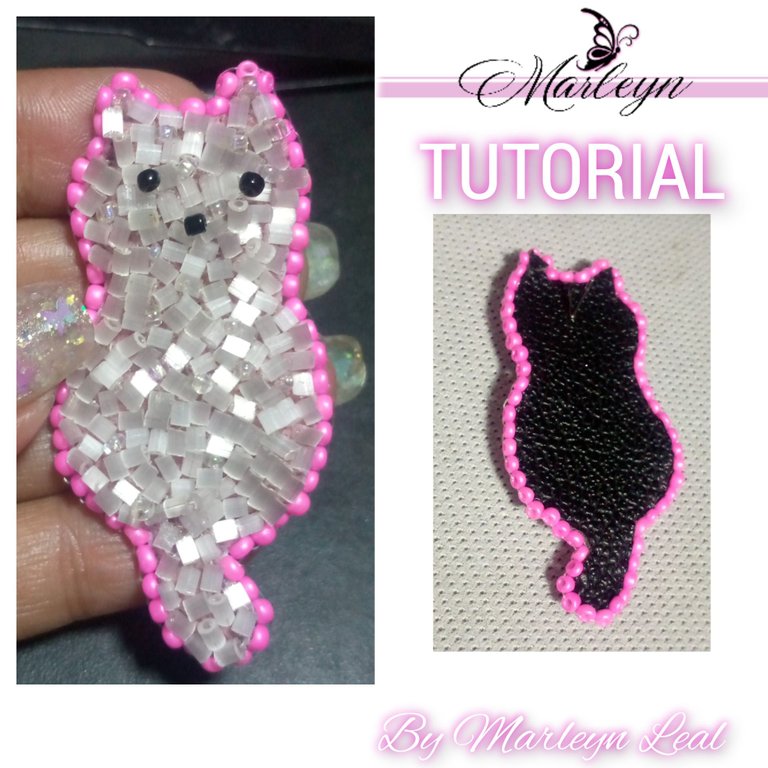
Feliz y bendecido día, espero se encuentren muy bien, llenos de buena energía, brillando, creciendo y sobre todo siendo cada día su mejor versión, el día de hoy les he realizado unos zarcillos bordados de gato, utilizando canutillos partidos color blanco hielo.. Este es uno de los primeros modelos que hago aún no me quedan muy bonitos, quizás soy muy perfeccionador pero creo que mientras mejor es tu trabajo mejor receptividad tiene al salir a la vida, estos aretes son un pedido personalizado para una amiga muy especial que ama los Gatos.
Happy and blessed day, I hope you are very well, full of good energy, shining, growing and above all being every day your best version, today I have made you some embroidered cat earrings, using white ice colored split canutillos. This is one of the first models that I make, they are still not very nice, maybe I am a perfectionist but I believe that the better your work is the better receptivity it has when it comes to life, these earrings are a custom order for a very special friend who loves Cats.
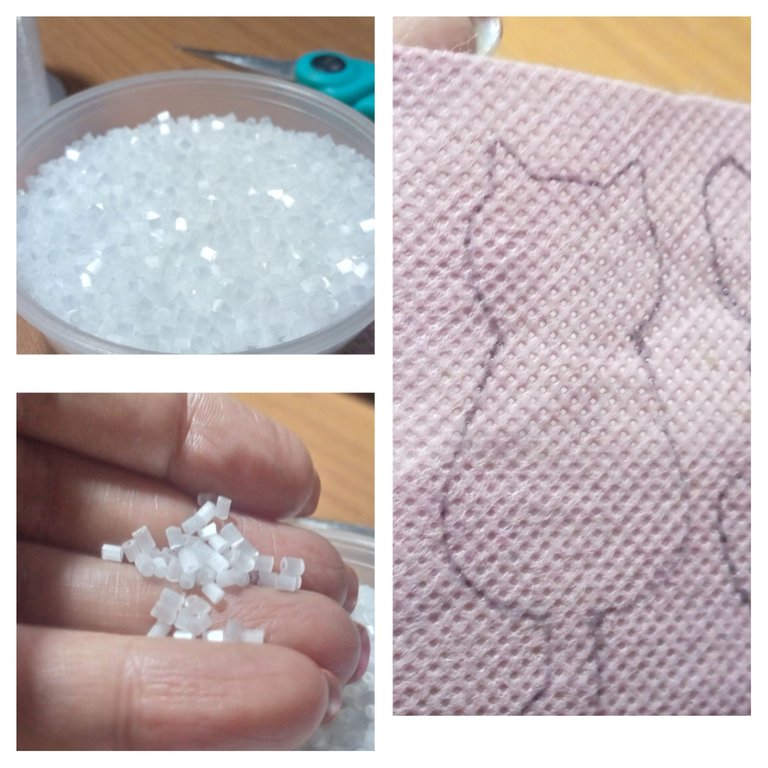
Materiales: Canutillo partido blanco hielo o el color de tu preferencia, Tela pop, tijera, aguja, hilo, molde con la figura a bordar, Cuero o tela gruesa, Base de zarcillo plana pequeña aproximadamente .5 milímetros de diámetro, mostacillas transparentes tornasol, 6 mostacillas negras, Animo, Paciencia y Amor por lo que hacemos.
Materials: Ice-white split beading or the color of your choice, pop fabric, scissors, needle, thread, mold with the figure to embroider, leather or thick fabric, small flat tendril base approximately .5 millimeters in diameter, transparent iridescent beads, 6 black beads, courage, patience and love for what we do.
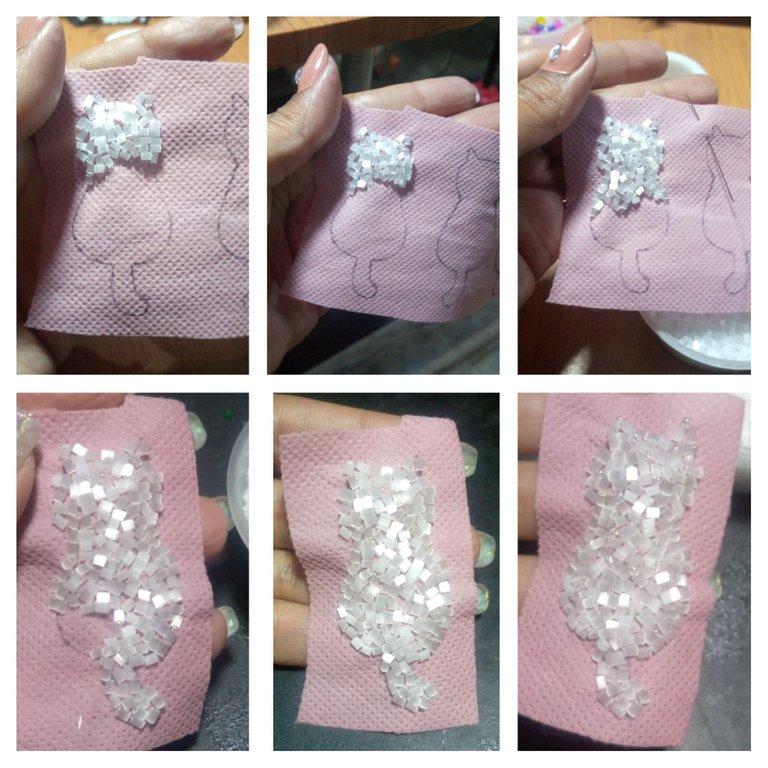
Ensarta el nailon en la aguja, realiza un nudo en la punta del hilo y comenzamos a bordar nuestra figura, paso a paso sin apresurarte, no debes seguir un patrón, es un trabajo 100% manual y lleva su tiempo aunque si te gusta realmente lo que estas haciendo es como una terapia. A mi me relaja, me encanta lo que hago y cada día aprendo mas junto a todos ustedes.
Thread the nylon on the needle, tie a knot at the end of the thread and we begin to embroider our figure, step by step without rushing, you should not follow a pattern, it is a 100% manual work and takes time but if you really like what you're doing is like a therapy. It relaxes me, I love what I do and every day I learn more with all of you.
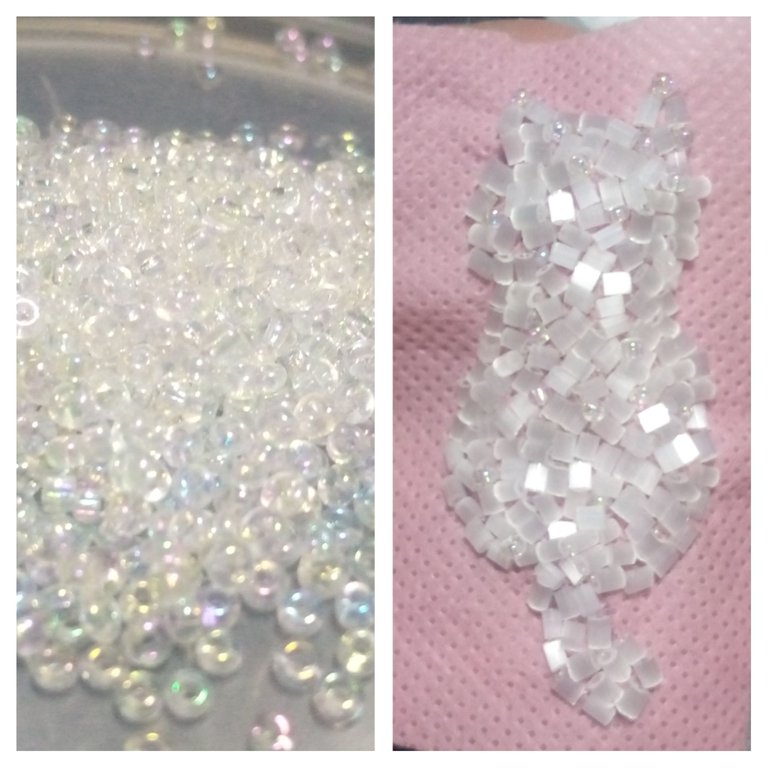
Al terminar de bordar toda la pieza note varios vacíos entre las piedras y decidí agregar estas mostacillas transparentes tornasol que le daba como cierta vida mi gato.
When I finished embroidering the whole piece I noticed several gaps between the stones and decided to add these transparent iridescent beads that gave some life to my cat.
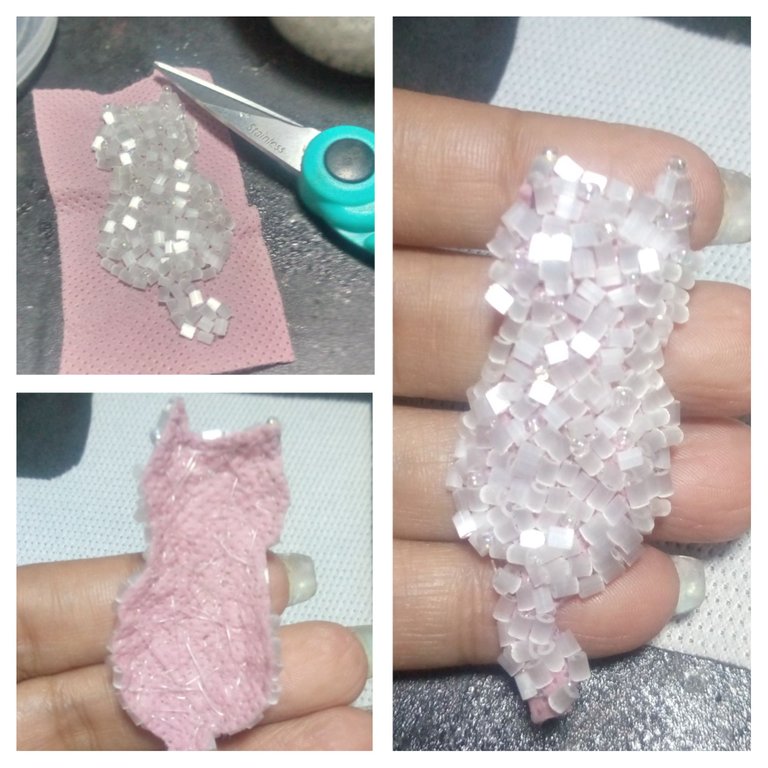
Cortamos la tela sobrante, siempre con cuidado de no cortar los hilos para no perder todo el trabajo anterior.
We cut the excess fabric, always being careful not to cut the threads so as not to lose all the previous work.
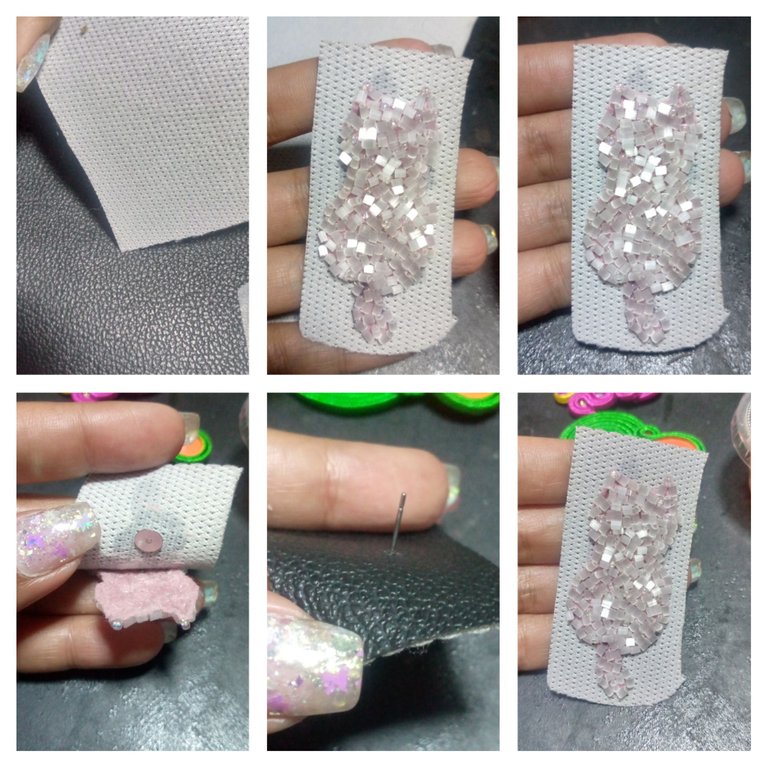
Colocamos pegamento en la parte de atrás y lo vamos a pegar en el cuero, evita colocar pegamento por toda la orilla para que no se dificulte el bordado final. puedes ver en las fotos mi proceso, no olvides colocar el pin o base de zarcillo antes de pegar el cuero, yo lo pego en la pieza, lo dejo secar y después lo ensarto en el cuero de esta manera estoy en la plena seguridad que en ambos zarcillos el pin estará colocado en la misma parte.
We put glue on the back and we are going to glue it on the leather, avoid placing glue all around the edge so that the final embroidery is not difficult. You can see in the pictures my process, do not forget to place the pin or tendril base before gluing the leather, I glue it on the piece, let it dry and then thread it on the leather in this way I am fully confident that in both tendrils the pin will be placed in the same part.
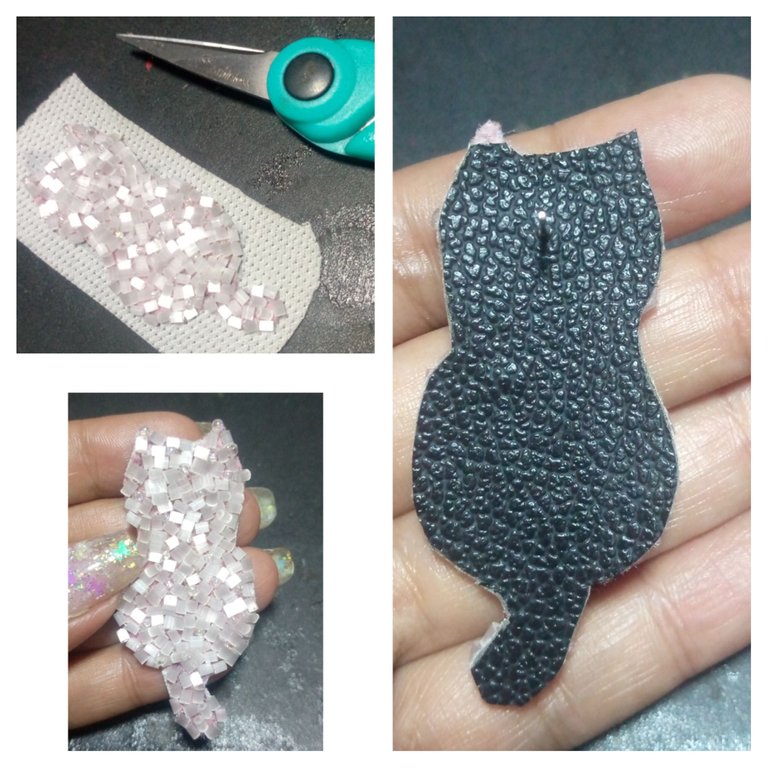
Es recomendable dejar secar la pieza un rato antes de empezar a bordar la orilla yo normalmente la dejo secar de un día para otro pero es porque hago cantidad de piezas y voy como diré, como fabricación en cadena, para mi facilidad. En esta parte me equivoque y le corte mal el cuero me comí una oreja del gato jajaja, pensé editar esta parte pero es normal equivocarnos y puede pasarte lo importante es solucionar.
It is advisable to let the piece dry for a while before starting to embroider the border, I usually let it dry overnight but it is because I make a lot of pieces and I go as I will say, as chain stitching, for my ease. In this part I made a mistake and I cut the leather wrong and I ate a cat's ear hahaha, I thought to edit this part but it is normal to make mistakes and it can happen to you, the important thing is to fix it.
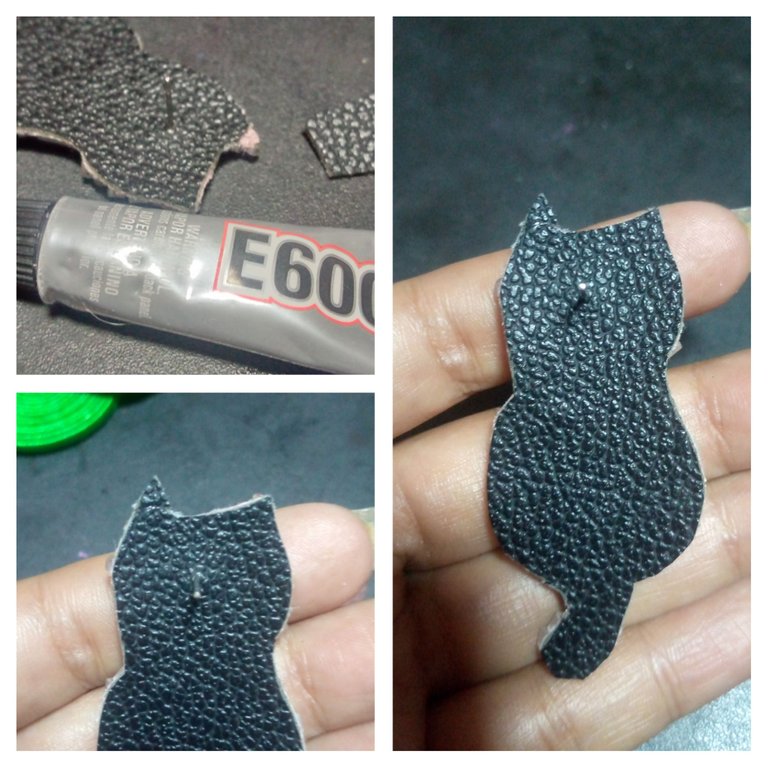
Con un poco de pega E6000 le pegue un pedacito de cuero a la oreja nuevamente no quedo perfecto pero logre salvar mi pieza.
With some E6000 glue I glued a little piece of leather to the ear again, it was not perfect but I managed to save my piece.
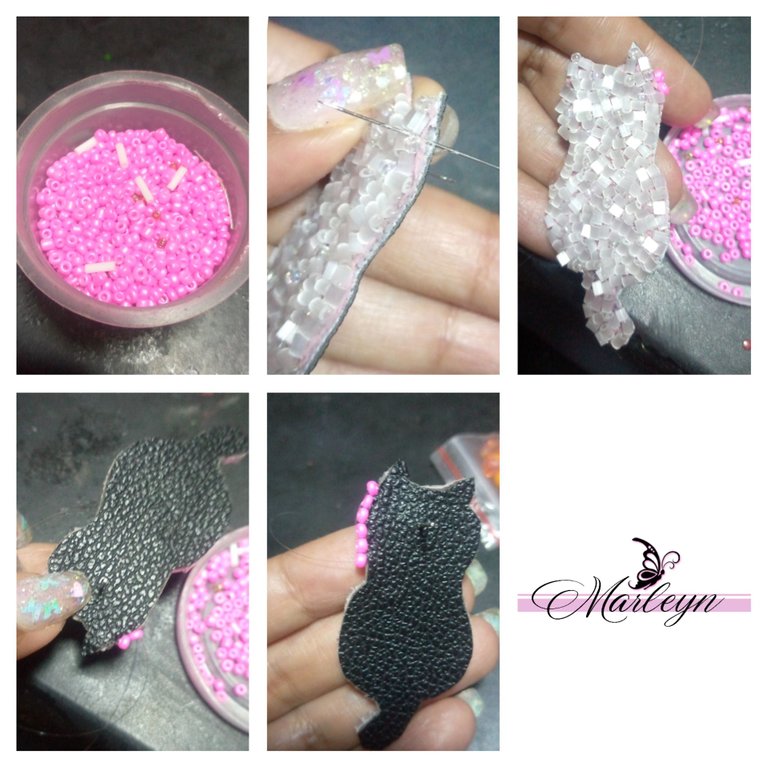
Al día siguiente comencé a bordar la orilla, quizás lo veas un poco difícil pero es realmente sencillo, ensarta la aguja con el hilo nuevamente aproximadamente un metro de hilo, realiza un amarre en la punta introduce la aguja de abajo hacia arriba por la orilla como vez en la segunda imagen, esta es una de las cosas por las que comente no colocar pegamento en la orilla, ahora baja la aguja completamente traspasando el cuero, si es posible agarrando un hilo de la parte de arriba para darle mas seguridad que no se va a desprender nuestra pieza, al sacarla por abajo por el cuero introduce una mostacilla en la aguja y ahora vuelve a pasar la aguja por el cuero, ahora subimos la aguja de abajo hacia arriba por la mostacilla, y repites todo el proceso.. Siento que es mejor un vídeo para la próxima pieza lo hare.
The next day I started to embroider the border, maybe you see it a little difficult but it is really simple, thread the needle with the thread again approximately one meter of thread, make a tie at the tip introduce the needle from the bottom up along the edge as you see in the second image, this is one of the things why I said not to put glue on the edge, now lower the needle completely through the leather, if possible grabbing a thread from the top to give you more security that our piece will not come off, to remove it from the bottom through the leather introduces a bead on the needle and now pass the needle back through the leather, now we raise the needle from the bottom up by the bead, and repeat the whole process. . I feel that a video is better for the next piece I will do it.
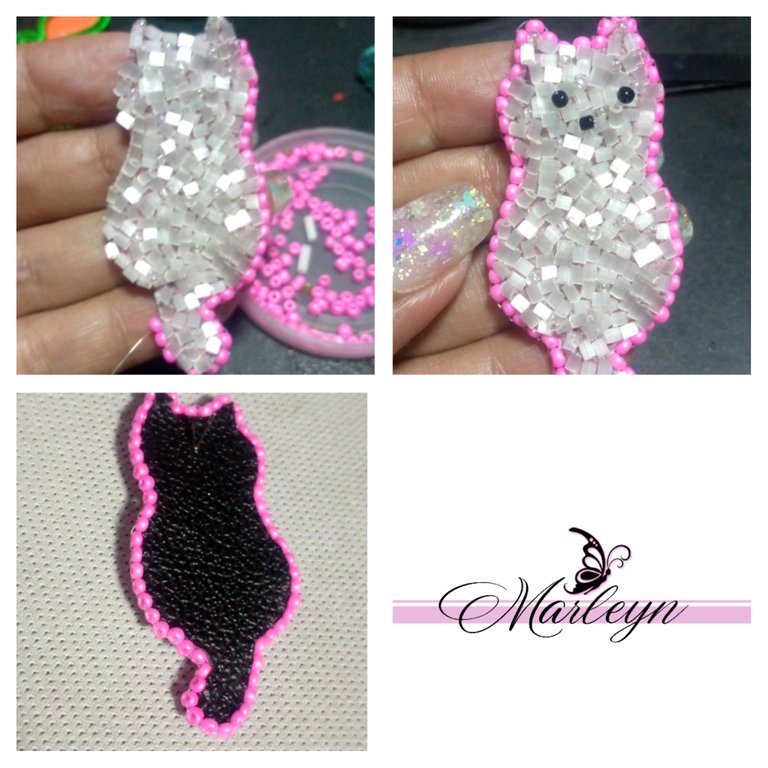
Continuamos así bordando toda la orilla tratando en lo posible de tomar las mostacillas que tengan los tamaños mas parecidos posibles. Al terminar puedes colocar unas pequeñas mostacillas negras que realcen su cara, yo este lo hice de esta manera por que fue un pedido personalizado aunque a mi particularmente me gusta mas solo la figura sin la cara. ¿Como te gustaría mas a Ti?
De esta manera hemos finalizado nuestra pequeña pieza de Gatos, como has visto en mis tutoriales y mas con esta técnica puedes hacer cualquier pieza el limite es tu imaginación.
We continue embroidering all the border trying as much as possible to take the beads that have the most similar sizes as possible. At the end you can place a few small black beads to enhance his face, I did it this way because it was a custom order although I particularly like the figure without the face. How would you like it better?
In this way we have finished our little piece of Cats, as you have seen in my tutorials and more with this technique you can make any piece the limit is your imagination.





IMAGENES CREADAS EN CANVA
IMAGES CREATED IN CANVA
