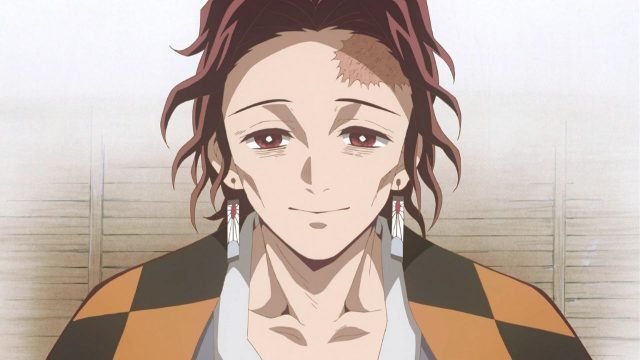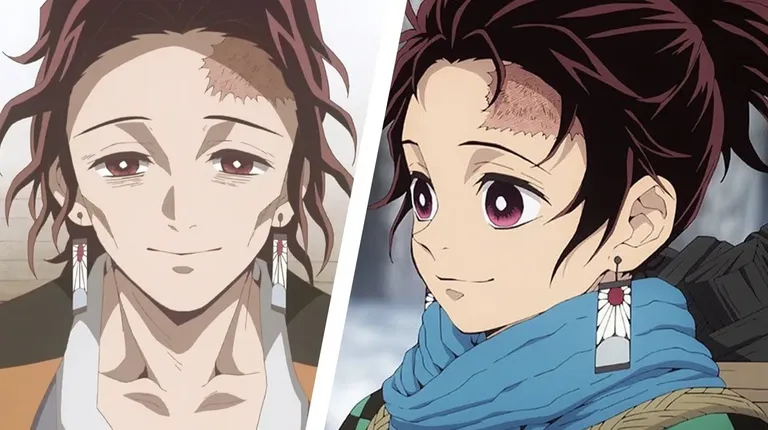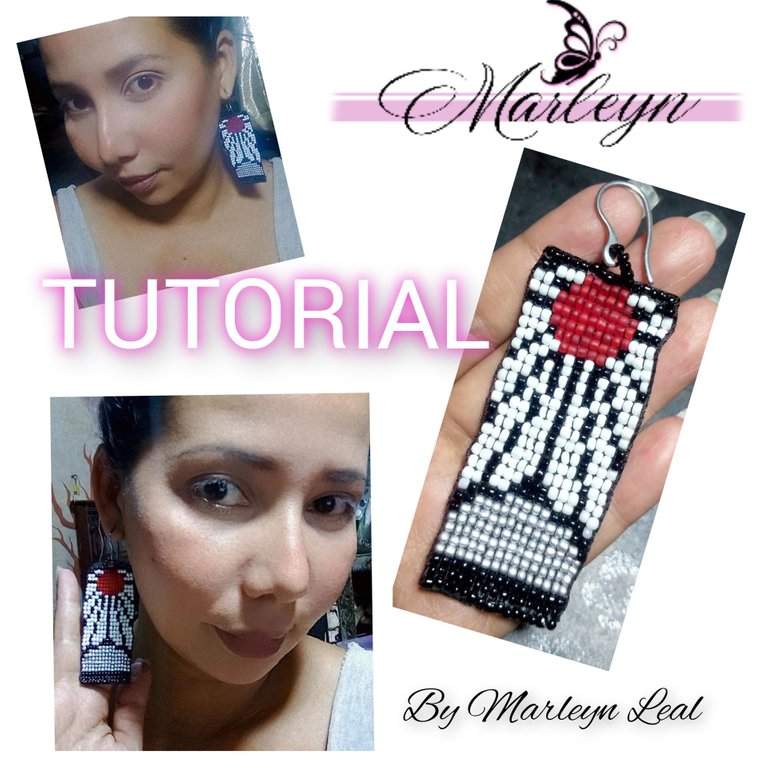
Feliz y Bendecido nuevo día, espero estén super bien, brillando, creciendo y siendo cada día su mejor versión... hoy e realizado un tutorial de unos hermosos pendientes de una serie de anime es Kimetsu no Yaiba muy popular entre mis hijos y sus amistades! Yo no la e visto incluso no sabia nada de esta serie pero conseguí información en una pagina web que por aquí o tambien abajo les dejo un pequeño dato informativo que extraje de la misma, y si quieres ahondar mas en la historia te invito a leer su publicación completa. Estos pendientes eran importantes para mi hija @ana.elizabeth tenia un tiempo solicitando que por favor se los fabricara y yo entre mis ocupaciones no los había realizado... estos los hice de prueba, aunque como hermosa mujer creativa ya en mi mente encontré varias maneras de hacerlos diferentes con un mejor resultado, esto es ensayo y error para lograr siempre algo mejor. Quizás con la técnica puntada de Ladrillo quede mejor, lo intentare pronto.
Happy and Blessed new day, I hope you are super well, shining, growing and being every day your best version... today I made a tutorial of some beautiful earrings of an anime series is Kimetsu no Yaiba very popular among my children and their friends! I didn't even know anything about this series but I got information on a website that here or also below I leave a little information that I extracted from it, and if you want to delve more into the story I invite you to read their full publication. These earrings were important for my daughter @ana.elizabeth, she had been asking me for a while to please make them for her and I had not made them... I made these as a test, although as a beautiful creative woman in my mind I found several ways to make them different with a better result, this is trial and error to always achieve something better. Maybe with the Brick stitch technique it will be better, I will try it soon.
Según la pagina epic dope Kimetsu no Yaiba es una serie de manga japonesa escrita e ilustrada por Koyoharu Gotoge. Su publicación en Weekly Shonen Jump de Shueisha comenzó en febrero de 2016 y finalizó en mayo de 2020 con 23 volúmenes de tankōbon recopilados.
En un mundo lleno de demonios y asesinos de demonios, Kimetsu no Yaiba sigue la vida de dos hermanos, Tanjiro y Nezuko Kamado, después del asesinato de su familia a manos de un demonio. Sus dificultades no terminan ahí, ya que la vida de Nezuko se salva solo para que ella viva como un demonio.
According to epic dope site Kimetsu no Yaiba is a Japanese manga series written and illustrated by Koyoharu Gotoge. Its publication in Shueisha's Weekly Shonen Jump began in February 2016 and ended in May 2020 with 23 collected tankōbon volumes.
In a world full of demons and demon killers, Kimetsu no Yaiba follows the lives of two siblings, Tanjiro and Nezuko Kamado, after the murder of their family at the hands of a demon. Their difficulties don't end there, as Nezuko's life is saved only for her to live as a demon.
Los pendientes de Tanjiro son pendientes de Hanafuda que tradicionalmente se han transmitido de generación en generación. Los pendientes han sido usados por el padre de Tanjiro, Tanjuro, y el primer usuario de Breath of the Sun en la historia, Yoriichi Tsugikuni.
Tanjiro's earrings are Hanafuda earrings that have traditionally been passed down from generation to generation. The earrings have been worn by Tanjiro's father, Tanjuro, and the first Breath of the Sun user in history, Yoriichi Tsugikuni.
De todas maneras si quieres ahondar en la información de la serie puedes ingresar en la pagina anteriormente mencionada donde explica a detalle esta interesante serie, para los amantes del anime estos pendientes son sumamente solicitados. Así como también en los enlaces de las imágenes.
Todos los materiales son de fácil acceso , para fabricarlos requieres mas paciencia que materiales.
Anyway if you want to delve into the information of the series you can enter the aforementioned page where he explains in detail this interesting series, for anime lovers these earrings are highly requested. As well as the links to the images.
All the materials are easily accessible, to make them you need more patience than materials.
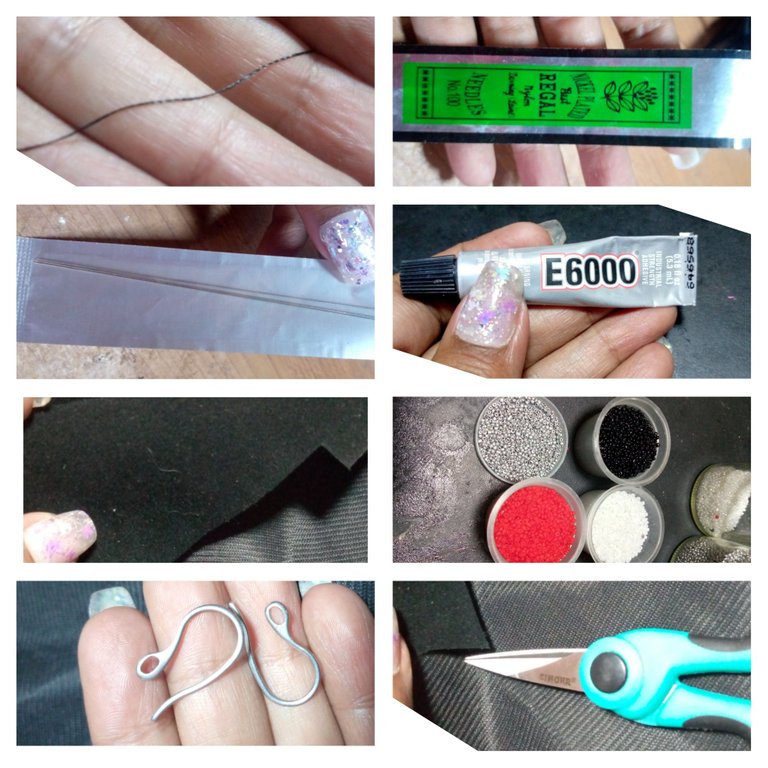
Materiales: Mostacillas #11 color Rojo, Negro, Blanco y plateado o gris, tijera, encendedor, pegamento yo recomiendo la E6000, tela de Gamuza, base de zarcillo tipo anzuelo, agujas para telar, un telar de mostacillas, hilo nailon negro, hilo chino 0.8 milímetros,y como siempre te digo mucha Paciencia y amor por lo que hacemos. (Si tienes la posibilidad de realizarlo con las miyuki seria lo mejor, la perfección, bellos)
Materials: Red, black, white and silver or gray beads #11, scissors, lighter, glue, I recommend E6000, chamois cloth, hook type tendril base, loom needles, a bead loom, black nylon thread, Chinese thread 0.8 millimeters, and as I always tell you a lot of patience and love for what we do. (If you have the possibility to do it with the miyuki it would be the best, perfection, beautiful).
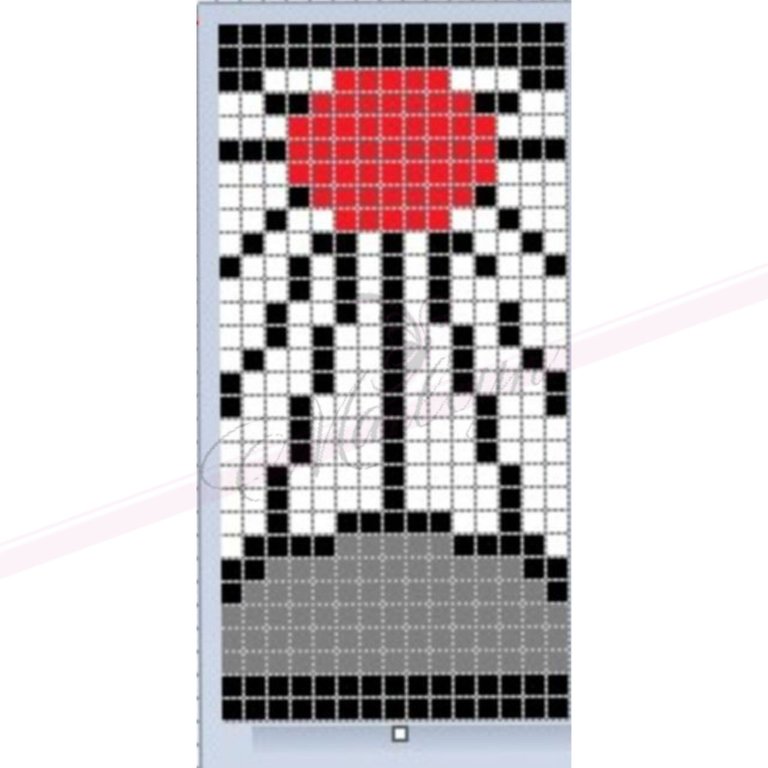
En la imagen de arriba les dejo un patrón de donde va cada mostacilla según su color en el telar para de esta manera formar la figura. Este patrón me lo realizo mi hijo, el estudia diseño gráfico pero olvide preguntar detalles de que programa utilizo, estaré pendiente de preguntar para dejarlo por los comentarios luego.
In the image above I leave a pattern of where each bead goes according to its color on the loom to form the figure. This pattern was made by my son, he studies graphic design but I forgot to ask details of what program I use, I'll be pending to ask to leave it in the comments later.
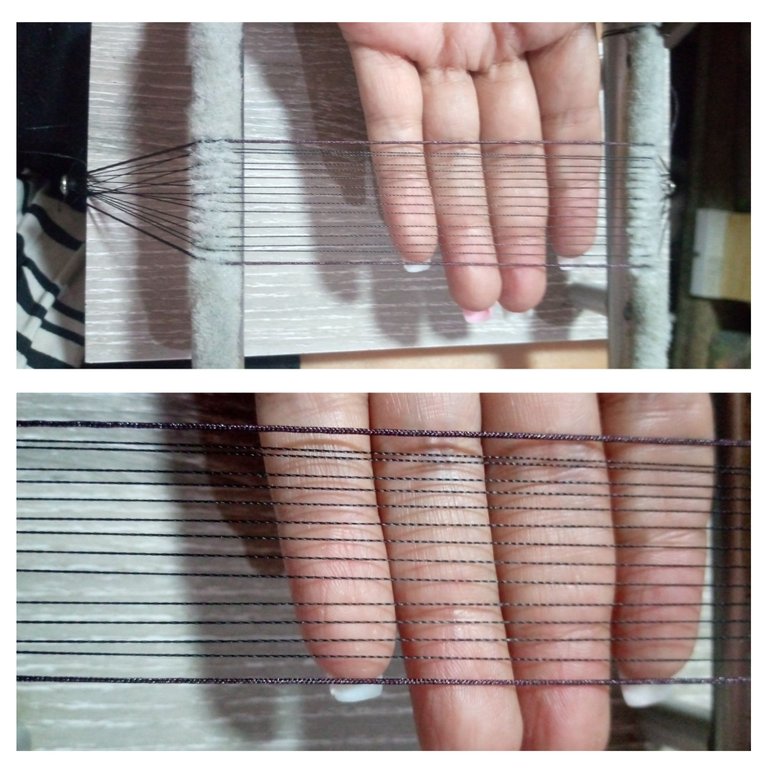
Paso 1: Yo tengo un telar artesanal que lo elaboro mi novio para mi hace un tiempo, debemos colocar 15 hilos bien prensados, donde los hilos de cada punta sean los mas gruesos en este caso utilice hilo chino de 0.8 milímetros de grosor.
Step 1: I have a handmade loom that my boyfriend made for me some time ago, we must place 15 threads well pressed, where the threads of each end are the thickest in this case I used Chinese thread of 0.8 millimeters thick.
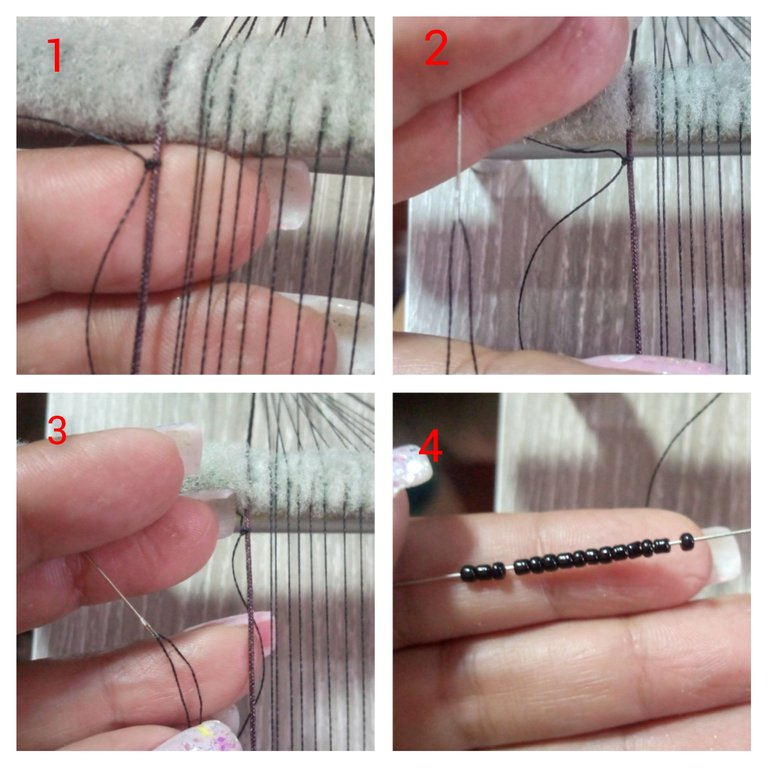
Paso 2: Vamos a tomar un hilo de aproximadamente 1 metro, una punta la vamos a amarrar con doble nudo en un extremo del telar y la otra punta vamos a ensartar la aguja, introduce 15 mostacillas en la aguja, si te pasa como a mi que solo tengo mostacillas chinas normales y son de tamaños distintos busca las mas parecidas en tamaño dentro de lo posible.
Step 2: We are going to take a thread of approximately 1 meter, one end we are going to tie it with a double knot at one end of the loom and the other end we are going to thread the needle, introduce 15 beads in the needle, if it happens to you like me that I only have normal Chinese beads and they are of different sizes, look for the most similar in size as much as possible.
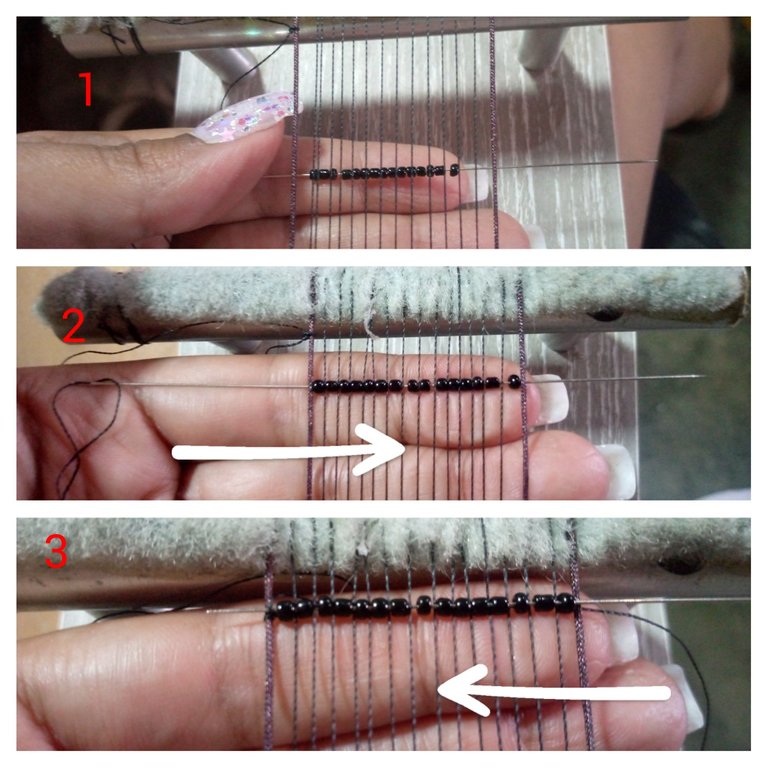
Paso 3: Coloca la aguja con las mostacillas por abajo,vamos con paciencia a arreglar las mostacillas, cada mostacilla debe quedar entre cada hilo, primero introduces la aguja por abajo, la sacas, y ahora la pasas por arriba, es decir por sobre de cada hilo a través de las mostacillas.
Step 3: Place the needle with the beads at the bottom, we will patiently arrange the beads, each bead must be between each thread, first introduce the needle from below, take it out, and now pass it from above, that is to say, over each thread through the beads.
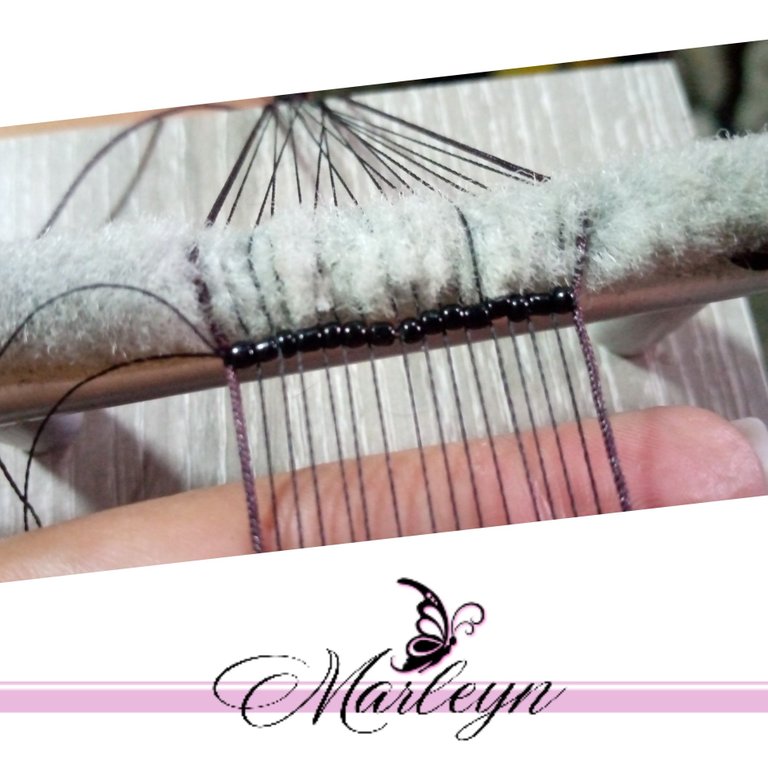
Al halar la aguja y apretar un poco debe quedarte así, yo lo apreté mucho hacia arriba, pero realmente no es necesario apretarlo tanto.
When you pull the needle and tighten it a little, it should stay like this, I tightened it upwards a lot, but it is not really necessary to tighten it that much.
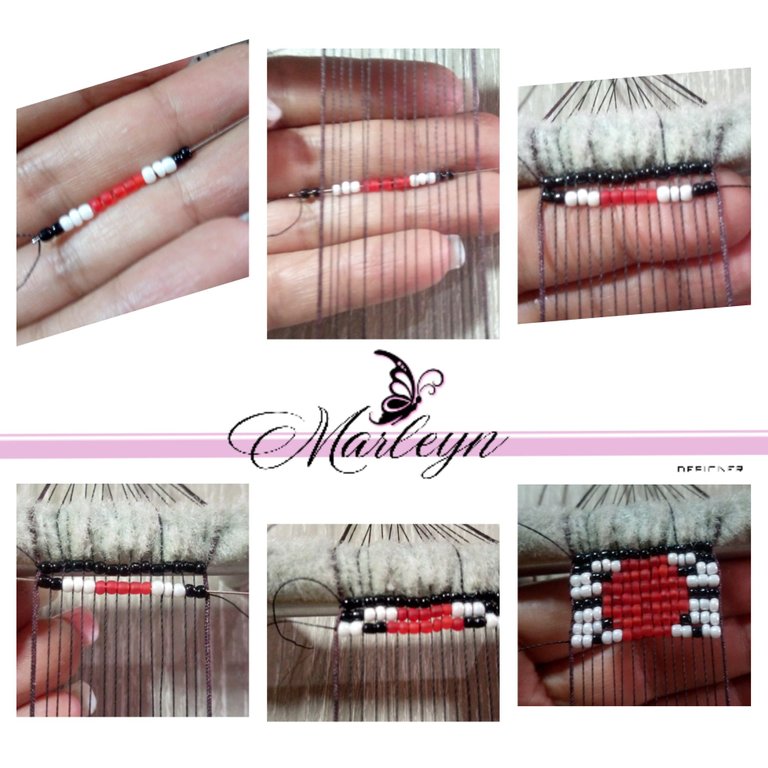
Paso 4: Vamos a realizar el mismo proceso durante toda nuestra fabricación, esto es repetitivo y netamente manual, solo debes seguir el patrón que te e dejado en la parte superior de esta publicación.
Step 4: We will perform the same process throughout our manufacturing, this is repetitive and purely manual, just follow the pattern that I left you at the top of this publication.
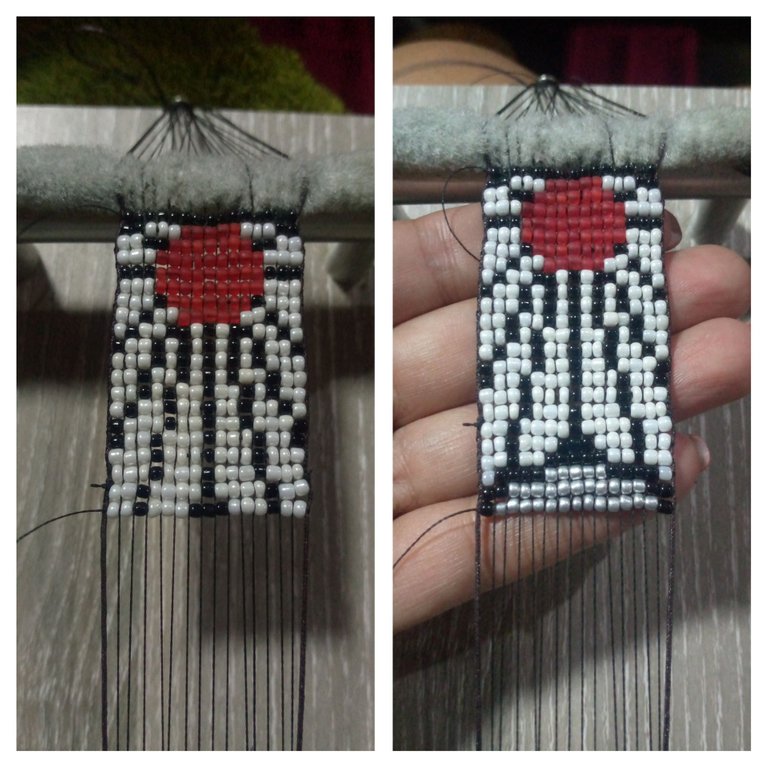
Paso 5: Siempre vamos a estar pendiente de todos los detalles y que las piedras estén bien pegadas entre ellas, para que no queden espacios vacíos o una hilera mas larga que otra que se verán algo extraños. Si el hilo se te acaba, amarra bien con nudo doble y luego vuelve a realizar el mismo proceso con el hilo que hicimos al principio, escondes el hilo entre las piedras y continuamos como si nada.
Step 5: We will always be aware of all the details and that the stones are well glued together, so that there are no empty spaces or one row longer than another that will look a little strange. If you run out of thread, tie a double knot and then repeat the same process with the thread we did at the beginning, hide the thread between the stones and continue as if nothing happened.
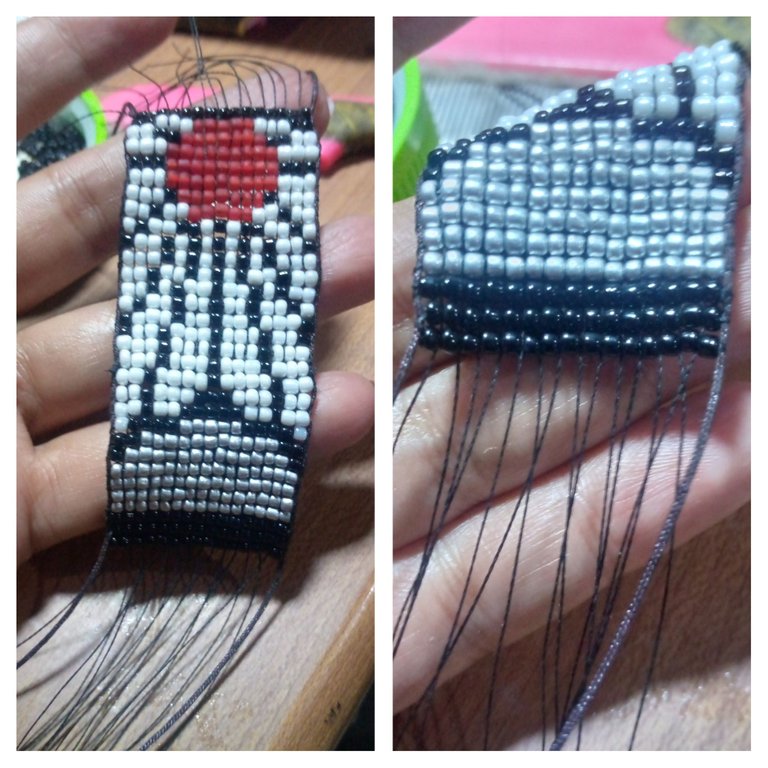
Paso 6 : Cuando terminamos por completo, soltamos los hilos... Aquí en esta parte no sabia bien que hacer por eso creo que quedara mejor con la técnica de ladrillo, yo coloque silicon liquido en las orillas y subí los hilos hasta que se pegaron, luego corte el restante.
Step 6 : When we are completely finished, we release the threads... Here in this part I didn't know what to do so I think it will be better with the brick technique, I put liquid silicone on the edges and pulled up the threads until they stuck, then cut the rest.
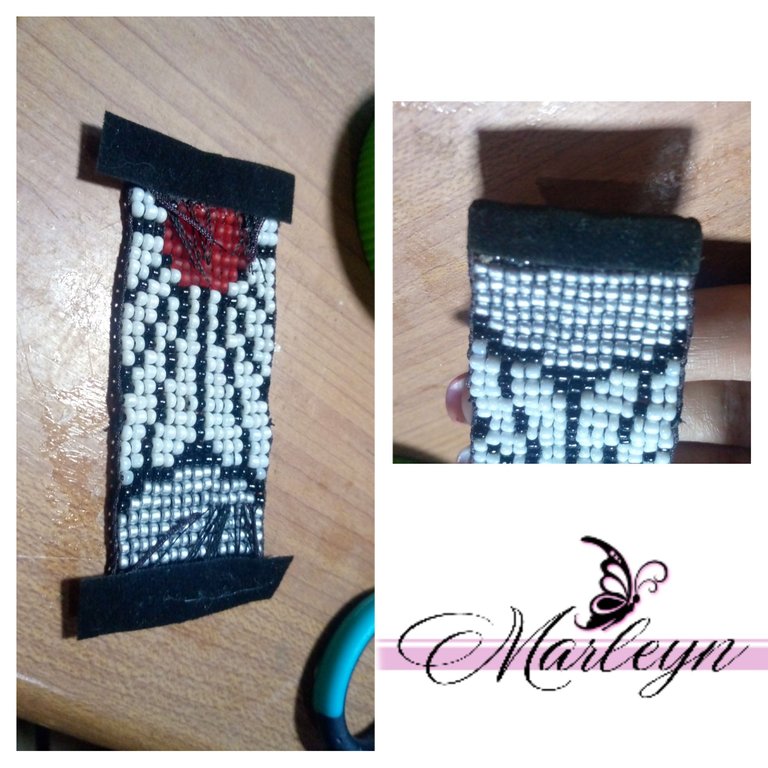
Paso 7: Le pegaremos un pedacito de gamuza en las orillas para tapar los hilos y darle mas fuerza así también un mejor acabado.
Step 7: We will glue a piece of chamois on the edges to cover the threads and give it more strength and a better finish.
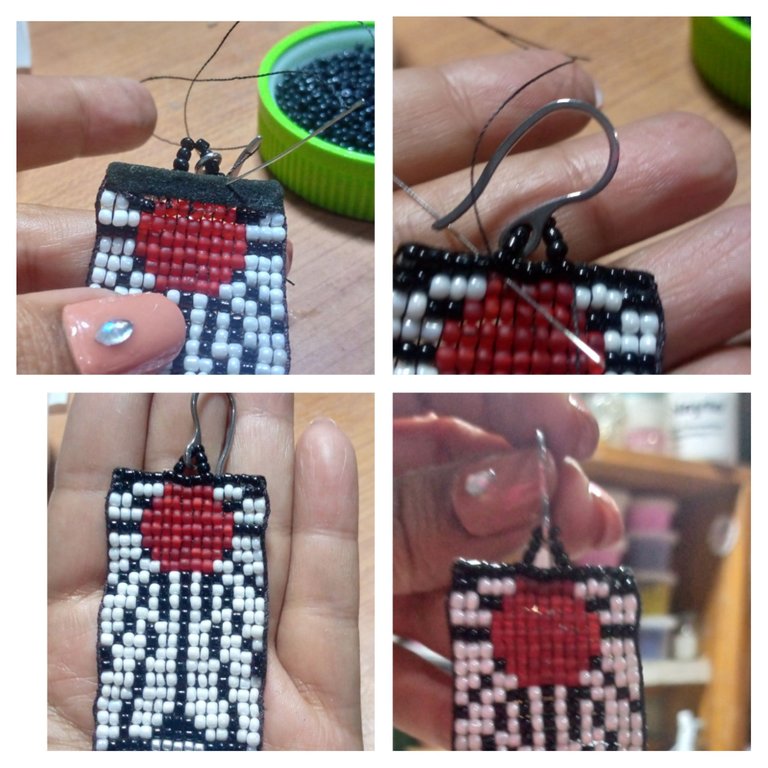
Paso 8: Ensarta la aguja nuevamente y amarra el hilo con cuidado donde no se vea, coloca 3 mostacillas introduce el anzuelo continua con 6 mostacillas mas formando un arco en el centro superior de nuestro zarcillo, amarra bien para que no se suelte y corta el hilo restante.. De esta manera hemos terminado un hermosos zarcillo largo con una extraña historia tras de el. Espero sea de tu agrado, Gracias por estar, por leer y por ser quien eres.
Step 8: String the needle again and tie the thread carefully where it is not visible, place 3 beads in the hook and continue with 6 more beads forming an arc in the top center of our tendril, tie well so that it does not come loose and cut the remaining thread... In this way we have finished a beautiful long tendril with a strange story behind it. I hope you like it. Thank you for being here, for reading and for being who you are.


IMAGENES CREADAS EN CANVA
IMAGES CREATED IN CANVA
