Creo que cada vez más, los días están pasando muy rápido ya hoy nos encontramos a mitad de semana. Es grato para mi estar de nuevo en esta estupenda comunidad @jewelry, durante todos estos días he visto excelente proyectos creativos aquí.
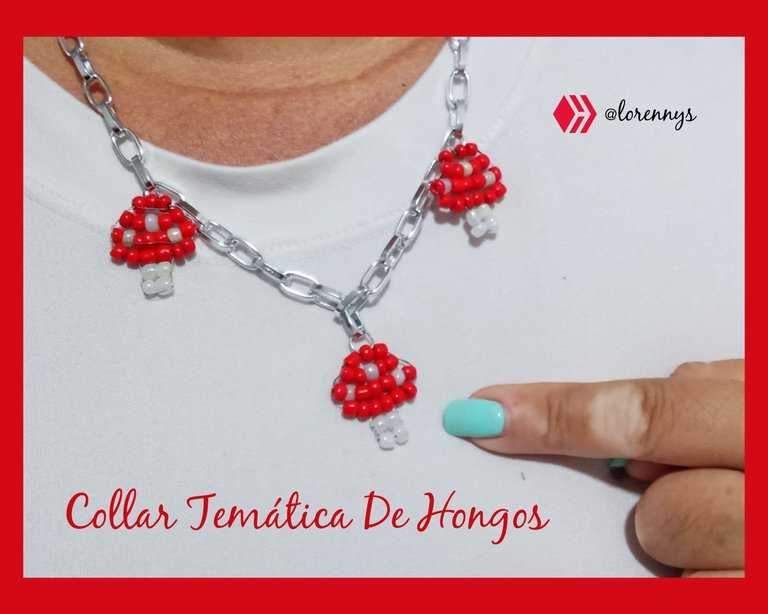
Para no quedarme atrás, quiero compartirles la elaboración de un collar temática de hongos, que por cierto me quedaron muy parecidos a los hongos de Mario Bross jajaja.
I think that more and more, the days are passing very fast and today we are in the middle of the week. It's great for me to be back in this wonderful community @jewelry, during all these days I have seen excellent creative projects here.
Not to be left behind, I want to share with you the making of a mushroom themed necklace, which by the way I got very similar to the Mario Bross mushrooms hahaha.
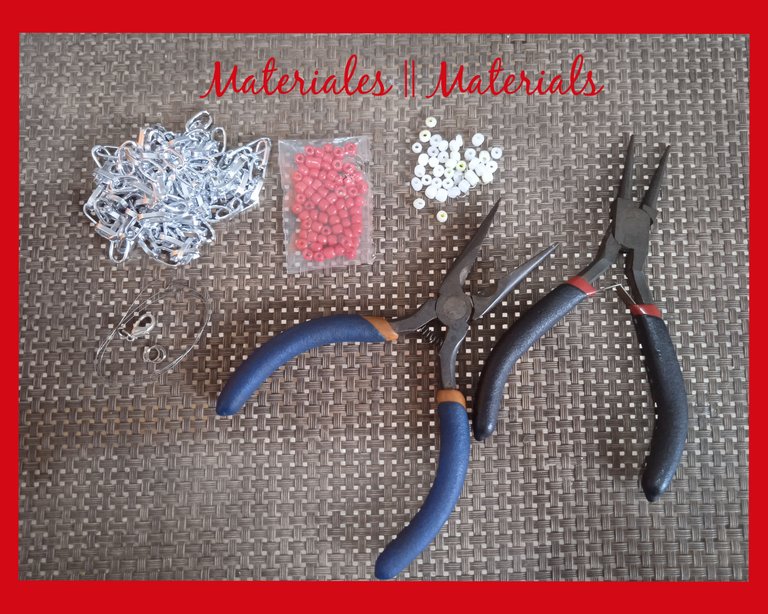
Materiales usados para elaborar esta original gargantilla de setas.
✓Cincuenta centímetros de cadena plateada de eslabones medianos.
✓Mostacillas color rojo.
✓Mostacillas color blanco.
✓Tres argollas pequeñas, para guindar los dijes en forma de seta.
✓Una tranca tipo langosta.
✓Una argollita para la tranca.
✓Un metro de alpaca para bisutería.
✓Pinza plana.
✓Pinza de corte.
Materials used to make this original mushroom choker.
Fifty centimeters of silver plated chain of medium links.
Red colored beads.
White beads.
Three small rings, to hang the mushroom-shaped charms.
One lobster clasp.
✓One small ring for the lock.
One meter of alpaca for costume jewelry.
✓Pincer flat.
✓Cutting tweezers.
Para realizar este proyecto; uso estos sencillos y pocos pasos
Primer Paso:
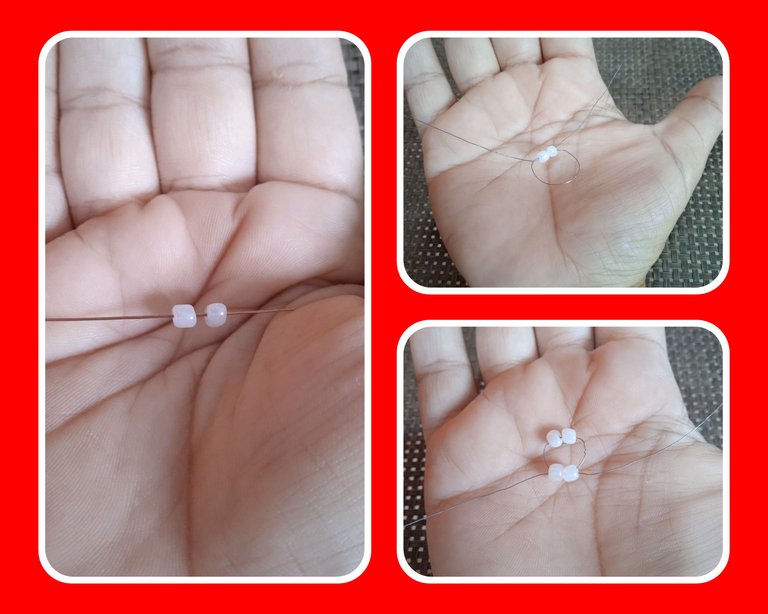
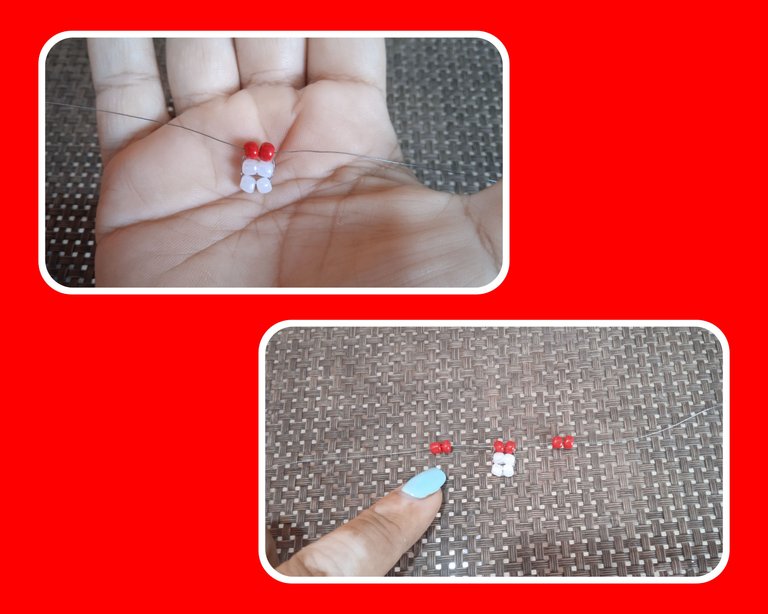
Voy a comenzar mi proyecto usando la alpaca de bisutería, corto veinte centímetros, es la medida para tejer una primera seta, pues elaboraré tres para armar el diseño que tendrá la gargantilla.
En la alpaca inserto dos mostacillas blancas, las llevo hasta la mitad del alambre y allí las cruzo, luego por una punta inserto de nuevo dos mostacillas blancas y las cruzo, (muestro las imágenes).
To make this project; I use these simple and few steps.
First step:
I am going to start my project using the alpaca of costume jewelry, I cut twenty centimeters, it is the measure to weave a first mushroom, because I will elaborate three to assemble the design that will have the choker.
In the alpaca I insert two white beads, I take them to the middle of the wire and there I cross them, then through one end I insert again two white beads and I cross them, (I show the images).
Segundo Paso:
En este paso voy a insertar dos mostacillas rojas, las llevo al centro encima de las blancas y las cruzo, luego coloco dos mostacillas rojas a cada lado de las rojas del centro y así tengo seis mostacillas rojas.
Second step:
In this step I am going to insert two red beads, bring them to the center on top of the white ones and cross them, then place two red beads on either side of the red ones in the center and so I have six red beads.
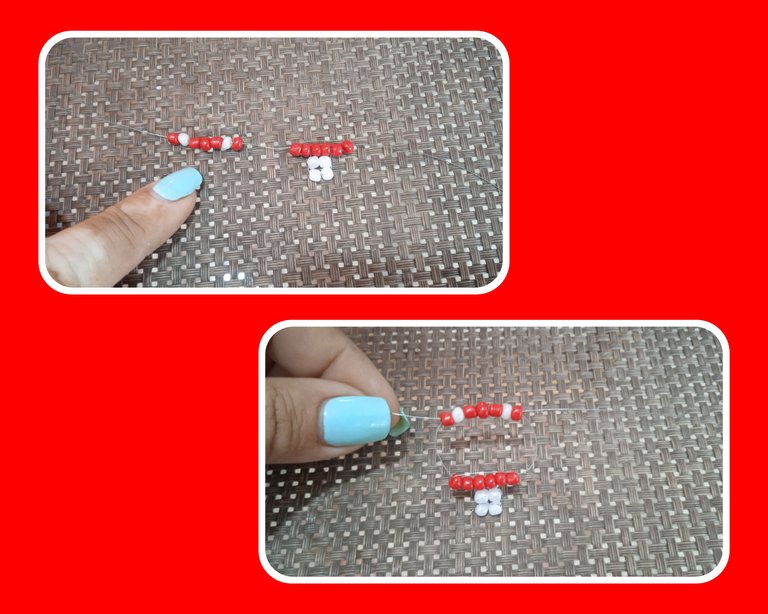
Tercer Paso:
Aquí en este paso insertaré siete mostacillas en esta forma: pongo en una punta, una mostacilla roja, una mostacilla blanca, tres mostacillas rojas, una mostacilla blanca, y finalizo con una mostacilla roja; para tener las siete mostacillas, ahora inserto el alambre de la otra punta por todas las mostacillas y las cruzo; va quedando como muestra la foto.
Third step:
Here in this step I will insert seven beads in this way: I put in one end, a red bead, a white bead, three red beads, a white bead, and I finish with a red bead; to have the seven beads, now I insert the wire of the other end through all the beads and cross them; this is how it is going to be.
Cuarto Paso:
Ahora inserto cinco mostacillas de esta manera: en una punta coloco dos mostacillas rojas, una mostacilla blanca, dos mostacillas rojas, las cruzo con el alambre de la punta, así.
TEXTO TRADUCIDO
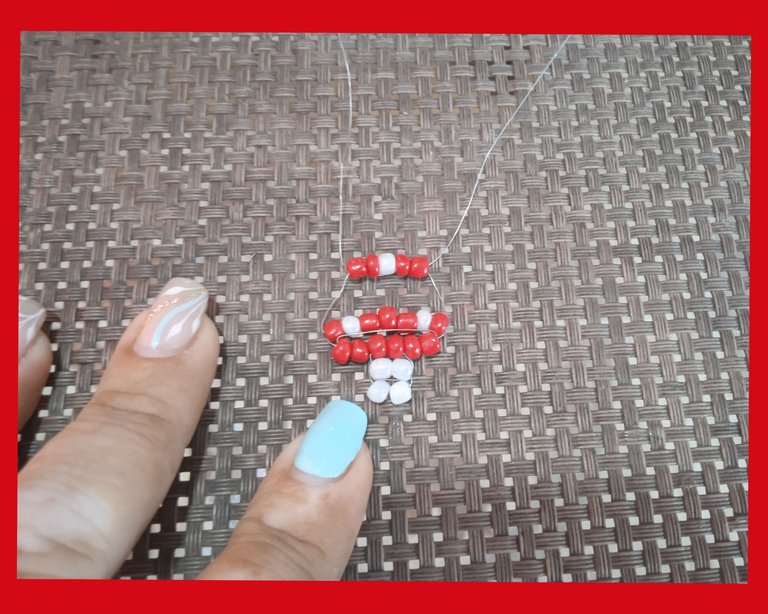
Quinto Paso:
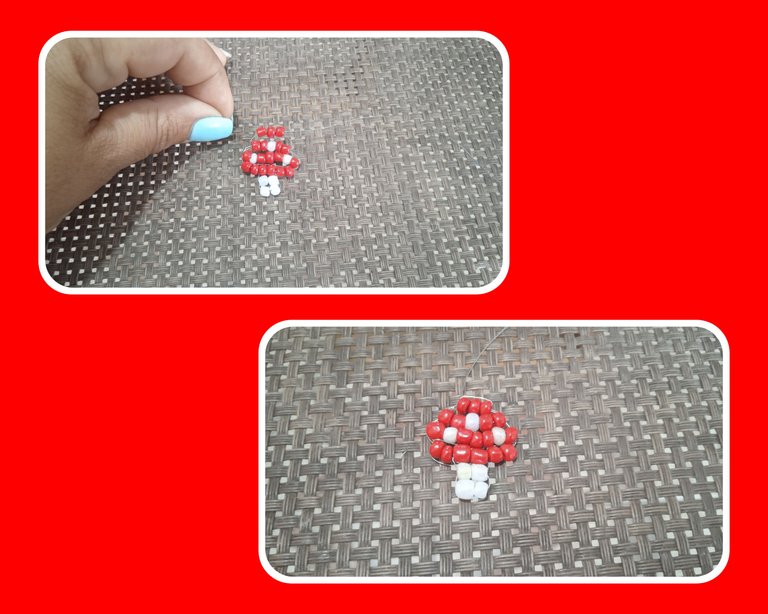
En este paso, terminaré de formar el diseño de mi primera 🍄, para ello inserto por una punta tres mostacillas rojas y las cruzo, paso de nuevo el alambre en sentido contrario y hago un nudo halo las dos puntas para asegurar y perderlo en el medio de las mostacillas, así nuestra labor quede más prolija.
Corto con la pinza los excedentes y así queda.
Fifth Step:
In this step, I will finish forming the design of my first 🍄, for this I insert by one end three red beads and cross them, I pass the wire again in the opposite direction and make a knot halo the two ends to secure and lose it in the middle of the beads, so our work is neater.
I cut the excess with the pliers and this is how it looks.
Sexto Paso:
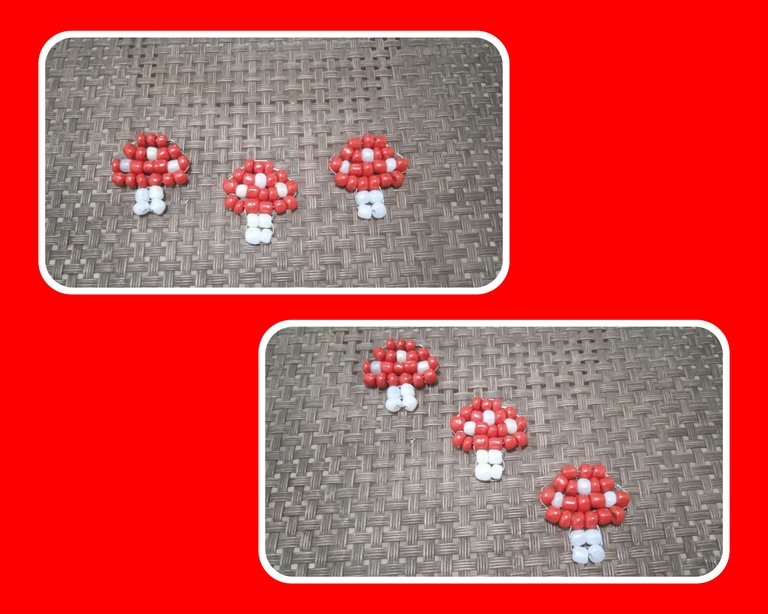
Ahora usando procedimiento igual elaboraré dos setas 🍄 más para tener las tres de la gargantilla.
Sixth Step:
Now using equal procedure I will elaborate two more mushrooms 🍄 to have the three of the choker.
Séptimo Paso:
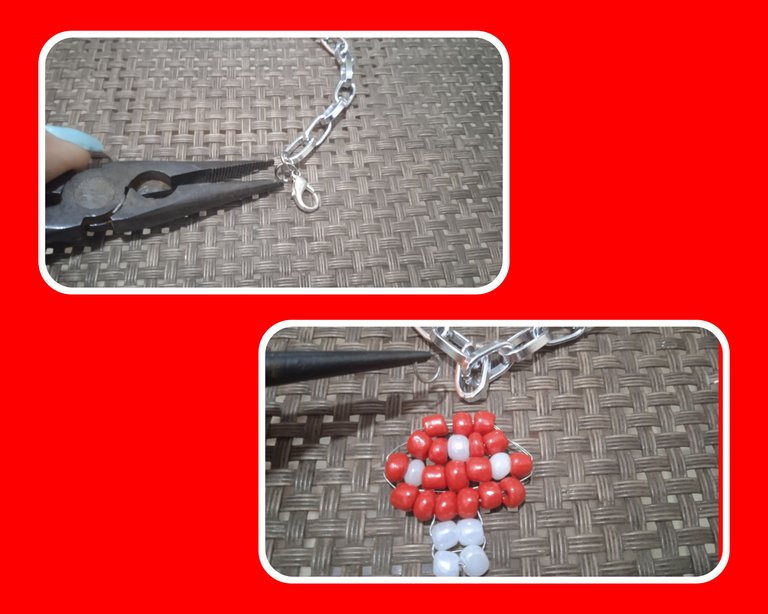
Ahora elaboraré el diseño así: doblo la cadena de eslabones plateada a la mitad, allí coloco la primera 🍄, luego a ocho eslabones del lado izquierdo coloco otra seta y a otros ocho eslabones del lado derecho pongo la última y así va quedando.
Ya para finalizar uso la pinza para colocar la tranca tipo langosta. Quedando así.
Seventh step:
Now I will elaborate the design like this: I fold the silver link chain in half, there I place the first 🍄, then at eight links on the left side I place another mushroom and at another eight links on the right side I place the last one and so it goes on.
Finally, I use the clamp to place the lobster clasp. It looks like this.
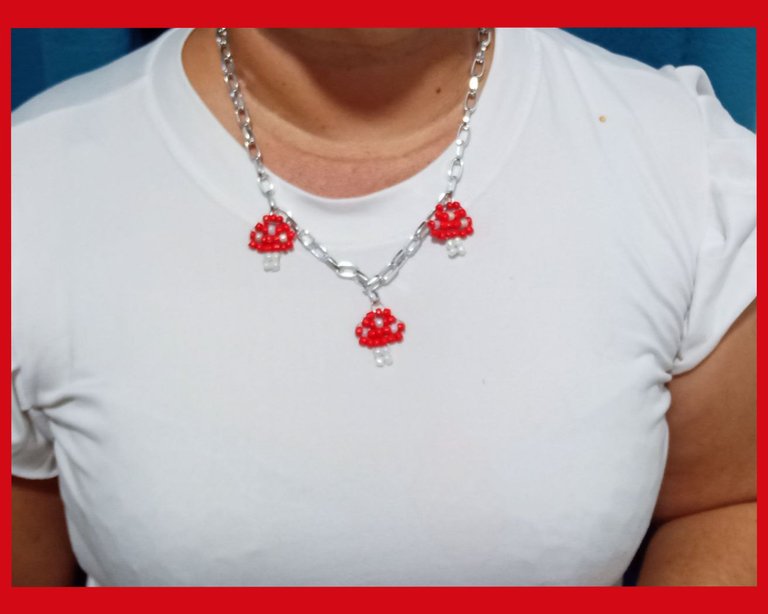
Este es el final de mi tarea creativa de hoy 😃 algo totalmente diferente a lo que siempre había elaborado, es un poco más casual o juvenil pero también le da un toque diferente a un outfit sport.
This is the end of my creative assignment today 😃 something totally different than what I had always worked out, it's a bit more casual or youthful but it also gives a different touch to a sport outfit.
✓Todas las fotografías son de mi propiedad ,capturadas con mi Redmi A9. Editadas con GridArt versión gratuita. Banner final editado con Canva versión libre.
✓Deelptraductor fue utilizado para esta publicación.
Éxitos y bendiciones para todos 🙏🏻 hasta las próxima publicación.
¡Tengan una feliz tarde!
¡Gracias por detenerte a leer!
✓All photos are my property ,captured with my Redmi A9. Edited with GridArt free version. Final banner edited with Canva free version.
✓Deelptraductor was used for this publication.
Success and blessings to all 🙏🏻 until the next posts.
Have a happy afternoon!
Thanks for stopping by to read!

