ESPAÑOL
Mundo Hive y amigos de @Jewerly, una vez más emocionada de pasar por aquí a compartir con ustedes. Espero que todos estén sanos y felices.
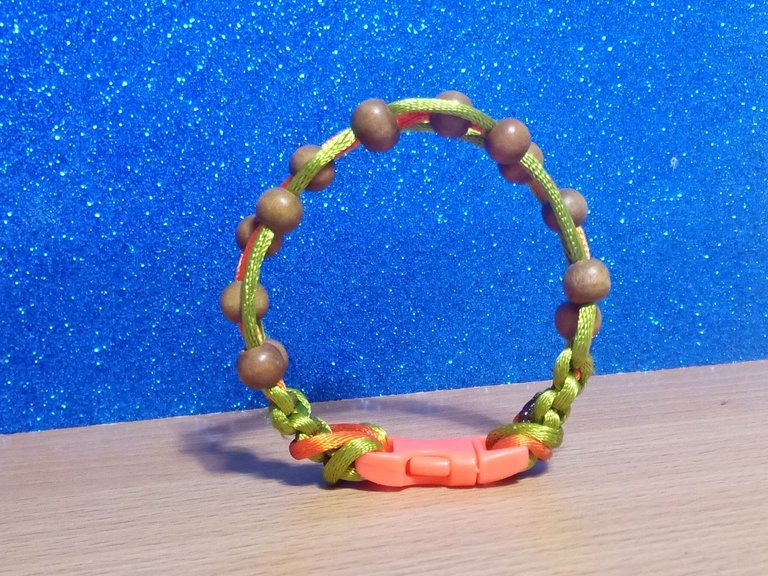
En esta ocasión les traigo una pulsera que realicé en el nudo trenzado en al cual adicione unas cuentas de madera con la técnica del macramé. Cómo ya les había comentado asiste a algunos talleres de esta técnica, quería aprende acerca de la técnica para elaborar macetas para mi mundo verde 🌿.
ENGLISH
Hive World and @Jewerly friends, once again excited to stop by to share with you. I hope you are all healthy and happy.
This time I bring you a bracelet that I made in the braided knot in which I added some wooden beads with the macramé technique. As I had already told you I attend some workshops of this technique, I wanted to learn about the technique to make pots for my green world 🌿.
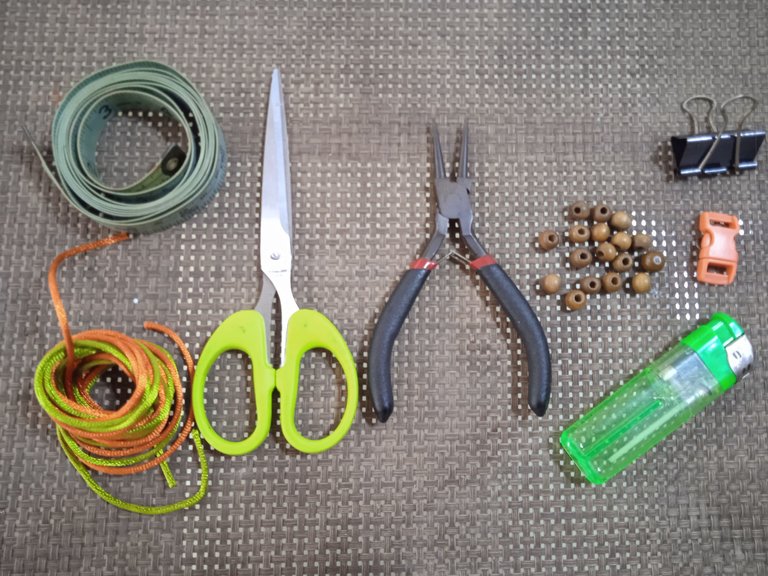
Materiales usados para elaborar esta pulsera trenzada en cola de rata y cuentas de madera, técnica macramé
✓Un metro y medio cola de rata color naranja fuerte.
✓Un metro y medio cola de rata color verde oliva o militar.
✓Un clip plástico color naranja, para la tranca.
✓Cuentas de madera tamaño pequeñas.
✓Tijeras.
✓Encendedor.
✓Pinza.
Materials used to make this bracelet braided in rat tail and wooden beads, macramé technique
One and a half meters of strong orange rat tail.
✓One and a half meter rat tail olive green or military color.
✓One orange plastic clip, for the tranca.
✓Small wooden beads.
✓Scissors.
✓Lighter.
✓Tweezers.
Para lograr esta Pulsera use sencillos y pocos pasos
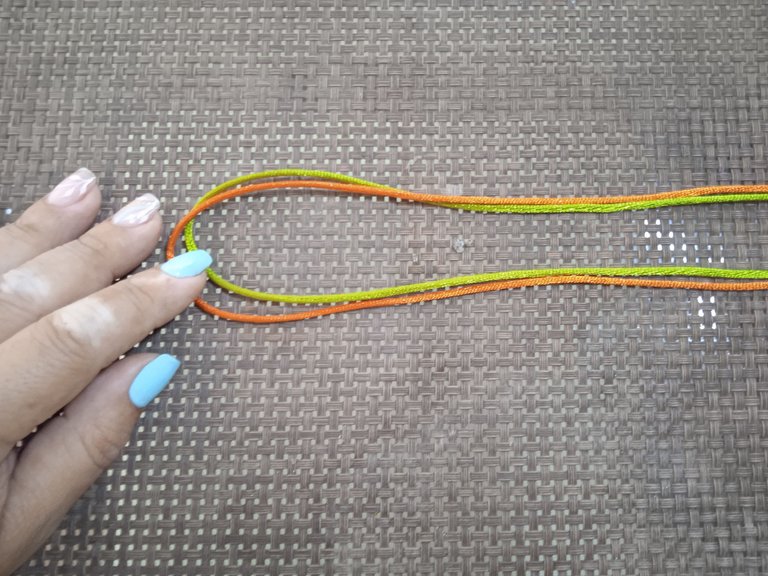
PRIMER PASO:
Comienzo juntando los dos cordones
cola de rata para verificar que las medidas sean iguales, luego abro el clip en las dos partes que lo forman, y en una de ellas inserto los cordones cola de rata doblados a la mitad y así tengo cuatro hilos, como muestra la imagen.
To make this Bracelet use a few simple steps
STEP ONE:
I start by joining the two cords together
Then I open the clip in the two parts that form it, and in one of them I insert the rat tail cords folded in half and so I have four strands, as shown in the picture.
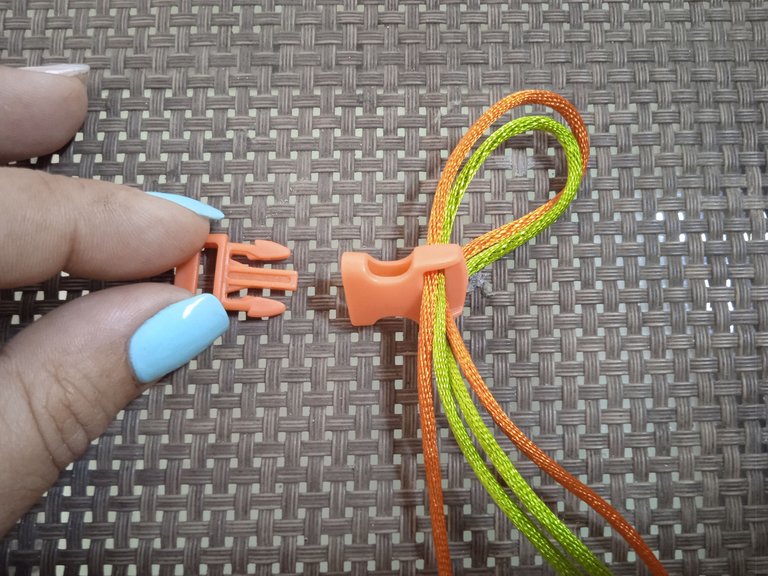
SEGUNDO PASO:
En este paso hago un nudo alondra para fijar los cordones al clip.
STEP TWO:
In this step I tie a lark's knot to attach the cords to the clip.
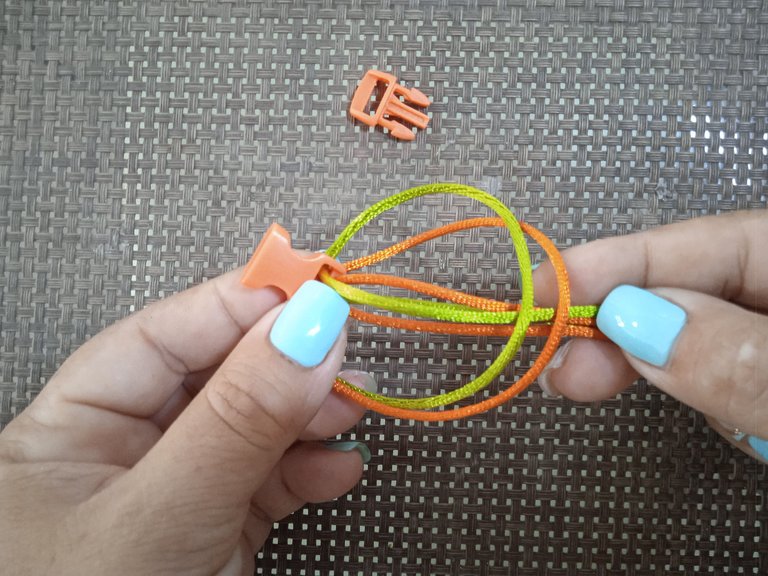
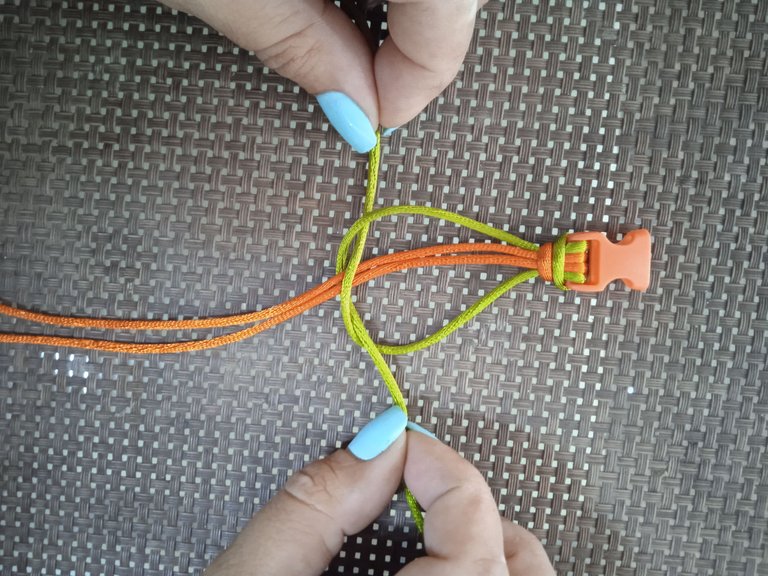
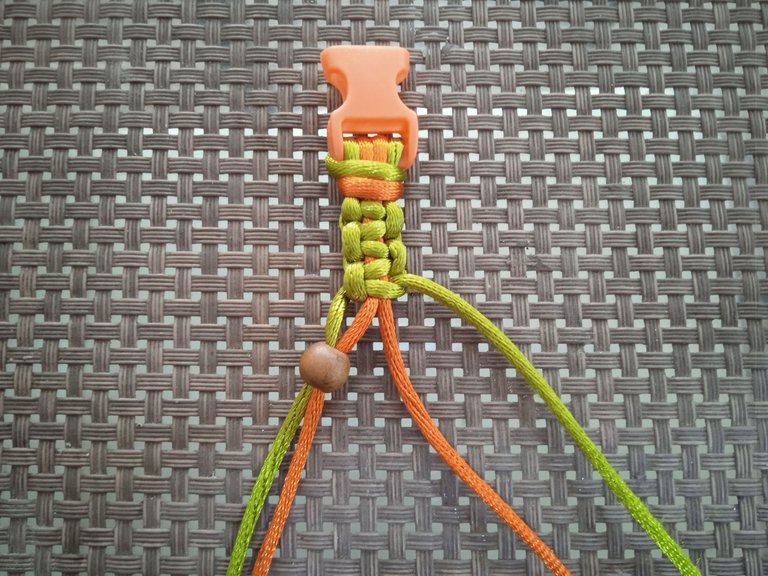
TERCER PASO:
Aquí tejo cinco nudos planos de la siguiente forma: los dos cordones naranja los pongo en el centro y los verde militar laterales, ahora coloco el cordon verde militar de la derecha encima de los centrales color naranja formando una especie de "P"; con el cordon verde militar o verde oliva del lado izquierdo lo paso por encima del verde de la derecha, luego lo paso por debajo de los centrales y los saco por encima del cordon verde oliva de la derecha, halo las dos puntas verdes para ajustar y así tengo el nudo plano, como se ve en la imagen.
THIRD STEP:
Here I weave five flat knots in the following way: the two orange cords I put them in the center and the military green cords on the sides, now I place the military green cord on the right on top of the central orange cords forming a kind of "P"; with the military green or olive green cord on the left side I pass it over the green cord on the right, then I pass it under the central cords and take them out over the olive green cord on the right, pull the two green ends to adjust and so I have the flat knot, as seen in the image.
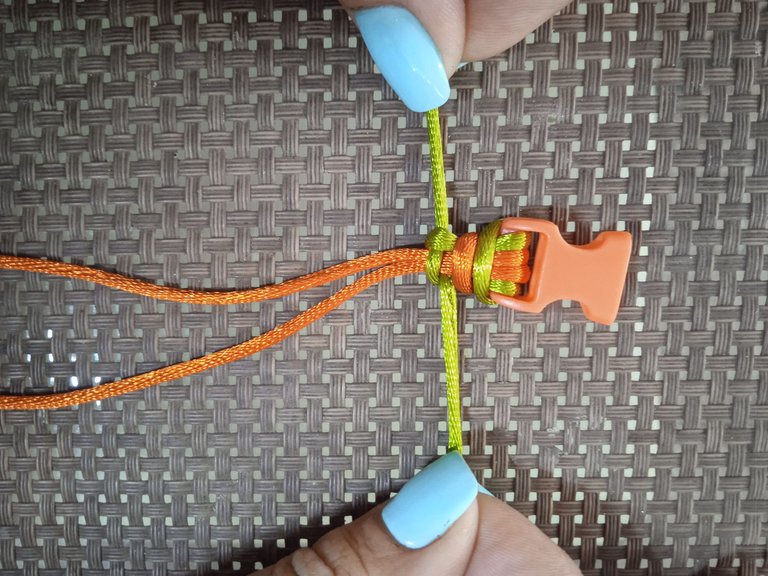
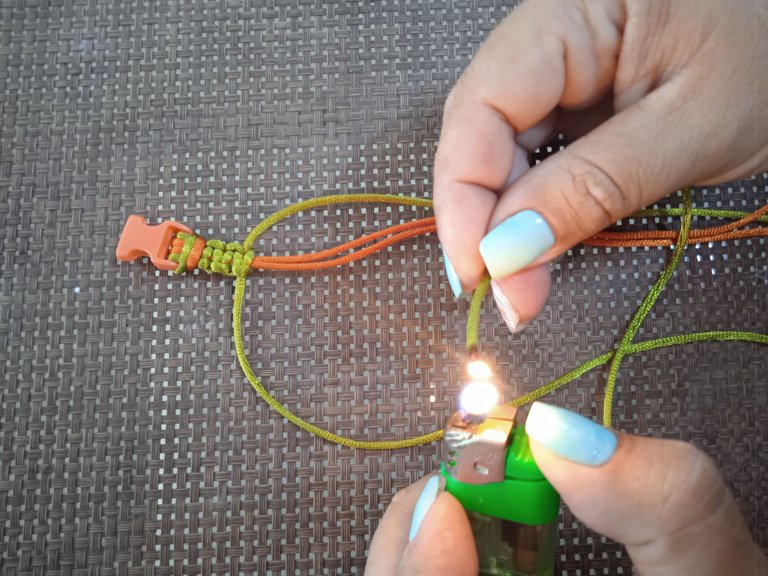
CUARTO PASO:
Ahora uso el encendedor para quemar las puntas de los cordones, evitando que se deshilachen y que queden finos para facilitar pasarlos por las cuentas de madera.
STEP FOUR:
I now use the lighter to burn the ends of the cords, keeping them from fraying and keeping them thin to make it easier to thread them through the wooden beads.
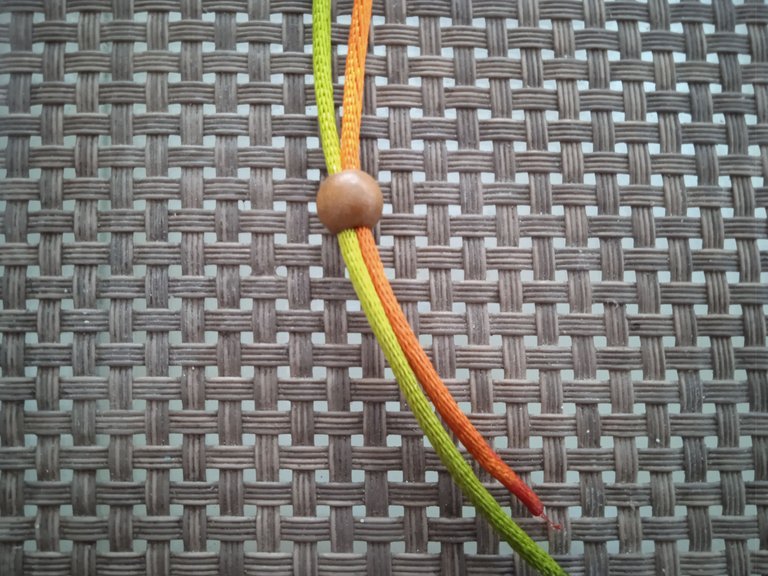
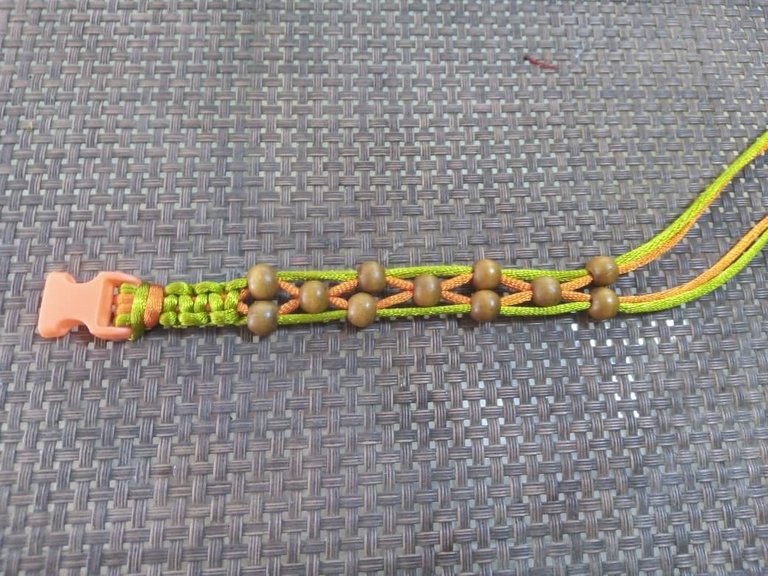
QUINTO PASO:
Ahora hago el nudo Trenzado así, inserto de cada lado juntando un cordón verde oliva o militar y un cordón naranja una cuenta pequeña de madera, realizo un procedimiento igual del lado contrario, va quedando como muestra la imagen, ahora en los cordones centrales de color naranja, inserto una cuenta de madera así este paso se realiza de acuerdo al largo deseado, yo realicé cinco módulos para una medida de catorce centímetros, ya que mi pulsera debe tener un largo de dieciocho centímetros, los otros cuatros se aumentarán con los nudos planos y la tranca.
FIFTH STEP:
Now I make the Braided knot like this, I insert on each side joining an olive green or military cord and an orange cord a small wooden bead, I perform the same procedure on the opposite side, it will be as shown in the image, now in the central orange cords, I insert a wooden bead so this step is done according to the desired length, I made five modules for a measure of fourteen centimeters, since my bracelet should have a length of eighteen centimeters, the other four will be increased with the flat knots and the stringer.

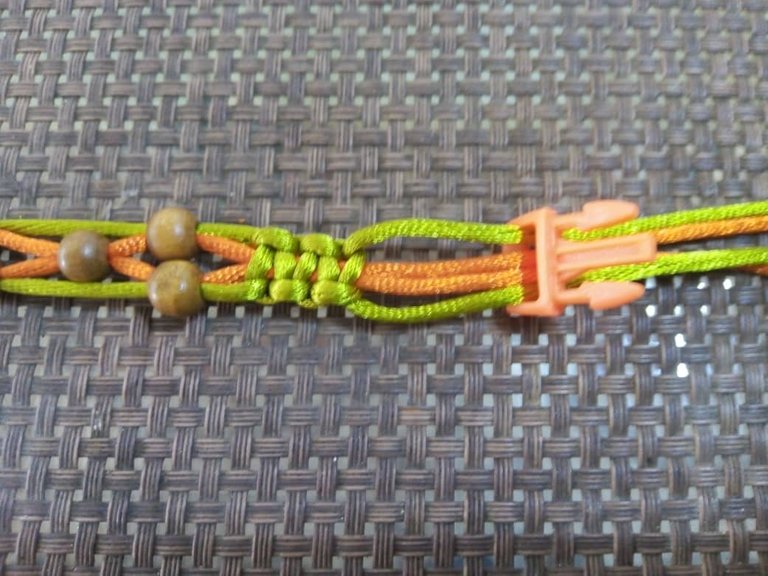
PASO SEIS:
Una vez que tengo listo el largo deseado de mi pulsera, realizo de nuevo cinco nudos planos y coloco la otra mitad del clip, corto con las tijeras el excedente de los cordones y sello con el encendedor para terminar de ajustar la tranca, y así queda.
STEP SIX:
Once I have the desired length of my bracelet ready, I make five flat knots again and place the other half of the clip, cut with the scissors the excess cords and seal with the lighter to finish adjusting the stringer, and that's how it looks.
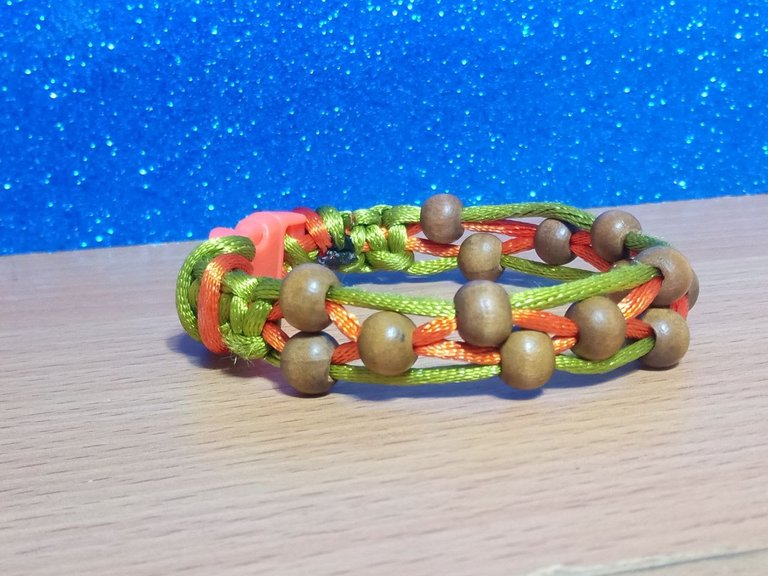
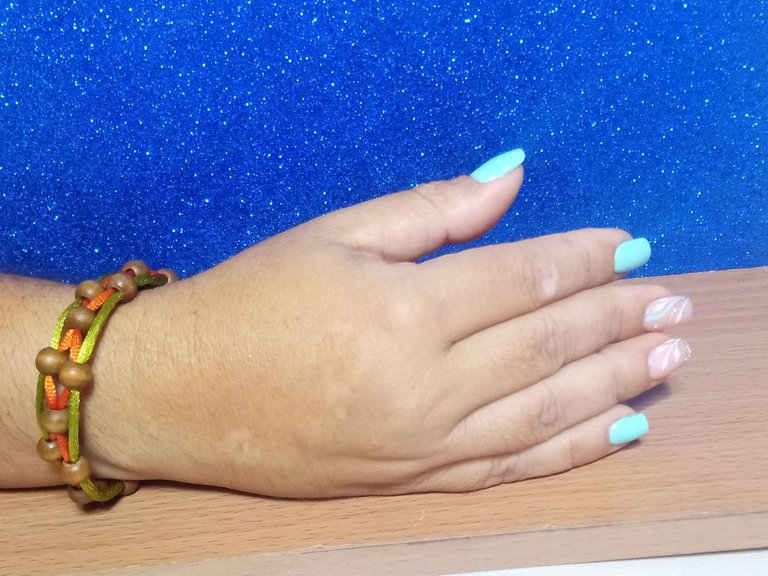
De esta manera he finalizado mi hermosa pulsera que espero les haya gustado y se animen a elaborarla, ya que es muy sencilla de realizar y con pocos materiales.
In this way I have finished my beautiful bracelet that I hope you liked it and I encourage you to make it, because it is very simple to make and with few materials.
Todas las fotografías son de mi propiedad ,capturadas con mi Redmi A9. Editadas con GridArt y banner final editados con Canva edición gratuita. Deelptraductor fue utilizado para esta publicación.
Éxitos y bendiciones para todos 🙏🏻 hasta las próxima publicación.
¡Tengan un feliz día!
¡Gracias por detenerte a leer!
All photos are my property, captured with my Redmi A9. Edited with GridArt and final banner edited with Canva free edition. Deelptraductor was used for this publication. Success and blessings to all 🙏🏻 until the next posts.
Have a happy day!
Thanks for stopping by!
eer!