(ENG)
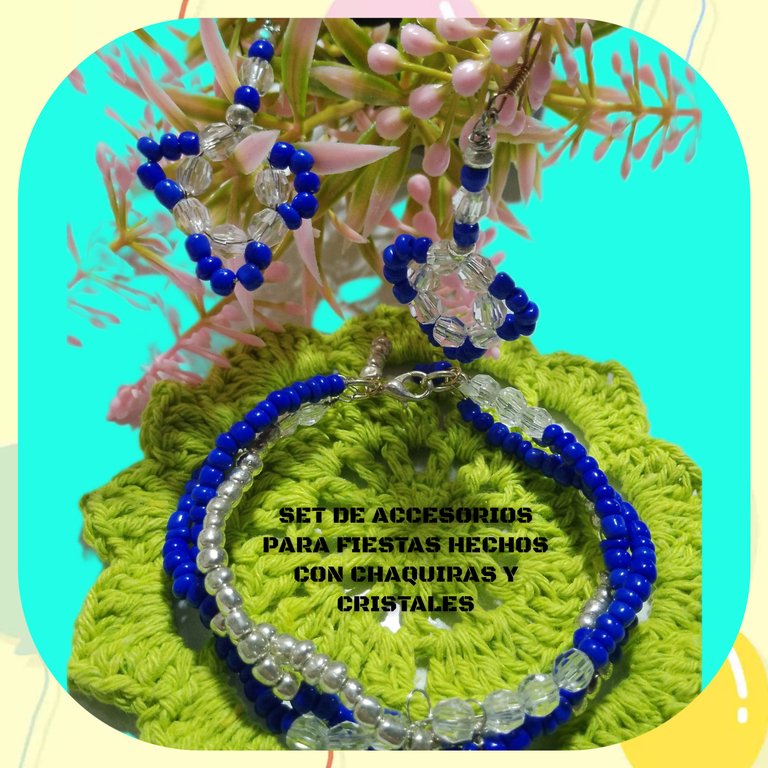
Hello everyone, at @jewelry, I am pleased to start this beautiful week, hoping it is very useful and enjoyable for all of you. Today I am going to show you a very simple step by step on how to make a cute and eye-catching set of accessories, ideal to wear at parties, surely if you wear the appropriate wardrobe, you will look very beautiful, for this I use the wiring technique and a great touch of jewelry. I invite you to follow me on this journey and process, I hope you enjoy it.
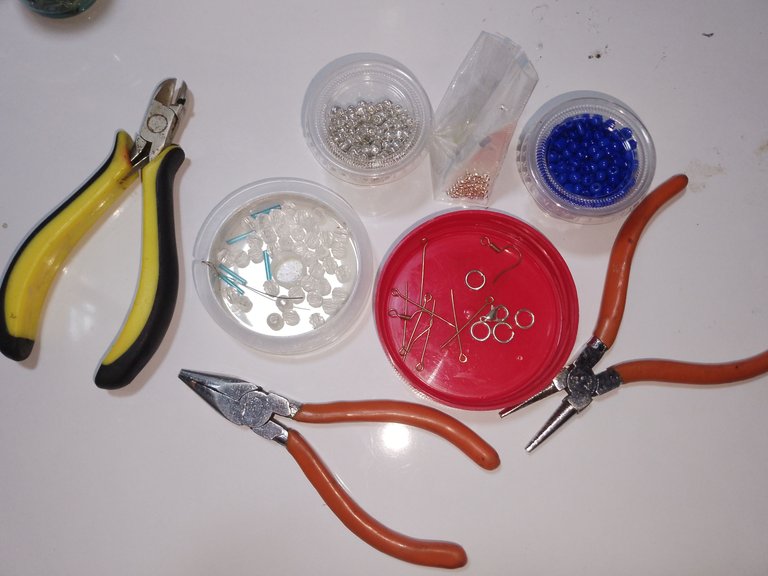
Used materials:
. Beads (silver and blue)
. Crystals n10.
. Jewelry wire o.a.
. Barrette.
. Hook for earrings.
. Hoops for earrings.
. Jewelry tweezers.
. Pins.
STEPS:
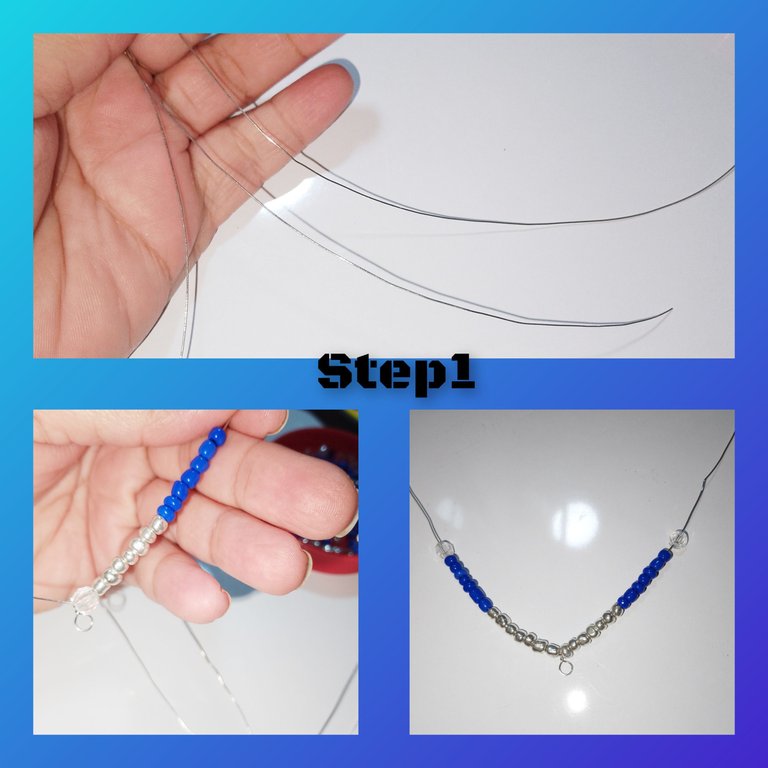
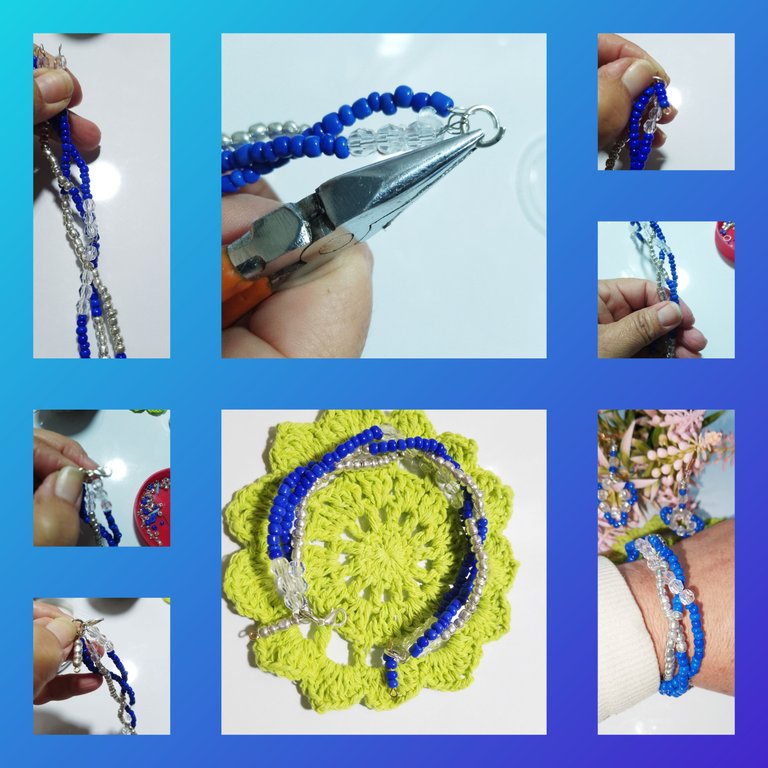
1.) I start by cutting three pieces of wire, these of the same length, and command the wrist of my hand as a reference, and leaving a few more centimeters, after cutting them, I fold two of them in half and in it, with the pliers round tip I make a small hoop. I start with a first wire and place ten blue beads, followed by fifteen silver beads. When covering this first side, I place a crystal and make a ring with the clip at the end. I repeat on the next side.
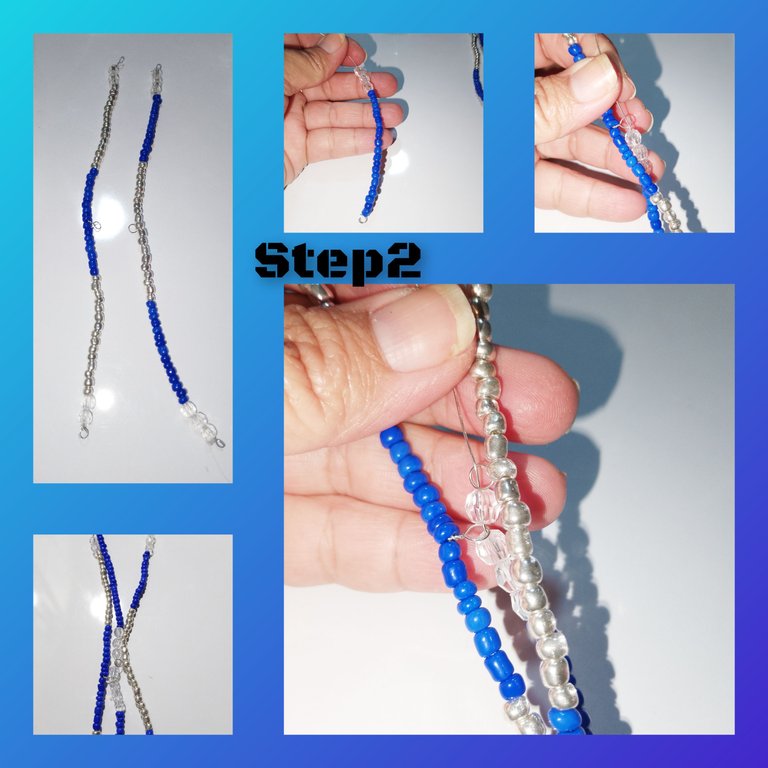
2.) I take a second, wire, the one I have made the ring in the center, and I begin to place silver beads, second blue ones, and on the end three crystals, with the round tip tweezers I do a small ritual, I repeat in the next side. For the next wire, I make a small ring at one of the ends, I place twenty blue beads, just covering half of the wire, I place three crystals, I insert the ring in the center of the previous wires, I put a crystal and I continue, introducing it through the central ring of the next wire, I place three more crystals, and I repeat the beginning, placing twenty blue beads, then making the ring with the tweezers.
3.) ready, the three cuts of wire, I stand on one of the sides and make a braid, involving and then another, without letting go so that they do not sit on me, I place a jewelry earring with the help of tweezers, I must insert the three, rings at the ends of the side of the wires, I also introduce a small pendant of beads, which I have assembled with the pin and silver beads. And I close the ring, but first I place the pin too much. I repeat on the next side, but unlike that I will only place the jewelry earring and a small bead pendant, armed with a jewelry pin, covered with blue beads. I check to see if it is the right size for my hand wrist, and also give it shape. That giving the cute and striking bracelet ready.
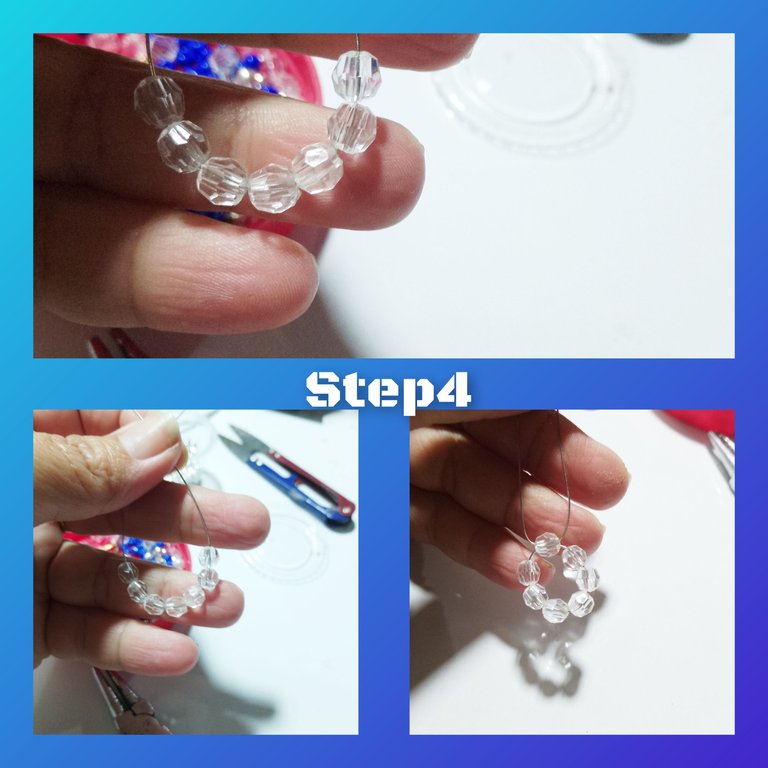
4.) for the Retes, I cut two pieces of wire, fold the wire almost in half, and introduce seven crystals, introducing the next wire through the last crystal, continuous, through the end of the longest wire, and in the opposite direction.
5.)Continue, I insert five beads, blue in color, balance one crystal and insert the next one, in this way, I repeat two more times, to reach the path to the crystals. Once I found the wires, I dot spiral turns between them, I place a silver bead, a blue one, a crystal, a blue bead, and a silver one, now I pass the wire through the small riti of the hook, for earrings, I make turns on the bottom, of the hook and cut the wireresidual.
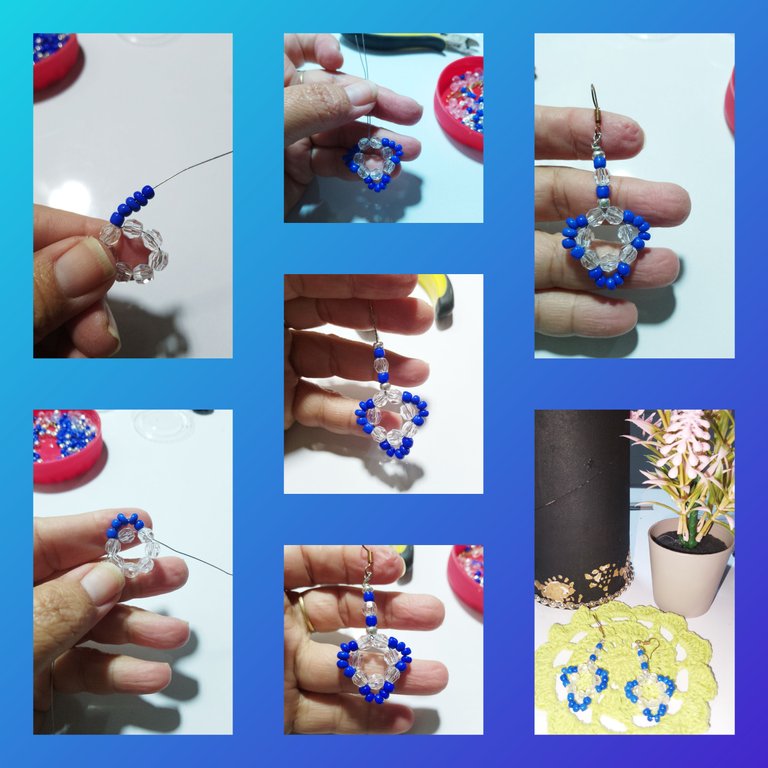
In this way, I have concluded, very happy with the final result.
. All photos are my property.
. Use incollage . Use language translator.
Grateful for your visit to my blog, see you soon.
(ESP)
Hola a todos, en @jewelry, me complace, iniciar esta linda semana, deseando sea de mucho provecho y disfrute para todos ustedes. Hoy paso a mostrarles, un muy sencillo paso a paso, de como realizar, un lindo y llamativo, Set de accesorios,ideal para lucir en fiestas, de seguro si llevas el vestuario apropiado, lucir muy hermosa, para ello use la técnica de alambrismo y un gran toque de bisutería. Les invito a seguirme en este recorrido y proceso, deseo lo disfruten.

Materiales usados:
. Chaquiras (plateadas y azul)
. Cristales n10.
. Alambre de bisutería o.a.
. Pasador.
. Anzuelo para aretes.
. Aritos para aretes.
. Pinzas de bisutería.
. Alfileres.

PASOS:
1.) comienzo cortando tres pedazos de alambre, estos de mismo largo, y comando como referencia l muñeca de mí mano, y dejando unos centímetros más, luego de cortarlos, dos de ellos los doblo a la mitad y en ella, con la pinza punta redonda hago un pequeño arito. Inicio en un primer alambre y coloco, diez chaquiras de color azul, seguid de quince de color plateado, al cubrir este primer lado, coloco un cristal y hago un arito con la pinza en el extremo. Repito en el siguiente lado.

2.) tomo un segundo, alambre, el que le he hecho el arito en el centro, y comienzo a colocarle chaquiras plateadas, segundas de azules, y el el extremo tres cristales, con la pinza punta redonda hago un pequeño rito, repito en el siguiente lado. Para el siguiente alambre, hago un pequeño arito en uno de los extremos, coloco, veinte chaquiras de color azul, justo cubierto la mitad de el alambre, coloco tres cristales, introduzco en el arito de el centro de los alambres anteriores, pongo un cristal y continuo, introduciendo lo por el arito central de el siguiente alambre, coloco tres cristales más, y repito el inicio, colocando veinte chaquiras azules,luego haciendo el arito con la pinza.

3.) listos, los tres cortes de alambre, me ubico en uno de los lados y hago un trenzado, involucrando y luego otra, sin soltar para que no se me sienten, coloco con ayuda de las pinzas un arito de bisutería, debo introducir los tres, aritos de los extremos de el lado de los alambres, introduzco además un pequeño colgante de chaquiras, que he armado con el alfiler y chaquiras plateadas. Y cierro el arito, pero antes coloco demás el pasador. Repito de el siguiente lado, pero a diferencia que solo colocaré el arito de bisutería y un pequeño colgante de chaquiras, armado con alfiler de bisutería, cubierto con chaquiras azules. Verifico, sea justo el tamaño para mí muñeca de la mano, y así además dar forma. Que dando lista la linda y llamativa pulsera.

4.) para los Retes, corto dos pedazos de alambre, doblo casi a la mitad el alambre, e introduzco siete cristales, introduciendo el siguiente alambre por el último cristal, continuo, por el extremo de alambre más largo, y en sentido contrario.

5.)Continuo, introduzco cinco chaquiras, de color azul, saldo un cristal e introduzco en el siguiente, de est manera, repito dos veces más, par alcanzar el recorrido a los cristales. Encontrado los alambres, dot vueltas en espiral entre ellos, coloco una chaquira plateada, una azul, un cristal, una chaquira azul, y una plateada, ahora paso el alambre por el pequeño riti de el anzuelo, para aretes, doy vueltas en la parte inferior, de el anzuelo y corto el alambre residual.

De est manera, he concluido, muy contenta con el resultado final.
. Todas las fotos son de mí propiedad.
. Use incollage
. Use traductor lenguaje.
Agradecida por su visita a mí blog, hasta una pronta oportunidad.
