ENGLISH
ESPAÑOL
Hola queridos amigos de #jewelry, sean todos bienvenidos una vez más a mi blog ☺️ En estos últimos días he estado un poco ausente pues he tenido algunos inconvenientes y no había tenido tiempo de ponerme con mis creaciones, Afortunadamente el día de hoy traigo una hermosa joya que les comparto con mucho amor y cariño 💞
Hello dear friends of #jewelry, be all welcome once again to my blog ☺️ In recent days I have been a little absent because I have had some inconveniences and had not had time to get with my creations, Fortunately today I bring a beautiful jewel that I share with love and affection 💞
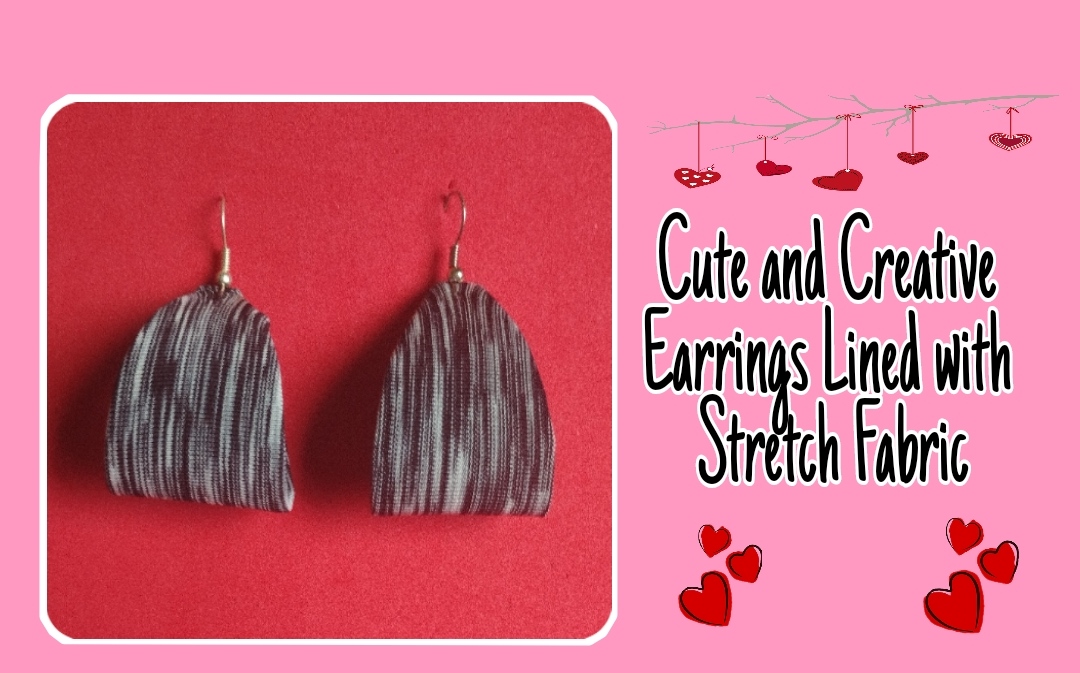
Se trata de unos creativos pendientes elaborados con Plástico transparente y forrados en tela para darles un look mucho más hermoso y llamativo. Está es una excelente opción para crear lindos accesorios, en esta ocasión yo elegí un color de tela oscuro para realizar el forro de los pendientes y así poder combinar con diferente tipos de atuendos.
These are creative earrings made with transparent plastic and lined with fabric to give them a much more beautiful and eye-catching look. This is an excellent option to create beautiful accessories, this time I chose a dark color of fabric to make the lining of the earrings and thus be able to combine with different types of outfits.
Pero también podemos usar colores de tela más vivos que sean de nuestro agrado y que tengamos disponibles en casa 😃 A continuación les mostraré el paso a paso para elaborar estos pendientes, esperando que sean de su agrado.
But we can also use more vivid fabric colors that are to our liking and that we have available at home 😃 Next I will show you the step by step to elaborate these earrings, hoping that they are to your liking.
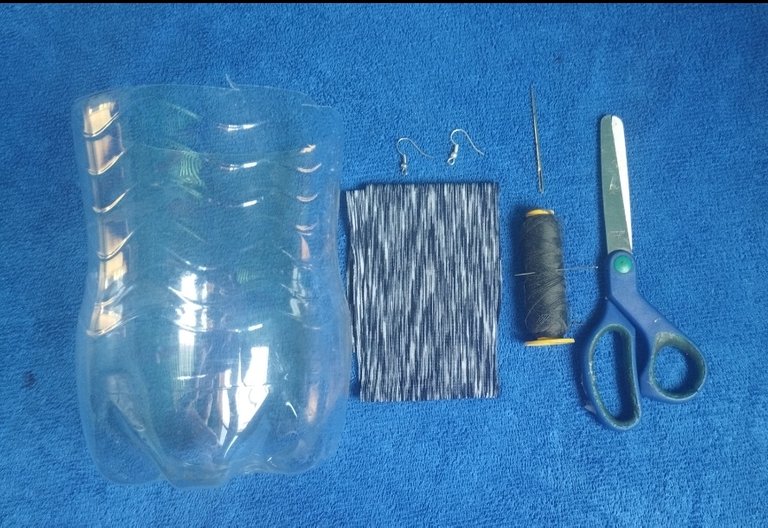
Materiales que utilice:
Materials used:
Un trozo de botella de plástico Transparente.
Un trozo de tela elástica el color de su preferencia.
Hilo y aguja de coser.
Aguja gruesa.
Tijeras.
Argollas para guindar el pendiente.
A piece of transparent plastic bottle.
A piece of elastic fabric in the color of your choice.
Sewing thread and needle
Thick needle.
Scissors.
Hoops to hang the earring.
Procedimiento a realizar:
Procedure to be followed:
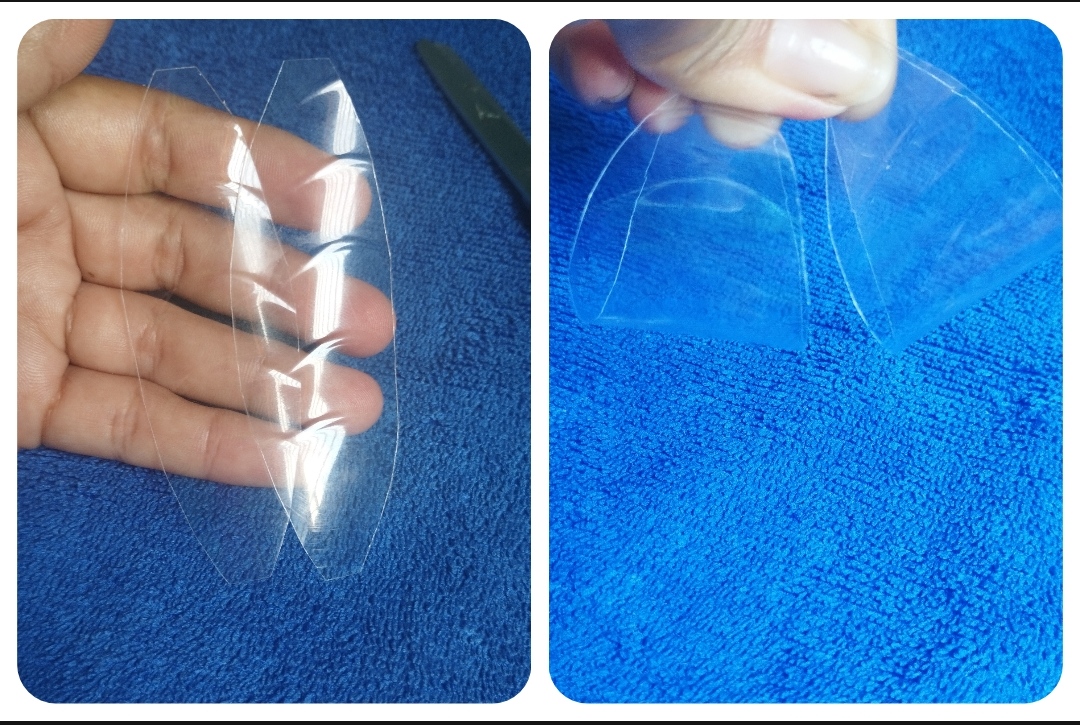
💫 Paso #1: Iniciaremos la elaboración en estos pendientes cortando con ayuda de las tijeras un trozo de plástico Transparente al que le daremos la forma de una hoja, fino en las puntas y un poco más grueso en el medio.
💫 Step #1: We will begin the elaboration of these earrings by cutting with scissors a piece of transparent plastic in the shape of a leaf, thin at the ends and a little thicker in the middle.
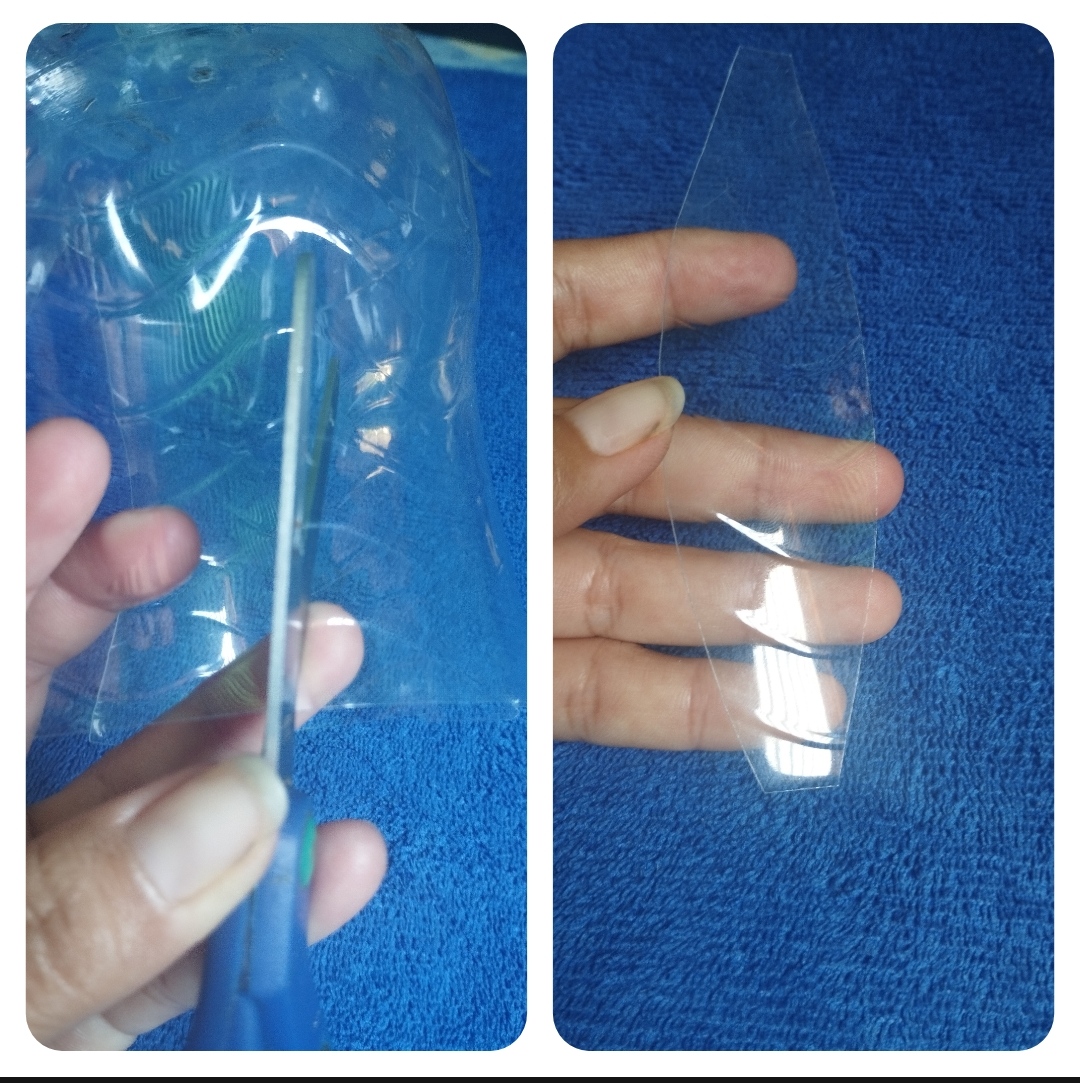
💫 Paso #2: Unimos la punta superior con la punta inferior de la hoja y ajustaremos la forma con las tijeras, tratando de quede igual.
💫 Step #2: We join the upper tip with the lower tip of the sheet and adjust the shape with the scissors, trying to keep it the same.
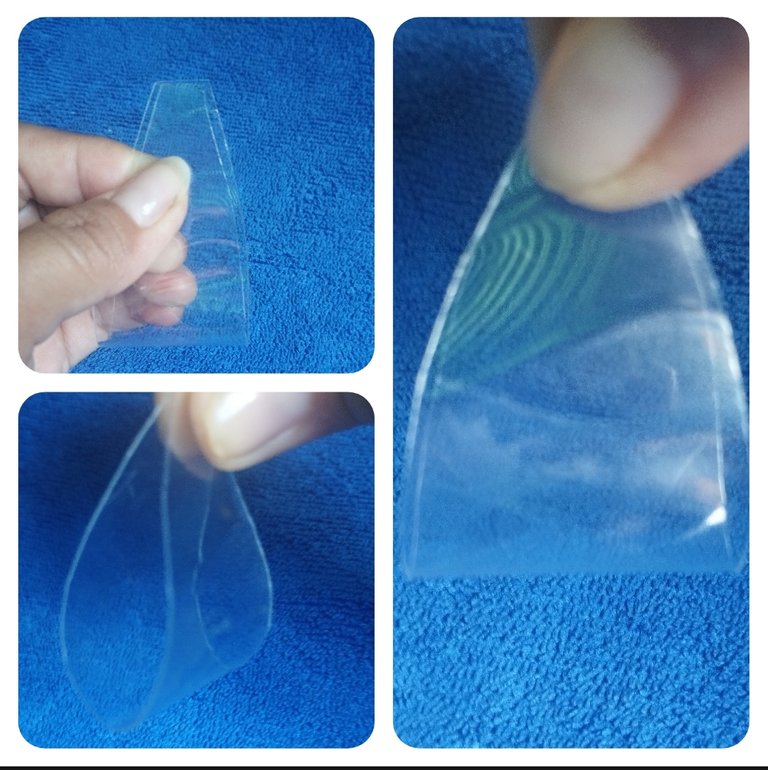
💫 Paso #3: Ahora tomaremos está hoja como molde y medimos para sacar la otra hoja para el segúndo pendiente. Seguiremos el mismo procedimiento.para ajustar el tamaño de la hoja procurando que las dos hojas se vean similares.
💫 Step #3: Now we will take this sheet as a mold and measure to get the other sheet for the second slope. We will follow the same procedure to adjust the size of the leaf, making sure that the two leaves look similar.
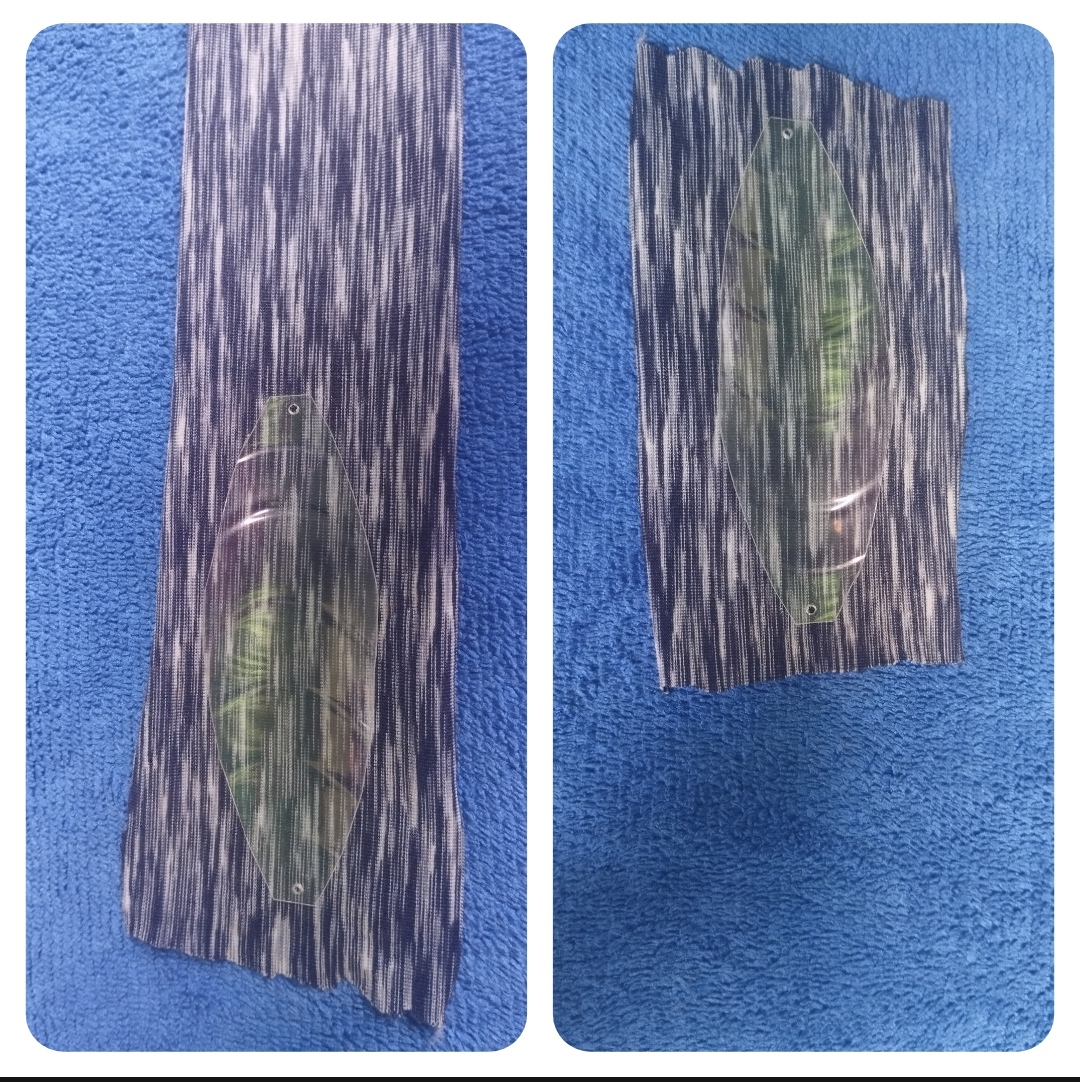
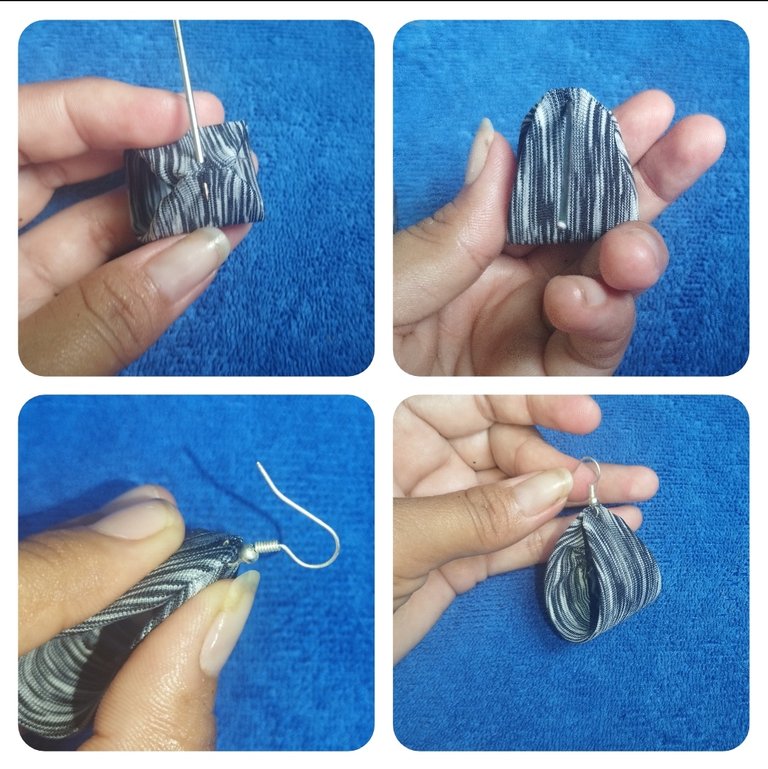
💫 Paso #4: Ya teniendo las hojas listas les realizamos un pequeño orificio que nos permitirá guindar el pendiente. Para esto doblaremos la hoja uniendo ambas puntas, calentarnos la aguja grande y procedemos a realizar el orificio en ambas hojas.
💫 Step #4: Once the leaves are ready, we make a small hole that will allow us to hang the earring. To do this we will fold the leaf joining both ends, heat the large needle and proceed to make the hole in both leaves.

💫 Paso #5: Continuaremos midiendo y cortando un trozo de tela que servirá para forrar la hoja que hemos realizado.
💫 Step #5: We continue measuring and cutting a piece of fabric that will be used to line the sheet we have made.
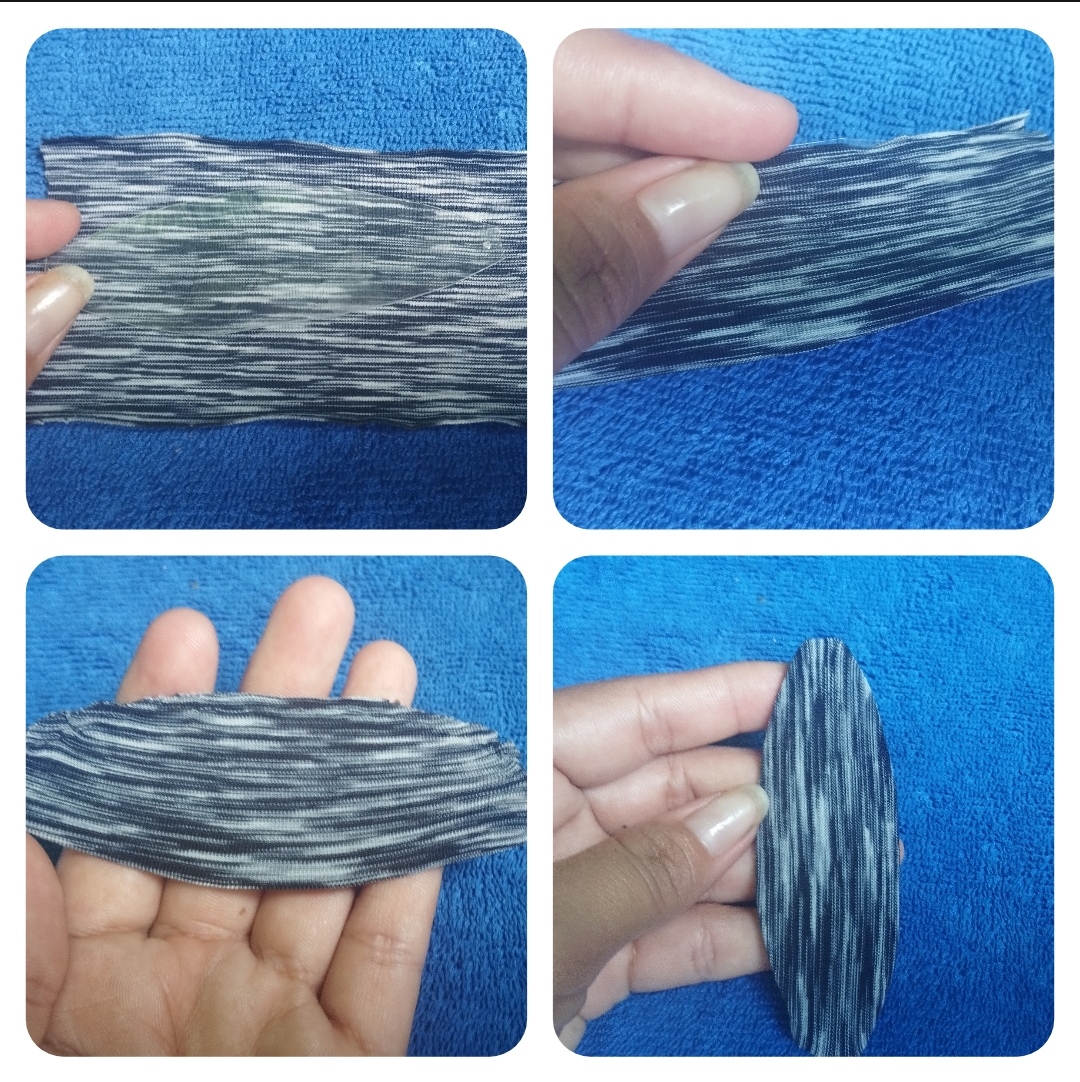
💫 Paso #6: Con ayuda del hijo y la aguja comenzamos a coser todo el borde de la hoja procurando que quede ajustada la tela. Al finalizar recortamos la tela sobrante y ajustamos la costura hacia el interior de la hoja.
💫 Step #6: With the help of the son and the needle we begin to sew the entire edge of the sheet, making sure that the fabric is tight. At the end we trim the excess fabric and adjust the seam towards the inside of the sheet.
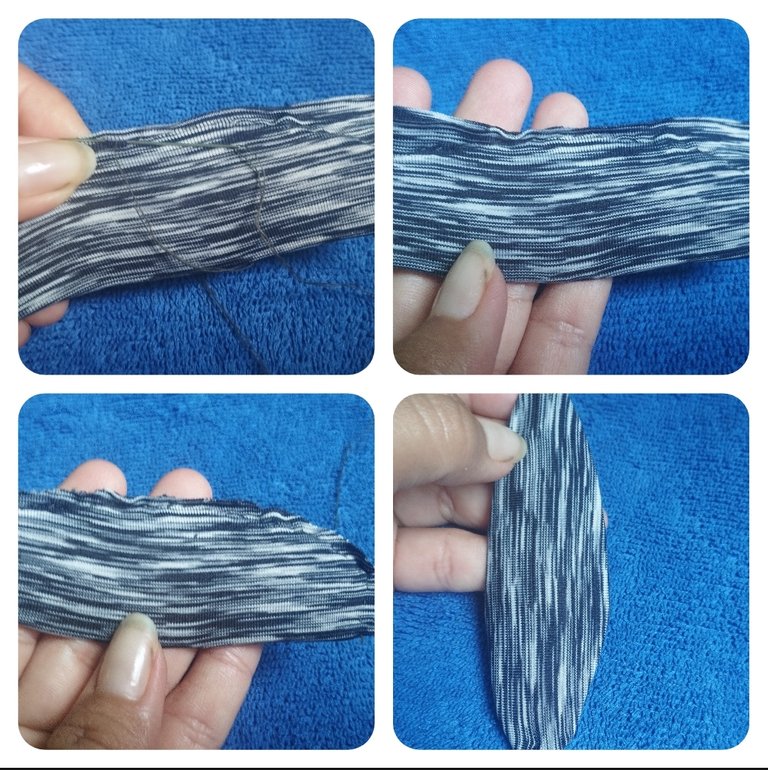
💫 Paso #7: Procedemos a realizar el mismo procedimiento para forrar la otra hoja y veremos que han quedado muy lindas una vez que están terminadas.
💫 Step #7: We proceed to perform the same procedure to line the other sheet and we will see that they have been very nice once they are finished.
💫 Paso #8: Para finalizar doblamos la hoja uniendo las dos puntas, ubicamos el agujero que realizamos anteriormente y perforamos la tela con mucho cuidado usando la aguja gruesa. Luego colocaremos la argolla para guindar el pendiente y cerramos con firmeza para que el pendiente no se salga.
Haremos el mismo procedimiento con el segundo pendiente y tendremos lista nuestra creación.
💫 Step #8: Finally, we fold the sheet joining the two ends, we place the hole we made previously and we pierce the fabric very carefully using the thick needle. Then we place the ring to hang the earring and close it firmly so that the earring does not come off.
We will do the same procedure with the second earring and we will have our creation ready.
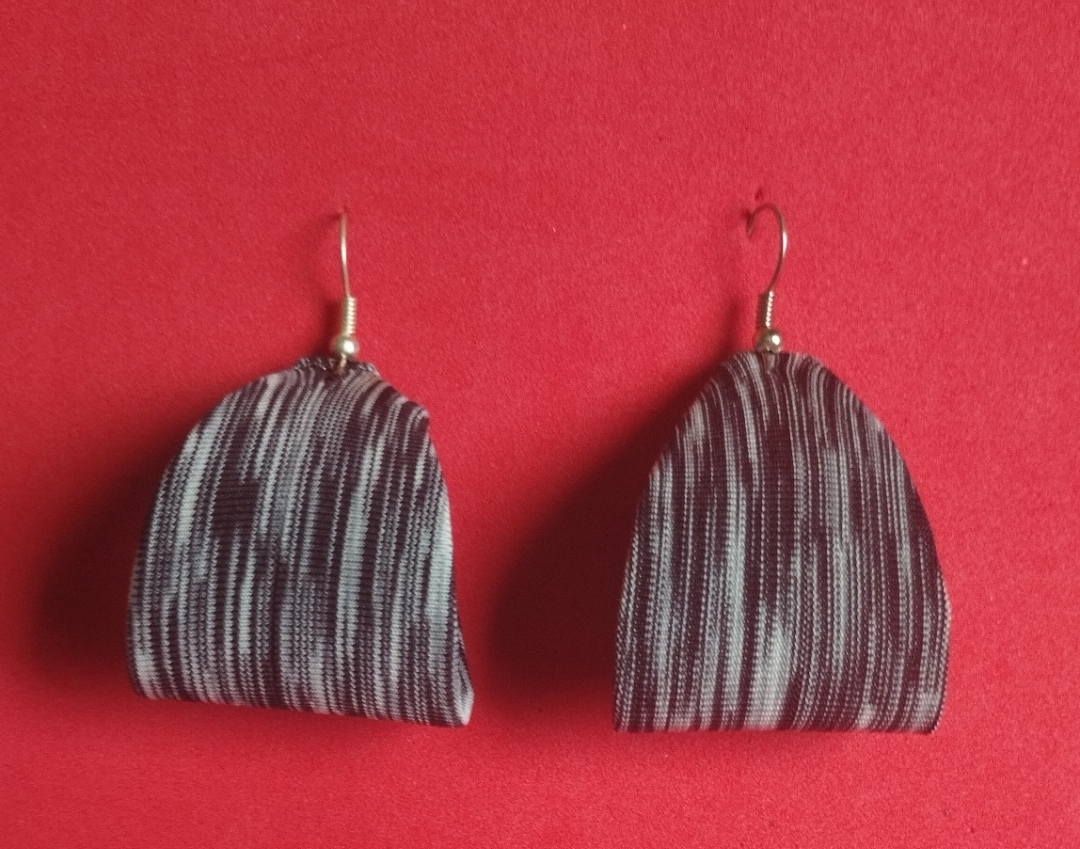
Aquí están mis Pendientes Listo 😍
Here are my Earrings Ready 😍
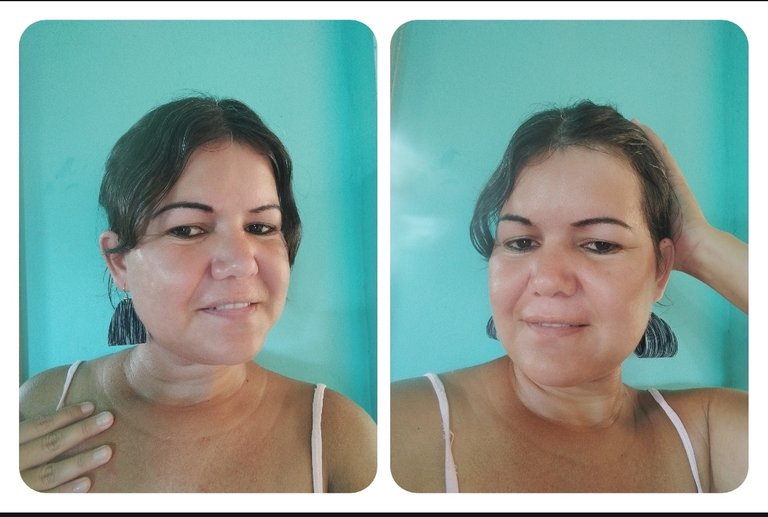
Selfie con mis Pendientes 🥰
Selfie with my Earrings 🥰
Cómo han podido observar estos lindos y Creativos zarcillos son muy fáciles de realizar y quedan hermosos. Ustedes pueden elaborarlos del color que deseen y de seguro lucirán muy bien. Ha sido un placer compartir este tutorial con ustedes, espero podamos vernos pronto con la elaboración de una nueva joya. Se les quiere 😘
As you have seen, these cute and creative earrings are very easy to make and look beautiful. You can make them in the color of your choice and they will look great for sure. It has been a pleasure to share this tutorial with you, I hope to see you soon with the elaboration of a new jewelry. We love you 😘
Gracias por apoyar y visitar mi publicación, nos vemos en una próxima oportunidad 💝
Thank you for supporting and visiting my publication, see you in a future opportunity 💝
Imágenes propias tomadas con mi Celular Redmi Note 11. Traducciones realizadas con Deepl.com.
Own images taken with my Redmi Note 11 cell phone. Translations made with Deepl.com.