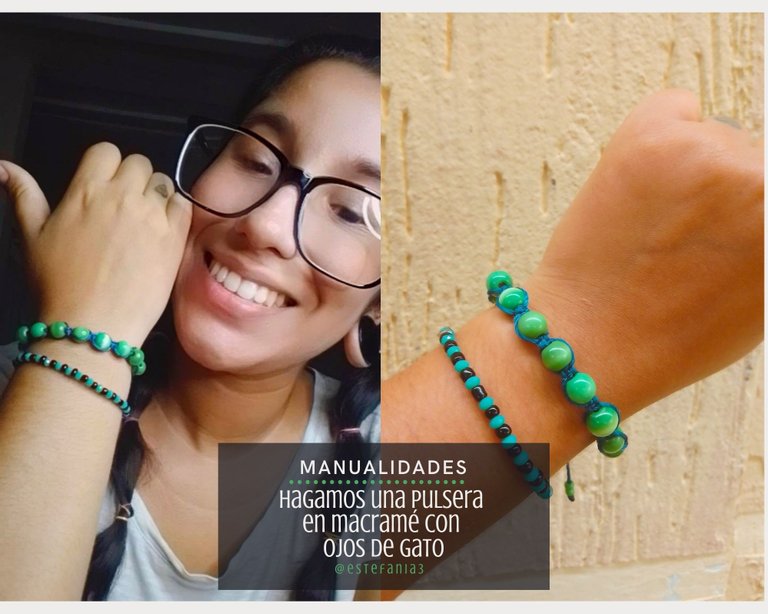

¡Hola Chicos!
Hoy quisiera compartir con ustedes el tutorial con el que podrán crear esta linda pulsera en macramé.
Este tejido es ideal para quienes van comenzando en el mundo de las artesanías y además combina muy bien con cualquier abalorio o piedra.
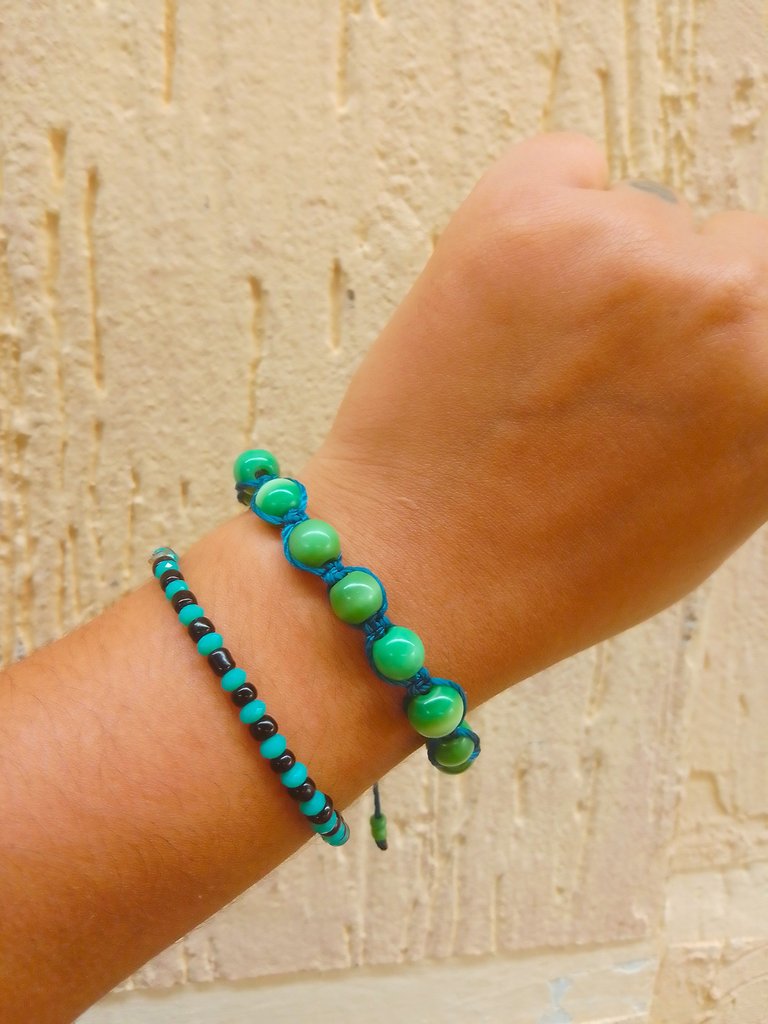
En este caso utilicé unas de ojo de gato en color verde. Estas cuentas están hechas de vidrio y al moverlas tienen un lindo efecto en su interior, por lo que lo convierte en un accesorio único.
La creación de esta pulsera es súper fácil y podrás hacerla en cuestión de minutos. Algo que es genial porque si estas necesitando un regalo urgente, esta pulsera puede sacarte de apuros.
Está pulsera forma parte de la colección que estoy creando para mí venta de bisutería, la cual me tiene bastante emocionada y llena de inspiración. Pronto les estaré trayendo nuevas creaciones.
Así que sin más que agregar, vayamos con los materiales y el paso a paso. ♥
Hey guys!
Today I would like to share with you the tutorial with which you can create this beautiful macramé bracelet.
This fabric is ideal for those who are starting in the world of crafts and also combines very well with any bead or stone.
In this case I used green cat eye ones. These beads are made of glass and moving them around has a nice effect on the inside, making it a unique accessory.
The creation of this bracelet is super easy and you will be able to create it in a matter of minutes. Something that is great because if you are in need of an urgent gift, this bracelet can get you out of trouble.
This bracelet is part of the collection that I am creating for my jewelry sale, which has me quite excited and full of inspiration. Soon I will be bringing you new creations.
So without further ado, let's go with the materials and step by step. ♥
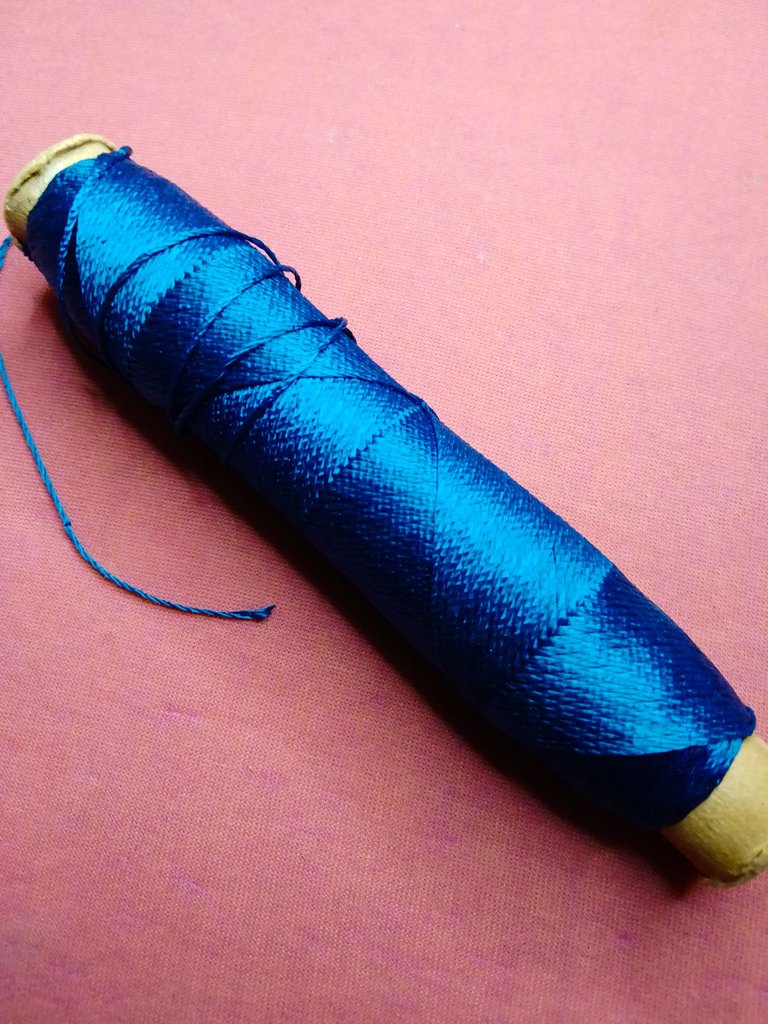
- 2 tiras de 90 y 45 centímetros de hilo encerado azul
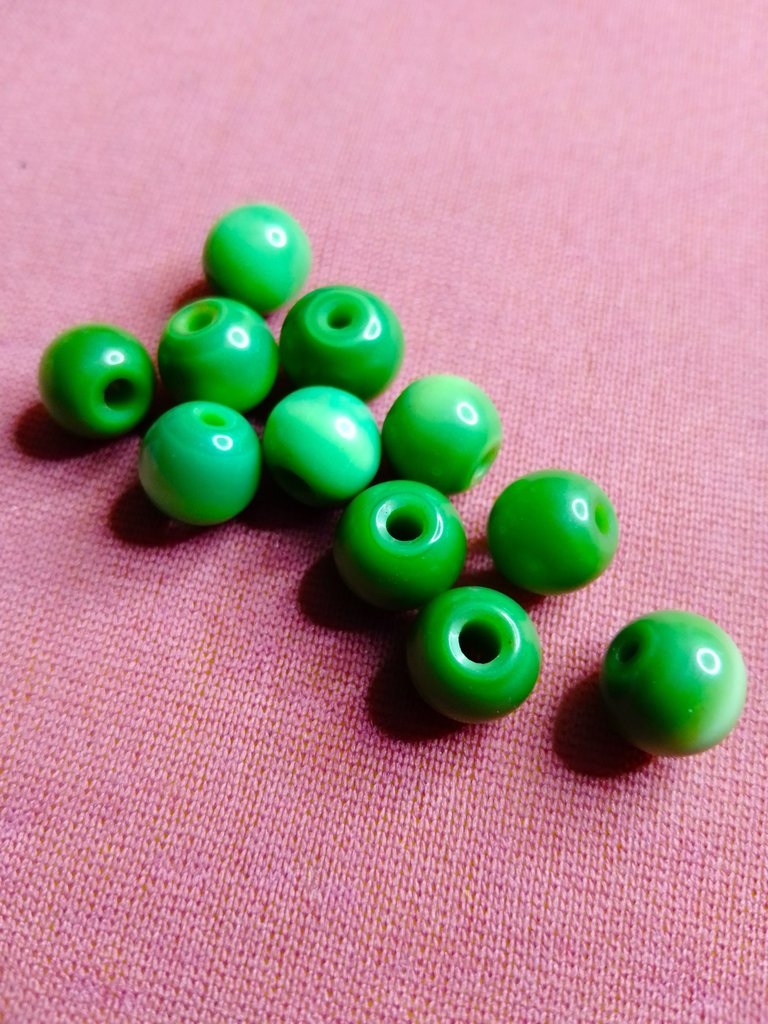
- 10 ojos de gato verde
- Encendedor
- Tijera
- 2 strips of 90 and 45 centimeters of blue waxed thread
- 10 green cat eyes
- Lighter
- Scissors
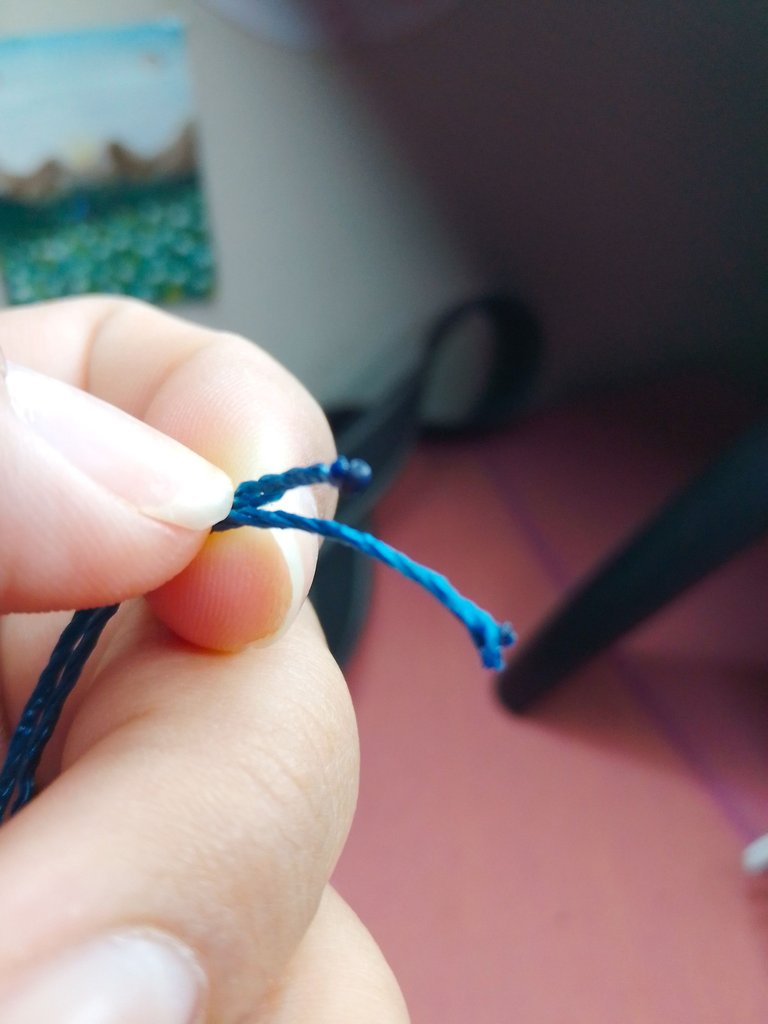
Vamos a cortar ambas tiras de hilo encerado y con el encendedor sellamos todos los extremos para evitar que se deshilachen.
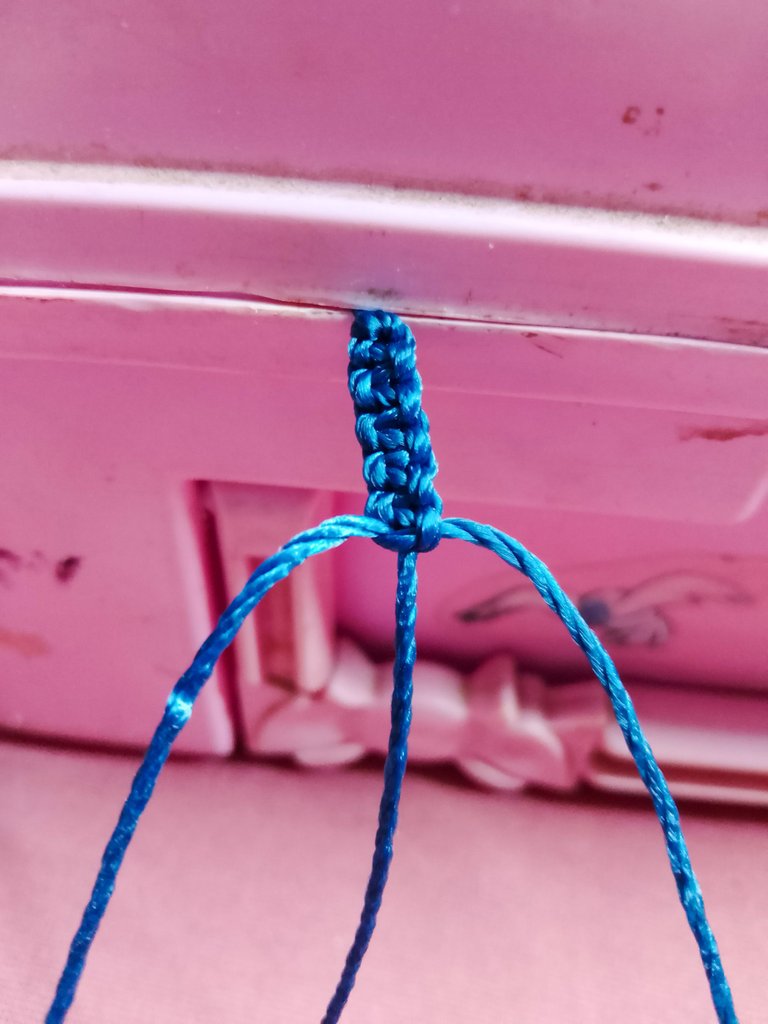
En una base colocamos el hilo de 45 centímetros, dejando 11 centímetros en el extremo superior. A partir de ahí amarraremos el hilo de 90 centímetros doblado a la mitad.
Colocamos el doblez rodeando el hilo más corto y comenzamos a tejer 10 puntos básicos de macramé como te muestro en la siguiente fotografía.
We are going to cut both strips of waxed thread and with the lighter we seal all the ends to prevent them from fraying.
On a base we place the 45-centimeter thread, leaving 11 centimeters at the upper end. From there we will tie the 90 centimeter thread folded in half.
We place the fold around the shorter thread and begin to weave 10 basic macramé stitches as I show you in the following photograph.
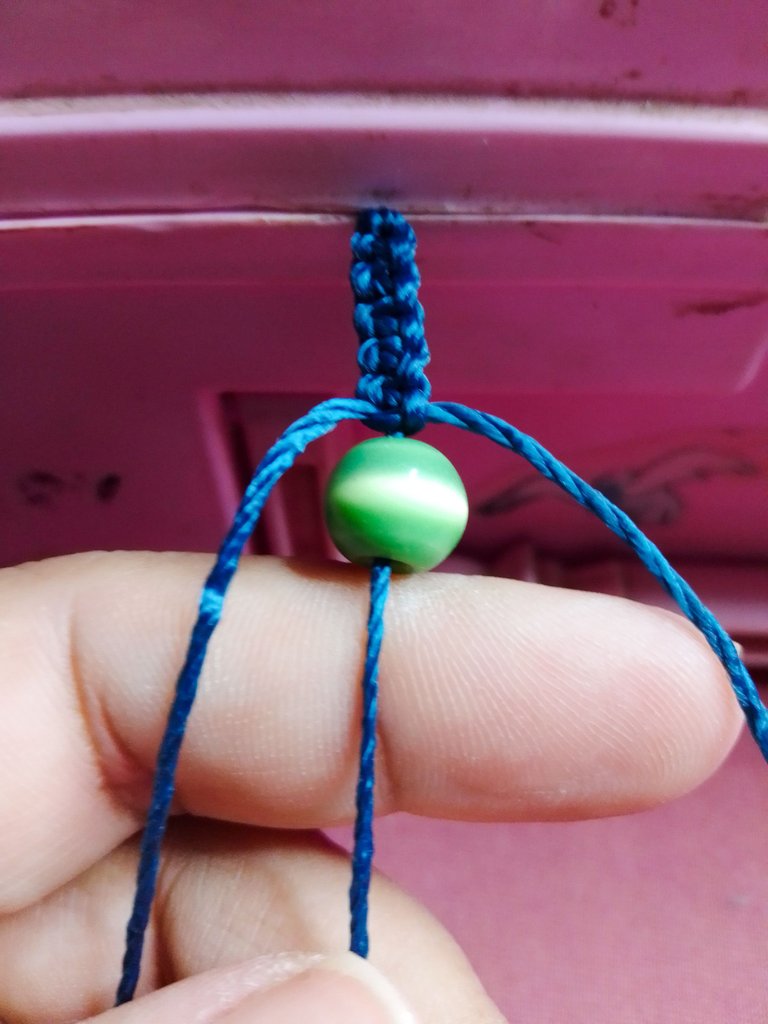
Introducimos la primera cuenta de ojo de gato en el hilo central. Luego haremos 3 nudos macramé para asegurarla.
We introduce the first cat's eye bead in the central thread. Then we will make 3 macramé knots to secure it.
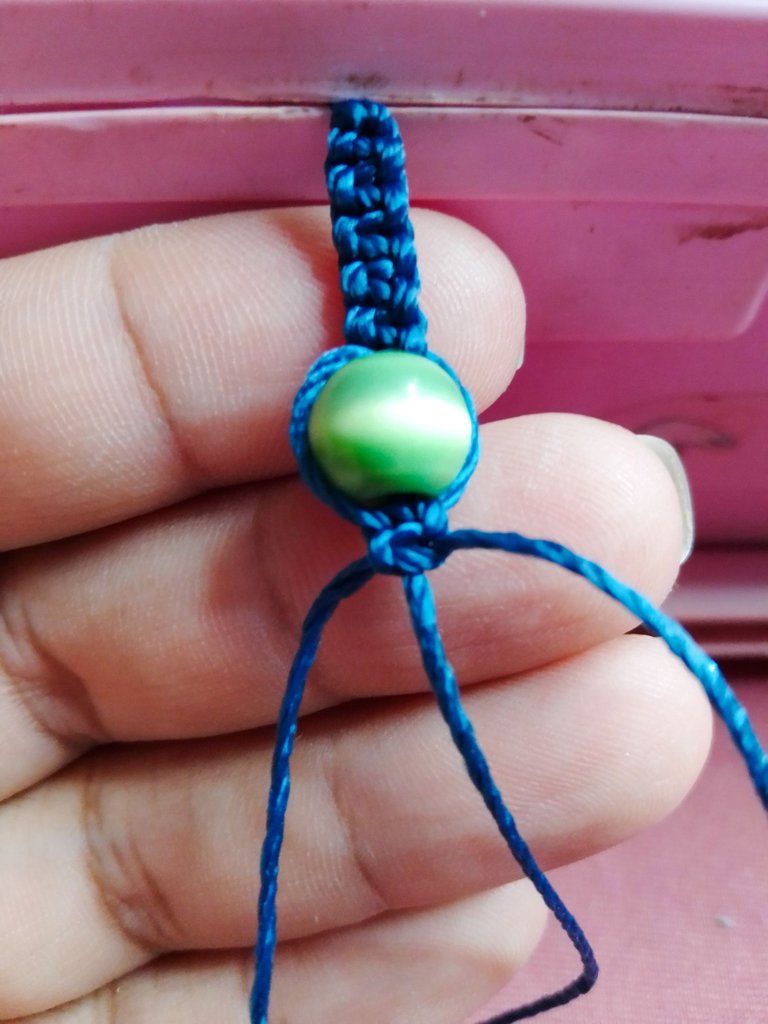
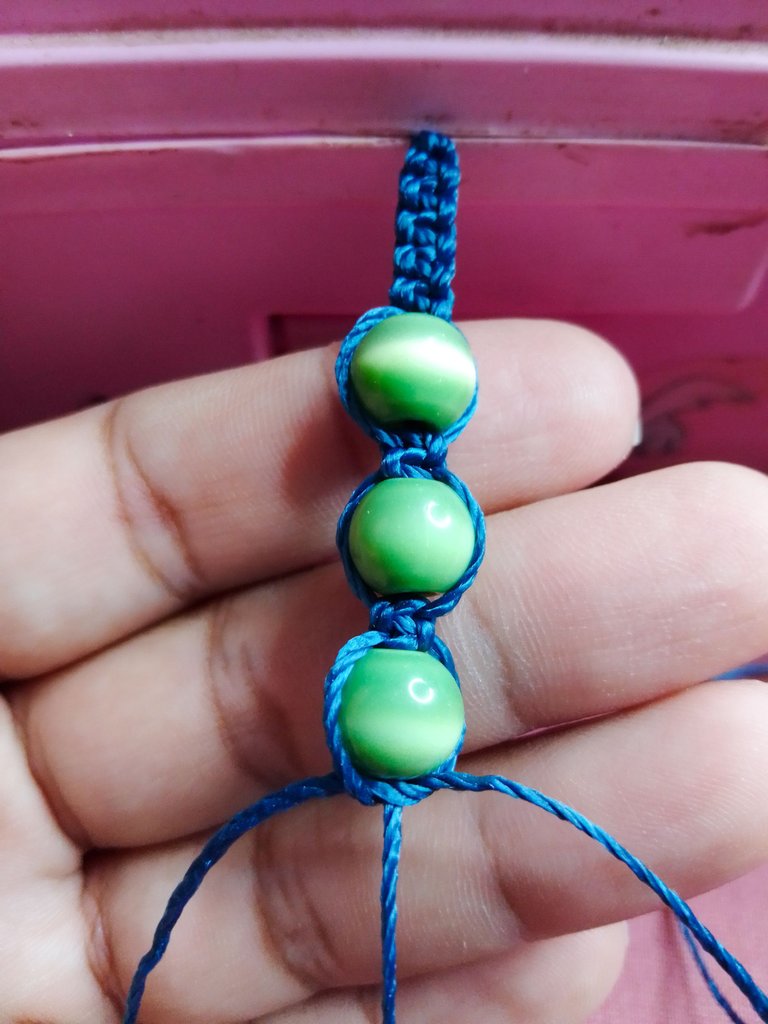
Repetiremos esta secuencia hasta introducir las 10 cuentas de ojos de gato, siempre tejiendo 3 nudos de separación.
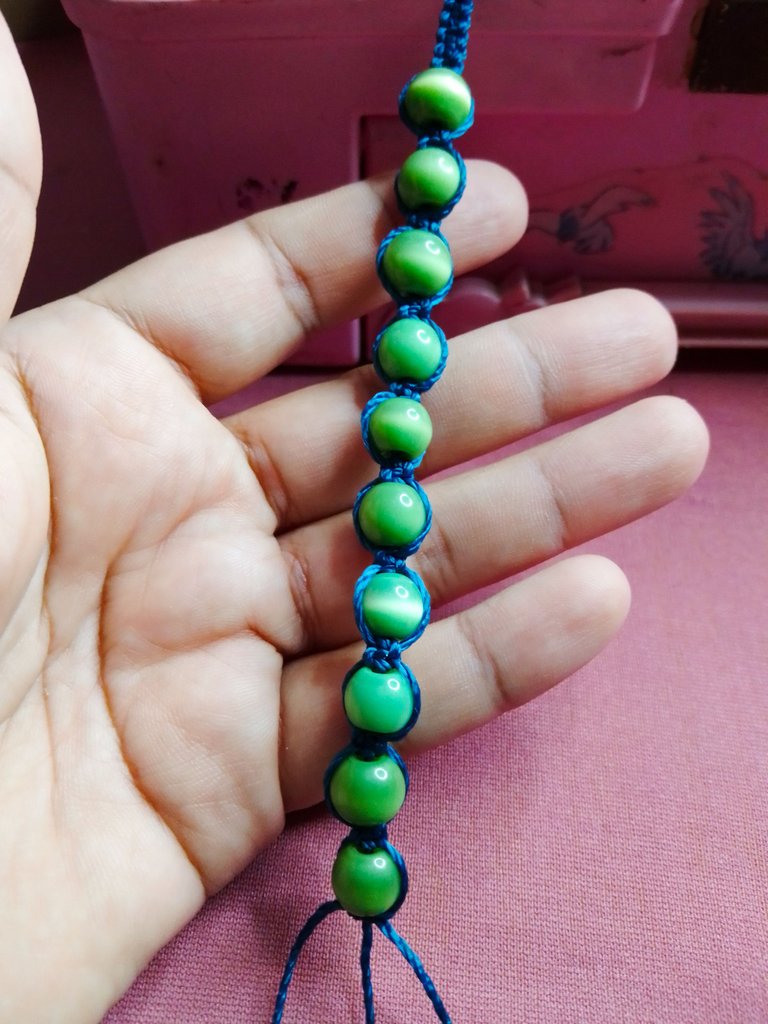
We will repeat this sequence until we introduce the 10 cat's eye beads, always weaving 3 separate knots.
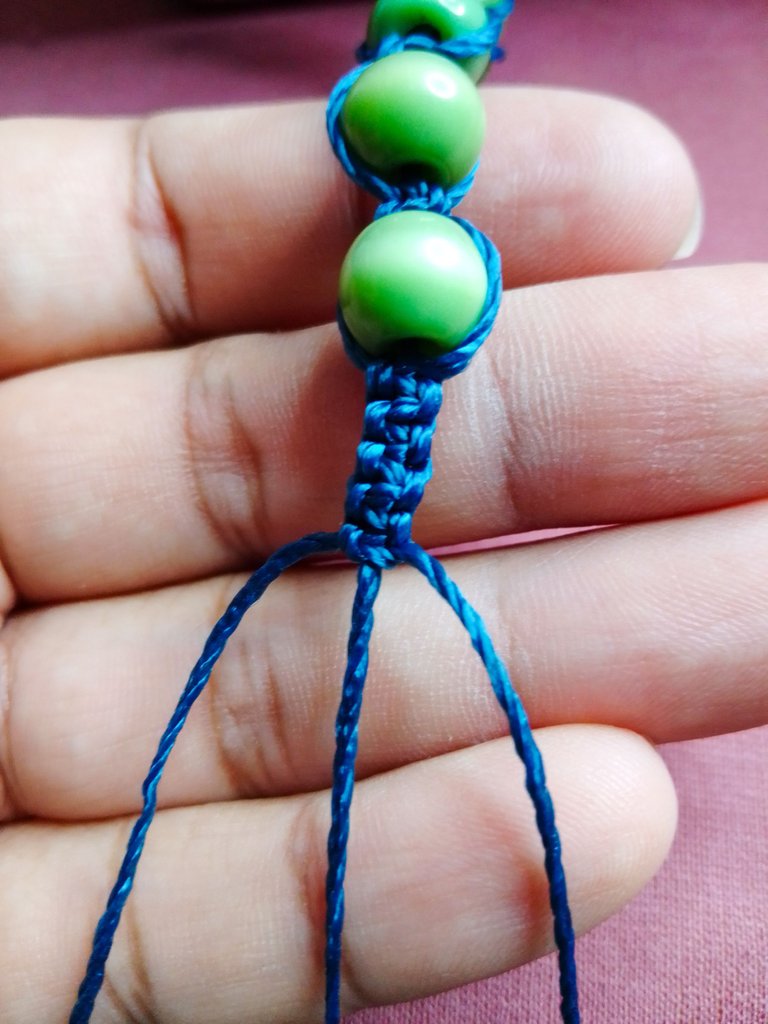
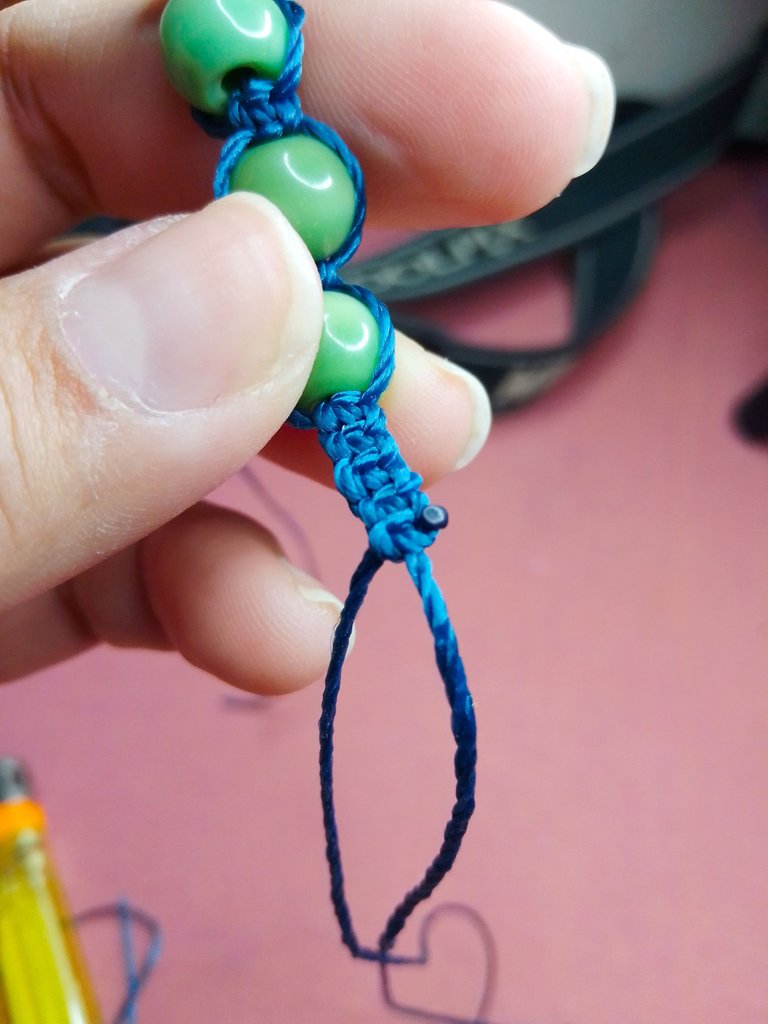
Al llegar al final tejeremos 10 puntos, como hicimos al inicio para que quede la pulsera pareja.
Retiramos de la base de donde teníamos sostenida la pulsera.
When we reach the end we will weave 10 stitches, as we did at the beginning so that the bracelet is even.
We removed from the base where we had held the bracelet.
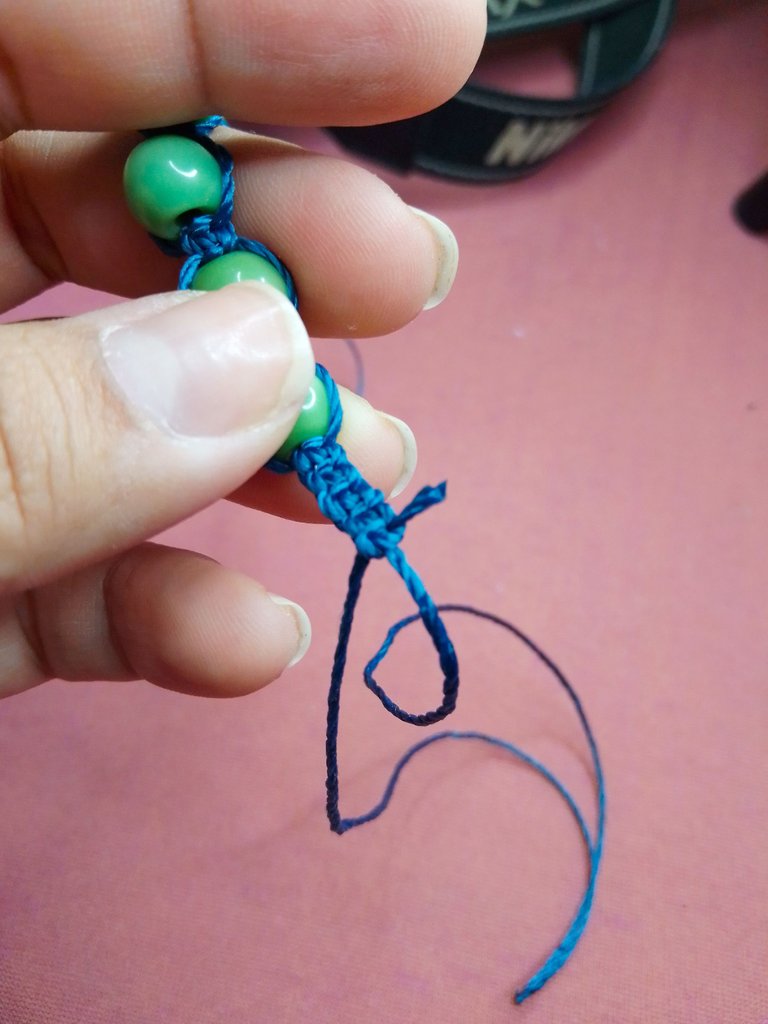
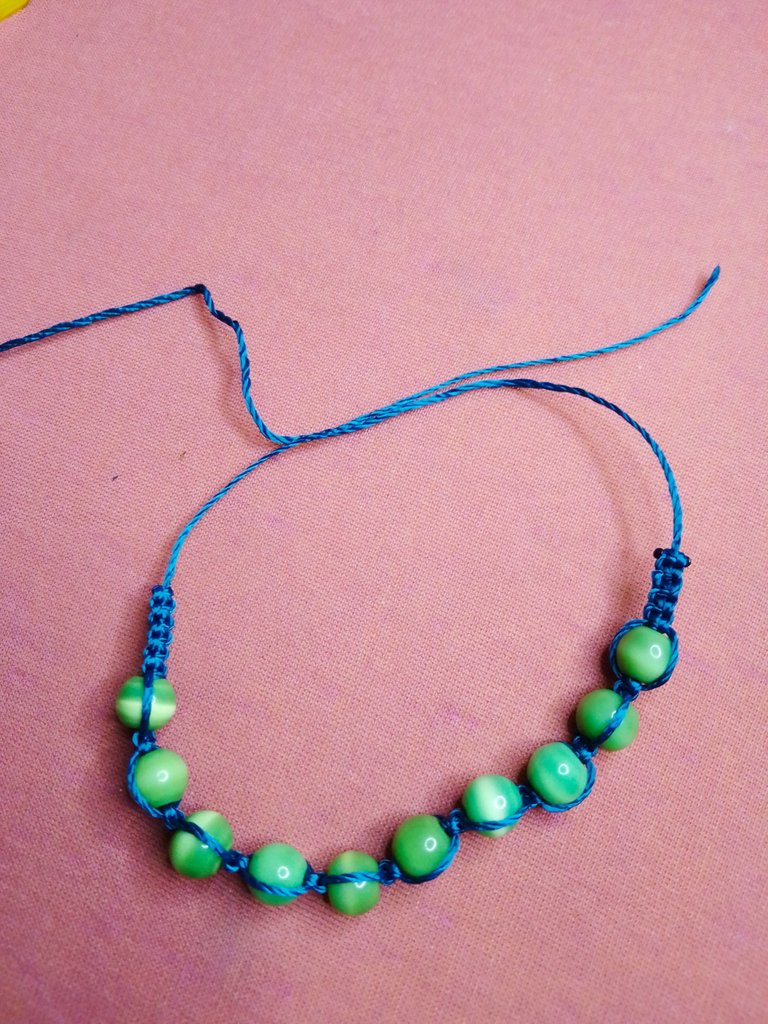
Ahora debemos hacer algo con los excedentes de hilo. Tomamos la tijera y cortamos el exceso dejando medio centímetro de hilo.
Con el encendedor vamos a quemar este pequeño hilo para sellar la pulsera. Hacemos lo mismo con el otro hilo.
Now we have to do something with the surplus yarn. We take the scissors and cut the excess leaving half a centimeter of thread.
With the lighter we are going to burn this small thread to seal the bracelet. We do the same with the other thread.
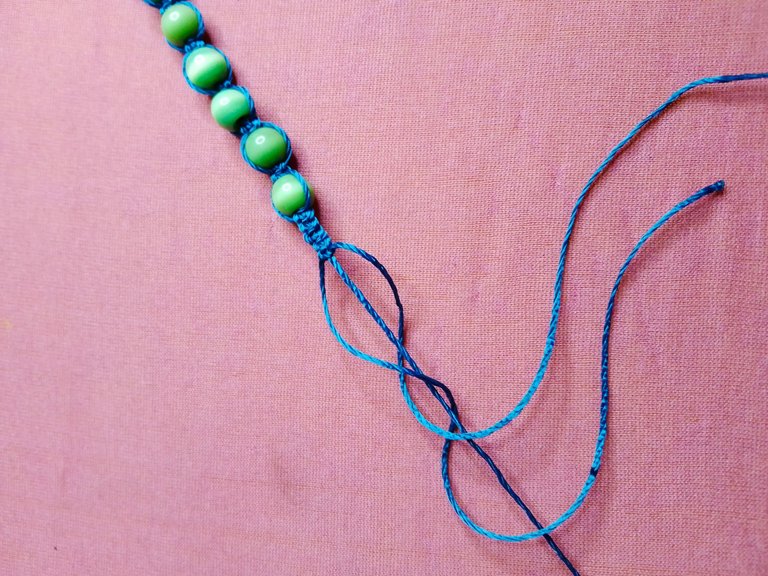
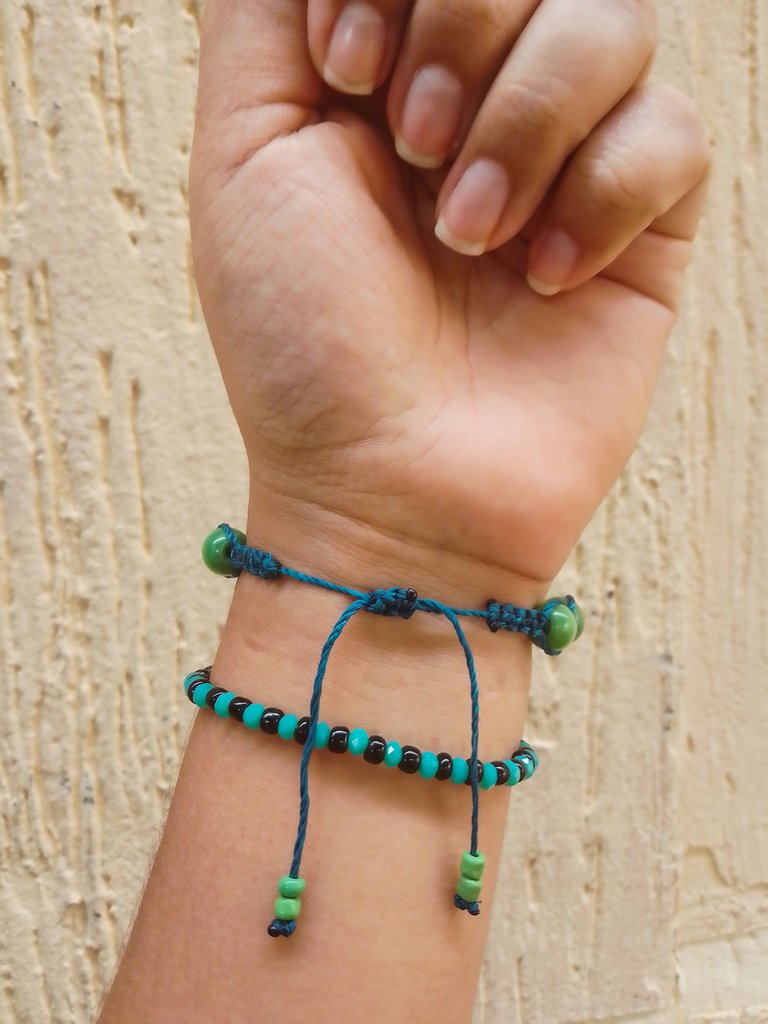
Para finalizar haremos un nudo corredizo para ajustar la pulsera. Tomaremos un trozo de 10 centímetros de hilo, cruzamos los extremos de la pulsera, como se aprecia en la foto, y sobre ellos tejemos 6 puntos macramé.
Cortamos los excedentes y quemamos con el encendedor las puntas de los hilos.
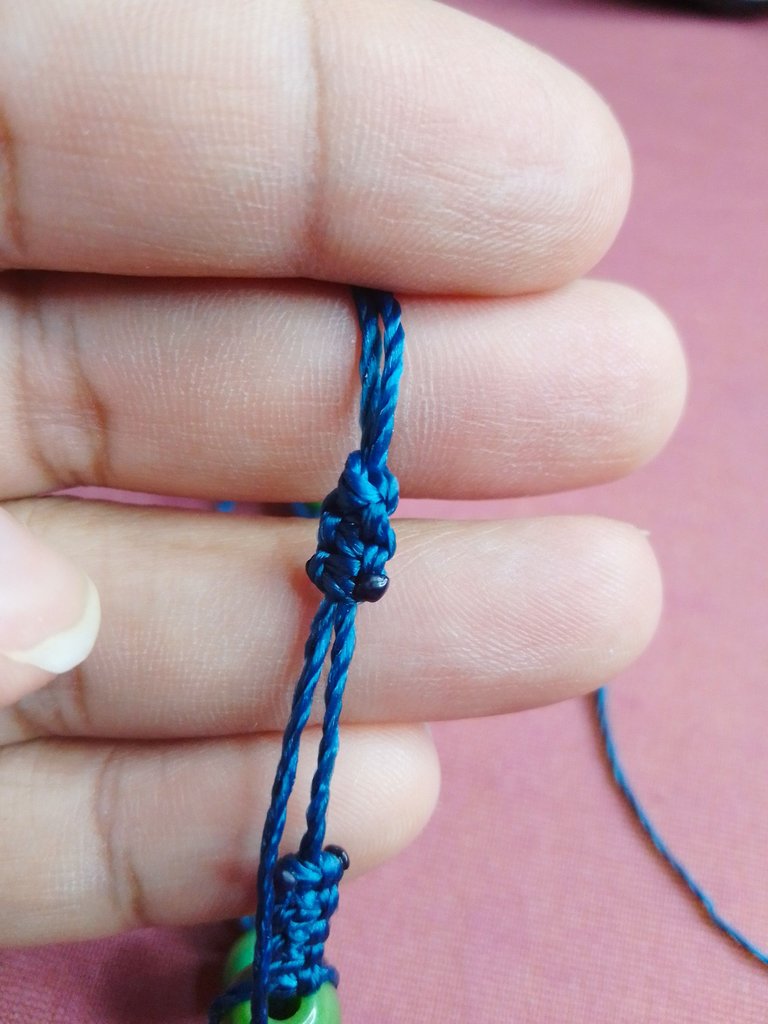
To finish we will make a slipknot to adjust the bracelet. We will take a 10-centimeter piece of thread, cross the ends of the bracelet, as shown in the photo, and weave 6 macramé stitches on them.
We cut the excesses and burn the ends of the threads with the lighter.
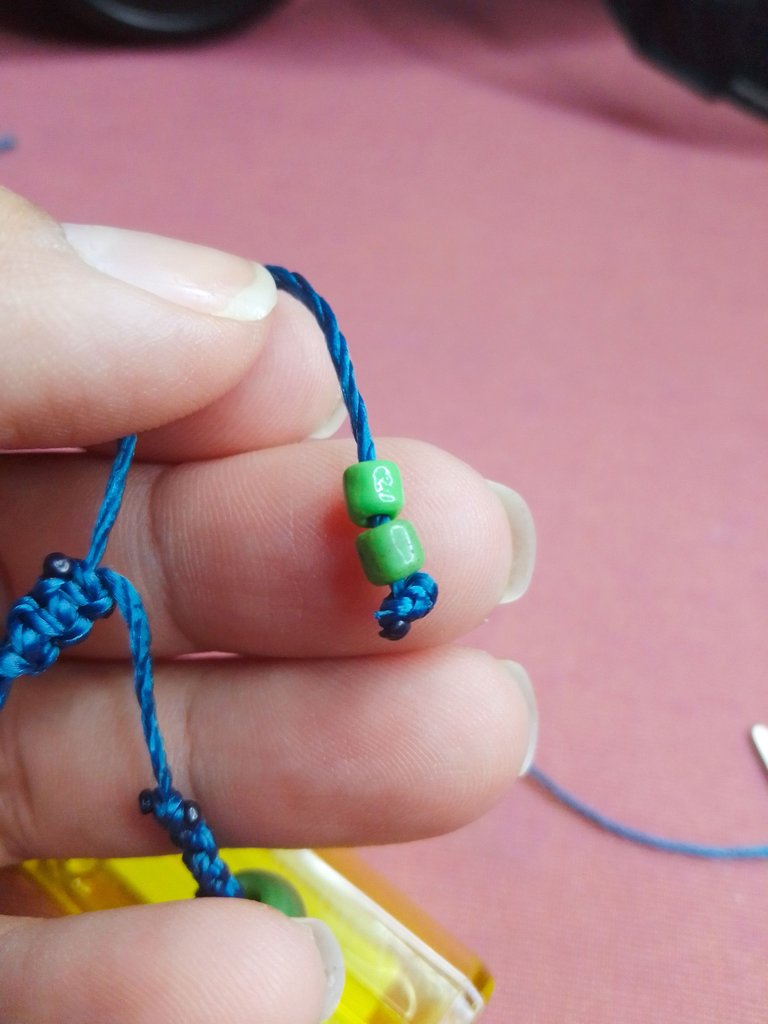
En los extremos de la pulsera coloqué dos abalorios verdes de cada lado para hacer un poco de peso y agregar un lindo detalle.
Así tenemos lista nuestra pulsera. Espero les haya gustado la propuesta. ♥
At the ends of the bracelet I placed two green beads on each side to add some weight and add a nice detail.
So we have our bracelet ready. I hope you liked the proposal. ♥

Espero haya sido de tu agrado y provecho.
Un gran abrazo a todos, y nos leemos en un próximo post
• Lakrearte en Hive •
Att: Estefania Garcia ♥

Imágenes y separadores de mi autoría
Portada editada en Canva
Fotografías tomadas con un Moto E7i power
Texto traducido en Google ImTranslate v.14.19