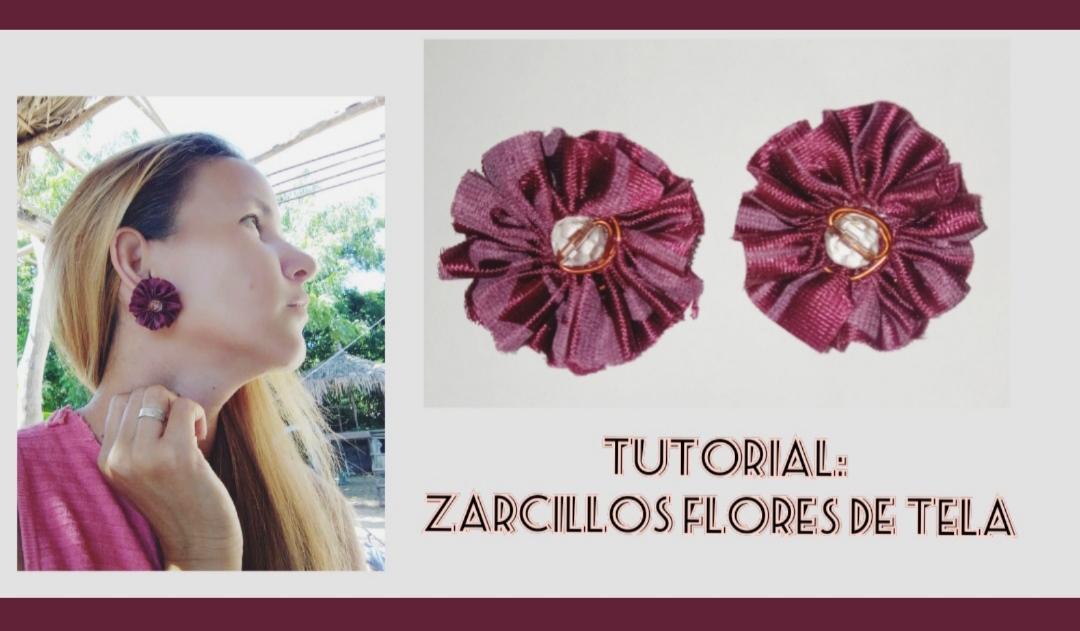
Saludos mis queridos y apreciados amigos miembros de esta bella y creativa comunidad, como siempre un gran placer para mí saludarlos y compartir con esta hermosa comunidad, el día de hoy les traigo una idea muy sencilla pero hermosa para que realicemos hermosos zarcillos de tela en casa de una forma muy fácil, hace un par de días salí a comprar una tela para que mi mamá que le gusta y sabe de costura me realizará un par de cortinas para mi cuarto y he quedado enamorada de esta hermosa tela que acá les comparto. Tanto fue muy atracción por ella que me imaginé con unos hermosos zarcillos Elaborados con esta tela, así que luego que mi mamá terminó y me entrego los retazos te tela que sobraron me puse mano a la obra, y acá está mi creación.
Greetings my dear and appreciated friends, members of this beautiful and creative community, as always a great pleasure for me to greet you and share with this beautiful community, today I bring you a very simple but beautiful idea so that we can make beautiful tendrils of fabric at home in a very easy way, a couple of days ago I went out to buy a fabric so that my mother, who likes it and knows how to sew, will make me a couple of curtains for my room and I have fallen in love with this beautiful fabric that here I share.
She was so attracted to her that I imagined myself with some beautiful earrings made with this fabric, so after my mom finished and gave me the leftover scraps of fabric, I got to work, and here is my creation.
Como mi intención era poder compartirlos con ustedes realice un fácil y sencillo tutorial que les fuera de utilidad para ustedes, y acá les comparto mi paso a paso.
As my intention was to be able to share them with you, I made an easy and simple tutorial that would be useful for you, and here I share my step by step.
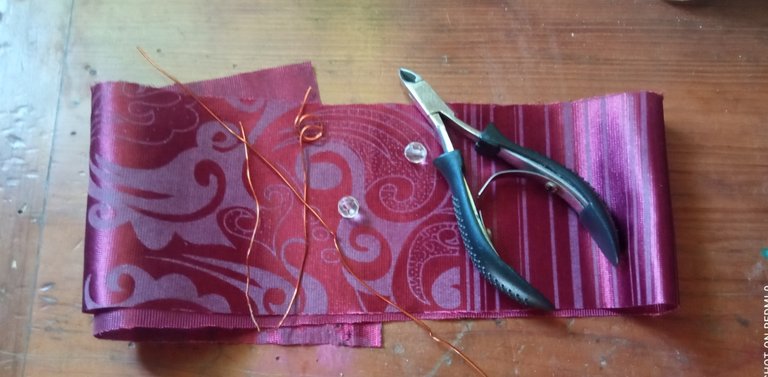
✴️ Que necesitamos:
- Retazos de tela.
- Alambre de Cobre.
- Pinza.
- Tijera.
- Pedrería.
✴️ What we need:
- Pieces of cloth.
- Copper wire.
- Gripper.
- Scissors.
- Rhinestones.
😊 paso a paso
😊 Step by step
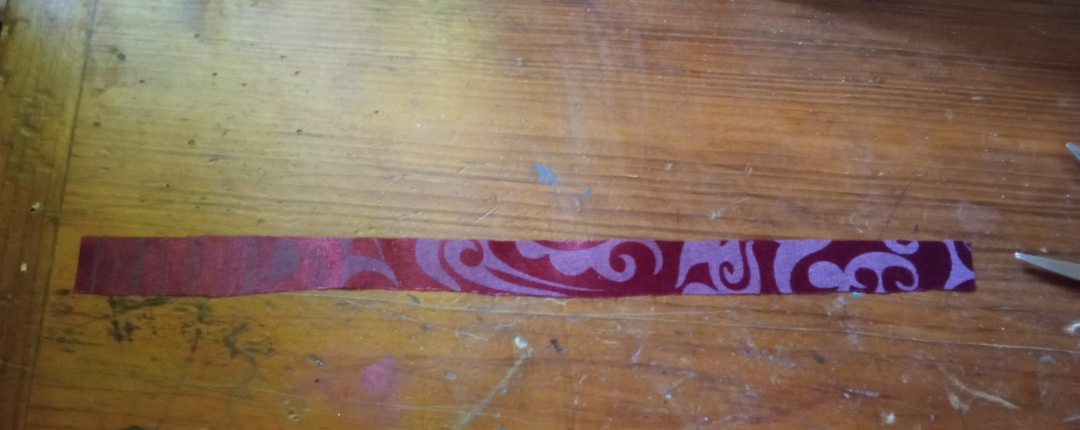
⭐ Paso 1: Primeramente al tener a nuestro alcance los materiales necesarios procedemos con ayuda de la tijera y la regla a medir y a cortar dos pedazos de tela de aproximadamente 30 cm de largo y dos cm de ancho.
⭐ Step 1: First, having the necessary materials within our reach, we proceed with the help of scissors and a ruler to measure and cut two pieces of fabric approximately 30 cm long and 2 cm wide.
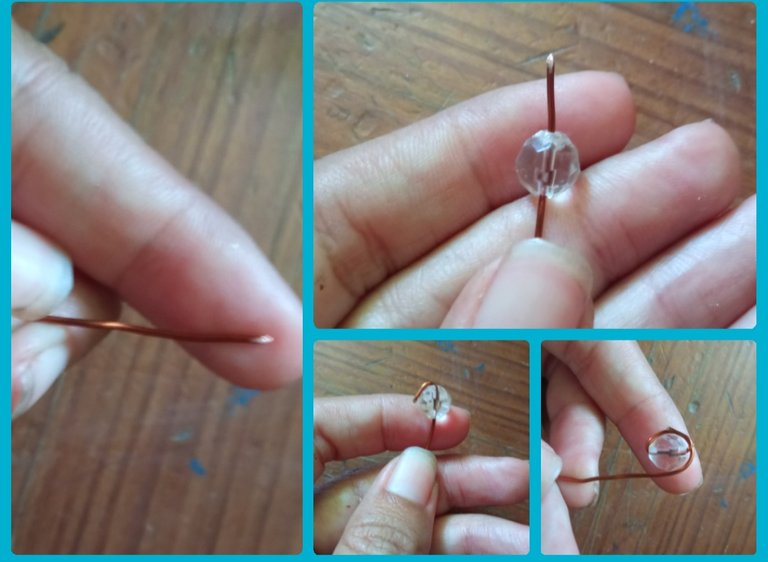
⭐ Paso 2: Seguidamente cortamos un trozo de alambre de 10cm y con ayuda de la pinza cortamos una de sus puntas dando una forma muy afilada, como forma de aguja a nuestro alambre, por el otro extremo del alambre i troduciremos la pedrería que hemos seleccionado, yo seleccione transparente para combinar con el color fuerte de la tela, una vez ingresada la pedrería doblamos la punta del alambre de modo que la pedrería quedé sujeta y no se mueva y realizamos una vuelta alrededor de la pedrería con el alambre de cobre.
⭐ Step 2: Next we cut a 10cm piece of wire and with the help of the pliers we cut one of its ends giving a very sharp shape, like a needle to our wire, on the other end of the wire we will introduce the rhinestones that we have selected , I selected transparent to combine with the strong color of the fabric, once the rhinestones were inserted, we bent the tip of the wire so that the rhinestones remained attached and did not move, and we made a loop around the rhinestones with the copper wire.
⭐ Paso 3:Por el otro extremo del alambre el cual le realizamos la punta comenzaremos a introducir la tira de tela que ya hemos recortado, introducimos el alambre en forma de zip-zap hasta introducir toda la tela
⭐ Step 3: At the other end of the wire, which we made the tip of, we will begin to introduce the strip of fabric that we have already cut, we introduce the wire in the form of a zip-zap until we introduce all the fabric
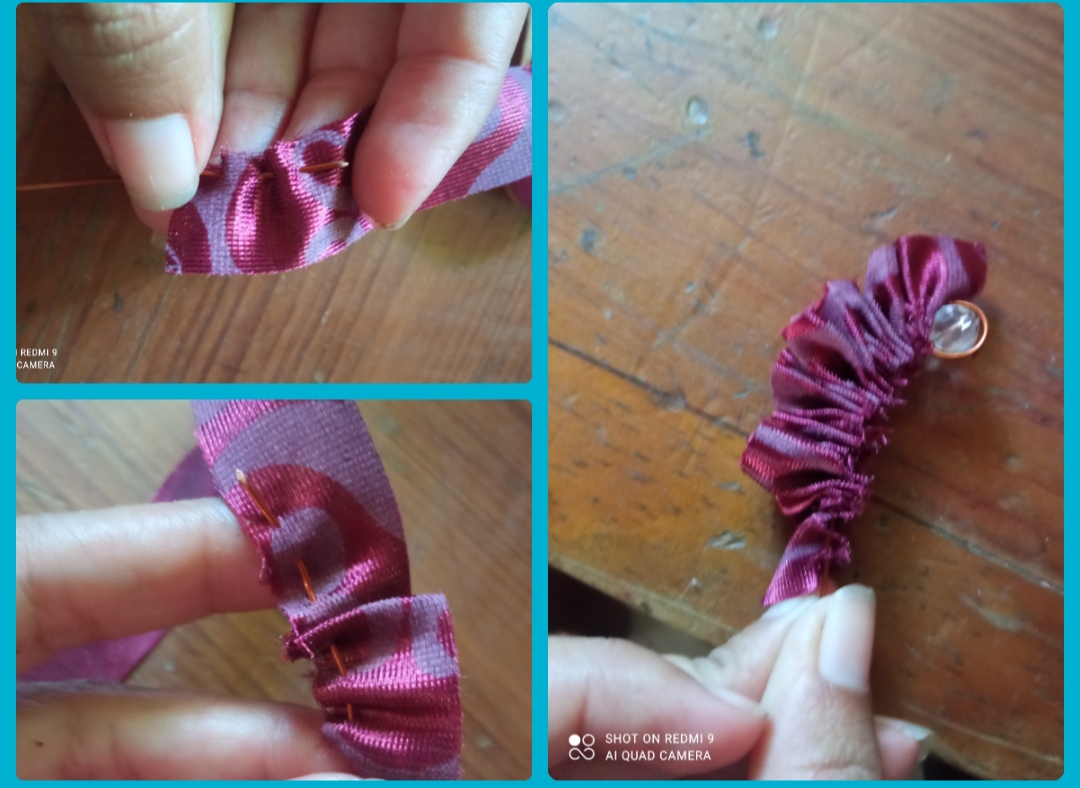
⭐ Paso 4: ahora tomamos la tela hasta llegar a las pedrería y una vez ahí damos la vuelta a las pedrería estirando un poco la tela para que podamos cubrir todo alrededor de las pedrería, esto debe quedar de la siguiente manera, en forma de una hermosa flor .
⭐ Step 4: now we take the fabric until we reach the rhinestones and once there we go around the rhinestones stretching the fabric a little so that we can cover everything around the rhinestones, this should be as follows , in the form of a beautiful flower.

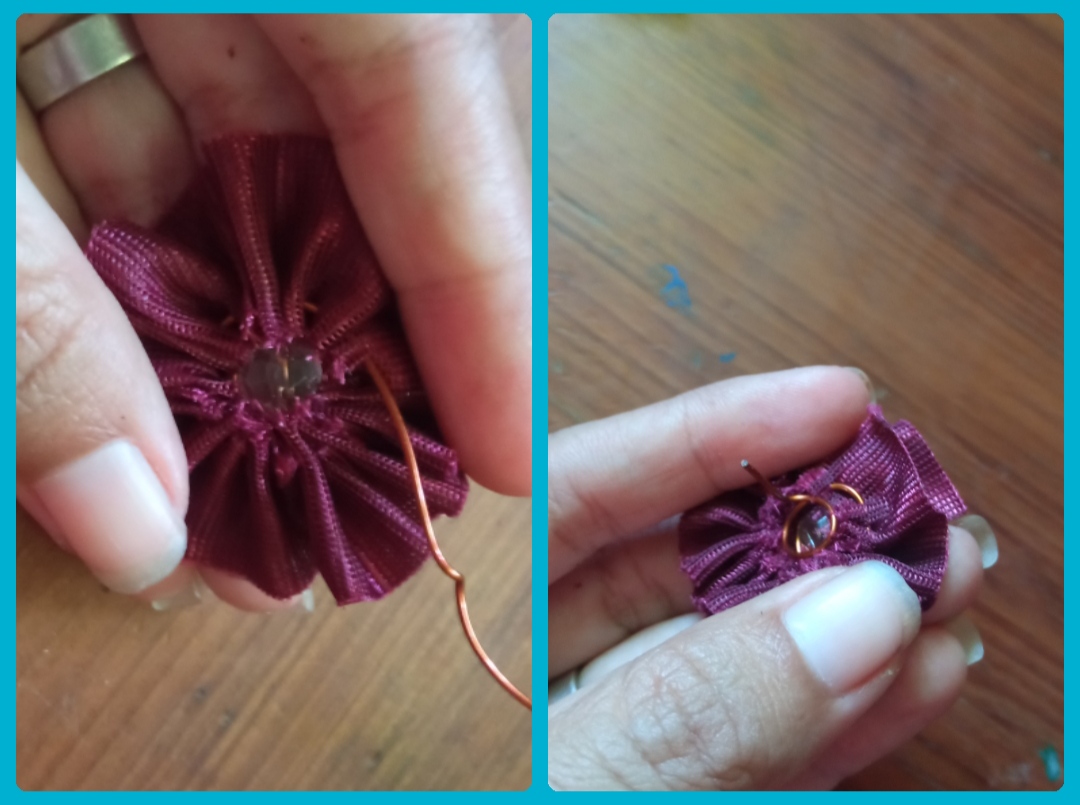
⭐ Paso 5: por último con el alambre que nos sobra lo llevaremos a la parte de atrás de la flor y realizaremos una vuelta circular en la forma de la pedrería y dejamos una punta lisa y cortamos el exceso de alambre.
Está forma que nos servirá para colocarnos el zarcillo, solo necesitamos realizar o comprar una tapita para sujetarlo a nuestra oreja.
⭐ Step 5: finally, with the remaining wire, we will take it to the back of the flower and make a circular turn in the shape of the rhinestones, leaving a smooth tip and cutting off the excess wire.
This shape will help us to put on the earring, we just need to make or buy a cap to hold it to our ear.
⭐ Zarcillos Flores de tela ⭐
⭐ Tendrils Fabric Flowers ⭐
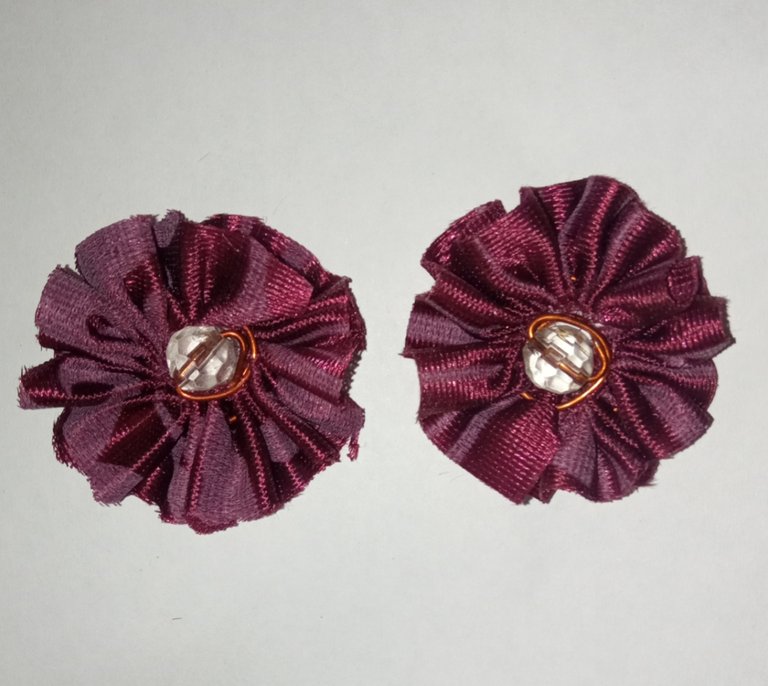
Y así mis queridos amigos lograremos elaborar unos muy hermosos zarcillos ideales para lucir y brillar el cualquier lugar, a mí me encantó el resultado y además no gaste nada en absoluto y gane unos bellos acsesorios.
Espero que este sencillo tutorial les sea de su agrado y utilidad.
And so, my dear friends, we will be able to make some very beautiful earrings that are ideal to show off and shine anywhere. I loved the result and also did not spend anything at all and won some beautiful accessories.
I hope that this simple tutorial will be to your liking and usefulness.
Como siempre Me despido Agradeciendo su visita y estaré atenta a cualquier duda, comentario y por supuesto a cualquier consejo o sugerencia.
Saludos y bendiciones.
As always I say goodbye Thanking you for your visit and I will be attentive to any questions, comments and of course any advice or suggestion.
Greetings and blessings.
las fotos fueron tomadas con mi teléfono Redmi 9, contenido exclusivo para Hive. Y la traducción fue realizada a través de Google.
photos were taken with my Redmi 9 phone, exclusive content for Hive. And the translation was done through Google.