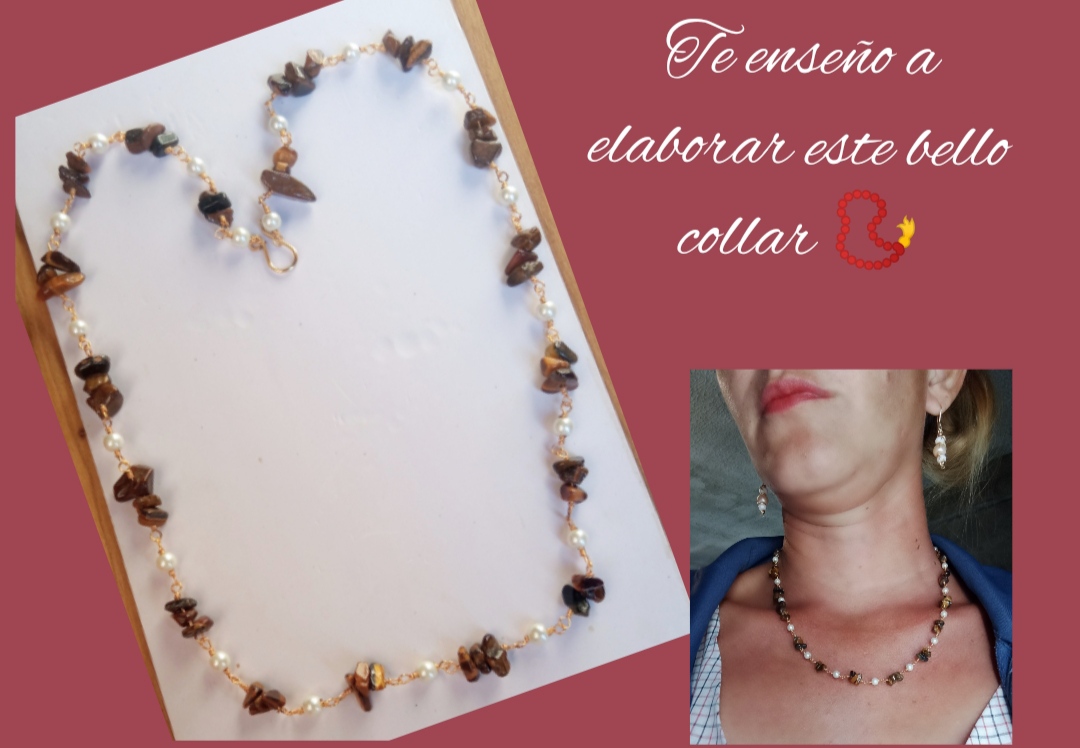
Feliz y bendecido día tengan todos ustedes mis queridos y apreciados amigos, sean todos bienvenidos a mi blog, espero estén pasando una excelente semana, es un gran placer para mí el compartir con esta hermosa comunidad este sencillo tutorial en el que les enseñaré paso a paso el como de manera rápida, fácil y sencilla podemos elaborar un hermoso collar utilizando la técnica del alambrismo. Este hermoso diseño que les comparto el día de hoy además de que no me estamos ser expertos, ni mucha práctica para elaborarlo, es Ideal para lucir y destacar en cualquier ocasión, y además por ser elaborado con un color tierra es ideal para combinar con cualquier vestimenta, este es un diseño muy sencillo y elegante para todos los gustos.
Happy and blessed day to all of you my dear and appreciated friends, you are all welcome to my blog, I hope you are having an excellent week, it is a great pleasure for me to share with this beautiful community this simple tutorial in which I will teach you step by step how we can quickly, easily and simply make a beautiful necklace using the wire technique.
This beautiful design that I share with you today, in addition to the fact that we are not experts, nor much practice in making it, is ideal to show off and stand out on any occasion, and also because it is made with an earthy color, it is ideal to combine with any clothing, this is a very simple and elegant design for all tastes.
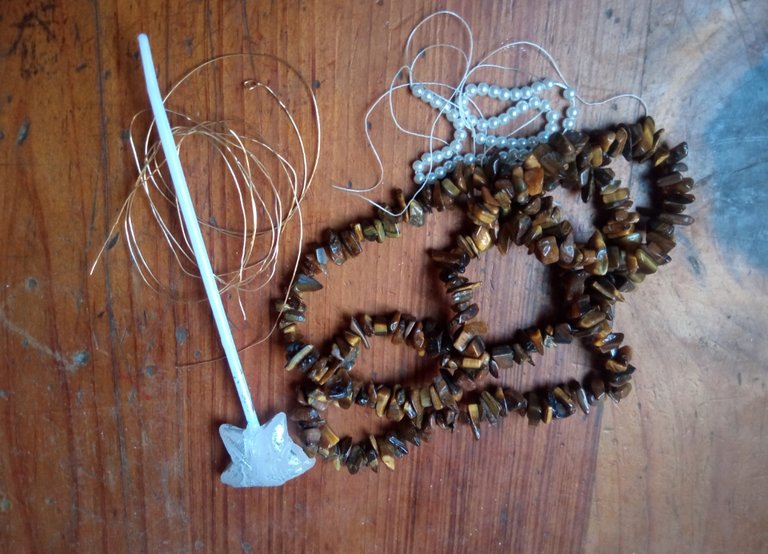
- Alambre de bisutería calibre 20.
- Alambre de bisutería calibre 26.
- piedras blancas perladas.
- piedras cuarzos marrones.
- palillo plástico.
- pinza de bisutería.
- 20 gauge jewelry wire.
- 26 gauge jewelry wire.
- pearly white stones.
- brown quartz stones.
- plastic toothpick.
- jewelry clamp.
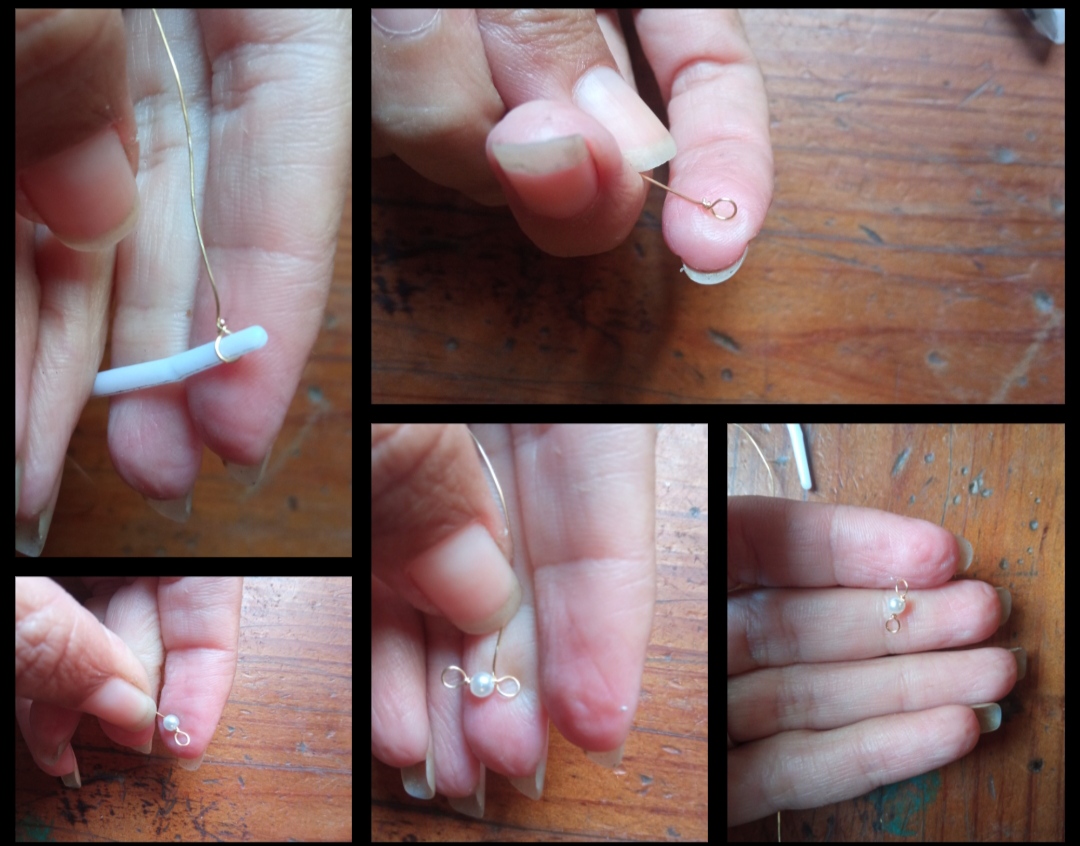
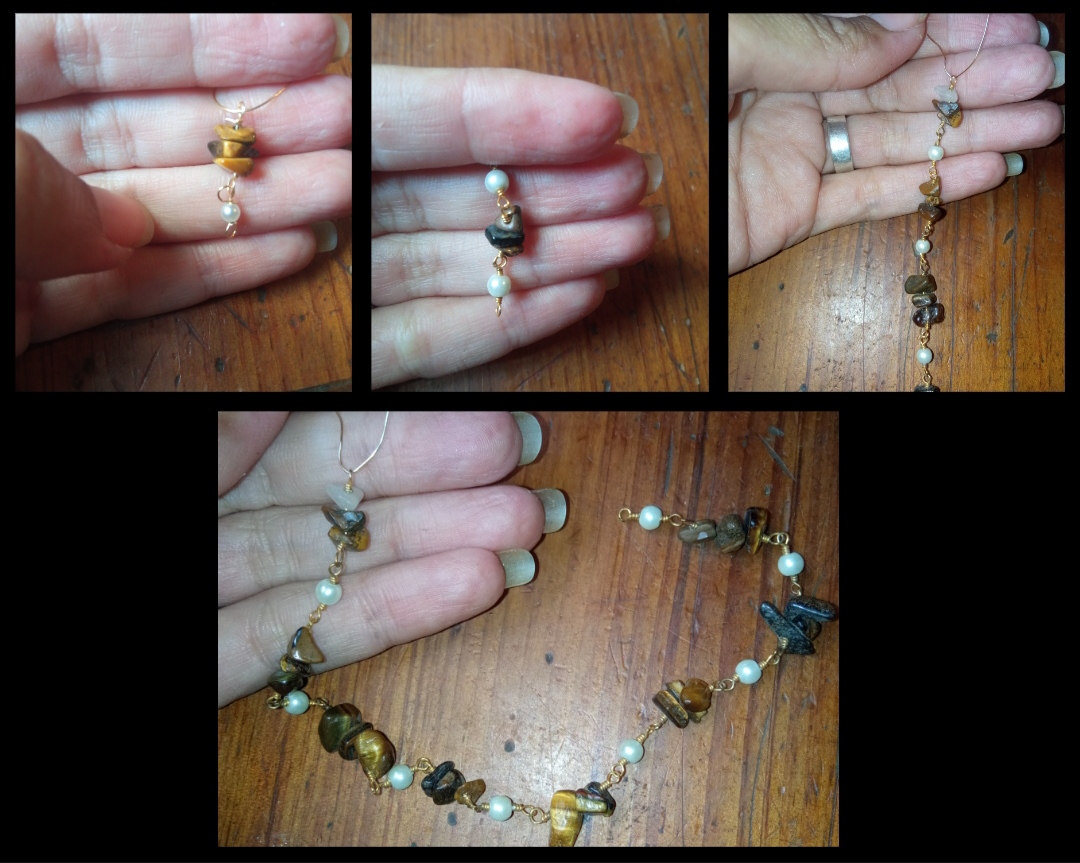
⭐ Paso 1: para iniciar esta hermosa elaboración lo primero que debemos hacer es tomar el alambre calibre 26 y con ayuda de un palillo muy delgado elaboraremos en la punta del alambre una pequeña forma circular como pueden observar en las imágenes, seguidamente introduciremos una pequeña piedra perlada y volvemos a elaborar una forma circular después de la piedra y cortamos el exceso de alambre, quedándonos una pequeña pieza como la que podrán observar a continuación.
⭐ Step 1: to start this beautiful preparation, the first thing we must do is take the 26 gauge wire and with the help of a very thin toothpick we will make a small circular shape at the tip of the wire as you can see in the images, then we will introduce a small pearl stone and we make a circular shape again after the stone and we cut the excess wire, leaving us with a small piece like the one you can see below.
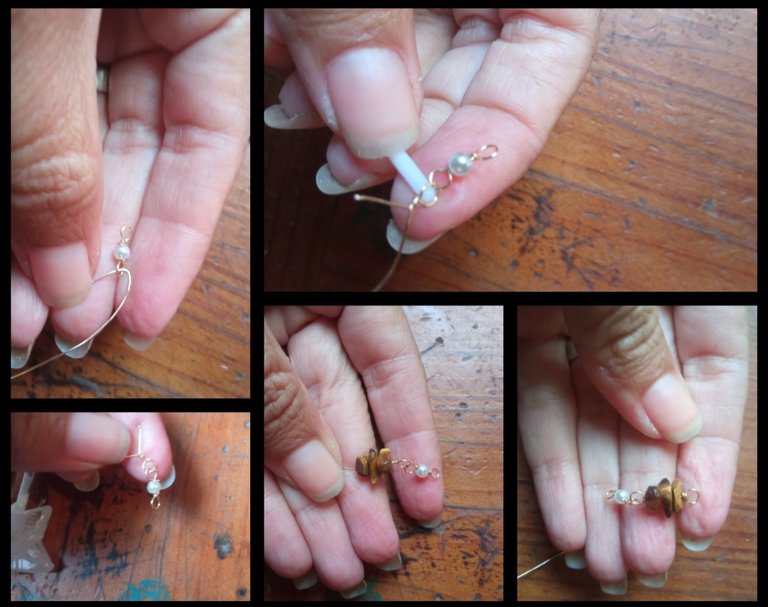
⭐ Paso 2: para continuar tomamos nuevamente el alambre de bisutería calibre 26 y lo introduciremos por una de las argollas de la pieza elaborada en el paso número uno, y apoyándonos en el palillo realizaremos una pequeña forma circular que quedará intercalado a la otra pieza, luego introducimos 3 piedras de cuarzo marrón y cerramos con otra forma circular.
⭐ Step 2: to continue, we take the 26 gauge jewelry wire again and insert it through one of the rings of the piece made in step number one, and leaning on the toothpick we will make a small circular shape that will be inserted into the another piece, then we introduce 3 brown quartz stones and close with another circular shape.
⭐ Paso 3: y así sucesivamente repitiendo los pasos número uno y dos e iremos alargando y dando forma a nuestro lindo collar. Repetiremos el procedimiento las veces necesarias hasta lograr obtener el largo deseado, si lo queremos tipo gargantilla o un poco más larga, esto dependerá de sus gustos y deseos.
⭐ Step 3: and so on, repeating steps number one and two and we will lengthen and shape our cute necklace. We will repeat the procedure as many times as necessary until we achieve the desired length, whether we want it as a choker or a little longer, this will depend on your tastes and desires.
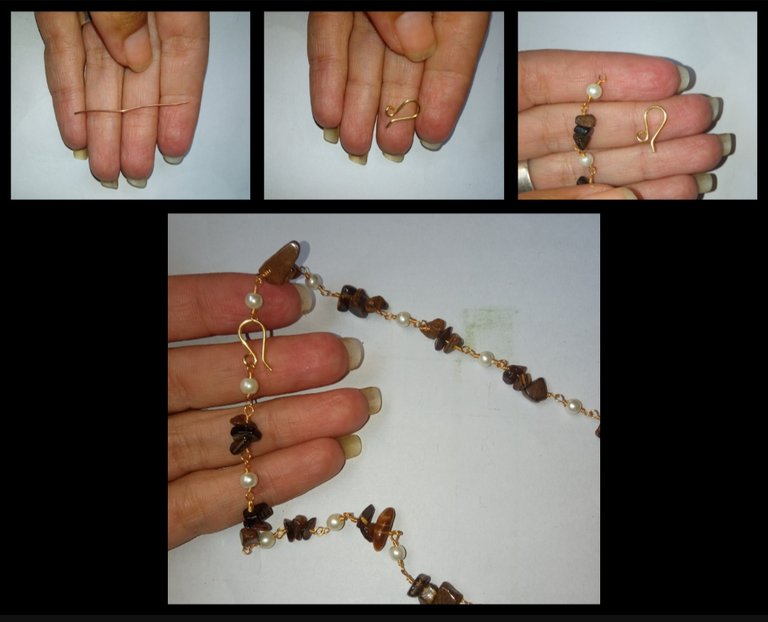
⭐ Paso 4: como último paso tomamos un pedacito de alambre de bisutería calibre 20 y con ayuda de la pinza de bisutería elaboraremos un pequeño ganchito que nos servirá para cerrador de cadena. Y lo uniremos a nuestro hermoso collar enganchandolo en la última argolla y listo nuestro hermoso diseño de collar.
⭐ Step 4: as the last step we take a small piece of 20 gauge jewelry wire and with the help of the jewelry clamp we will make a small hook that will serve as a chain closer.
And we will attach it to our beautiful necklace by hooking it into the last ring and our beautiful necklace design is ready.
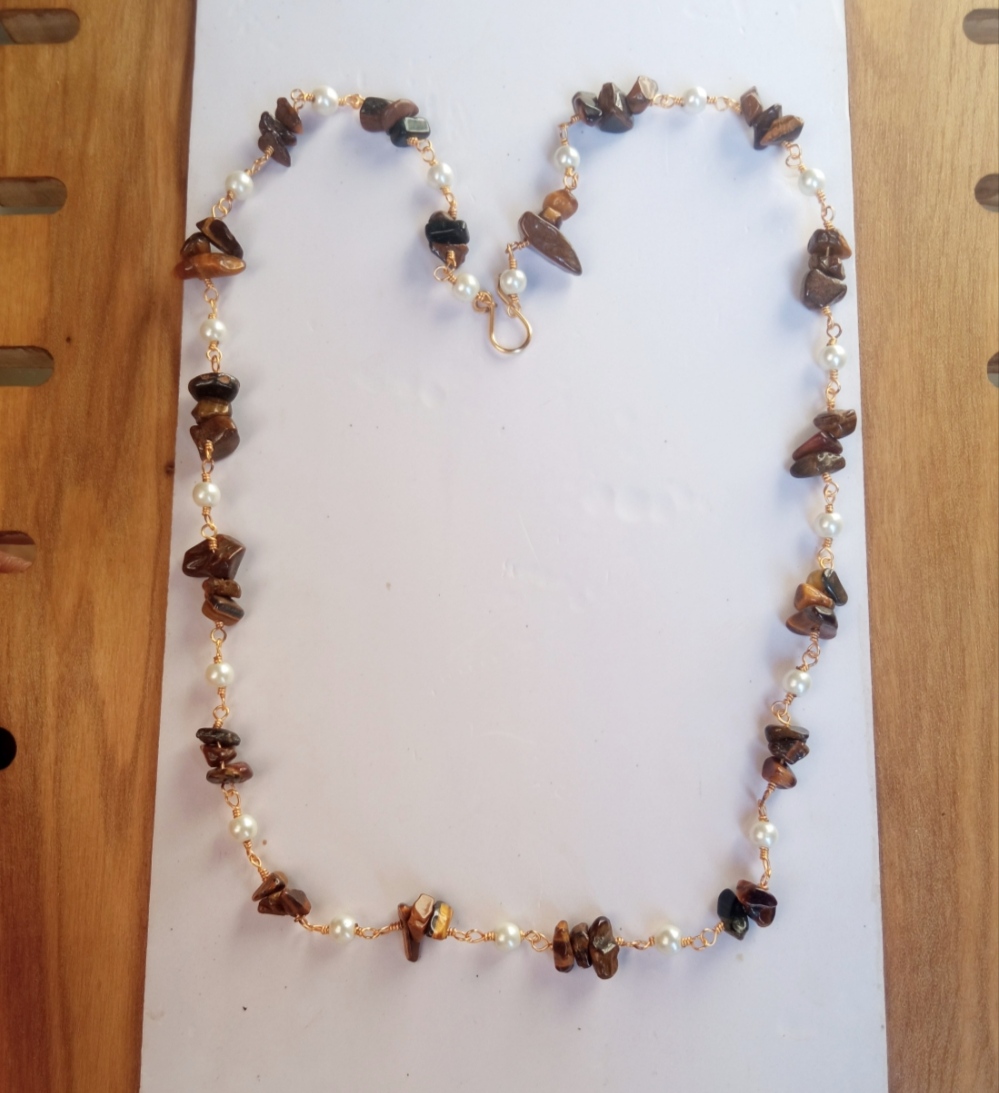
Todas las Fotos son de mi autoría y fueron tomadas con mi Celular Redmi 9.And so my dear and appreciated creative friends and creators, in a very creative and simple way we will be able to create and obtain a unique and very beautiful design, which we can adapt to our tastes in terms of colors or place a pendant in an adapted way.
This is a very pretty and delicate design, my dear readers, this has been my creation today for all of you, which I hope has been to your complete liking and this simple tutorial can be useful to you, I thank you very much for visiting my blog today, I say goodbye until another opportunity.
All Photos are my authorship and were taken with my Redmi 9 Cellphone


