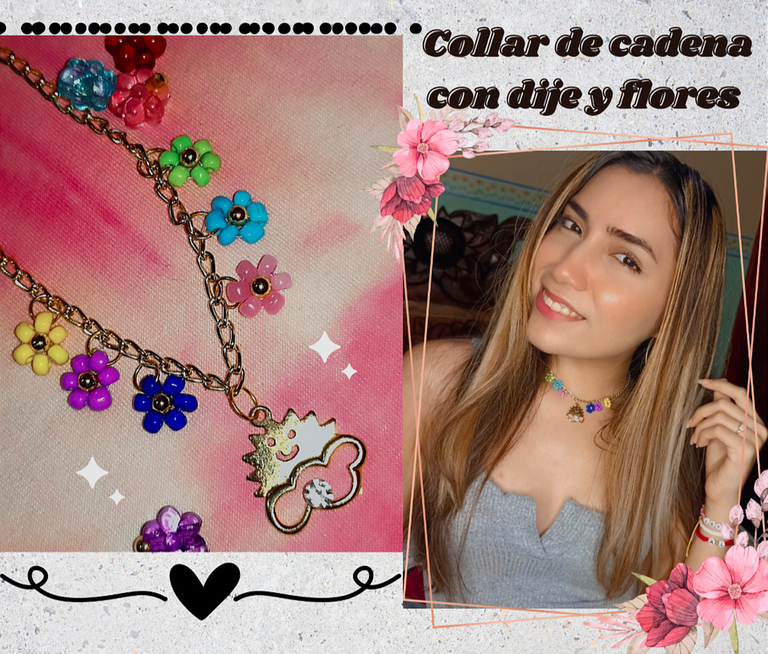


Hola amigos de Hive ❤️ hoy les quiero compartir un tutorial para realizar un accesorio usando pocos materiales, a base de una cadena, un lindo dije y varias flores hechas con cuentas de diferentes colores. En lo personal, a mi me gustan mucho las prendas con cadena, sencillas y sin muchos detalles, en este caso, les quise traer algo de ese estilo porque creo que a muchas les gustará, un accesorio para llevar en una salida casual por su fresco diseño, y también porque no?, en una salida nocturna tipo cóctel que además resaltará mucho más por el brillo dorado de todas las piedras y detalles metálicos que tiene nuestro collar. Te aseguro que es súper sencillo de hacer, y además te mostraré como realizar estás flores individualmente para que quizás las incluyas en un accesorio aparte, todo quedará de tu creatividad e imaginación, a partir de este paso a paso que te comparto a continuación, así que si te gusta, te animo a que me acompañes y aprendas junto a mi a realizarlo, y ahora sí, sin más que agregar... Comencémos!!

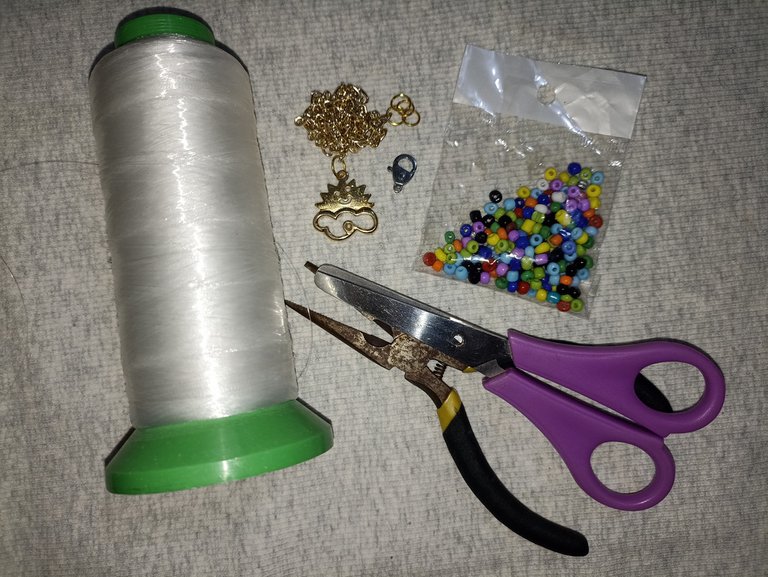

- Cadena
- 1 hebra de hilo nylon 20cm
- Cuentas de colores (36)
- 6 Perlas de 3mm
- Dije
- Tijera
- Encendedor
- Pinzas
- 8 argollas
- 1 cerradura o gancho


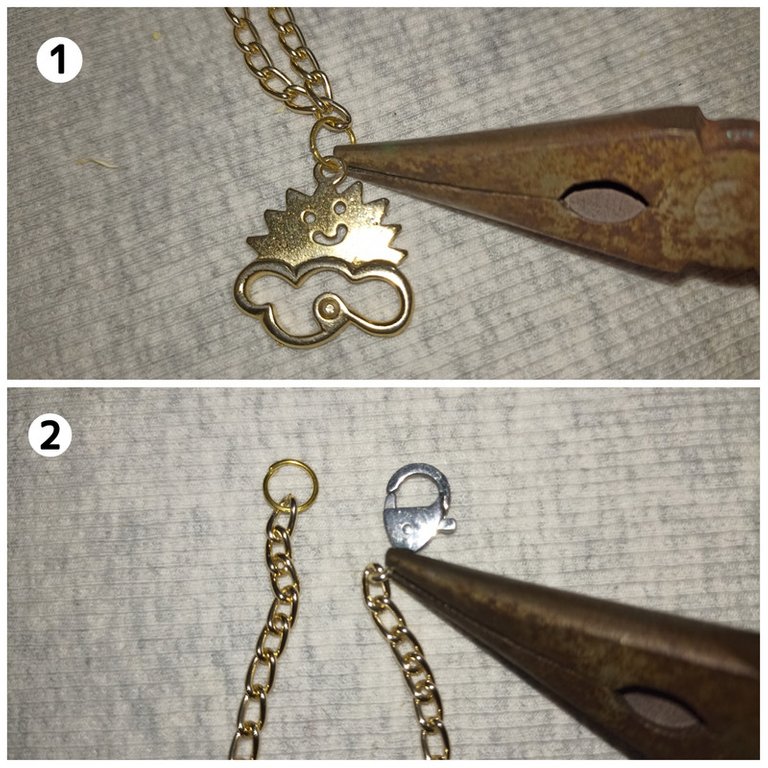
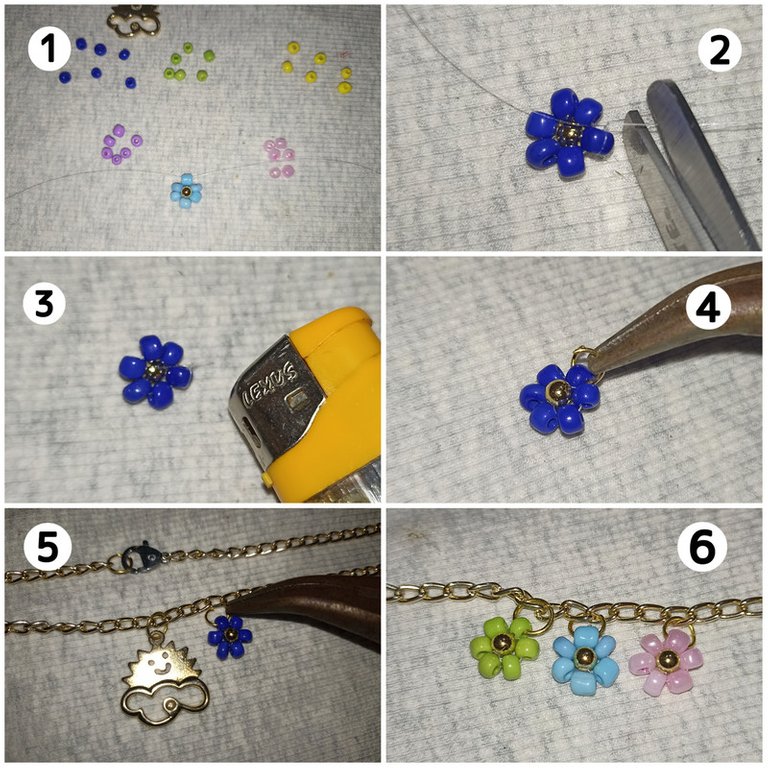
Lo primero y antes que nada, voy a tomar mi hebra de cadena, yo en este caso use una delgada, y medire el contorno de mi cuello para saber que tan ajustado, suelto o colgante quiero mi collar, ya una vez haya ubicado el tamaño, lo separo del sobrante y le agrego una argolla de un extremo y una cerradura del otro, también ubicare la mitad o el centro y le colocare el dije, en este caso usaré una nube con un simpático sol, con ayuda de las pinzas lo uno a la argolla. Hecho esto procedemos al siguiente paso...y el más divertido 😊.

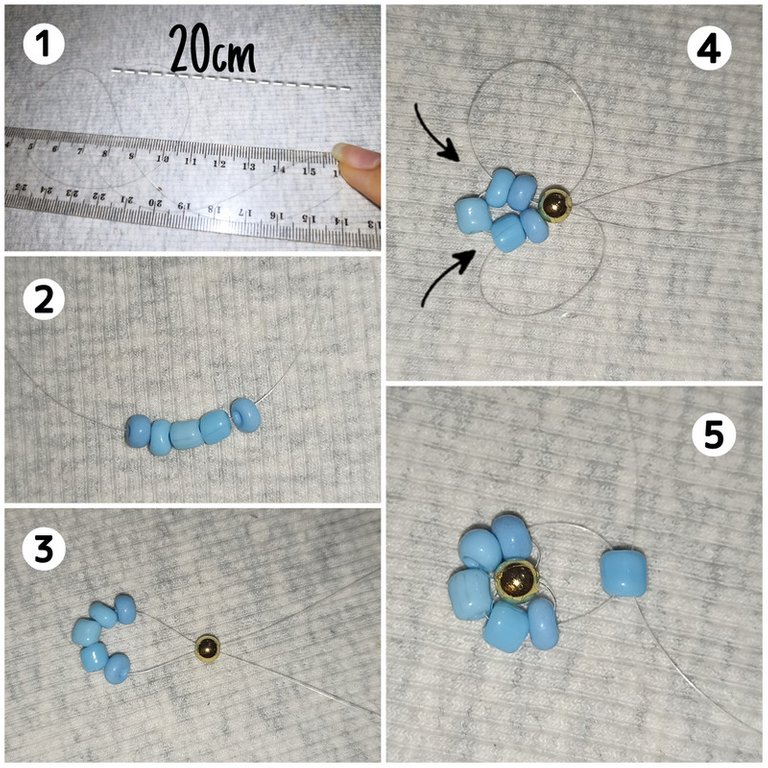
Para hacer estas florecitas, voy a necesitar una hebra de hilo nylon aproximadamente de 20cm, que a la mitad sería 10cm, con esto será más que suficiente. Luego voy a introducir 5 cuentas de un mismo color o como prefieras, y uniendo ambas hebras introducire una perla, ahora lo que haré será regresarme por las dos cuentas anteriores y cruzo ambas hebras en una nueva cuenta para hacer una flor de 6 pétalos en total. Una vez terminada simplemente nos queda hacer dos nudos simples, cortamos y quemamos las puntas. Todo este proceso lo vamos a repetir cambiando de color hasta tener 6 florecitas o las que desees agregarle.

Para mí collar yo use tonos rosa, azules, verdes y amarillos para que fuera bastante colorido y juvenil, pero si quieres jugar con esta elección puedes usar un solo color o siguiendo el patrón que más te guste. Y ya una vez listas las flores las unire a las argollas por una de las cuentas, miramos la distancia que queramos dejar entre cada una de ellas y las colocamos a nuestro collar, tratando que ambos lados nos queden iguales.

Ya casi para terminar y como detalle final le quise agregar una piedra brillante en un espacio que trajo el dije que compré con un poco de pega o silicón especial para metal y ya ahora sí estaría listo para usar!! ☺️
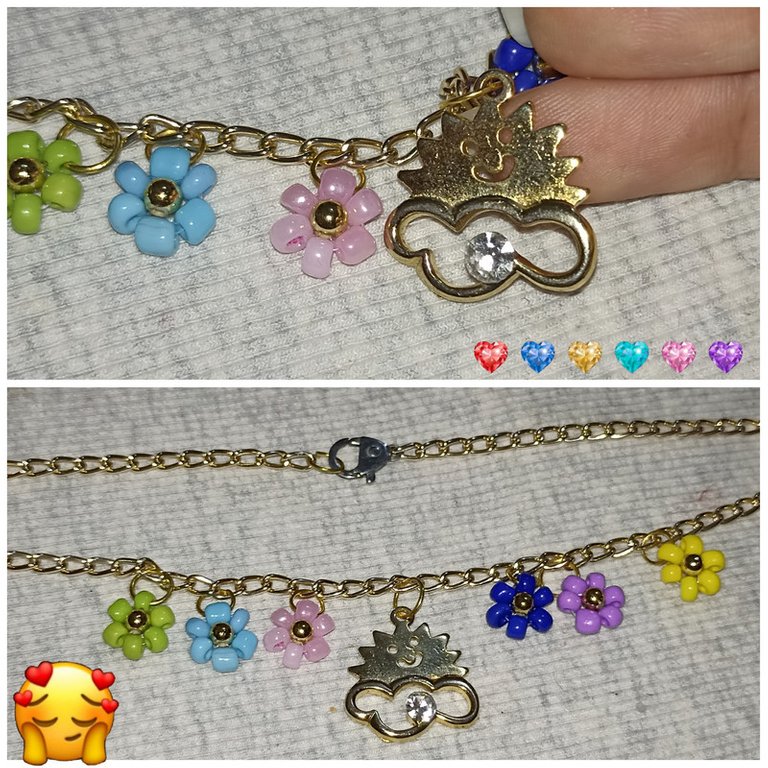


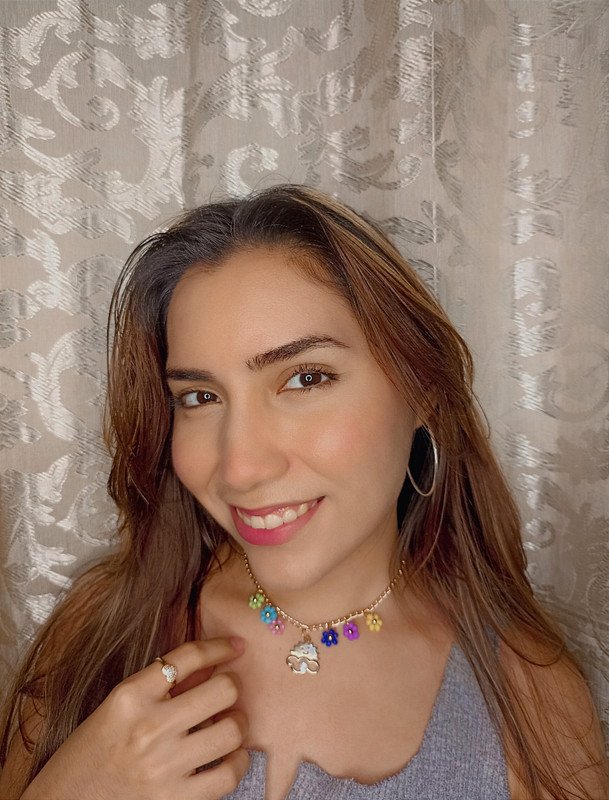
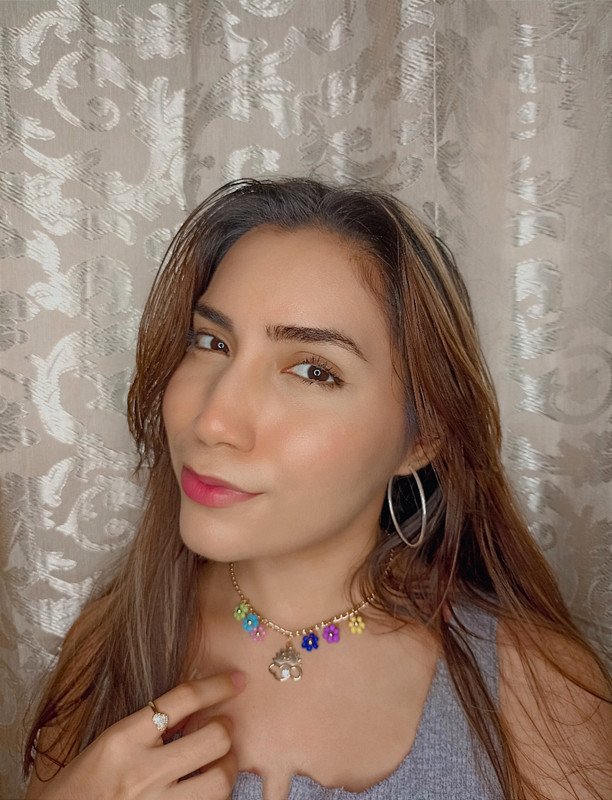
Y aquí les muestro el collar terminado!!. Lo puedes hacer un poco más suelto o si prefieres también lo puedes hacer un poco más ajustado tipo choker. Puedes seguir mi guía tutorial o puedes dejar volar tu imaginación y hacerlo combinando los colores, piedras, cristales y el diseño que quieras... La creatividad es tuya y por supuesto un toque secreto de amor para que el trabajo quede con el mejor acabado 🥰.!! si te gusto te animo a que lo intentes, me encantó mostrarles este pequeño tutorial, para tu uso personal, emprender o para regalar 😁...espero compartirles muy pronto nuevos trabajos, con mucho cariño me despido y será hasta la próxima !!💕
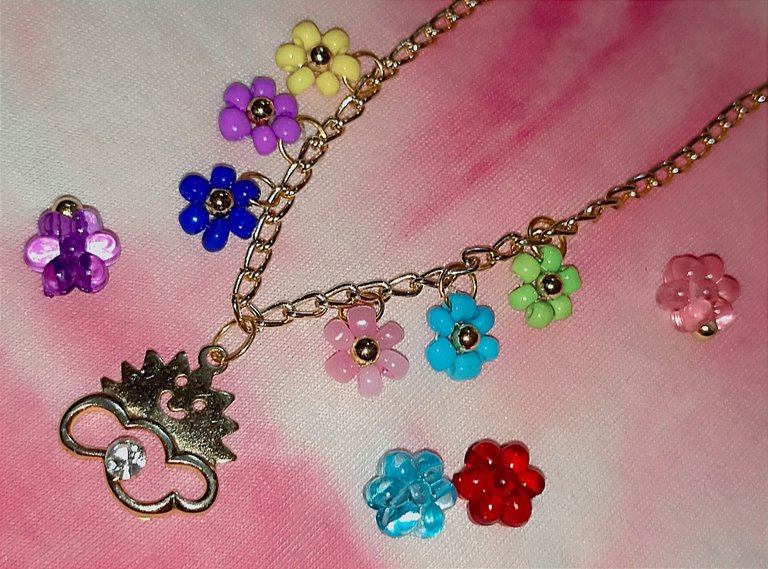


Hello friends of Hive ❤️ today I want to share with you a tutorial to make an accessory using few materials, based on a chain, a nice pendant and several flowers made with beads of different colors. Personally, I really like the garments with chain, simple and without many details, in this case, I wanted to bring you something of that style because I think many will like it, an accessory to wear in a casual outing for its fresh design, and also why not? in a cocktail type evening outing that will also stand out much more by the golden glow of all the stones and metallic details that has our necklace. I assure you that it is super simple to do, and I will also show you how to make these flowers individually so you can include them in a separate accessory, everything will be up to your creativity and imagination, from this step by step that I share with you below, so if you like it, I encourage you to join me and learn with me to do it, and now, without further ado .... Let's start!


- Chain
- 1 strand of nylon thread 20cm
- Colored beads (36)
- 6 beads of 3mm
- Pendant
- Scissors
- Lighter
- Tweezers
- 8 rings
- 1 lock or hook


First and foremost, I will take my chain strand, in this case I used a thin one, and I will measure the contour of my neck to know how tight, loose or pendant I want my necklace, once I have located the size, I separate it from the excess and add a ring at one end and a lock at the other, I will also locate the middle or center and I will place the pendant, in this case I will use a cloud with a nice sun, with the help of the tweezers I will attach it to the ring. Once this is done we proceed to the next step...and the most fun 😊.


To make these little flowers, I will need a strand of nylon thread of approximately 20cm, which in half would be 10cm, this will be more than enough. Then I will introduce 5 beads of the same color or as you prefer, and joining both strands I will introduce a pearl, now what I will do is to go back through the two previous beads and cross both strands in a new bead to make a flower of 6 petals in total. Once finished we just have to make two simple knots, cut and burn the ends. We are going to repeat this process changing the color until we have 6 little flowers or as many as you wish to add.


For my necklace I used shades of pink, blue, green and yellow to make it quite colorful and youthful, but if you want to play with this choice you can use a single color or following the pattern that you like. And once the flowers are ready I will attach them to the rings by one of the beads, we look at the distance we want to leave between each one of them and we place them to our necklace, trying that both sides are equal.


Almost to finish and as a final detail I wanted to add a shiny stone in a space that brought the pendant I bought with a little glue or special silicone for metal and now it would be ready to use! ☺️


And here I show you the finished necklace!!!. You can make it a little looser or if you prefer you can also make it a little tighter like a choker. You can follow my tutorial guide or you can let your imagination fly and make it combining colors, stones, crystals and the design you want.... The creativity is yours and of course a secret touch of love so that the work is with the best finish 🥰.!!! if you like it I encourage you to try it, I loved to show you this little tutorial, for your personal use, to undertake or to give away 😁...I hope to share with you very soon new works, with much love I say goodbye and will be until next time !!!💕


Todo el contenido es de mi autoría y las imágenes son de mi propiedad
Cámara: Redmi note 10s
Uso un aro de luz LED como base para mi teléfono y tomarme las fotos
All content is my own and images are my property
Camera: Redmi note 10s
I use an LED light ring as a base for my phone to take pictures of myself

Edición y Separador|Editing and Separator
App PicMonkey - App Picsart - App Canva
Traductor|Translator
DeepL


