Hola queridos amigos de Hive. Es un gusto siempre saludarles. Espero que cada una de sus metas se materialicen este año que se asoma. Así que feliz 2024 @Jewelry.
Nuestro espacio para desarrollar nuevas habilidades, sueños,creatividad, talentos ocultos,recrearnos y ser feliz. Eso se ha vuelto jewelry en nuestras vidas. Así que este nuevo año vamos a iniciar con esas pilas bien puestas. A diseñar planes y estrategias de organización. Desde la forma en la que ordenamos nuestros accesorios como los horarios de distribución de tareas en general.
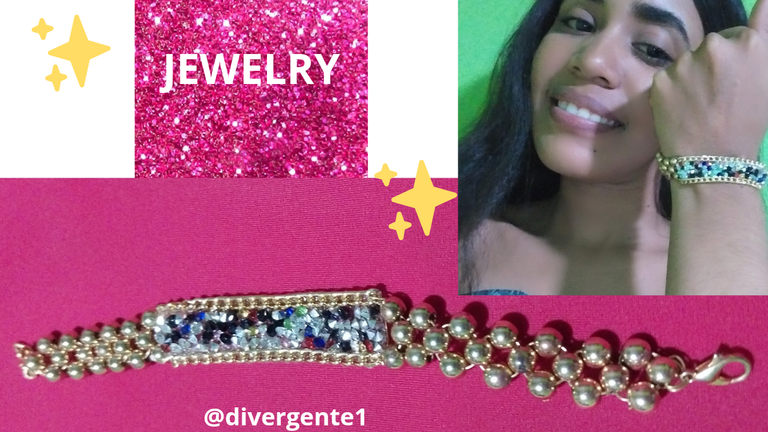
Para iniciar este año. Les traigo un hermoso brazalete elaborado con una fina cadena de piedras preciosas y perlas doradas. Esta combinación hace de este brazalete una original y bonita prenda. Espero les guste!
Estos son los materiales que vamos a necesitar.
Materiales
- Alambre de cobre1 mm
- perlas doradas
- Cinta de piedras
- una argolla
- gancho
Paso a Paso
1
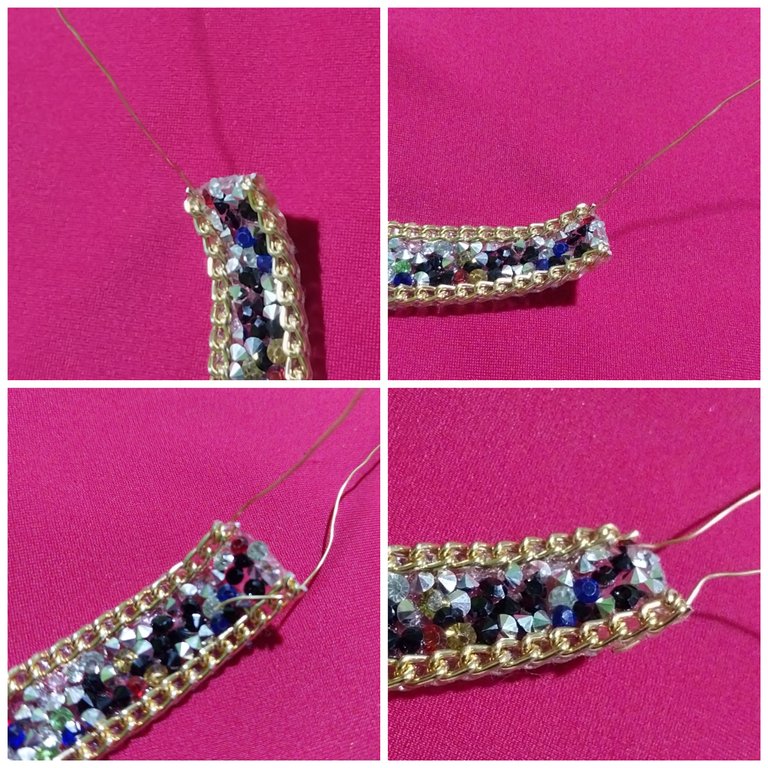
Tomaremos la cinta de piedras y ya que este material es muy fácil de atravesar, con mucho cuidado vamos a insertar el alambre de cobre en un de los extremos de la cinta. Luego doblamos el material hacia atrás y enrollamos. Luego realizamos el mismo procedimiento con el otro extremo de la cinta. De forma que nos quedan dos alambres en ambos extremos.
2
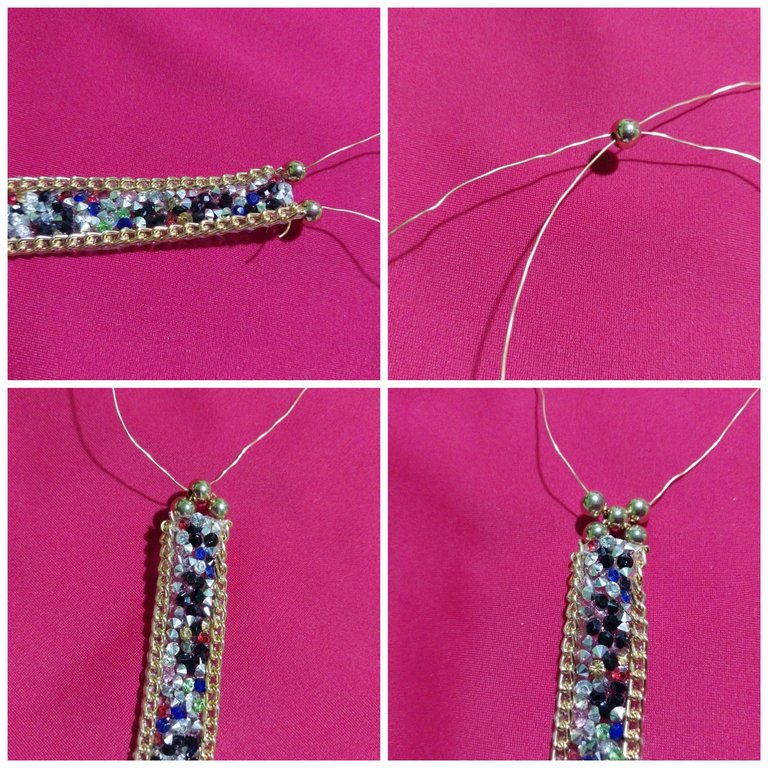
Luego debemos insertar una perla dorada en ambos extremos. Seguidamente tomamos una perla dorada y hacemos pasar ambos extremos del alambre por los agujeros de la perla de forma cruzada para que esta quede justo en el medio.
Luego hacemos presión sobre los extremos de los alambre y tiramos de este para que la perla llegue a su lugar y no quede floja, luego continuamos con el patrón. Dos perlas en cada extremo y luego una en el medio.
3
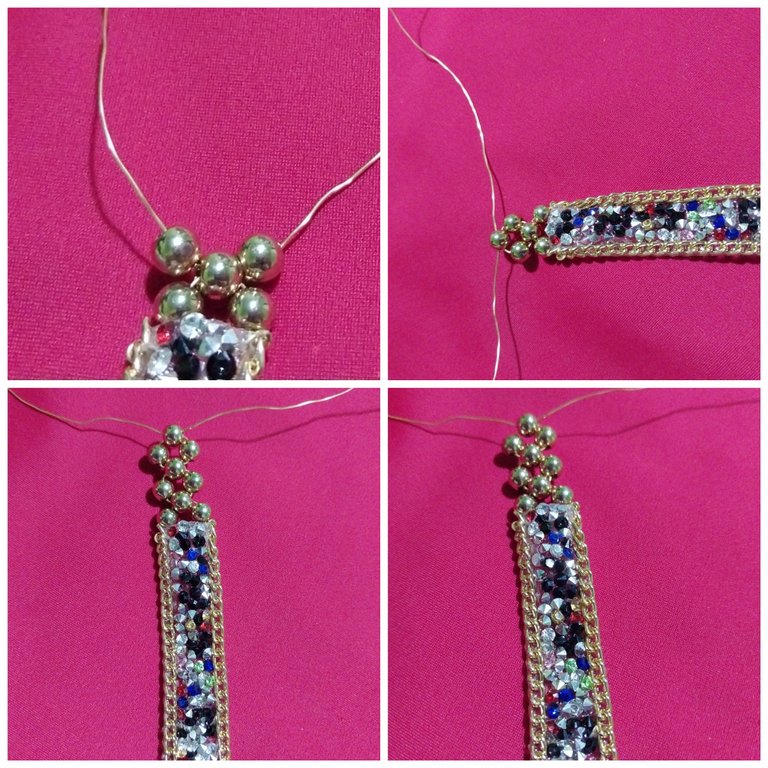
Continuamos con el patrón introduciendo dos perlas en ambos extremos y luego una en el medio. Es importante que al momento de trabajar con este material es decir, el cobre, se someta este a presión al momento de introducir las perlas con el propósito de evitar que en el brazalete queden espacios muy visibles del material de cobre.
4
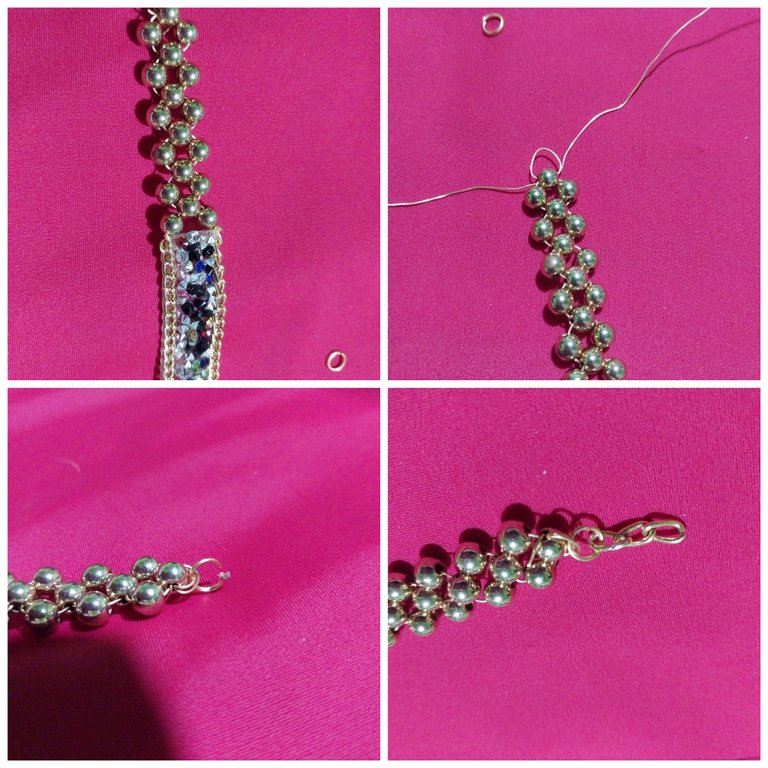
Una vez que se llegue a seis perlas contadas justo en la trayectoria del medio del brazalete se procede a sellar con la perla número 6 en ese extremo de la prenda. De forma que se hace pasar por el otro extremo de la perla los alambres sobresalientes. Hacemos esto dos veces con ambos extremos y luego cortamos el exceso.
Seguidamente debemos abrir las argolla e introducirlas en el área que creamos con el alambre.
5
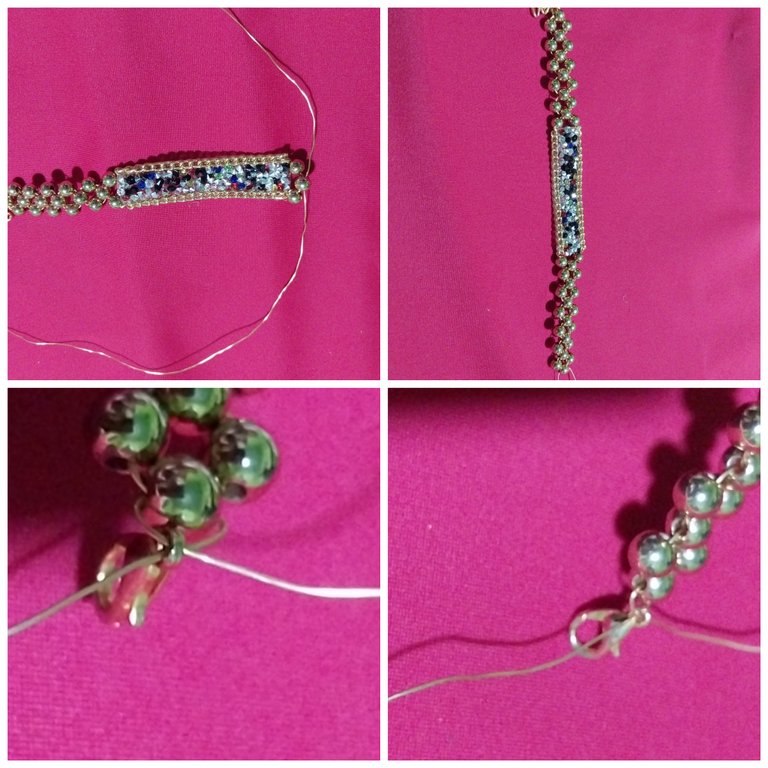
Iniciamos con el otro extremo y hacemos lo mismo, repetimos los pasos anteriores, solo que esta vez la parte central de este lado tendrá 7bperlas doradas en el medio. Al momento de culminar con la perla número 7 se debe hacer pasar de forma cruzada los extremos del alambre de cobre por el gancho.
Hacemos pasar el extremo del alambre dos veces y luego introducimos el material sobrante en la perla del medio. Luego cortamos este material.
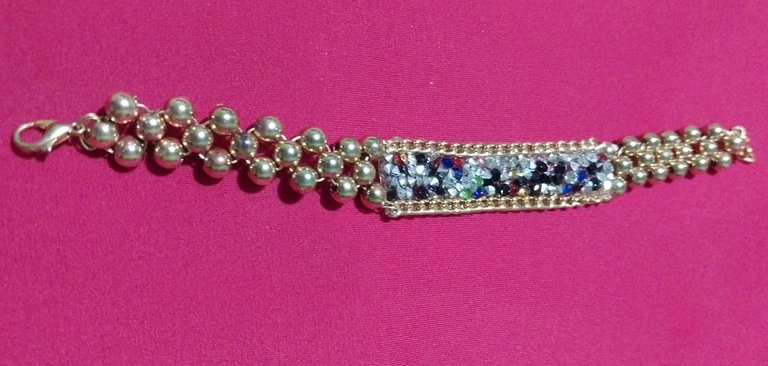
Este sería el resultado final. Espero que les guste! Saludos queridos amigos de Hive.
- Las imágenes me pertenecen
- Traductor: Deelp traslator
- Edicion: Canva
Hello dear friends of Hive. It is always a pleasure to greet you. I hope each of your goals materialize this looming year. So happy 2024 @Jewelry.

Our space to develop new skills, dreams, creativity, hidden talents, recreate ourselves and be happy. That has become jewelry in our lives. So this new year let's start with those batteries well put in place. To design organizational plans and strategies. From the way in which we order our accessories as the distribution schedules of tasks in general.
To start this year. I bring you a beautiful bracelet made with a fine chain of precious stones and golden pearls. This combination makes this bracelet an original and beautiful garment. I hope you like it!
These are the materials we are going to need.
Materials
- Copper wire1 mm
- golden pearls
- Ribbon of stones
- a ring
- hook
Step by step
1

We will take the stone ribbon and since this material is very easy to go through, we will carefully insert the copper wire into one end of the ribbon. Then we bend the material backwards and roll it up. Then we do the same procedure with the other end of the tape. So that we are left with two wires at both ends.
2

Then we must insert a golden pearl in both ends. Then we take a golden pearl and we pass both ends of the wire through the holes of the pearl in a crossed way so that it is right in the middle.
Then we put pressure on the ends of the wire and pull it so that the pearl reaches its place and is not loose, then we continue with the pattern. Two beads on each end and then one in the middle.
3

We continue with the pattern introducing two beads at both ends and then one in the middle. It is important that at the moment of working with this material, that is to say, the copper, it is subjected to pressure at the moment of introducing the beads with the purpose of avoiding that in the bracelet there are very visible spaces of the copper material.
4

Once it is reached six pearls counted just in the trajectory of the middle of the bracelet it is proceeded to seal with the pearl number 6 in that end of the garment. In such a way that the other end of the pearl is made to pass through the other end of the pearl the protruding wires. We do this twice with both ends and then cut the excess.
Next we must open the rings and insert them in the area we created with the wire.
5

We start with the other end and do the same, repeat the previous steps, only this time the central part of this side will have 7 golden beads in the middle. At the moment of culminating with the pearl number 7, the ends of the copper wire must be passed in a crossed way through the hook.
We make pass the end of the wire twice and then we introduce the excess material in the middle bead. Luego cortamos este material.

Este sería el resultado final. Espero que les guste! Saludos queridos amigos de Hive.
- Images belong to me
- Translator: Deepl Traslator
- Editing: Canva

