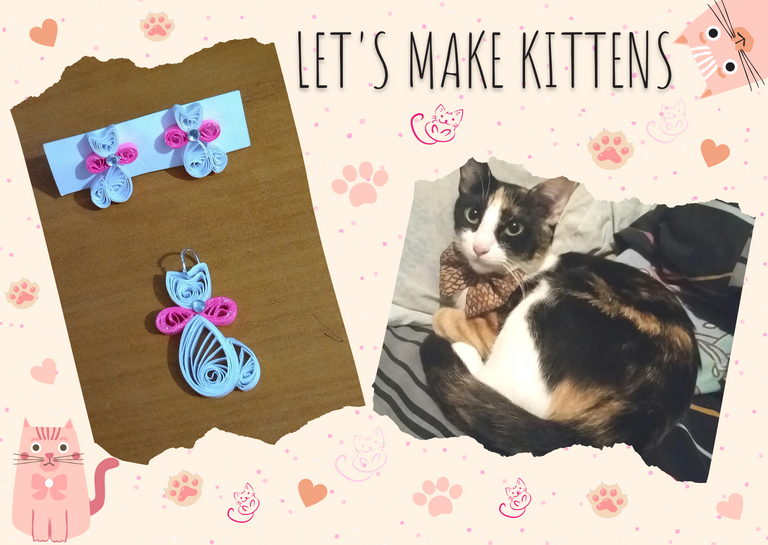
Hello everyone... 🐱🐾💕
Hello to my dear Hiver and the dear #Jewelry community, I hope you have a day full of many blessings and great ideas. As always I am here, very pleased, to show you my work, which is made with love and especially for you.
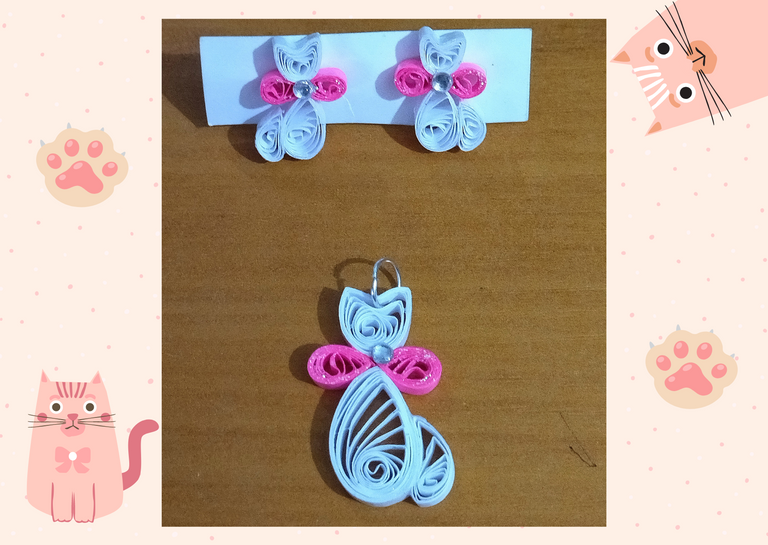
It is well known by those who follow me, and have reviewed my previous posts, my love for furry cats, in fact you know that I have at home a beautiful furry, which is my assistant michi 🐱🐾 hahahahahahaha . 😃 That's why I bring you in this opportunity some tendrils of cute kittens, made in the technique of quilling.
I am going to explain the elaboration of a small pair of fixed tendrils, remember that through the process of elaboration that I show you, you can adapt the measures and make larger or smaller charms, you can use your pieces for fixed tendrils or pendants, for necklace charms, bracelet, rings or simply use the figure to decorate, likewise you can several colors and make the combinations that you like, this world of quilling is so wide and beautiful that we can adapt it to the needs that come our way.
Let's get started: 😃

- Pink and white 3mm wide quilling ribbons.
- Quilling needle.
- White glue.
- Scissors.
- Ruler with various circumference measurements.
- Fine-nosed pliers.
- Base for fixed tendrils.
- Medium-sized costume jewelry earrings.
- Costume jewelry crystals.
- Gel disc.
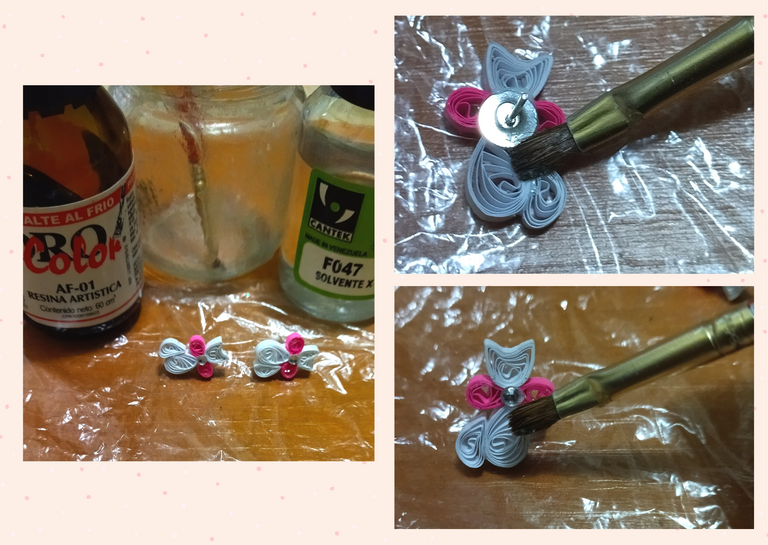
- Solvent X.
- Artistic resin.
- Glass flask.
- Brush.

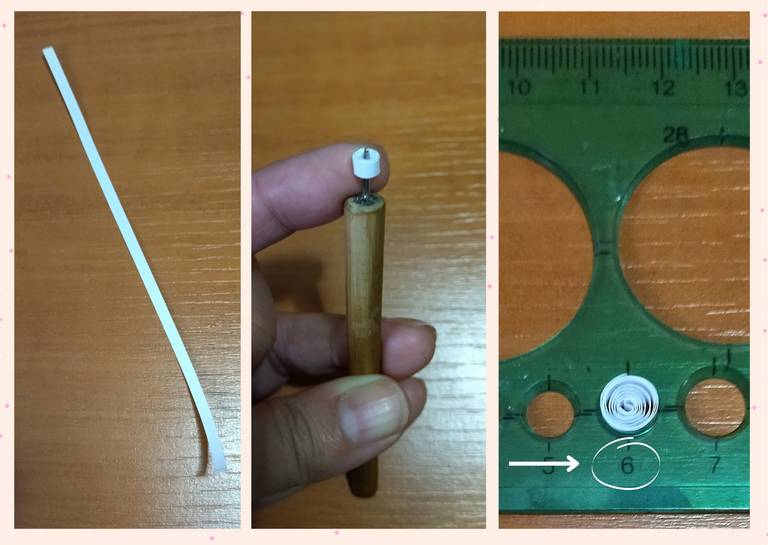
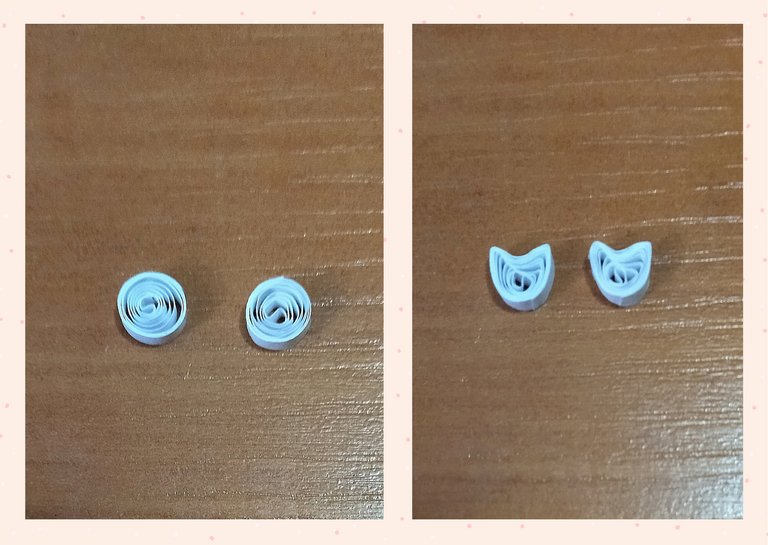
- Let's make the head of our kitten: we will take a white quilling ribbon 3mm wide x 14cms long, with the quilling needle we will roll, when we finish rolling the ribbon we take out and measure on the circumference ruler in the circle number 6, we take out we seal with glue, then we will mold simulating the head of a kitten. As we will make a pair of tendrils we will need two equal pieces.
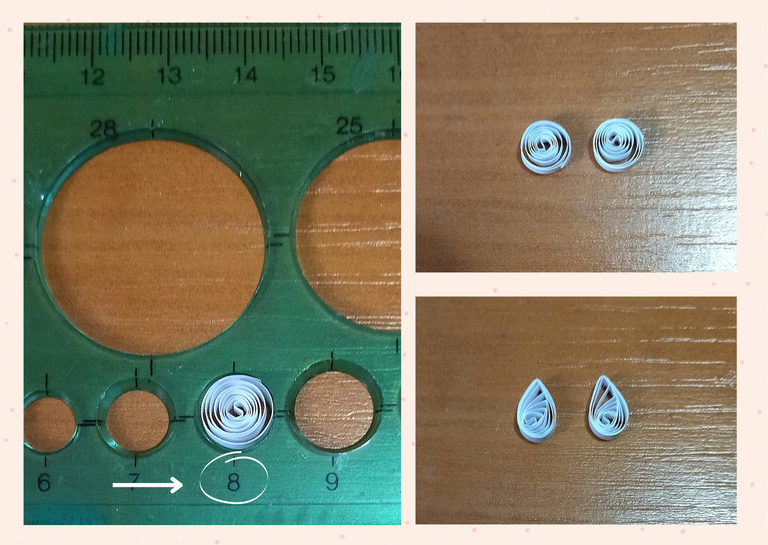
- Let's make the body of our kitten: we will take white quilling tape 3mm wide x 14cms wide and perform the same procedure above with the difference that we measure on the circumference ruler in the circle number 8, when we finish we will mold in the shape of a drop, from this we will need 2 equal pieces.

Hola a todos... 🐱🐾💕
Hola a mis queridos Hiver y a la querida comunidad de #Jewelry, esperando que tengan un día lleno de muchísimas bendiciones y de grandes ideas. Como siempre me encuentro por acá, muy complacida, para mostrarles mi trabajo, que está hecho con mucho amor y especialmente para ustedes.Es bien sabido por aquellas personas que me siguen, y han revisado mis post anteriores, mi amor por los peluditos gatunos, de echo saben que tengo en casa una bella peluda, que es mi asistente michi 🐱🐾 jajajajajaja . 😃 Es por ello que le traigo en esta oportunidad unos zarcillos de unos lindos gatitos, elaborado en la técnica de quilling.
Les voy a explicar la elaboración de un pequeño par de zarcillos fijos, recuerden que mediante el proceso de elaboración que les muestro, ustedes pueden adaptar las medidas y realizar dijes más grandes o más pequeños, pueden utilizar sus piezas para zarcillos fijos o colgantes, para dijes de collar, pulsera, anillos o simplemente utilizar la figura para decorar, así mismo pueden varias los colores y hacer las combinaciones que más les guste, este mundo del quilling es tan amplio y hermoso que podemos adaptarlo a las necesidades que se nos presenten.
Comencemos:😃

• Cintas de quilling de 3mm de ancho, rosadas y blancas.
• Aguja para quilling.
• Pega blanca.
• Tijera.
• Regla con diversas medidas de circunferencia.
• Alicate punta fina.
• Base para zarcillos fija.
• Argollas medianas de bisutería.
• Cristales de bisutería.
• Gel disco.
• Solvente X.
• Resina Artística.
• Frasco de vidrio.
• Pincel.

• Vamos a realizar la cabeza de nuestro gatito: tomaremos una cinta de quilling blanca de 3mm de ancho x 14cms de largo, con la aguja de quilling enrollaremos, al terminar de enrollar la cinta sacamos y medimos en la regla de circunferencia en el círculo número 6, sacamos sellamos con pega, luego moldearemos simulando la cabeza de un gatito. Cómo haremos un par de zarcillos necesitaremos dos piezas iguales.
• Vamos a realizar el cuerpo de nuestro gatito: tomaremos cinta para quilling blanca de 3mm de ancho x 14cms de ancho y realizaremos en mismo procedimiento anterior con la diferencia que meditemos en la regla de circunferencia en el círculo número 8, al terminar moldearemos en forma de gota, de esta necesitaremos 2 piezas iguales.
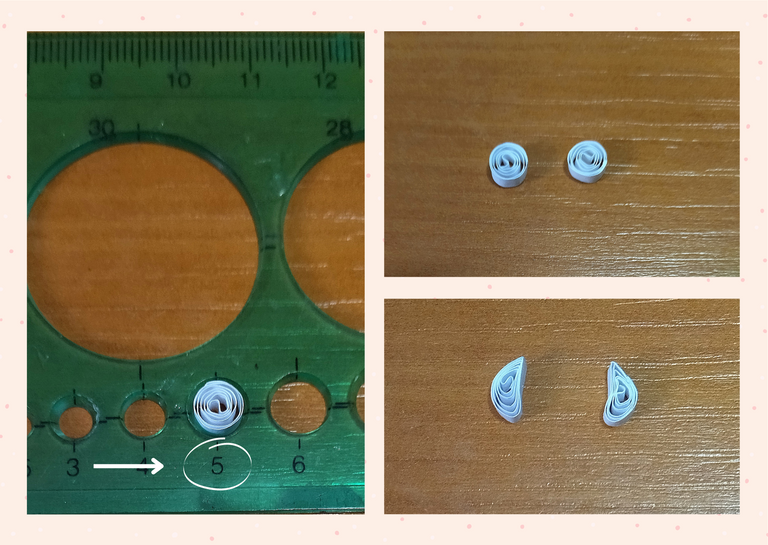
- Let's go with the kitty's tail: we take white quilling ribbon 3mm wide x 7cms long, we roll it and place it in the circle number 5, and then we mold it in a half moon shape simulating the cat's tail, like the other charms we will need 2 pieces.
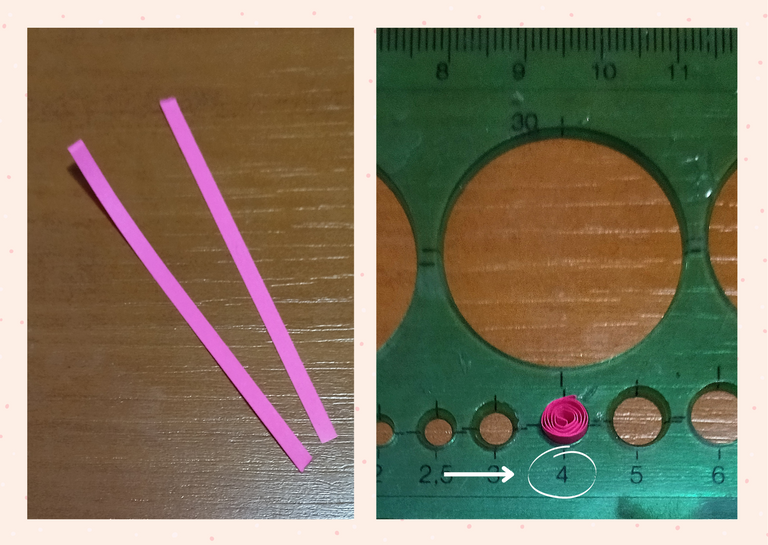
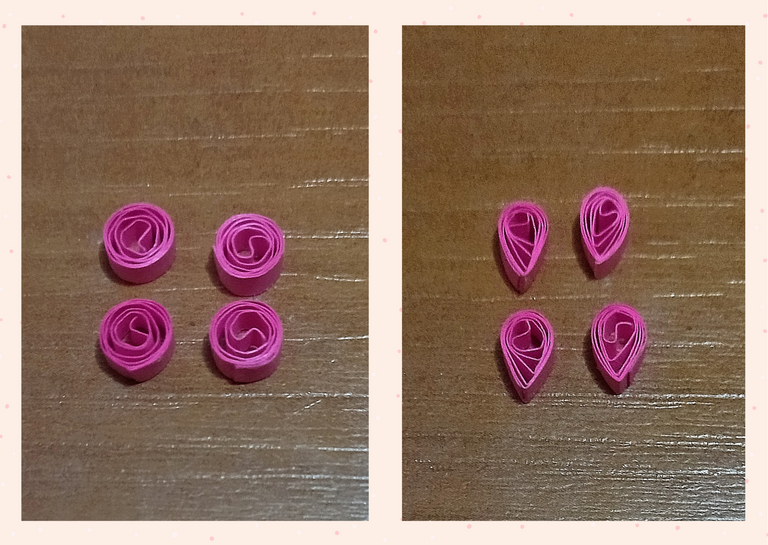
- To finish with the pieces we will need to assemble our kitty I want to add a small bow, we will take a pink quilling ribbon 3mm wide x 7cms long, we will roll it with the quilling needle and we will measure in the circle of the ruler number 4, we will mold it in the shape of a drop. For the pair of tendrils we will need 4 pieces like this.

• Vamos con la colita del gatito: tomamos cinta de quilling blanca de 3mm de ancho x 7cms de largo, enrollamos y colocamos en el círculo número 5, y luego moldeamos en forma de media luna simulando la colita del gato, cómo los demás dijes necesitaremos 2 piezas.
• Para terminar con las piezas que necesitaremos para armar nuestro gatito quiero añadirle un pequeño lazo, tomaremos cinta de quilling color rosado de 3mm de ancho x 7cms de largo, enrollaremos con la aguja de quilling y mediremos en el círculo de la regla número 4, moldearemos en forma de gota. Para el par de zarcillos necesitaremos 4 piezas como esta.
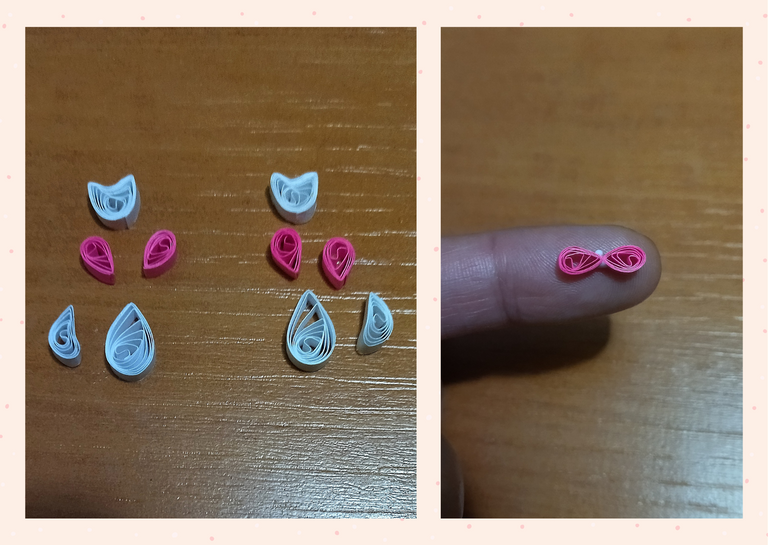
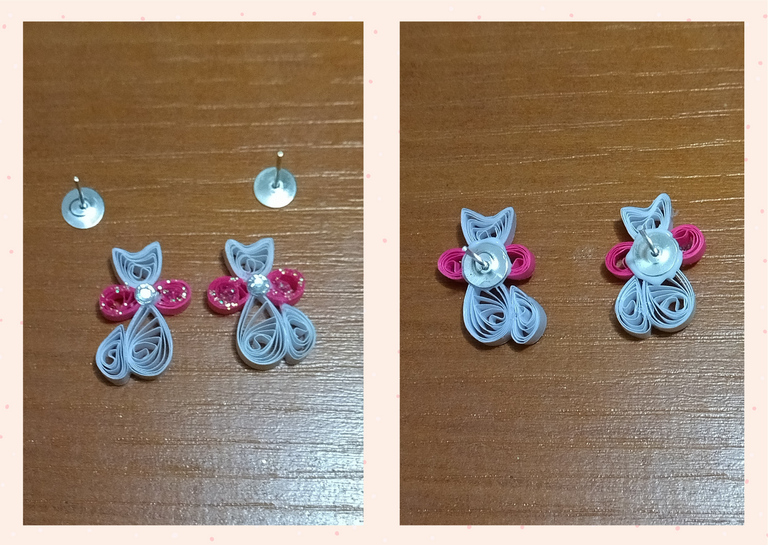
- Now we have our pieces ready, let's put them together, we start with the bow, we glue with white glue the two drops to form the bow, since with this we will hold the head and the body, we join the pieces mentioned above to the bow and then we place the glue, as shown in the images.
- To decorate and give a nice detail, I put a crystal on each ribbon, you can place whatever you want or leave it without placing anything.

• Ya tenemos nuestras piezas listas vamos a unirlas, empezamos con el lazo, pegamos con pega blanca las dos gotas para formar el lazo, ya que con este vamos a sostener la cabeza y el cuerpo, unimos las piezas antes mencionadas al lazo y luego colocamos la cola, tal como lo indican las imágenes.
• Para adornar y dar un detalle bonito, le coloque un cristal a cada lazo, ustedes pueden colocar lo que deseen o dejarlo sin colocar nada.
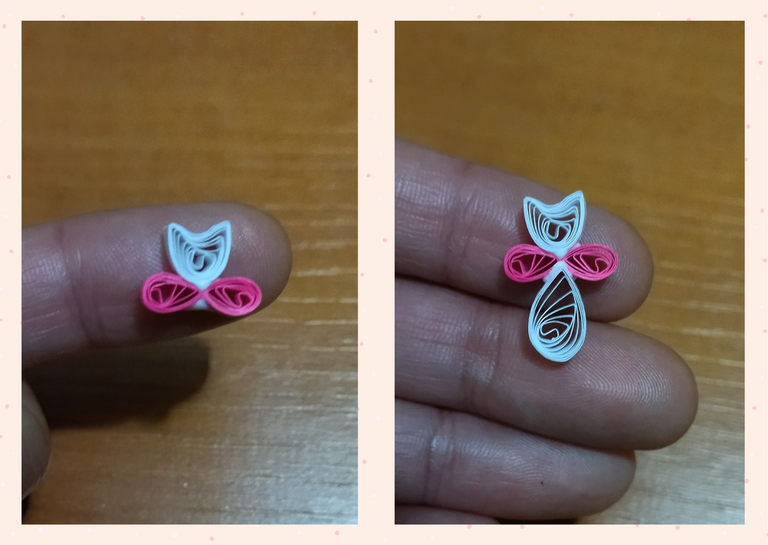
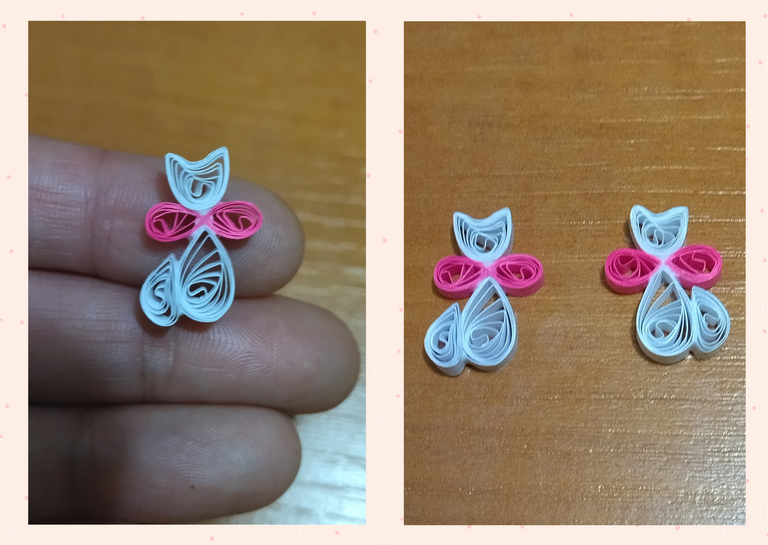
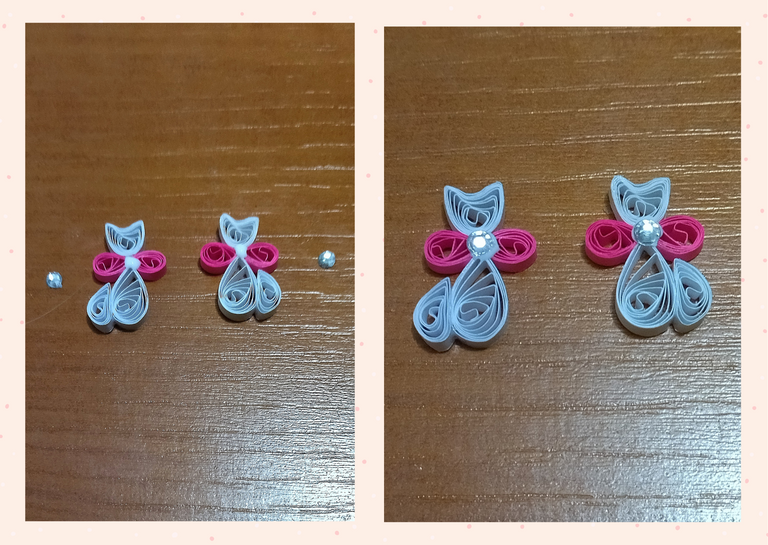
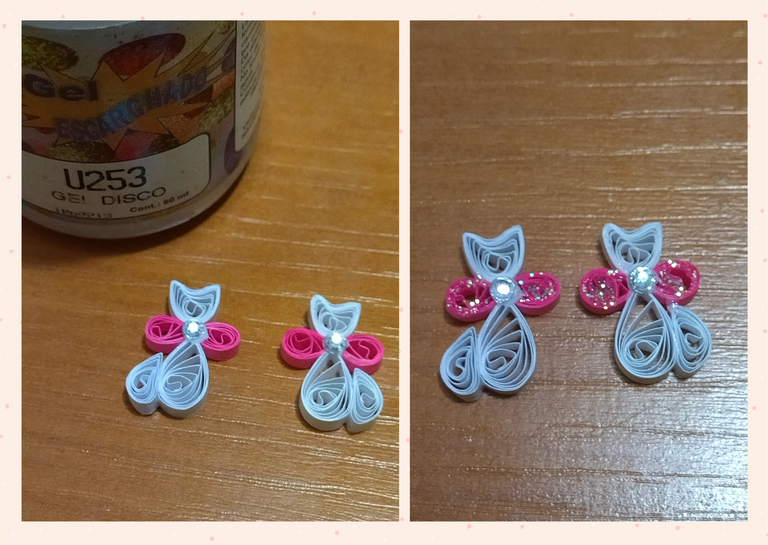
- I took some frosting gel and put it on the ribbons to give it shine.
- Now we proceed to glue our fixed bases for tendrils on the back side, (I use white woodworking glue which is quite resistant), let it dry.
- Finally we are going to place its liquid protection to our tendrils (plasticized), we take a glass bottle, we place a part of artistic resin and another part of solvent X, we mix and apply with a brush on all parts of the piece, let dry.
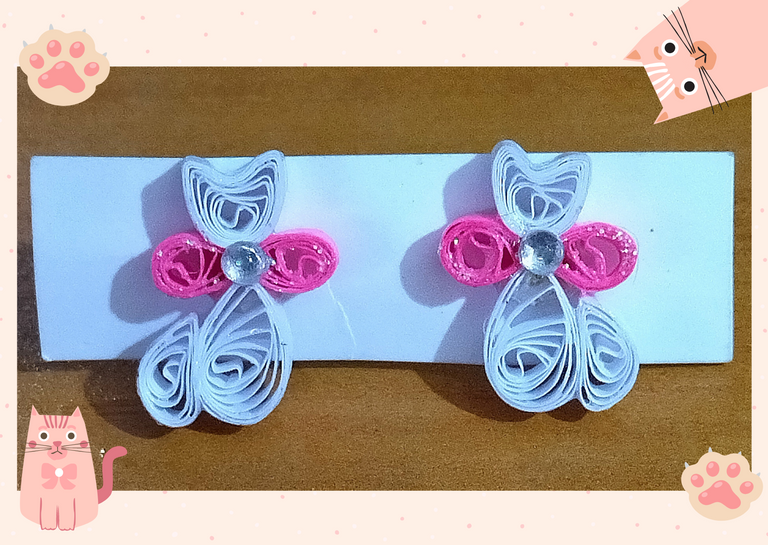
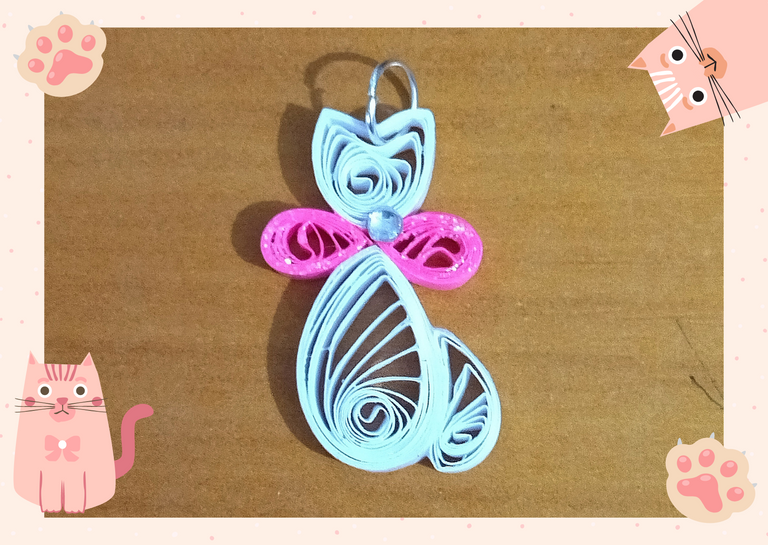
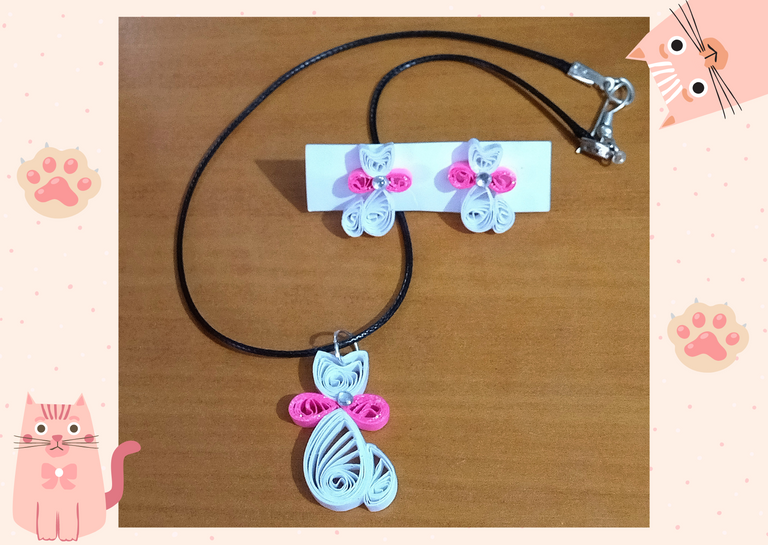
Now we have our kitty tendrils ready for use, I made a larger charm for you to see how it looks on a necklace. As I said at the beginning, you can play with the size and color combination of the pieces to be made, you just have to let your imagination fly.

• Tomé un poco de gel escarchado y le puse a los lacitos para darle brillo.
• Ahora procedemos a pegar nuestras bases fijas para zarcillos por la parte trasera, (yo uso cola blanca de carpintería que es bastante resistente), dejamos secar.
• Por último vamos a colocar su protección líquida a nuestros zarcillos (plastificado), tomamos un frasco de vidrio, colocamos una parte de resina artística y otra de solvente X, mezclamos y aplicamos con un pincel por todas las partes de la pieza, dejamos secar.
Ya tenemos nuestros zarcillos de gatito listos para su uso, les realice un dije más grande para que vean como luce en un collar. Cómo les dije al principio, puede jugar con el tamaño y combinación de colores de las piezas a realizar, solo debes dejar volar tu imaginación.

What did you think, did you like it?
I hope you did, I hope you liked my explanation, procedure and photos, I made them with love for you.
"Let out that muse that inspires you, and let your imagination fly".
Thank you all, see you next time. 🐾🐱💕

¿Que les pareció, les gustó?
Espero que sí, que les haya gustado mi explicación, procedimiento y fotos, los hice con mucho cariño por y para ustedes.
"Deja salir esa musa que te inspira, y deja volar tu imaginación".
Gracias a todos, nos vemos en la próxima. 🐾🐱💕

Todas las fotos usadas en este post son de mi autoría y han sido sacadas en mi celular personal un Redmi 9T y editadas Canva Banner y separador hecho por mí en Canva Traducido con la ayuda de DeepL


