Hello everyone... ✨
Hello to my dear Hivers and to the dear community of artists of #Jewelry, I'm here to show you a new work.
What I bring you today is something that I owed me weeks ago, I postponed it due to certain circumstances, the situation lived in the past elections that were held in Venezuela which were blatantly stolen from us coupled with other personal, triggered in me an emotional shock.
After July 28, I felt that I was living a deyavu of the year 2019, where I actively participated in marches, protests, in the area where I lived the attacks against all opponents of this regime were inclement, bombings, shootings, psychoterror, This time I was far away but it was my daughter who was voting for the first time, who sent me that they were living the same situation and the one who participated was her because they stole her hope and she was outraged, I was unable to protect my baby, you can imagine the helplessness and frustration I felt. Almost all my family is out of the country, practically I have no one, listening to a cousin crying because they stole her hope to return also destroyed me, among many other things.
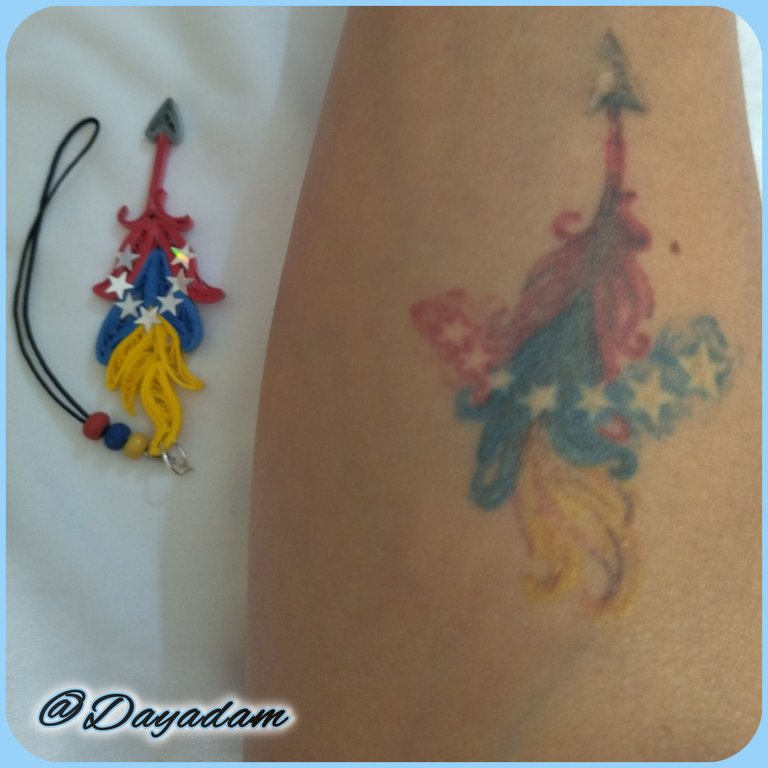
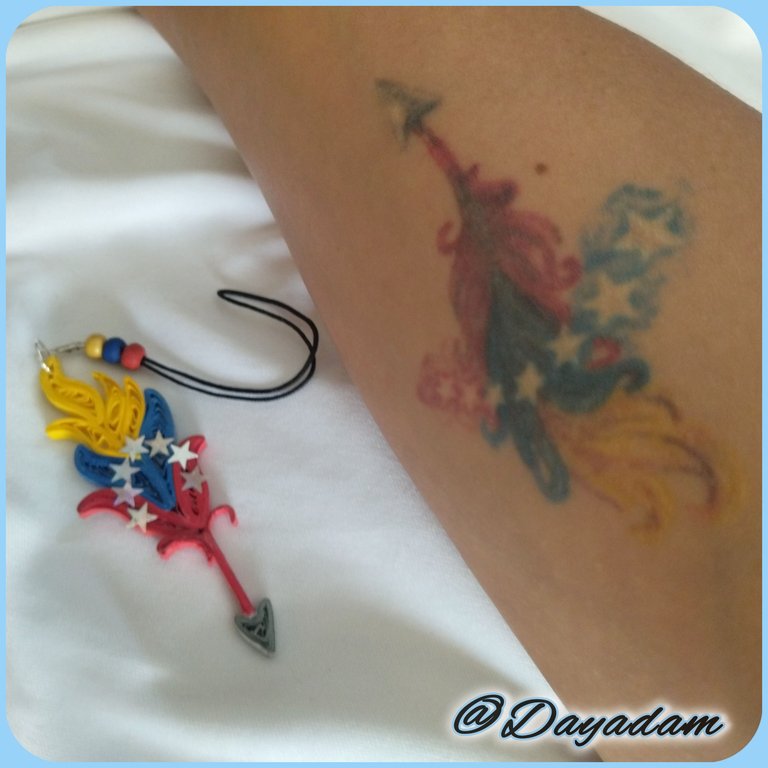
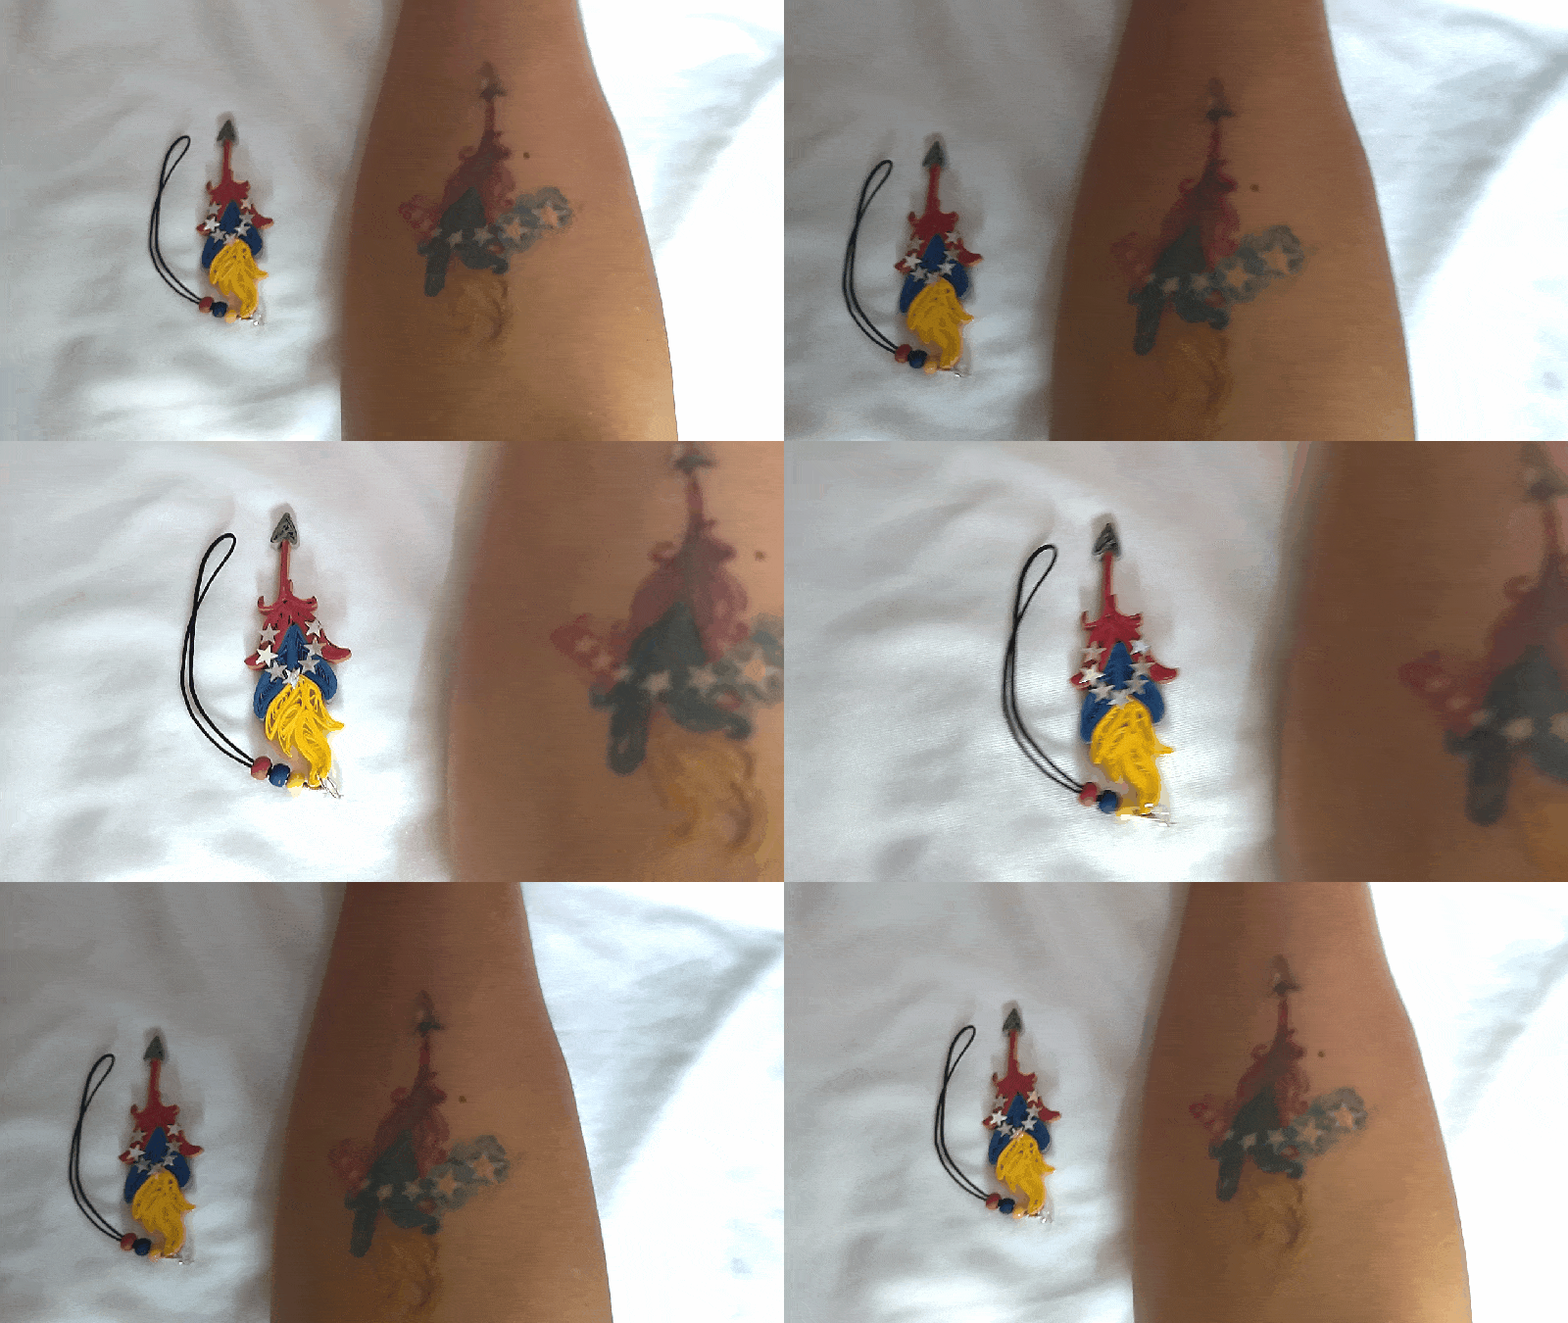
In the year 2019 when I lived everything actively, my relatives began to leave, and I almost lost my life in the protests, I got a tattoo, in honor of my beautiful Venezuela and all those children that I saw with my own eyes that lost their lives, I had a feather tattooed on my arm, with my national tricolor, with a spearhead and the 7 stars around it, excuse the catharsis but I owed it to myself.
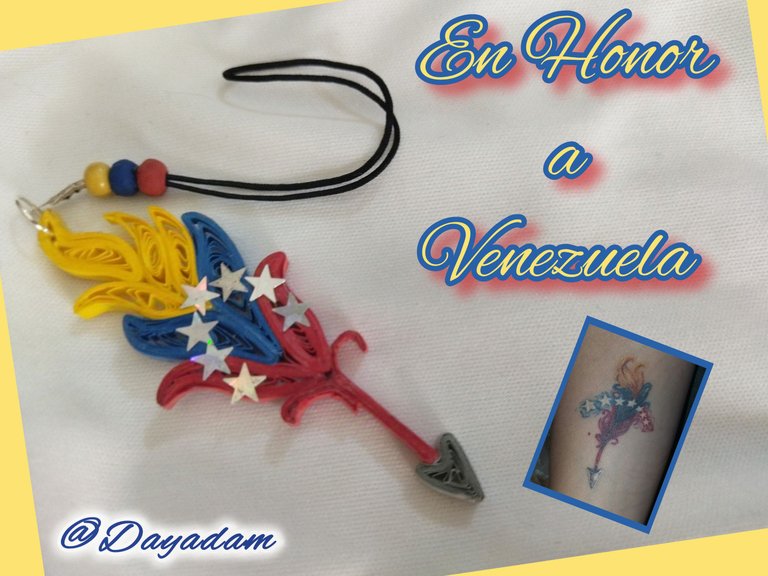
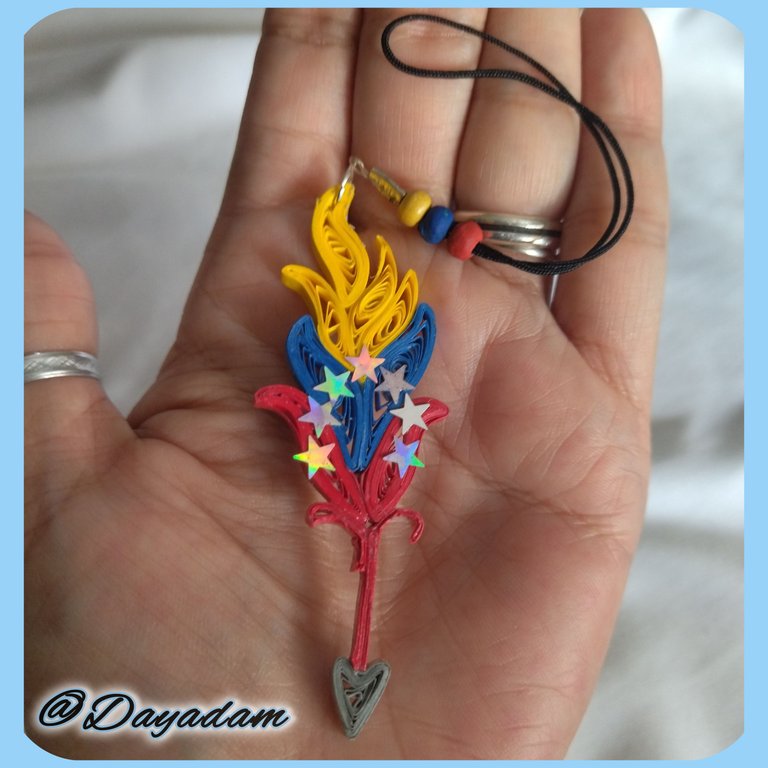
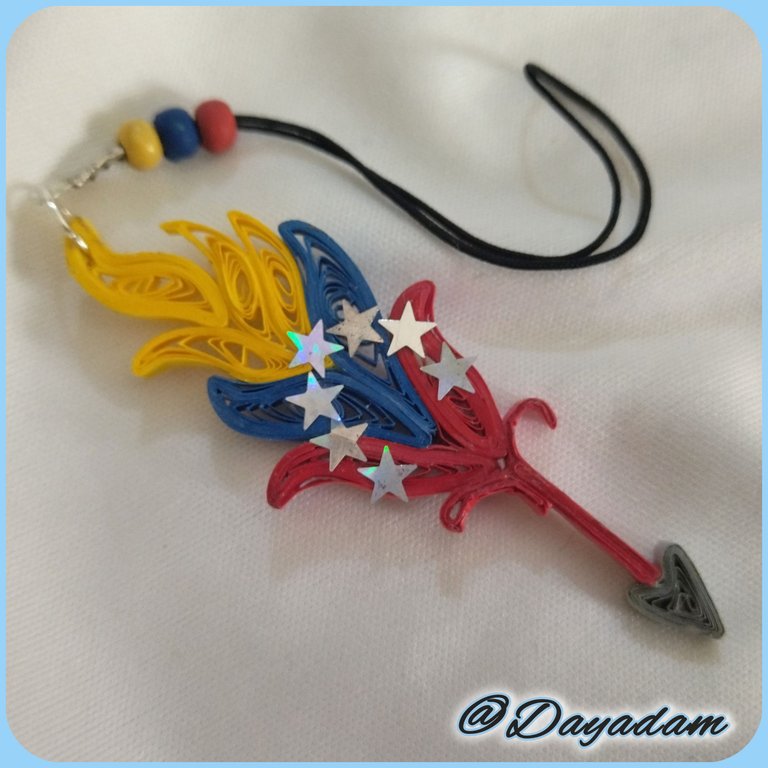
Well for today I decided to make in honor to my Venezuela for feeling to be living an even worse situation, a 2D pendant, a replica of my tattoo in the quilling technique.
My hopes do not die and will never die. "This Will Be Until The End".
I hope you like the work, join me in this creative process.
Let's get started:😃

Hola a Todos... ✨
Hola a mis queridos Hivers y a la querida comunidad de artistas de #Jewelry, estoy por aquí para mostrarles un nuevo trabajo.
Lo que les traigo para hoy es algo que me debía hace semanas, lo pospuse debido a ciertas circunstancias, la situación vivida en las pasadas elecciones que se celebraron en Venezuela las cuales nos fueron descaradamente robadas aunadas a otras personales, desencadenaron en mi un choque emocional.
Luego del día 28 de julio, sentí que vivía un deyavu del año 2019, donde participe de manera activa en marchas, protestas, en la zona donde habitaba los ataques contra todos los adversos a este régimen fueron inclementes, bombardeos, disparos, psicoterror, esta vez yo estaba lejos pero era mi hija que por primera vez votaba, la que me enviaba que estaban viviendo la misma situación y la que participaba era ella porque le robaron su esperanza y estaba indignada, yo sin poder proteger a mi bebe, pueden imaginar la impotencia y frustración que sentía. casi toda mi familia esta fuera del país prácticamente no tengo a nadie, escuchar a un primo llorando porque le robaron la esperanza de volver también me destruyo, entre muchas otras cosas.
En el año 2019 cuando viví todo de manera activa, mis familiares empezaron a irse, y casi pierdo la vida en las protestas, me hice un tatuaje, en honor a mi hermosa Venezuela y a todas aquellos niños que vi con mis propios ojos que perdieron la vida, mande a tatuar en mi brazo, una pluma con mi tricolor nacional, con una punta de lanza y las 7 estrellas a su alrededor, disculpen la catarsis pero esto me lo debía.
Pues para hoy decidí hacer en honor a mi Venezuela por sentir estar viviendo una situación aun peor, un colgante en 2D, una replica de mi tatuaje en la tecnica de quilling.
Mis esperanzas no mueren ni morirán jamas. "Esto Sera Hasta El Final".
Espero sea de su agrado el trabajo, acompáñenme en este proceso creativo.
Comencemos:😃

• Cintas de quilling de diversos colores.
• Aguja para quilling.
• Estrellas pequeñas.
• Pega blanca extra fuerte (de carpintería).
• Argolla de bisutería mediana.
• Hilo chino negro.
• Perlas de madera.
• Tapa nudo.
• Pincel.
• Pinza punta fina.
• Alicate punta fina.
- Quilling ribbons of different colors.
- Quilling needle.
- Small stars.
- Extra strong white glue (carpentry glue).
- Medium size costume jewelry ring.
- Black Chinese thread.
- Wooden beads.
- Knot cover.
- Paintbrush.
- Fine tip tweezers.
- Fine nose pliers.

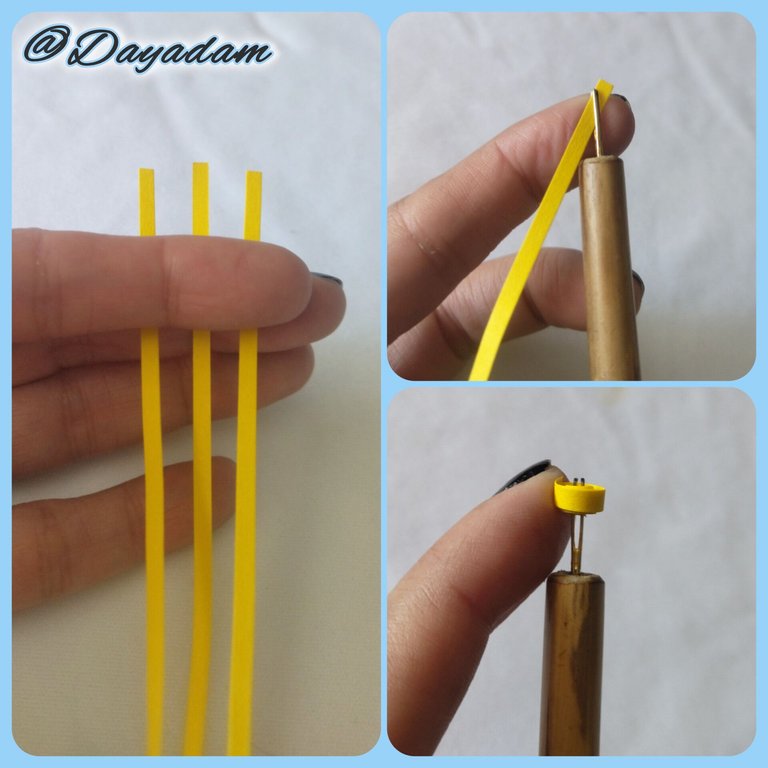
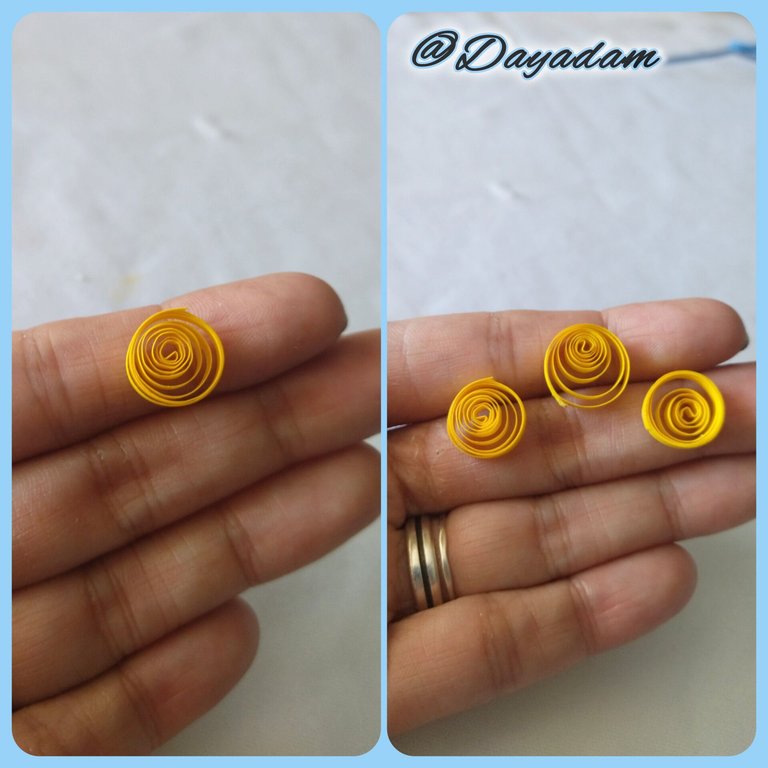
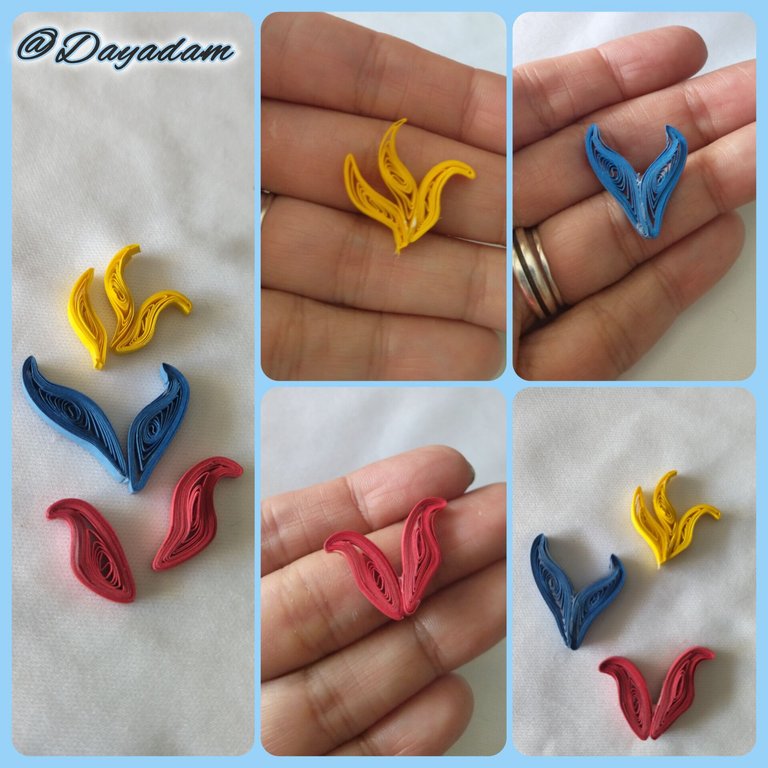
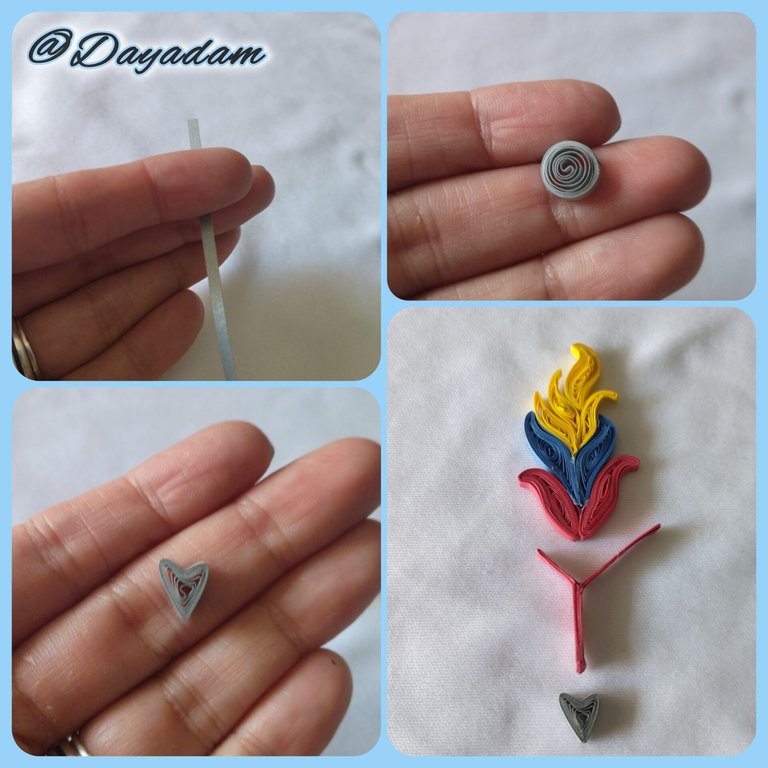
- We take 3mm wide yellow quilling tape, with the quilling needle we are going to roll until we get to the end of the tape, we take it out of the needle, loosen it a little and seal it with extra strong white glue. We will get an open circle, like this we will need 3 of relatively equal size.
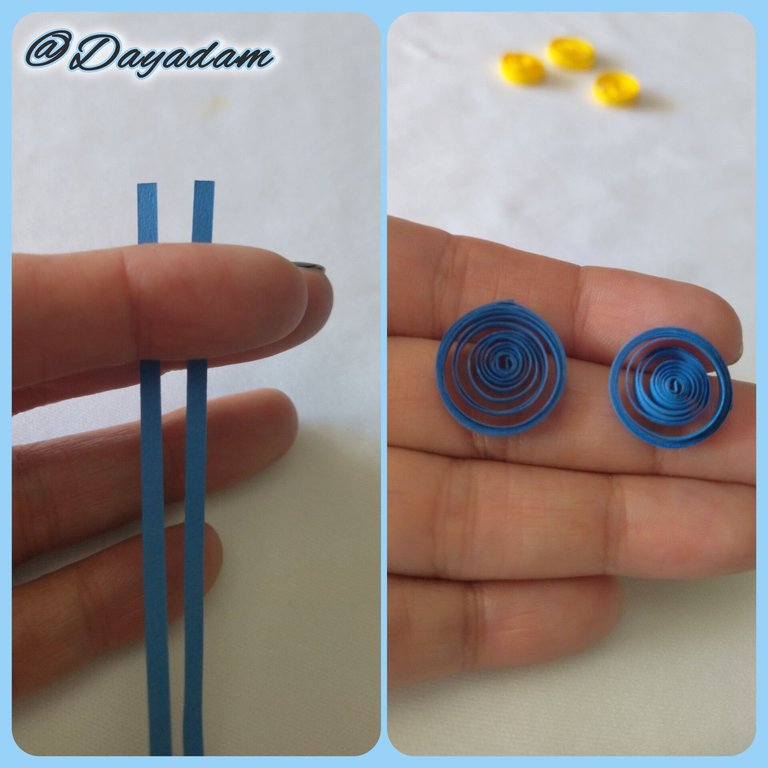
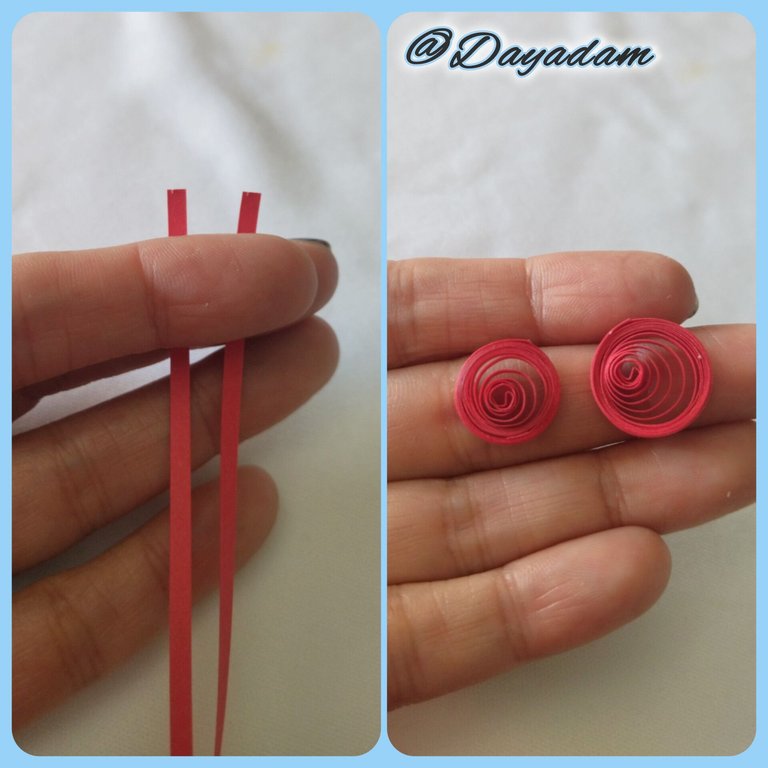
- We will repeat the process with blue and red ribbons of 3mm wide, of these colors we will need 2 open circles of a slightly larger size.
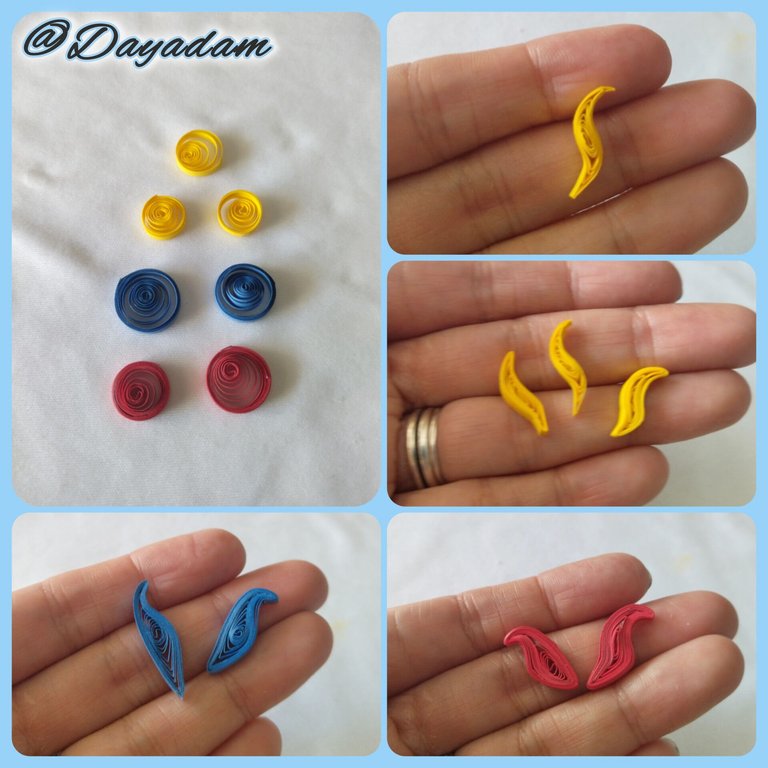
- Once the circles were ready, I proceeded to shape them according to my tattoo.
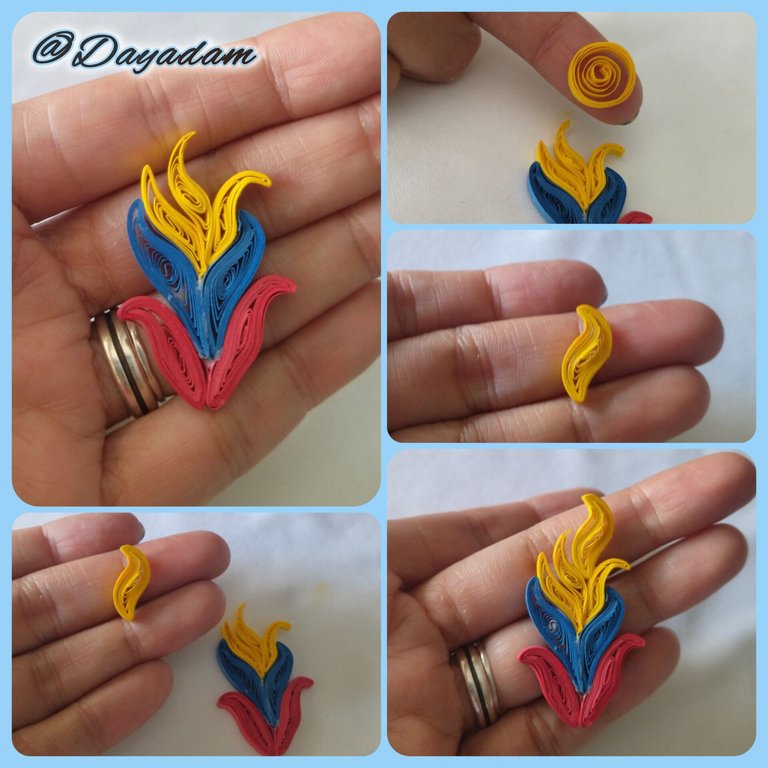
- I was joining the pieces by colors, then I glued them all in a harmonic way to form the feather.
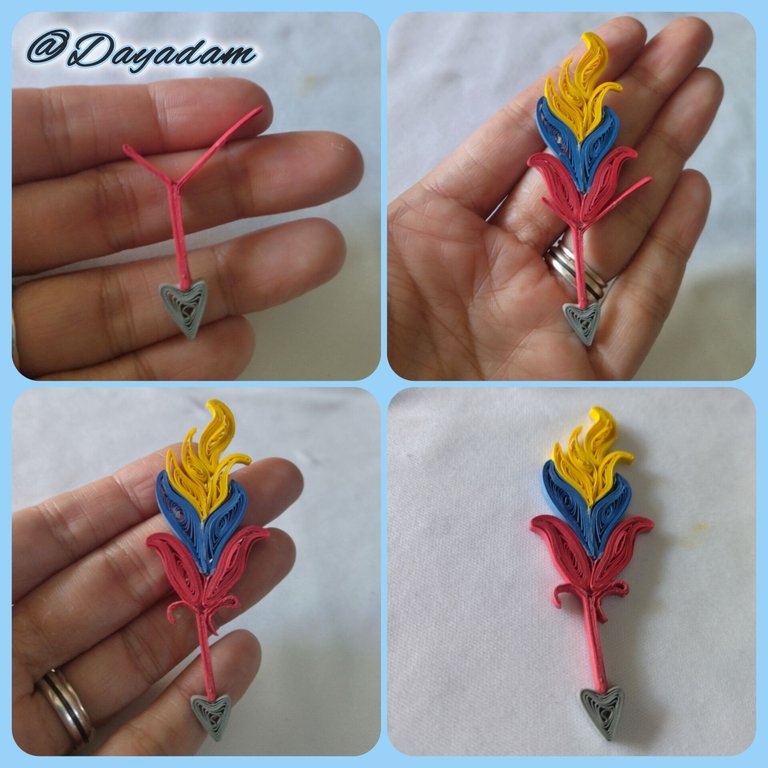
- In the process I noticed that something was missing to have more resemblance to the feather of my tattoo, so I made another yellow piece and incorporated it at the top.

• Comenzamos tomando cinta para quilling de color amarillo de 3mm de ancho, con la aguja para quilling vamos a enrollar hasta llegar al final de la cinta, sacamos de la aguja soltamos un poco y sellamos con pega blanca extra fuerte. Vamos a obtener un círculo abierto, como este necesitaremos 3 de un tamaño relativamente igual.
• Vamos a repetir el proceso con cintas azules y rojas de 3mm de ancho, de estos colores necesitaremos 2 círculos abiertos de un tamaño un poco mas grande.
• Listos círculos procedí a moldearlos dándoles forma según mi tatuaje.
• Fui uniendo las piezas por colores, luego las pegue todas de manera armónica para formar la pluma.
• En el proceso note que le faltaba algo para tener mas semejanza a la pluma de mi tatuaje, por lo cual realice otra pieza amarilla y la incorpore en la parte de arriba.
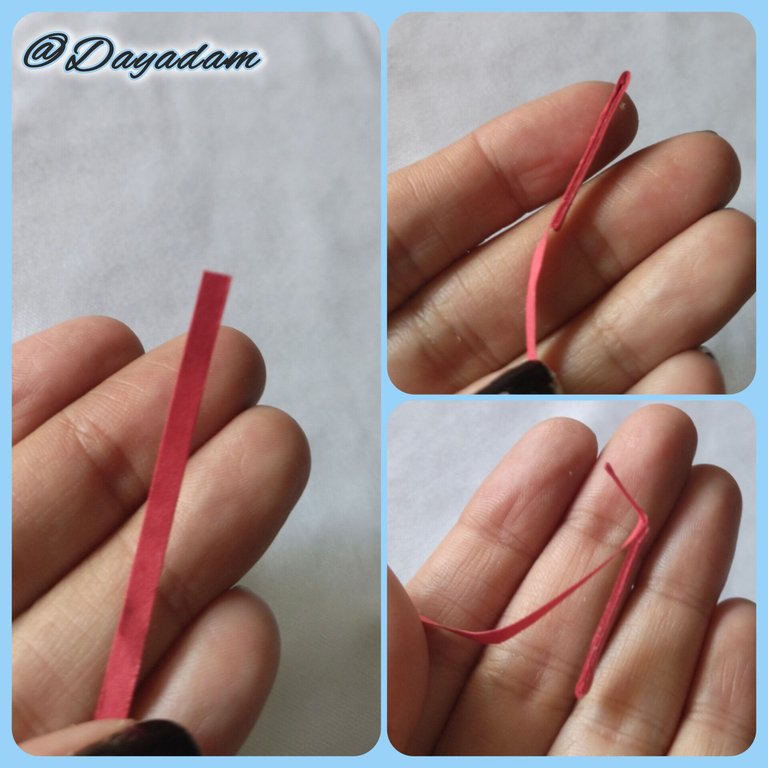
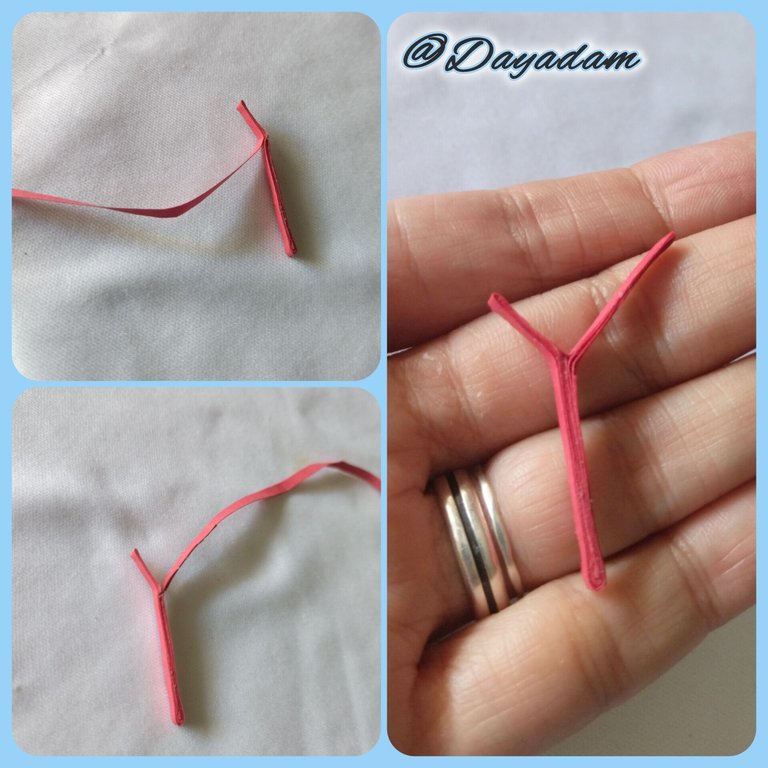
- To make the base of the feather I proceeded to take 3mm wide red ribbon which I joined together with glue, as you can see in the pictures.
- For the tip I made a silver colored open circle which I molded.
- I joined the red base to the silver colored tip, then to the feather, after drying I gave shape to the red parts that were still to be molded according to my tattoo.
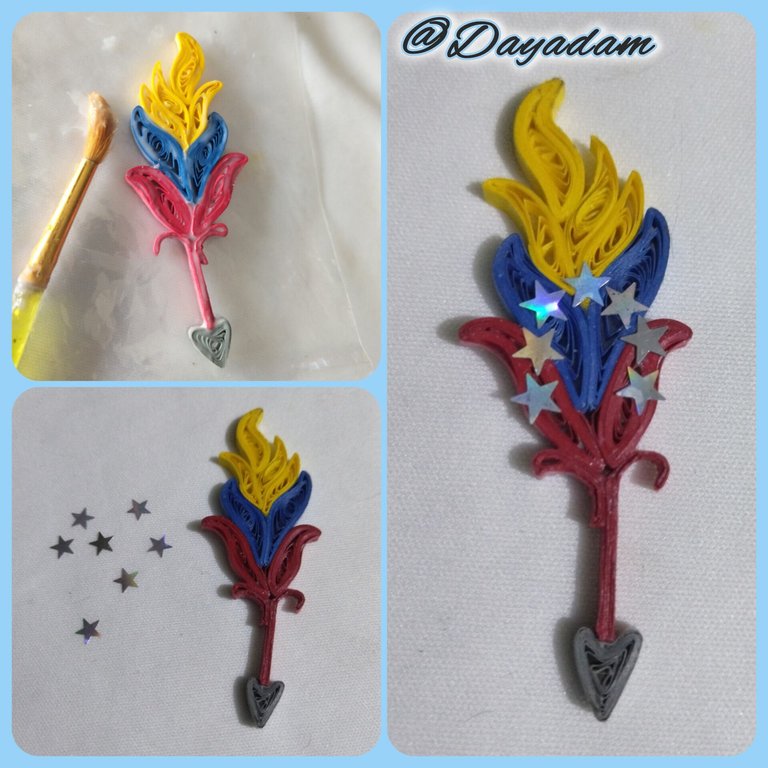
- I applied several layers of extra strong white glue to the piece to protect it, give it shine and plasticity, let it dry very well.
- I had some small silver stars, I took 7 of them and placed them in a uniform way to make them look like my tattoo.
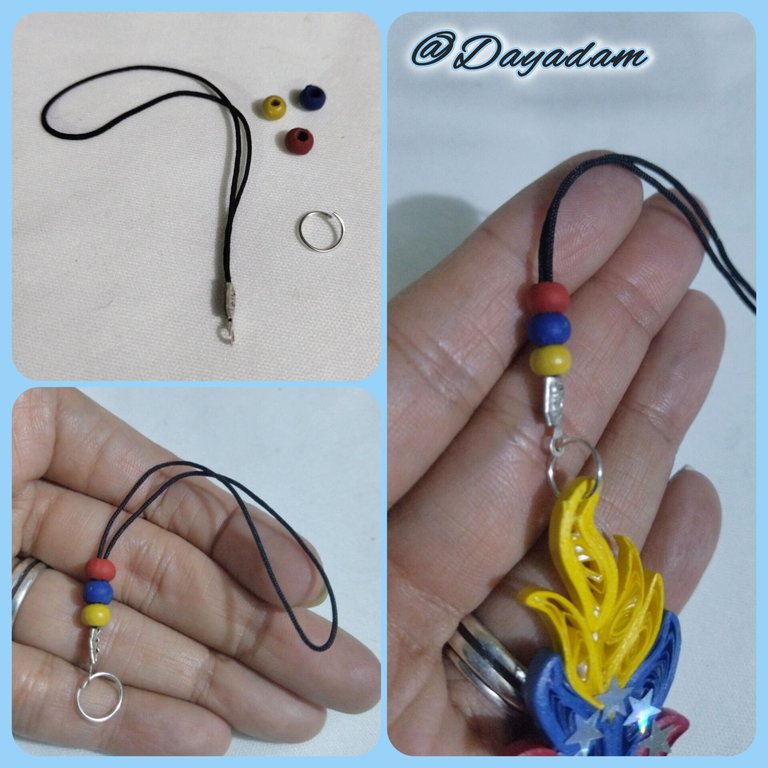
- To finish, I took a thin black Chinese thread, a knot cover, yellow, blue and red wooden beads and a medium size costume jewelry ring, with which I made a small pendant to place the feather.
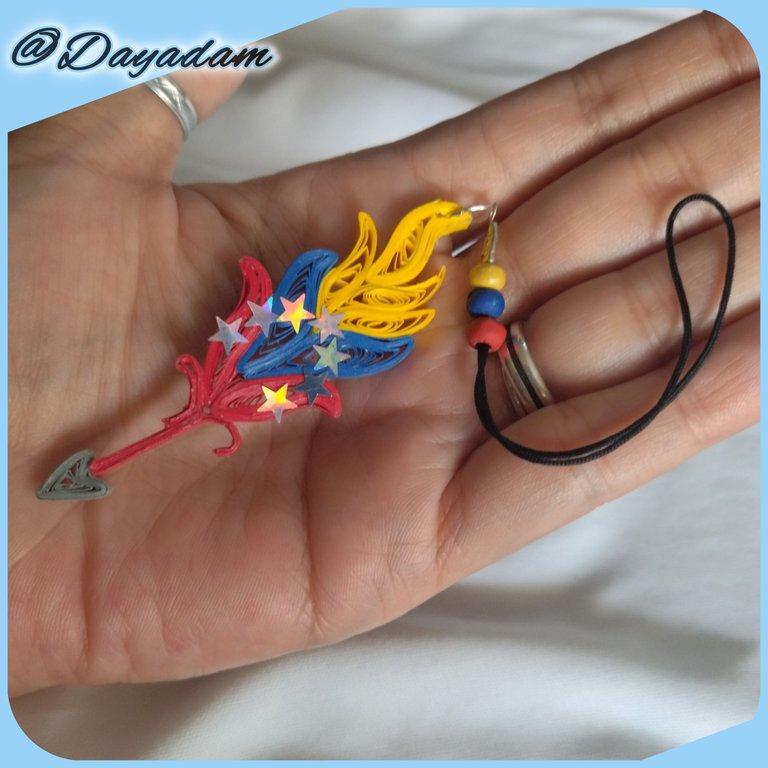
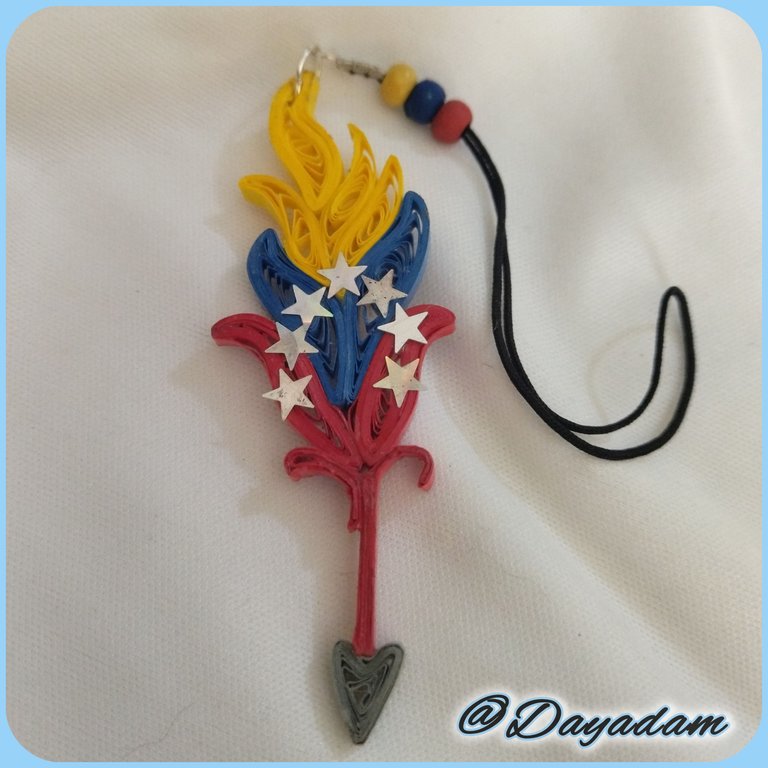
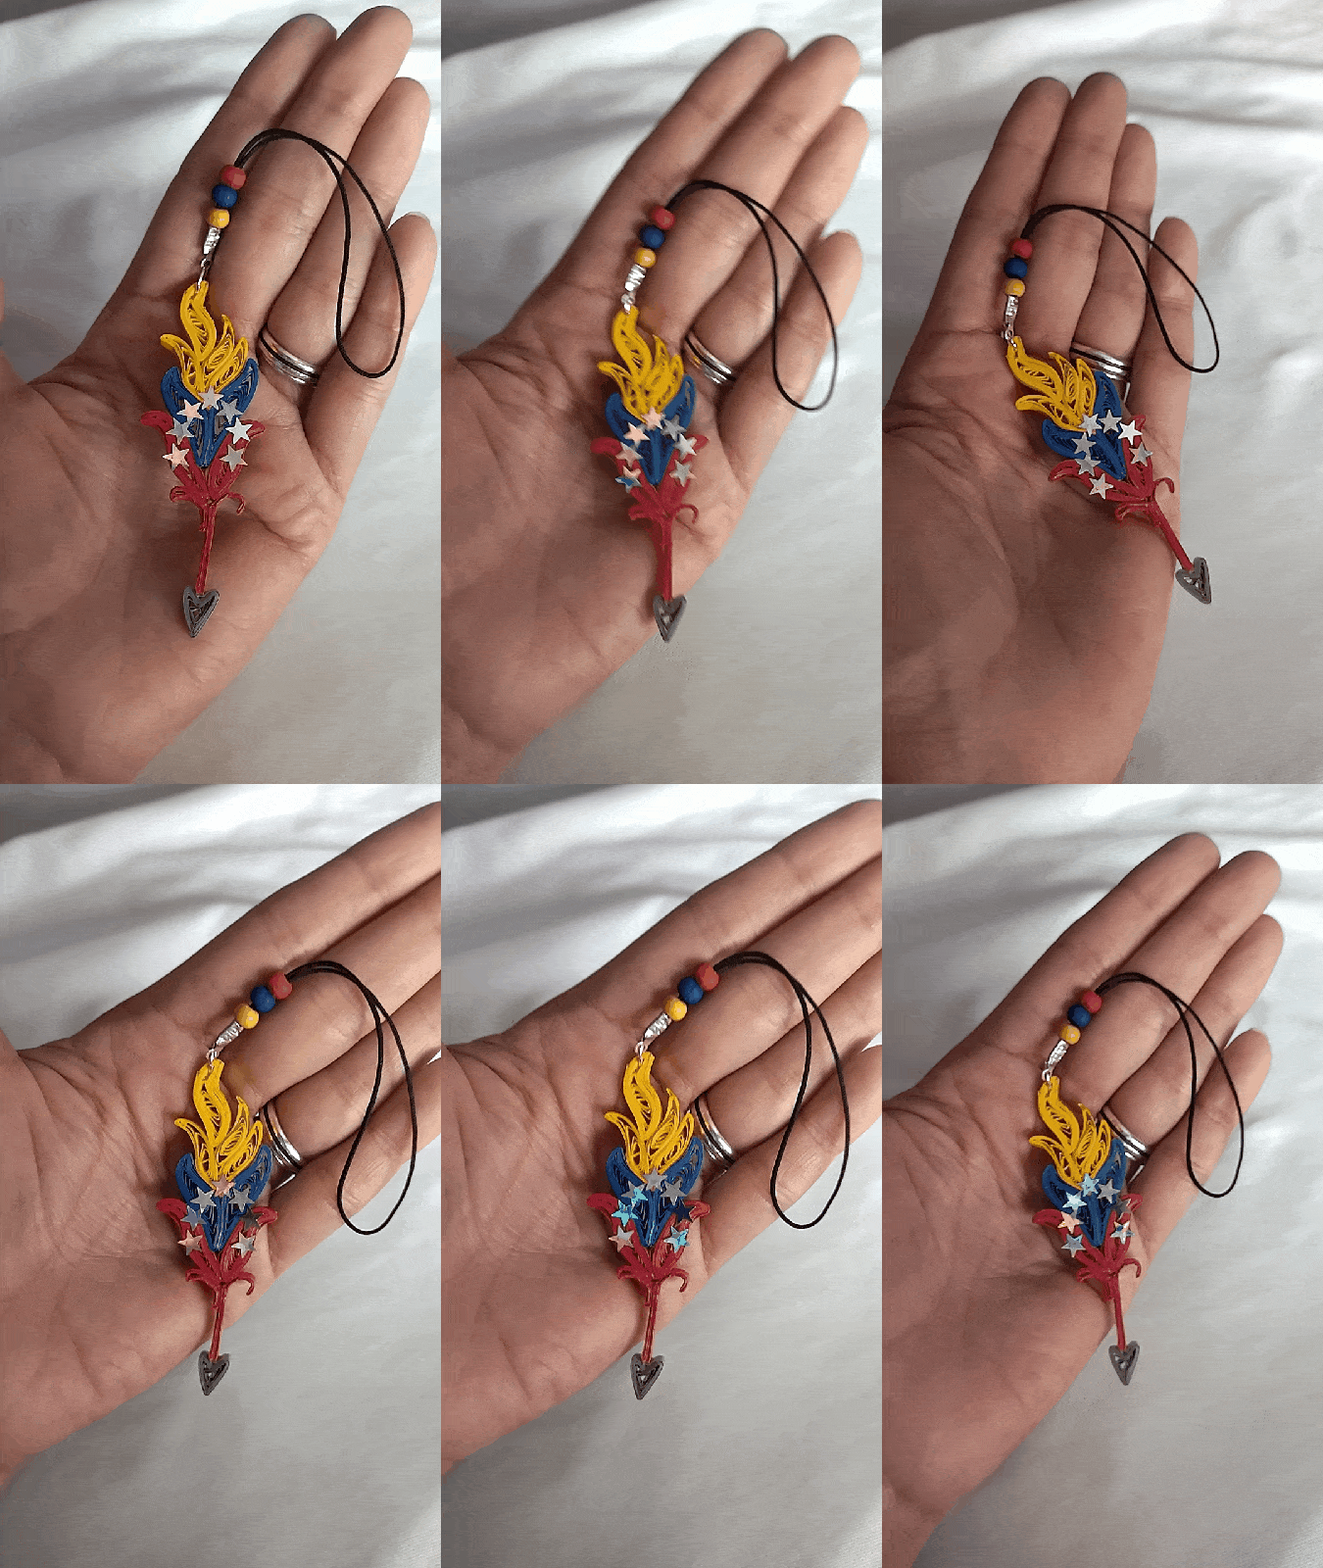
In this way we have this pendant of the replica of my tattoo in honor of my Venezuela in the quilling technique.

• Para realizar la base de la pluma procedí tomar cinta de 3mm de ancho de color rojo la cual fui uniendo entre si con pega, como pueden observar en las imágenes.
• Para la punta realice un circulo abierto de color plateado el cual moldee.
• Uní la base roja, a la punta de color plateado, luego a la pluma, al secar le di forma alas partes rojas que faltaban por moldear acorde a mi tatuaje.
• Aplique a la pieza varias capas de pega blanca extra fuerte para protegerla,darle brillo y plasticidad, deje secar muy bien.
• Tenia unas pequeñas estrellas de color plateadas, tome 7 y las coloque de manera uniforme para que hicieran semejanza con mi tatuaje.
• Para finalizar tome hilo chino fino de color negro, un tapa nudos, perlas de madera amarillo, azul y rojo mas una argolla de bisutería mediana, con lo cual realice un pequeño colgante para colocar la pluma.
De esta manera tenemos este colgante de la replica de mi tatuaje en honor a mi Venezuela en la técnica de quilling.

What did you think, did you like it?
I hope you did, I hope you liked my explanation, procedure and photos, I made them with love for you.
"Let out that muse that inspires you, and let your imagination fly".
Thank you all, see you next time...

¿Que les pareció, les gustó?
Espero que sí, que les haya gustado mi explicación, procedimiento y fotos, los hice con mucho cariño por y para ustedes.
"Deja salir esa musa que te inspira, y deja volar tu imaginación".
Gracias a todos, nos vemos en la próxima.

Todas las fotos usadas en este post son de mi autoría y han sido sacadas en mi celular personal un Redmi 9T y editadas en Canva y en Inshot Banner y separador hecho por mí en Canva Traducido con la ayuda de DeepL

