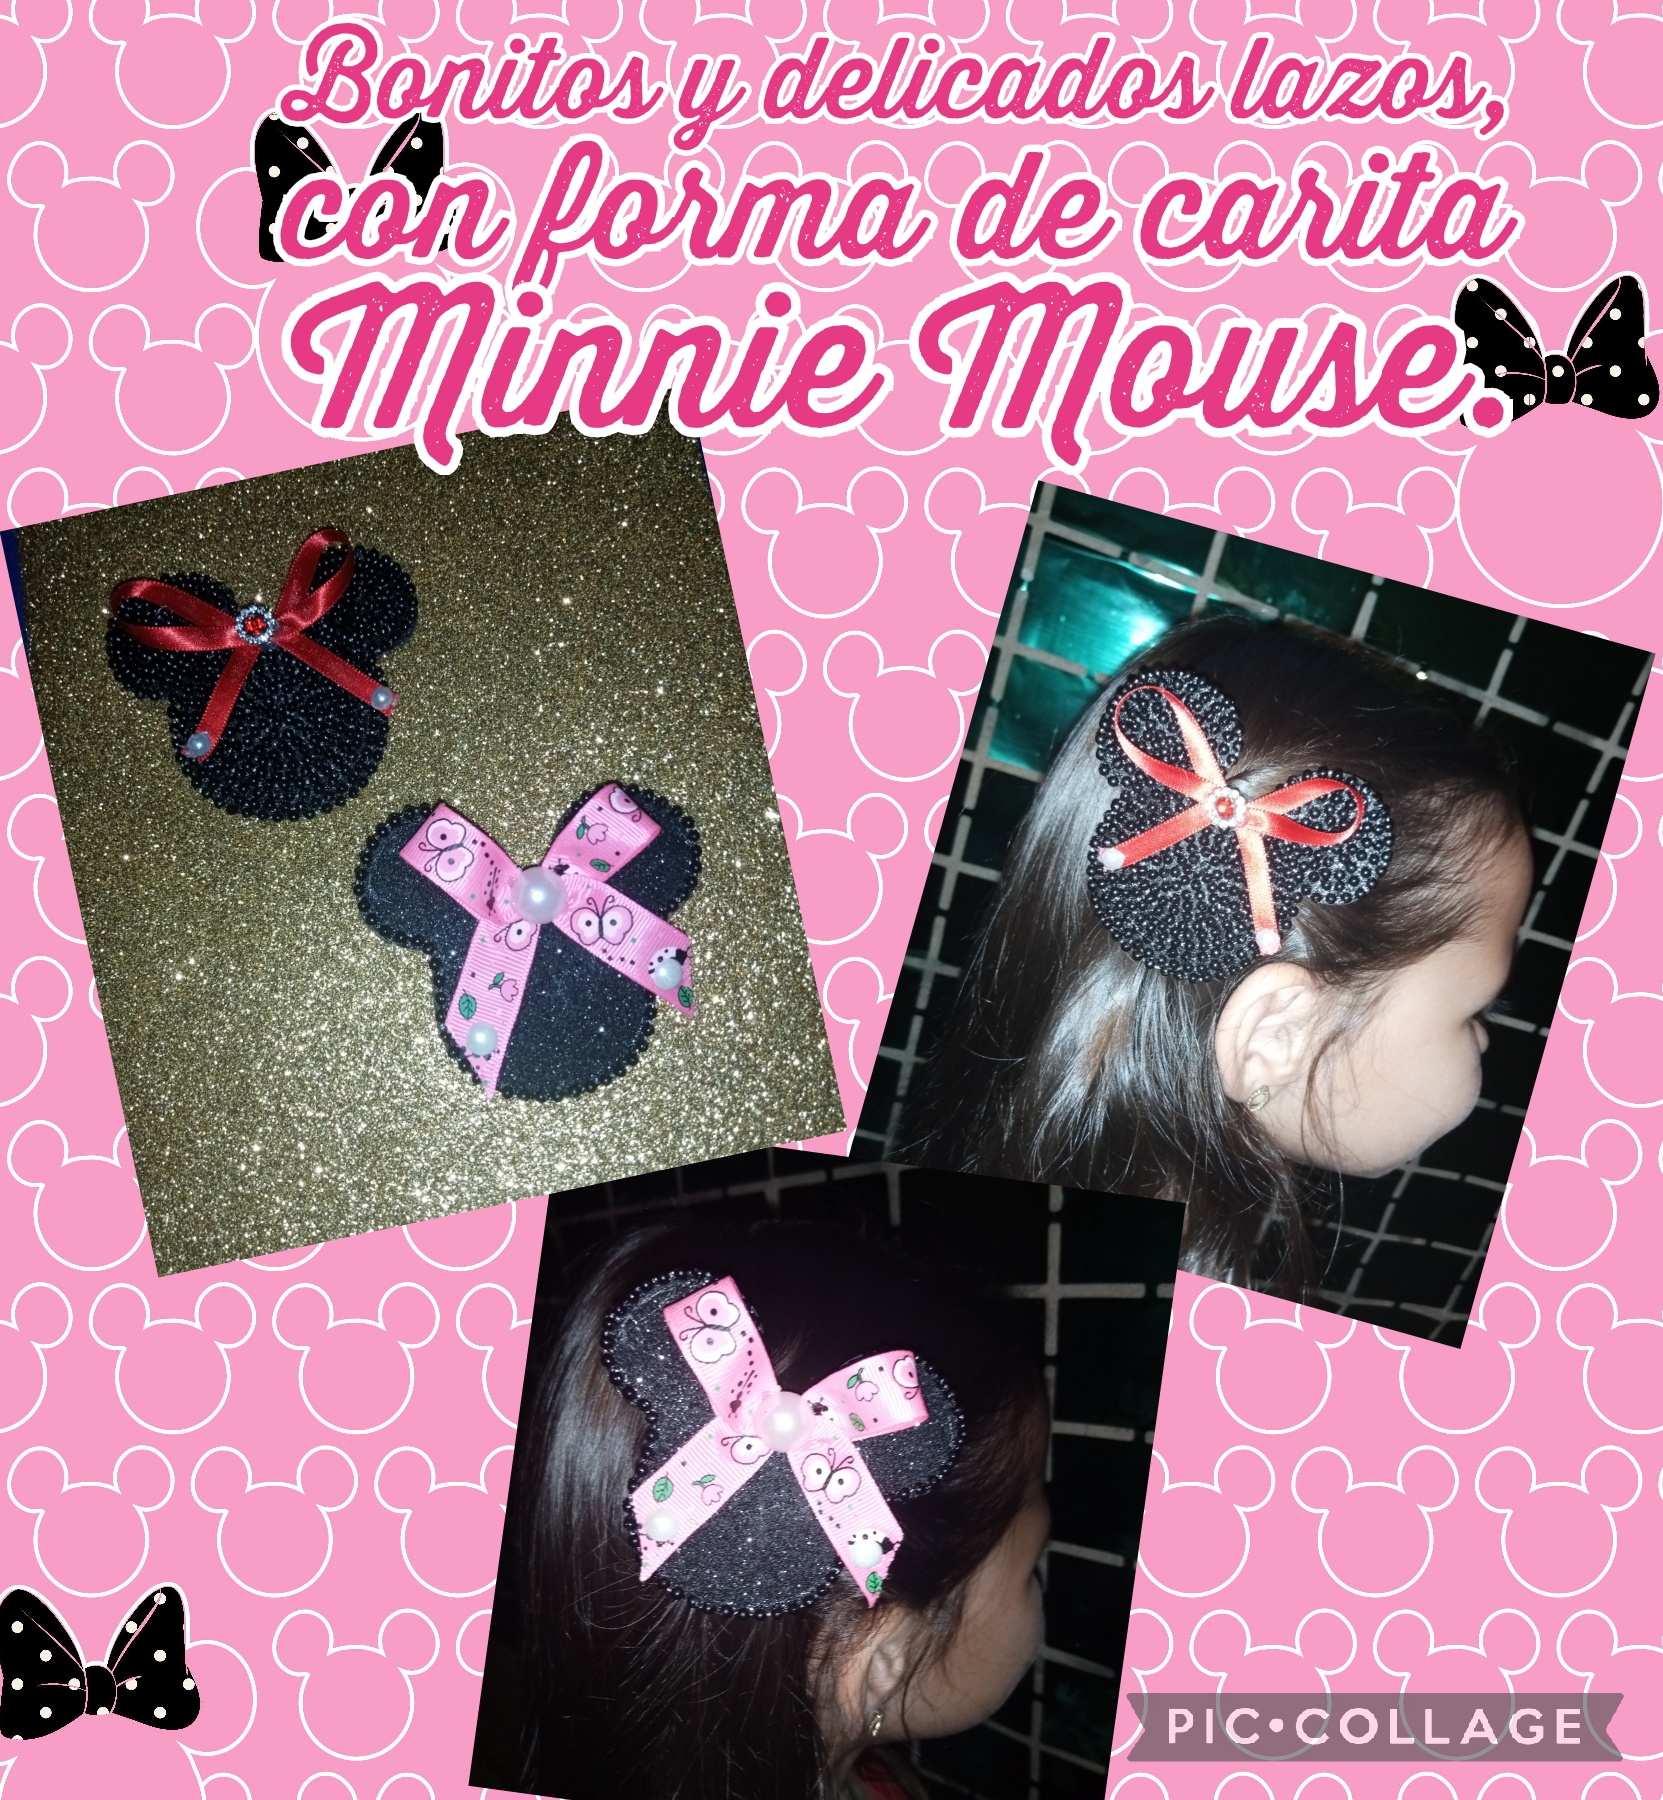
Muy buenos días mis amigos Jewelry, ante todo les envió un saludo y un fuerte abrazo, deseándoles que se encuentren muy bien, y Dios los bendiga a todos y les de muchas bendiciones, estoy de vuelta nuevamente con ustedes, ya que por problemas nuevamente con el internet, no habia podido compartir con ustedes mis proyectos, pero gracias a Dios que ya se acomodo un poco. Hoy les traigo un bonito y muy divertido proyecto, se trata de elaborar, unos bonitos y delicados lazos, con forma de carita minnie mouse, y decorados con perlas corridas y pedreria decorativa, estos lazos los hice para mi hija, que a ellas les encanta todo lo que le hago para ponerselo en el pelo, a mi niña le encanto sus lazos y espero que a ustedes tambien, seguidamente les voy a mostrar el paso a paso.
Good morning my friends Jewelry, first of all I send you a greeting and a big hug, wishing you that you are very well, and that God bless you all and give you many blessings, I am with you again, because of problems again With the internet I had not been able to share my projects with you, but thank God I have accommodated myself a bit. Today I bring you a beautiful and very fun project, it is about making beautiful and delicate bows, in the shape of a minnie mouse face, and decorated with running pearls and decorative rhinestones, I made these bows for my daughter, who loves everything I I do to put it in her hair, my daughter loved her bows and I hope you do too, then I will show you step by step.
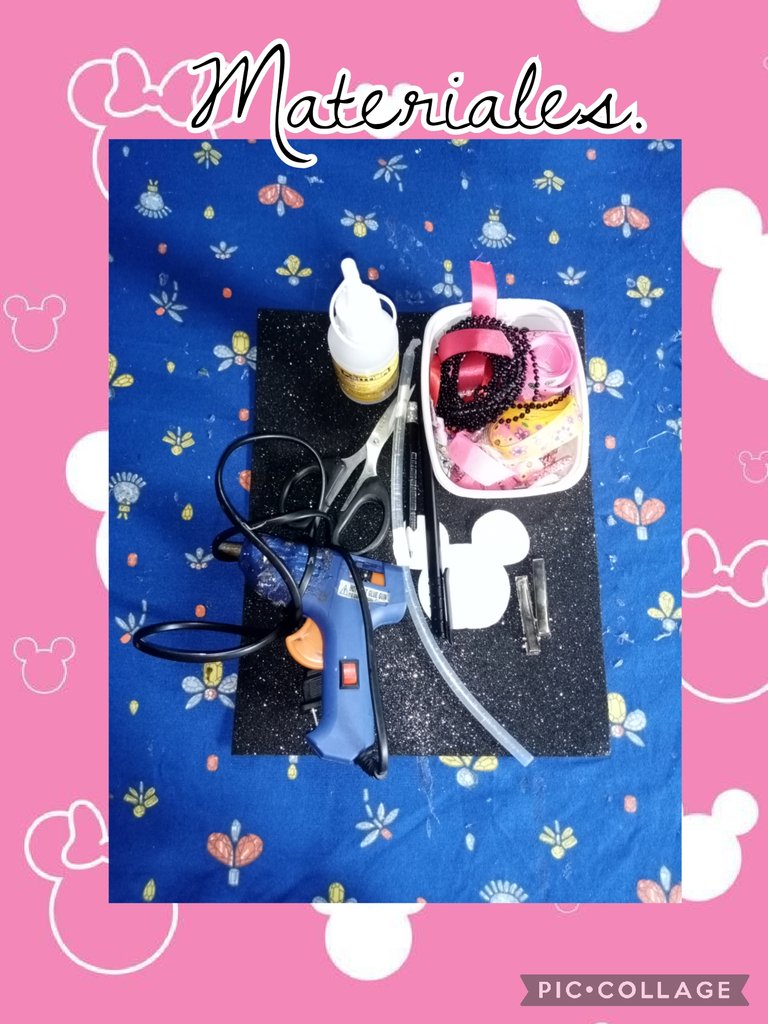
Para elaborar estos bonitos y delicados lazos, con forma de carita minié mousse, vas a necesitar los siguientes materiales y herramientas:
*Foami diamantado, color negro.
*Perlas corridas, pequeñas color negra.
*Cinta de tela estampada y unicolor.
*Pedrería decorativa y medias perlas.
*Silicona líquida.
*1 tijera.
*Pistola de silicona.
*Barra de silicona.
*1 marcador punta fina.
*2 pinzas de metal.
*Hilo y aguja.
To make these beautiful and delicate bows, in the shape of a mini mousse face, you will need the following materials and tools:
*Diamond foam, black.
*Round, small black pearls.
*Printed and unicolor fabric ribbon.
*Decorative rhinestones and half pearls.
*Liquid silicone.
*1 scissors.
*Glue gun.
*Silicone bar.
*1 fine tip marker
*2 metal clips.
*Thread and needle.
Let's start with the step by step, to elaborate this fun project.
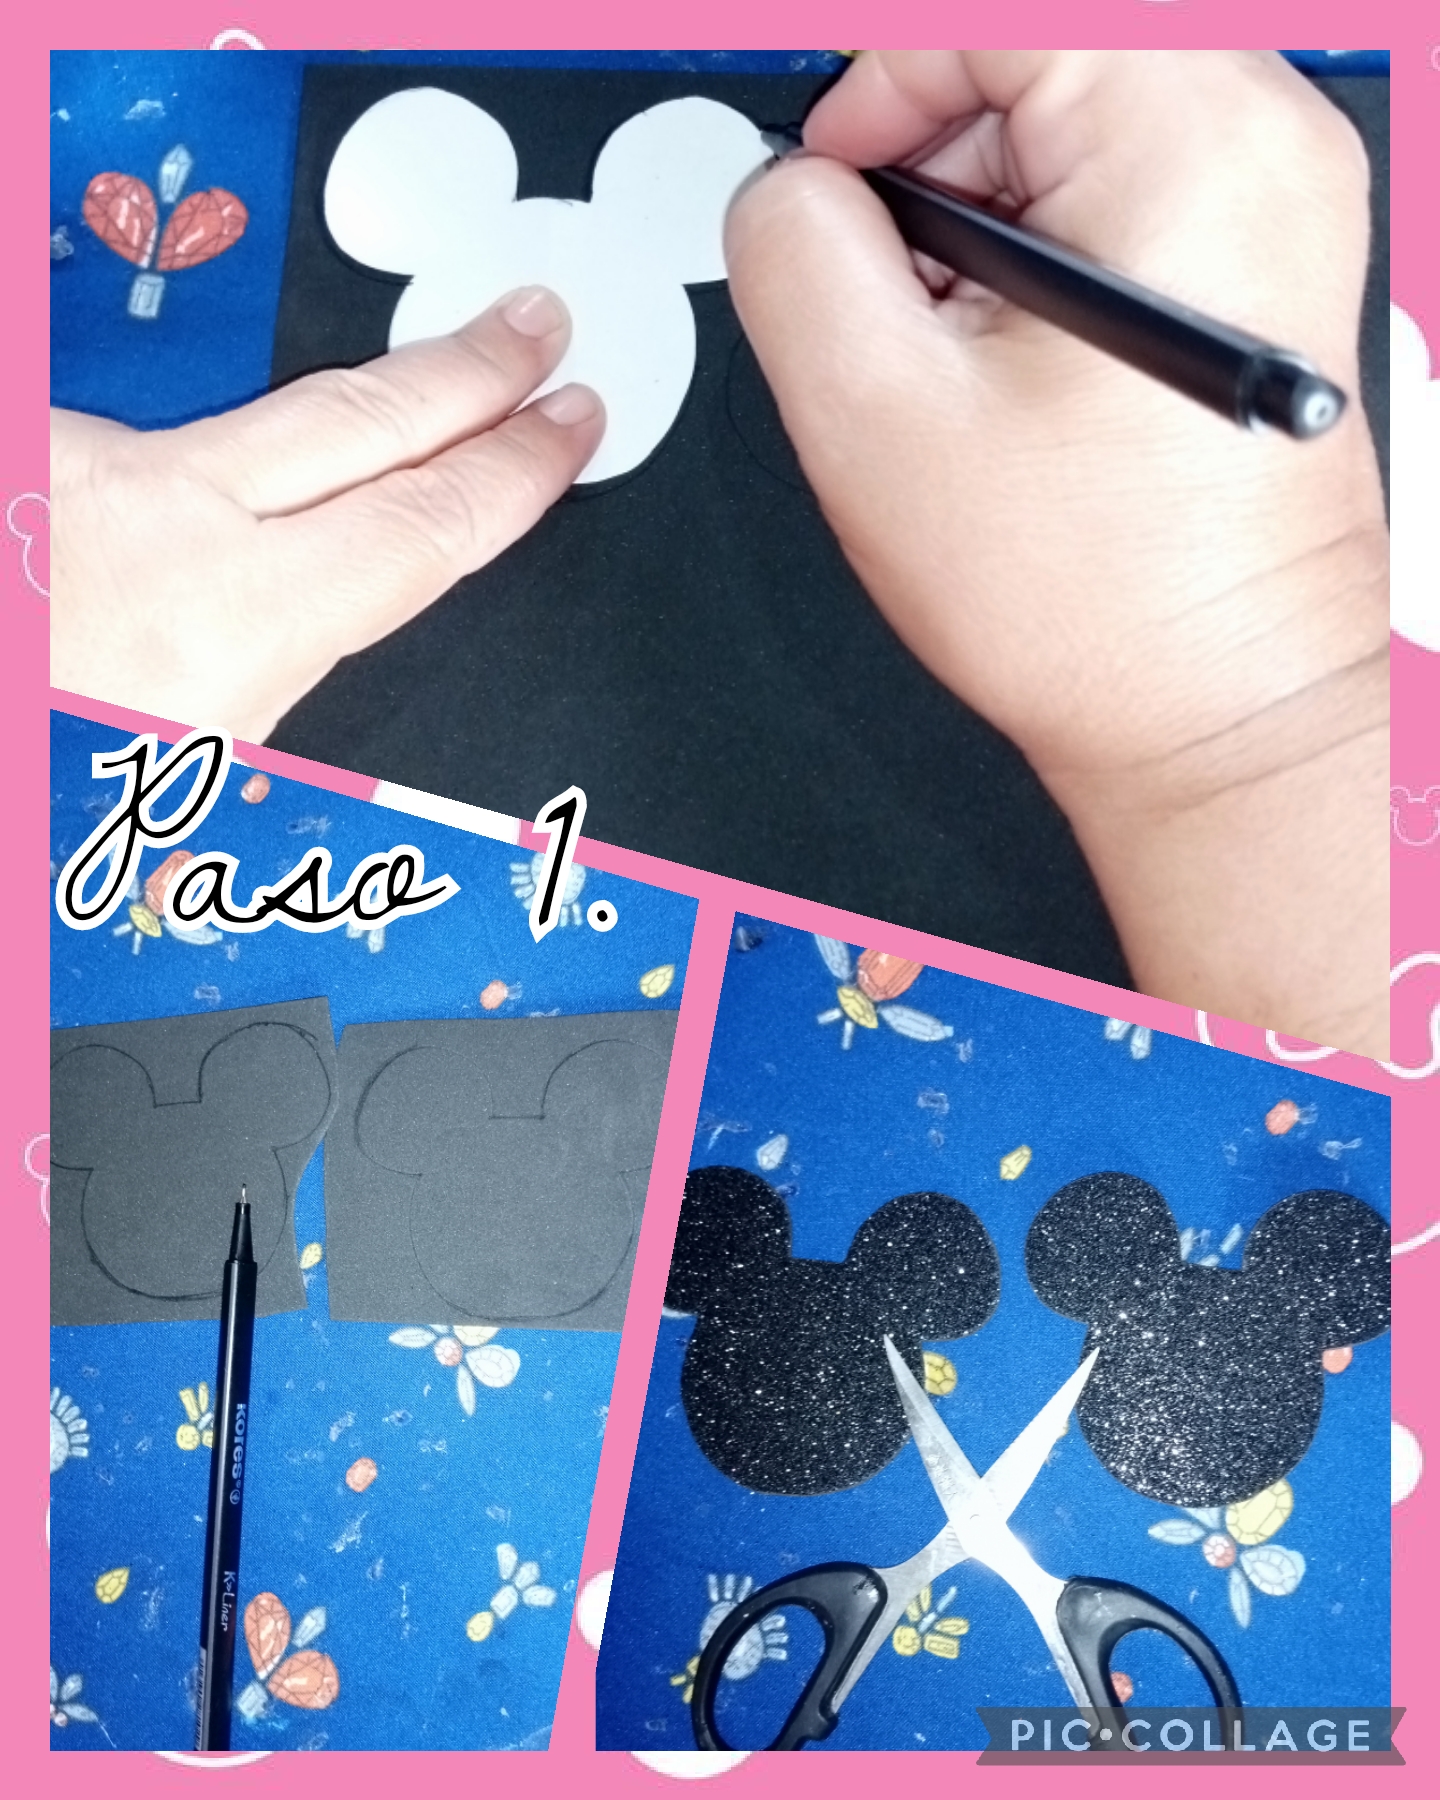
Step 1. We are going to start making these pretty and delicate bows, in the shape of a minnie mouse face, and we do it as follows: we take a pattern of the paper minnie mouse face, and we mark it on the diamond foami , black color, we are going to mark two little faces and then with the help of scissors we cut them around the edge until we obtain the silhouette that we are going to need, see the images.
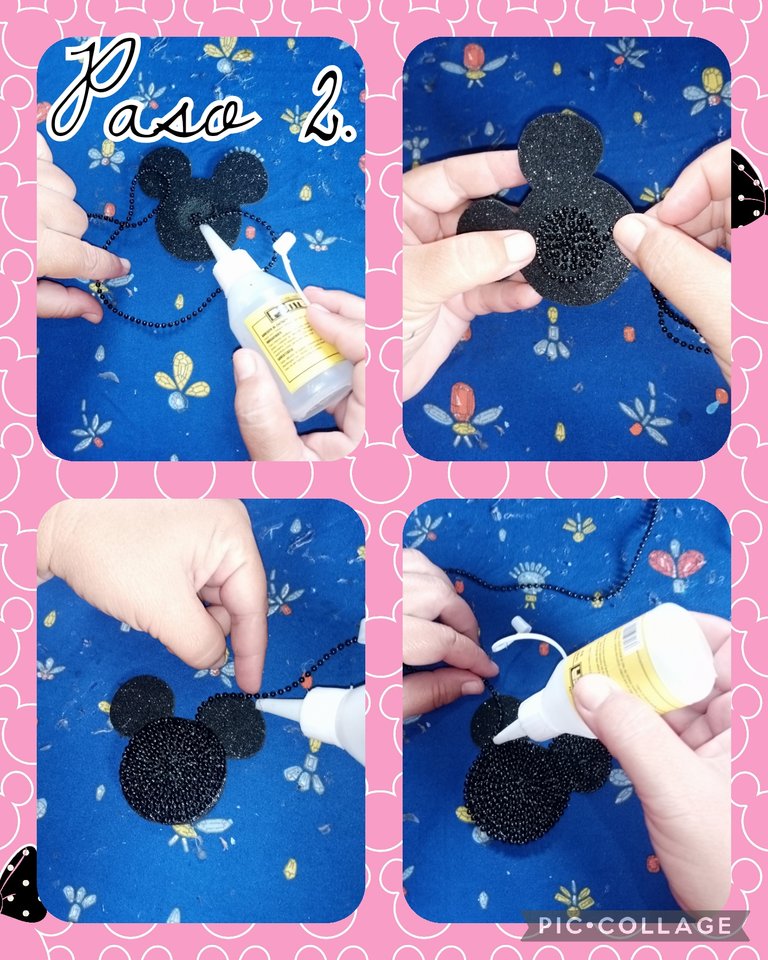
Step 2. Next, we are going to take black pearls and we are going to paste them with liquid silicone, on one of the faces, and we are going to do it in the following way, in the center of the face we place liquid silicone and leave dry a little, then we begin to stick the pearls in a circular way, until we cover the entire part of the face, then we are going to cover the ear, but we begin to do it from the edge inwards in a circular way, until we finish in the center and the same with the other ear, see the images.
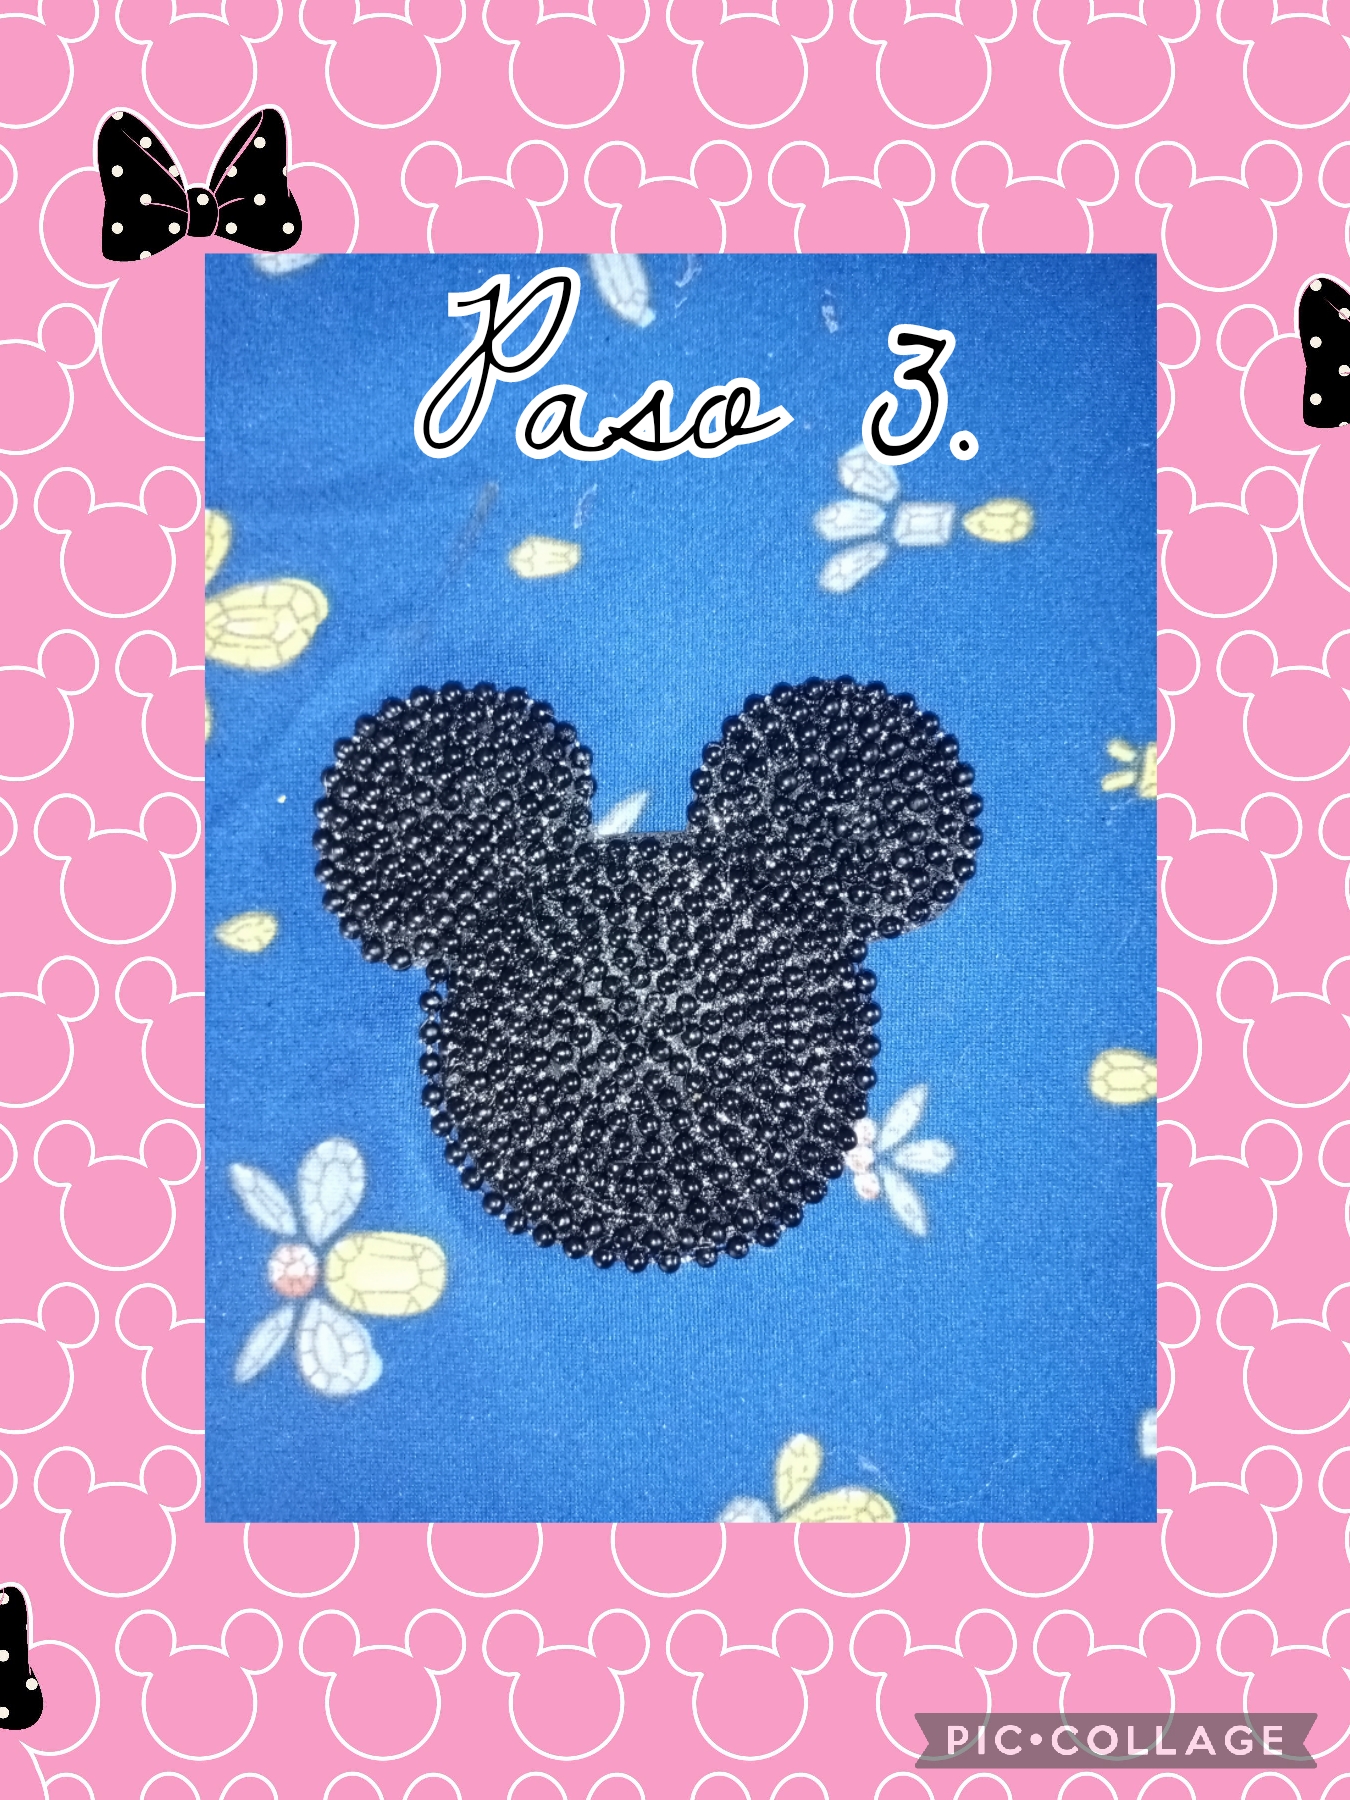
Step 3. In this step we show you how minnie mouse's face turned out, already covered with pearls, look at the image. See the image.
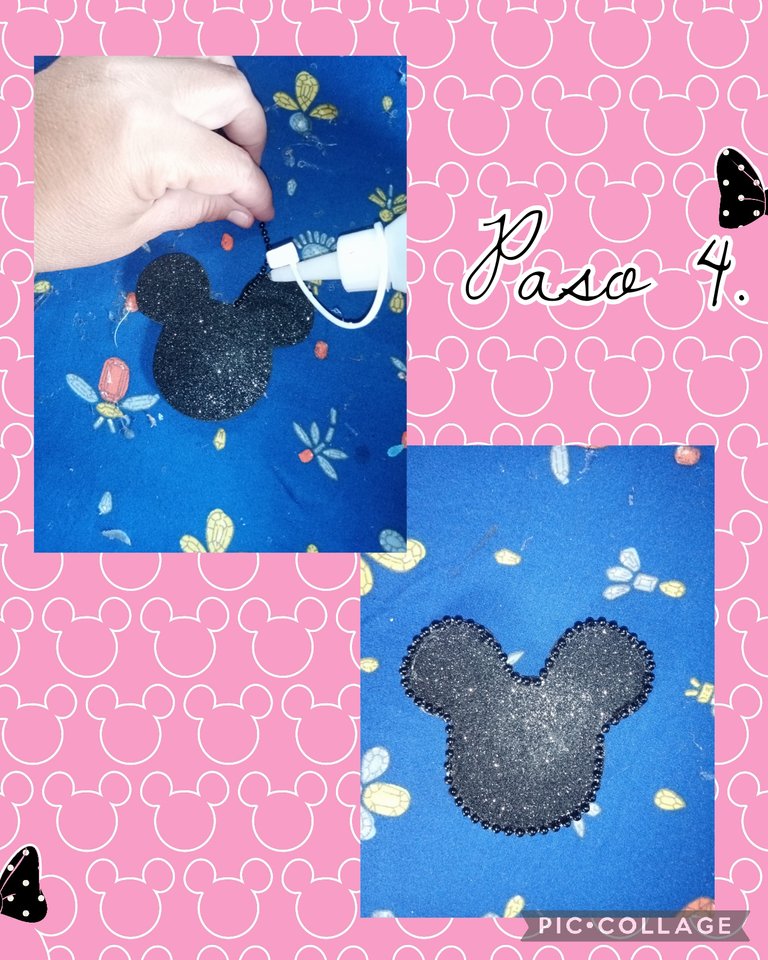
Step 4. In this step we are going to decorate the other face of minnie mouse, in the previous steps I had told you that there were two faces, to this face we are going to glue running pearls, only on the edge, and we are going to paste with liquid silicone, see the images.
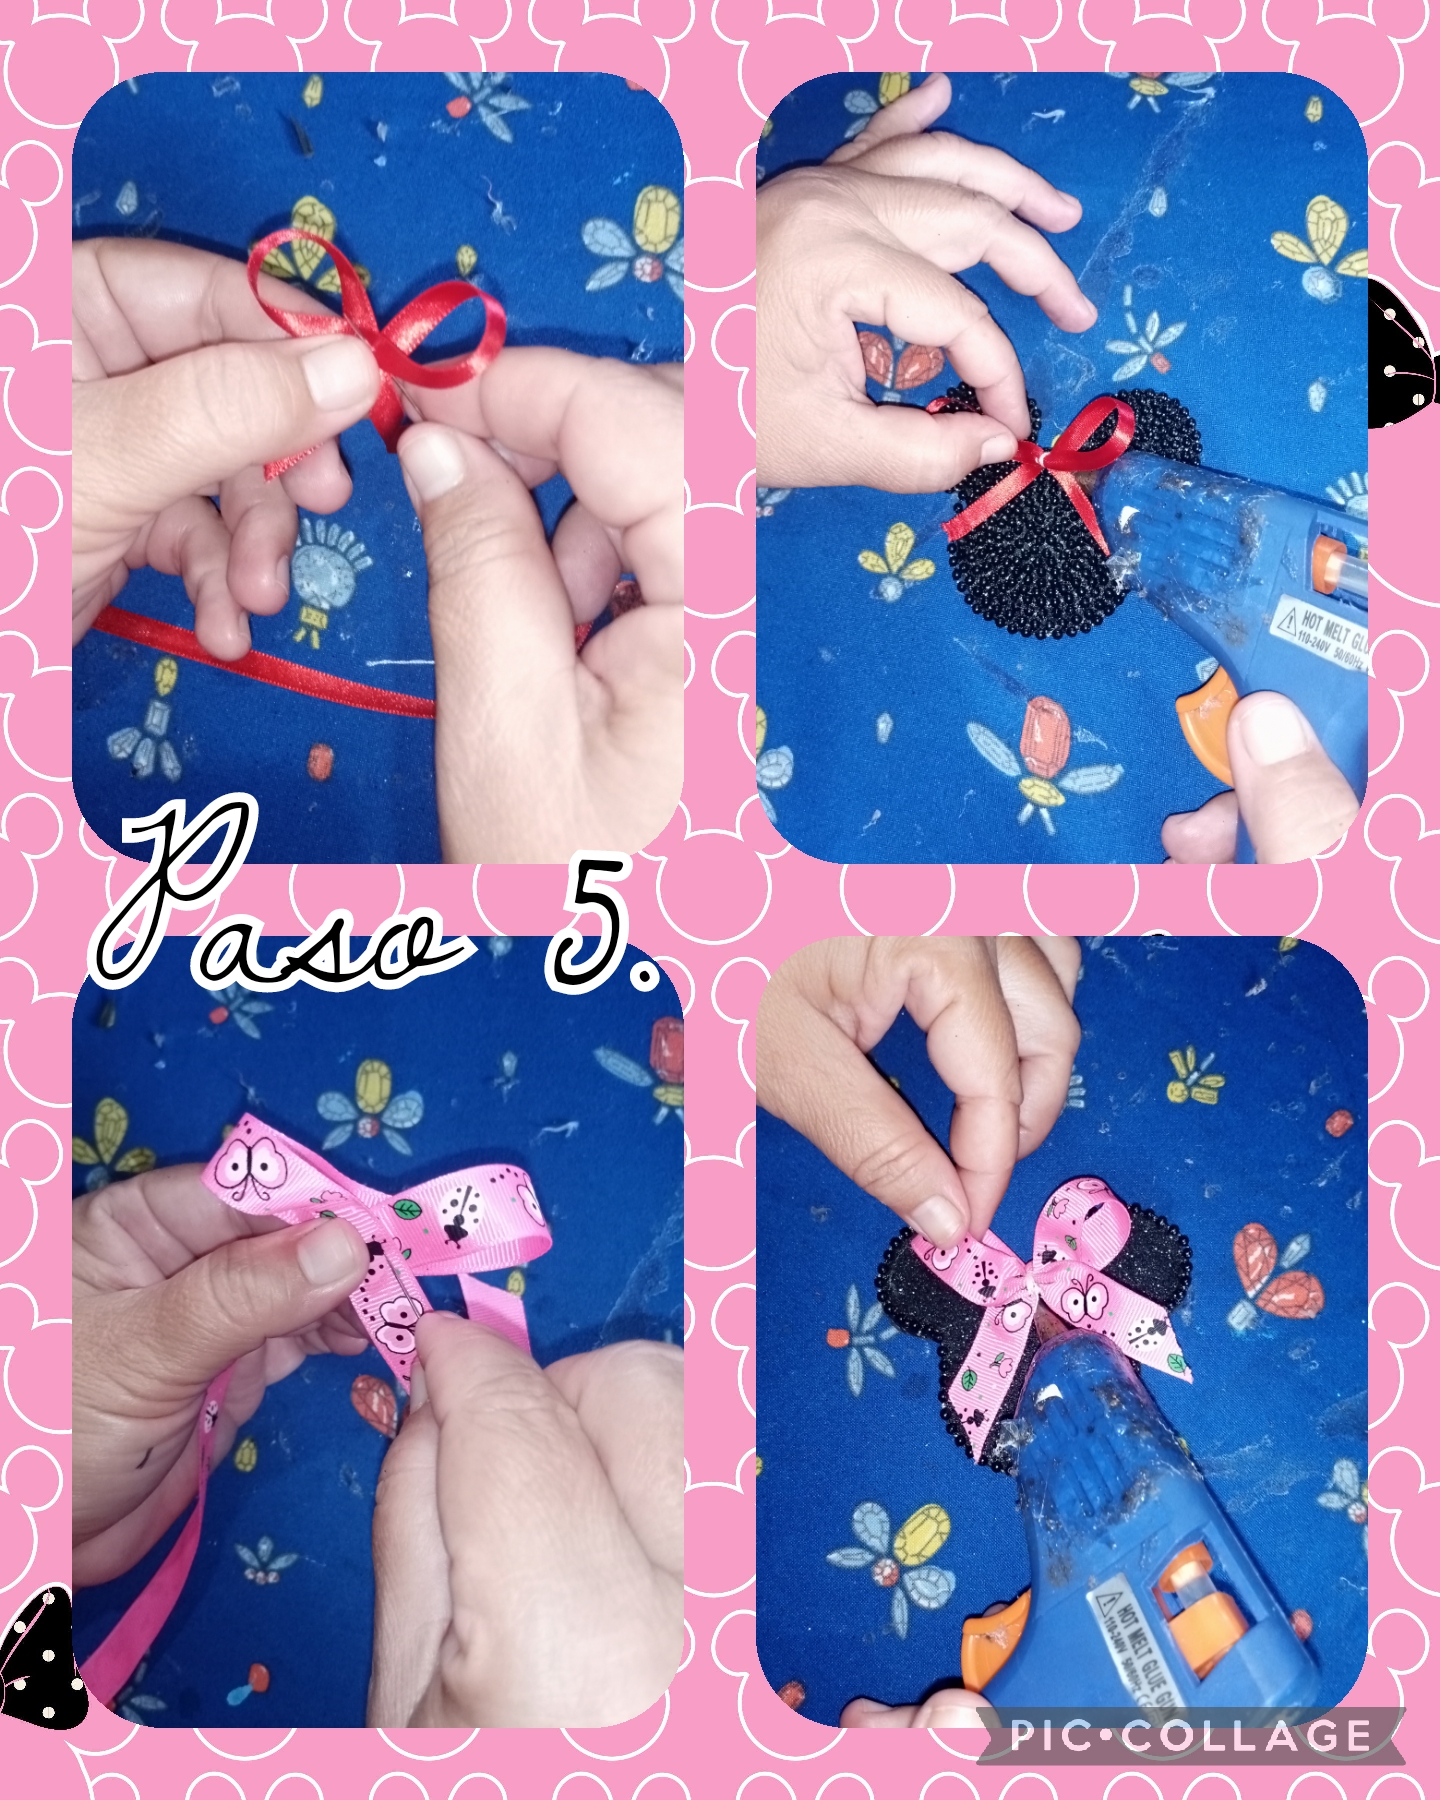
Step 5. In this step we are going to take the patterned and plain fabric ribbons to make some bows, which will serve to decorate the faces, we are going to do it as follows, we take the ribbons and in the part of the sides, and we make shapes of circles and in the center we join them, gluing them with a needle and thread, so that they do not untie us, then with hot silicone we glue the cloth bow, in the center of the ears, see the images.
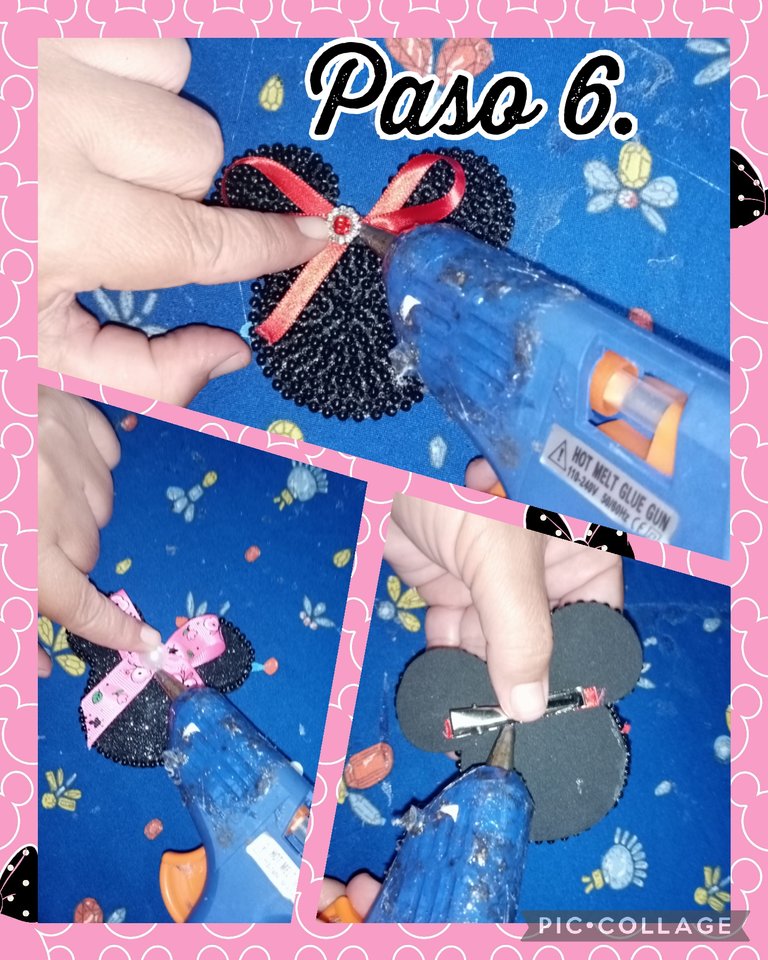
Step 6. Now in this step we are going to use decorative rhinestones and half pearls, we glue them in the center of the fabric bows, and in the ends of the fabric bows, we glue the half pearls and finally with hot silicone We glue the metal clips, on the back of the faces you can see the images.
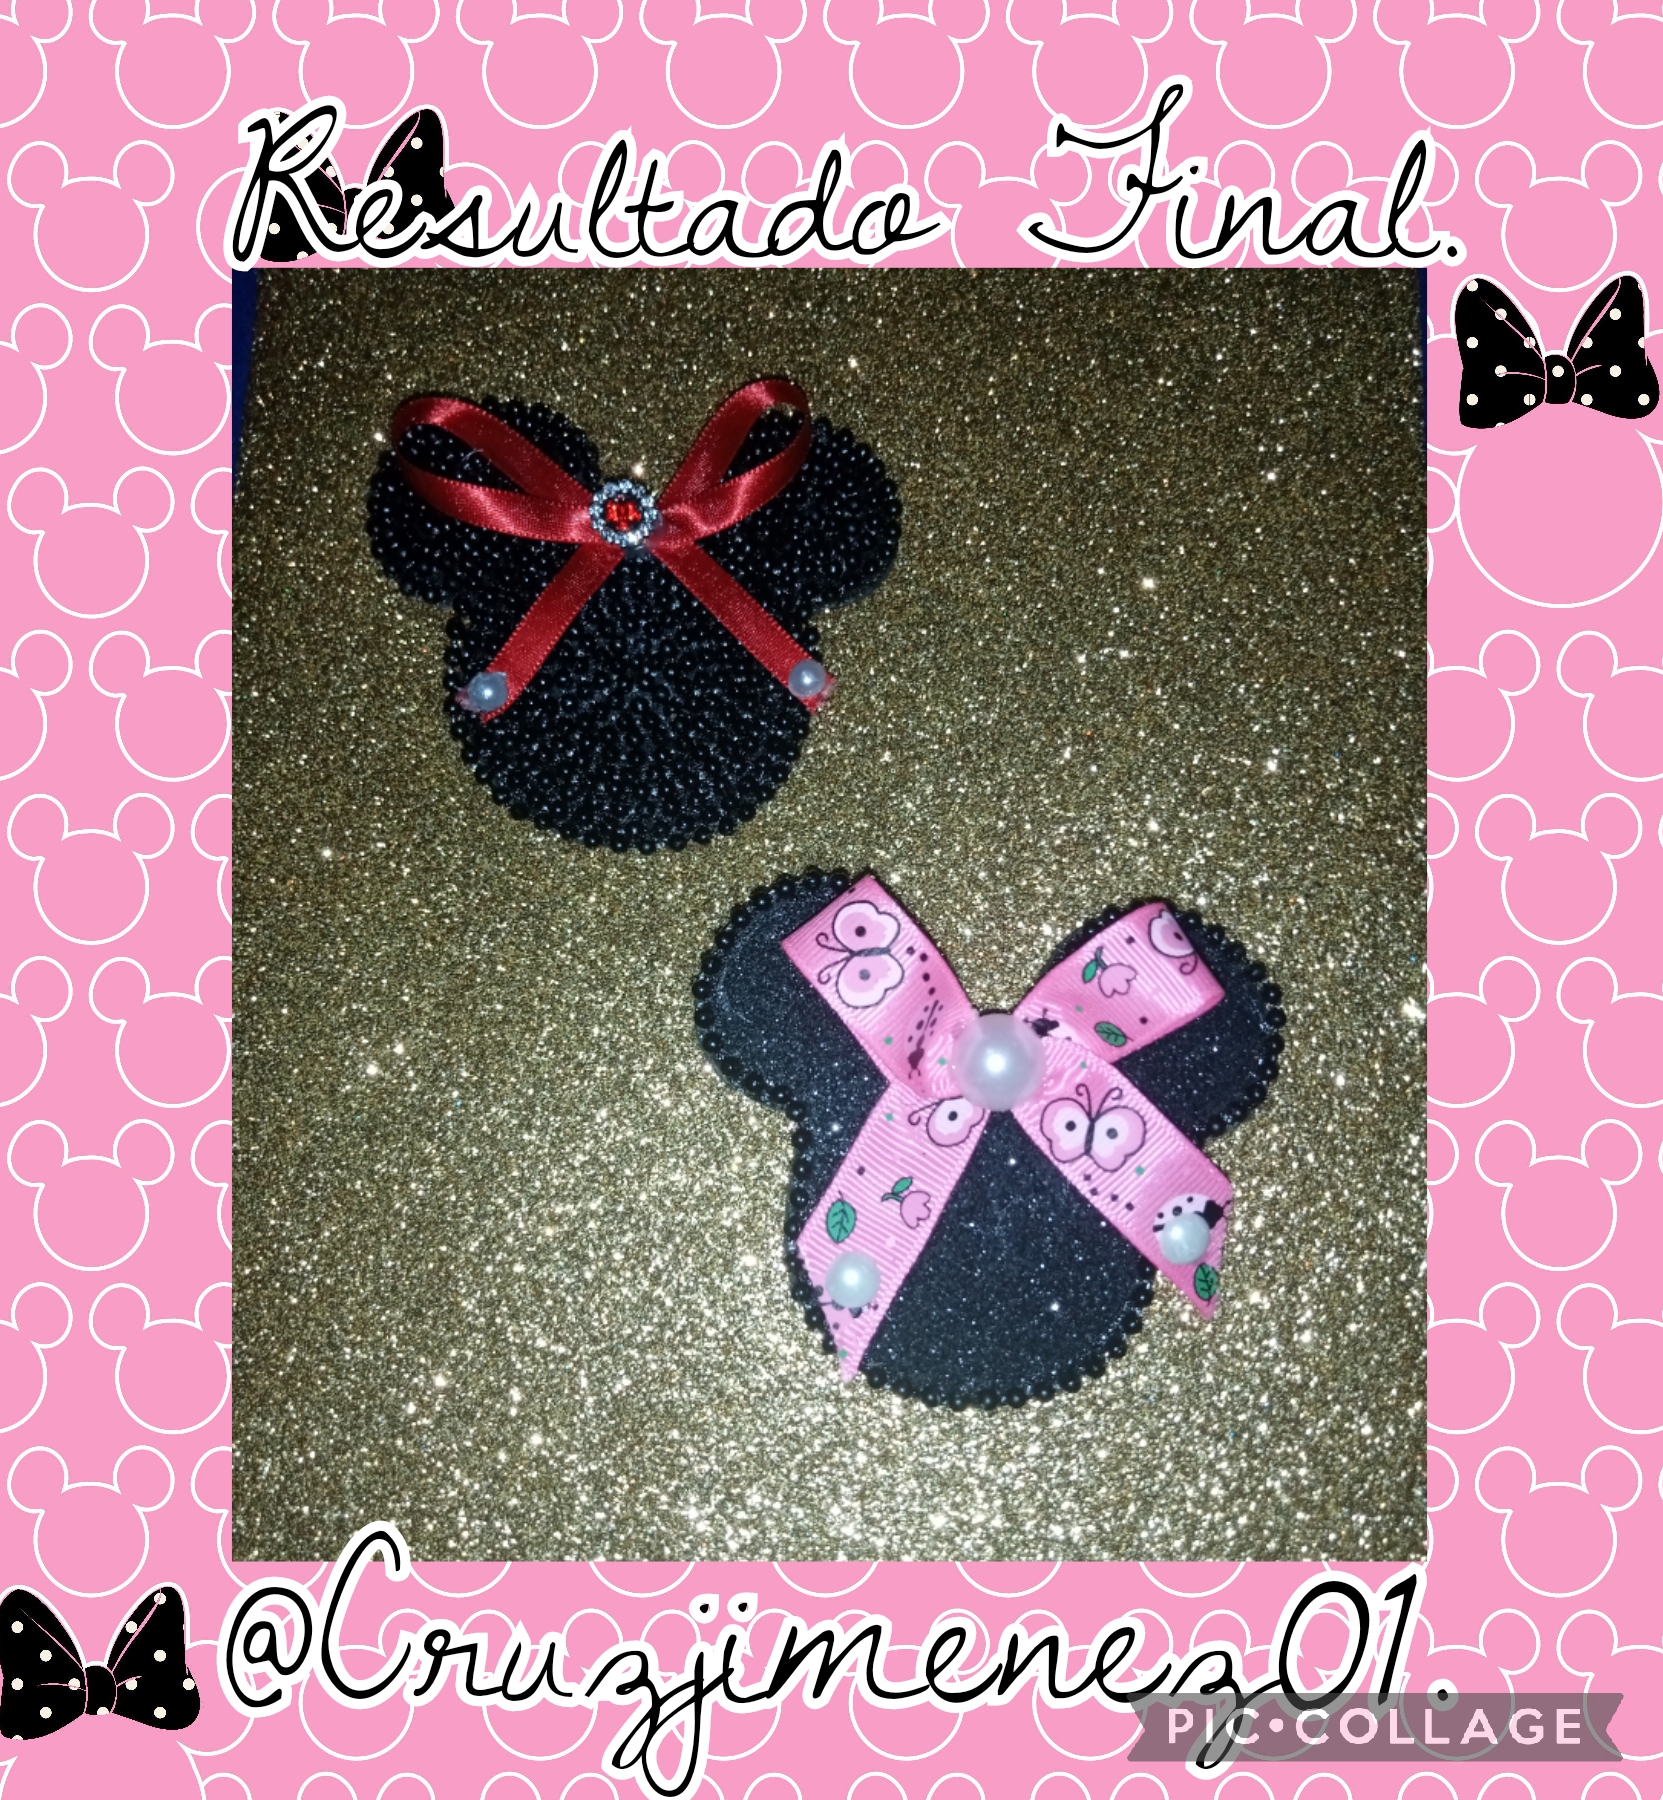
Once the steps were finished, the final result was some beautiful and delicate bows, in the shape of a minnie mouse face, for the princesses of the house, I especially made them for my daughter, thanks for visiting my blog, We See you very soon with another creative idea. Blessings.
Las fotos fueron capturadas con mi teléfono androide, TECNO SPARK 6GO y editadas con la aplicación PIC-COLLAGE y traducido con GOOGLE ESP-ING.
The photos were captured with my android phone, TECNO SPARK 6GO and edited with the PIC-COLLAGE application and translated with GOOGLE ESP-ING.