Hola amigos. Deseando que estén muy bien hoy. Paso para contarles que he tenido mucha curiosidad de saber un poco sobre el uso de la resina. Es un tema muy complejo, de lo poco que he leído no he aprendido mucho ya que la información es muy variada. La resina es un material que se ha usado en la elaboración de trabajos de envergadura en construcción de viviendas y diseños, sin embargo ahora recientemente la hemos visto en diferentes presentaciones en las manualidades.
He estado viendo videos y conversando un poquito e incluso realizando algunas pruebas. Ahora entiendo por qué los cursos y talleres sobre el uso de este material es tan costoso. Se necesita aplicar muchas técnicas para que los proyectos queden hermosos.
Debido a que no tengo aún la debida práctica se me ocurrió realizar una prueba con otro material, uno reciclado. Esto lo hice porque ví en un vídeo a una mujer riéndose de los que se matan buscando hacer dijes en resina y explicó rápidamente cómo los hace ella. Aunque la explicación fue rápida logré captar lo básico y lo puse en práctica. Aquí les muestro con paso a paso de que se trata.
Hello friends. Wishing you all well today. I stop by to tell you that I have been very curious to know a little about the use of resin. It is a very complex subject, from the little I have read I have not learned much as the information is very varied. The resin is a material that has been used in the development of major works in construction of houses and designs, but now recently we have seen it in different presentations in the crafts.
I have been watching videos and talking a little bit and even doing some tests. Now I understand why courses and workshops on the use of this material is so expensive. A lot of techniques need to be applied to make the projects look beautiful.
Since I still don't have the proper practice, I thought of doing a test with another material, a recycled one. I did this because I saw a video of a woman laughing at those who kill themselves trying to make resin charms and she quickly explained how she makes them. Although the explanation was quick, I managed to grasp the basics and put it into practice. Here I show you step by step what it is all about.
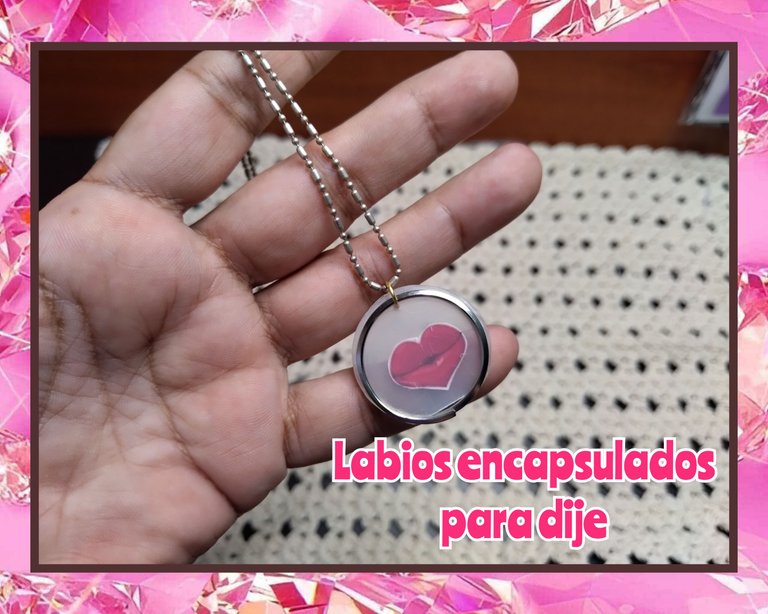
LABIOS ENCAPSULADOS.
ENCAPSULATED LIPS.
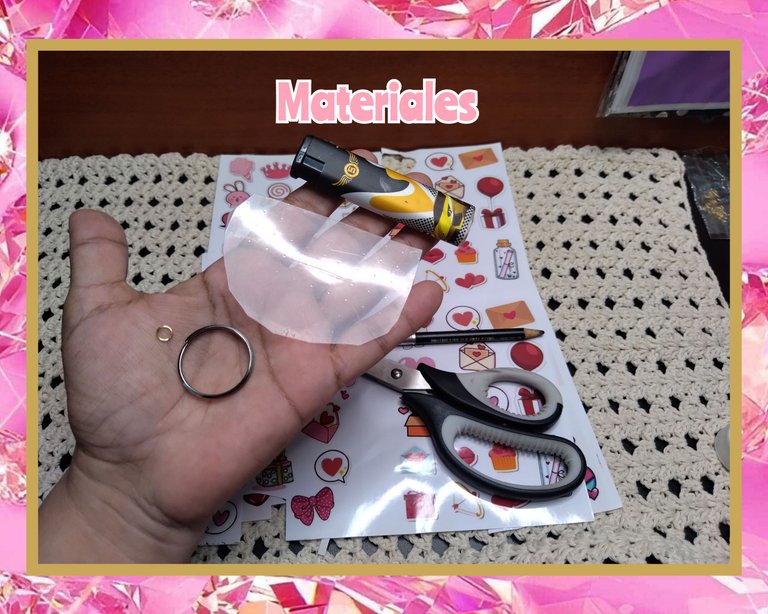
Desde bien temprano me levanté a buscar los materiales para hacer la prueba. Lamentablemente no tenía en casa botella de refresco desocupada y opté por usar otro tipo de plástico. Te recomiendo usar uno transparente y muy limpio para que este proyecto se vea súper mejor. Los materiales que usé son:
- Trozo de plástico liso, limpio y seco.
- Tijeras.
- Lápiz de grafito.
- Aro para llaveros.
- Argolla de alambre de bisutería.
- Encendedor.
- Figura en stickers para encapsular.
I got up very early in the morning to look for the materials to do the test. Unfortunately I didn't have an empty soda bottle at home so I opted to use another type of plastic. I recommend using a transparent and very clean one to make this project look even better. The materials I used are:
- Piece of smooth, clean and dry plastic.
- Scissors.
- Graphite pencil.
- Key ring.
- Wire jewelry ring.
- Lighter.
- Figure in stickers to encapsulate.
Me gustó mucho recrear un encapsulado con material reciclado. Hay muchas maneras de presentar un lindo trabajo y de hacer un dije bonito para regalar o usar. Esta es mi primer prueba y me encanta haberme atrevido a realizarlo.
I really enjoyed recreating an encapsulation with recycled material. There are so many ways to present a nice piece of work and make a pretty charm to give as a gift or wear. This is my first test and I love that I dared to do it.
💋 Empecé eligiendo entre los stickers alguno que encajara de manera adecuada en el centro del aro para llaveros. Siempre buscando que quedará en el centro y se vieran los espacios alrededor vacíos. Así fue que elegí estas tres figuras.
💋 I started by choosing one of the stickers that would fit properly in the center of the key ring. I always wanted it to be in the center and the empty spaces around it to be visible. That's how I chose these three figures.
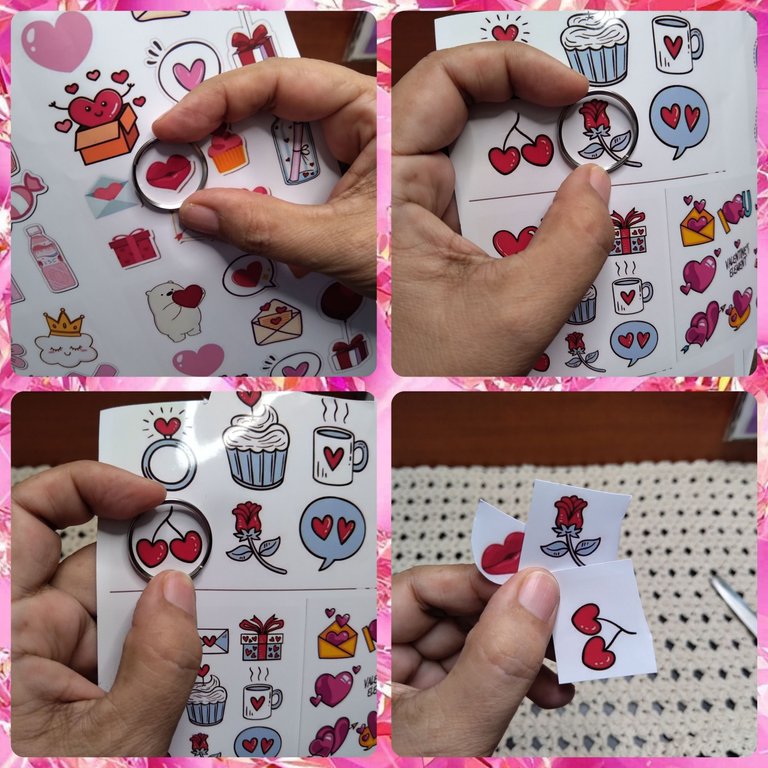
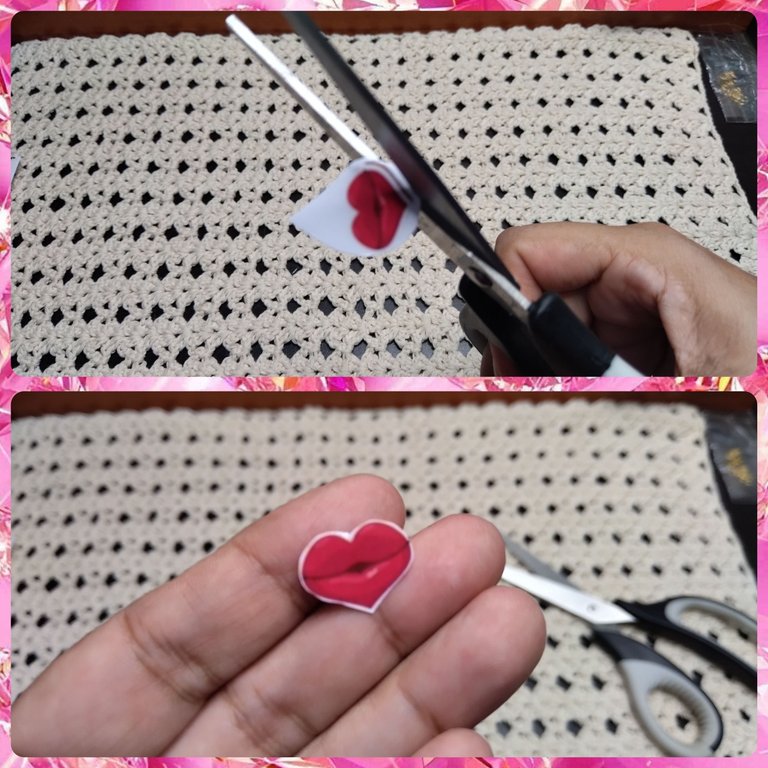
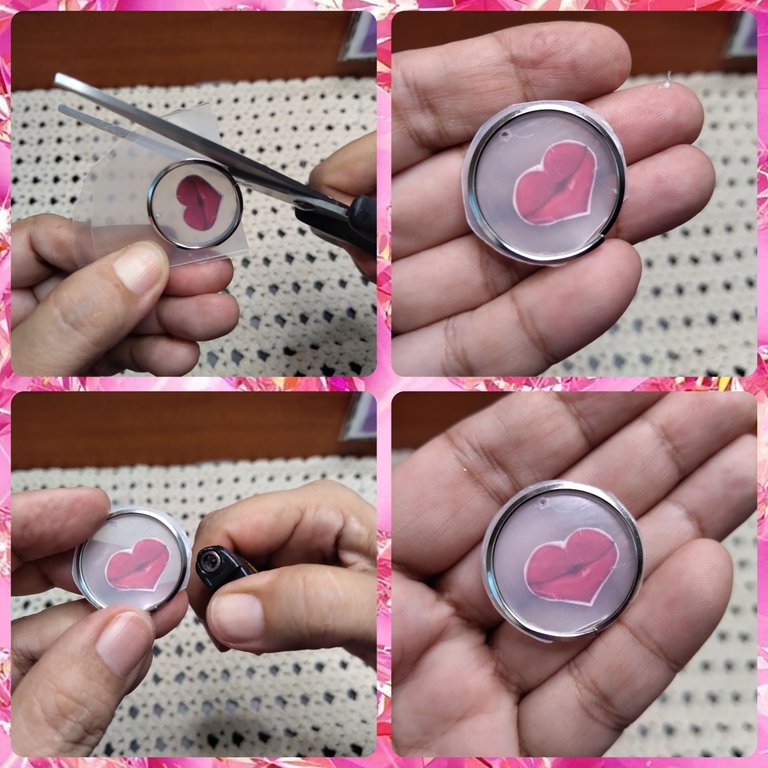
💋 Para esta primera prueba escogí los labios. Lo que hice fue recortar para que solo se vieran los labios sin mucho color blanco.
💋 For this first test I chose the lips. What I did was trim so that only the lips were visible without much white color.
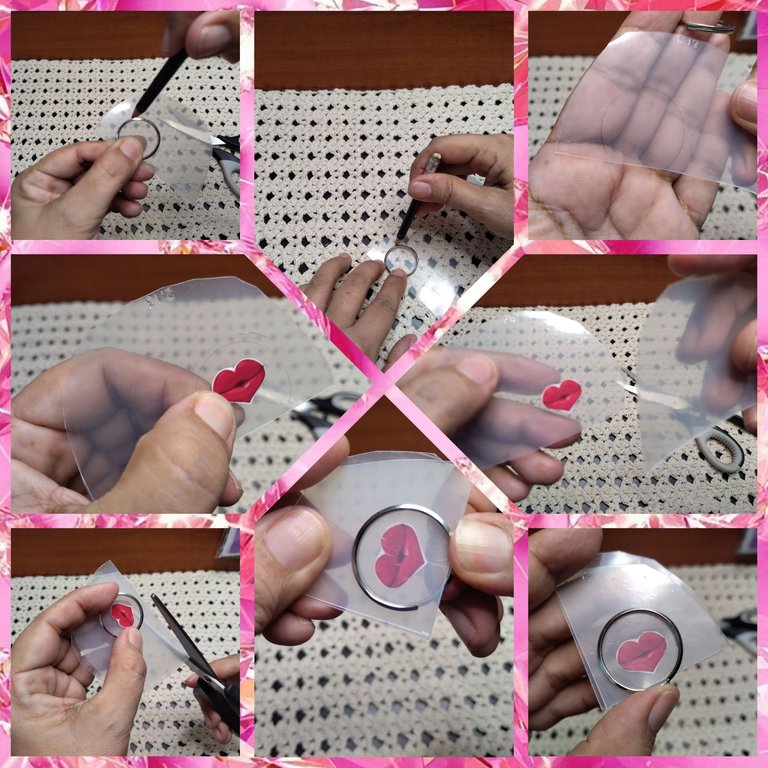
💋 Luego usando el lápiz marqué sobre dos trocitos plásticos (más grandes que el aro de llavero) el círculo o tamaño del aro. Esto para tenerlo como guía al momento de pegar el stickers. La idea es colocar el stickers en el medio del círculo plástico. Sobre ese círculo donde pegué el stickers montar el otro plástico. Lograr que se ubique bien centrado el stiker.
💋 Una vez que hemos logrado centrarlo y dejarlo dentro de los dos plásticos (encapsularlo) entonces tomamos el aro para llavero y metemos el encapsulado allí. Levantamos un poquito la entrada del aro como si fuesemos a meter las llaves, pasamos el plástico y debemos tratar de ubicar bien el stickers de manera que se vea centrado y que la parte abierta del llavero quede sobre la figura que elegimos. En mi primera prueba la entrada del llavero me quedo abajo 😏
💋 Then using the pencil I marked on two small plastic pieces (bigger than the key ring) the circle or size of the ring. This is to have it as a guide when sticking the stickers. The idea is to place the stickers in the middle of the plastic circle. On that circle where I glued the stickers, mount the other plastic. Make sure that the stiker is well centered.
💋 Once we have managed to center it and leave it inside the two plastics (encapsulate it) then we take the key ring and put the encapsulation there. We raise a little bit the entrance of the ring as if we were going to put the keys, we pass the plastic and we must try to place well the stickers so that it is centered and that the open part of the key ring is on the figure that we chose. In my first test the entrance of the key ring was at the bottom 😏
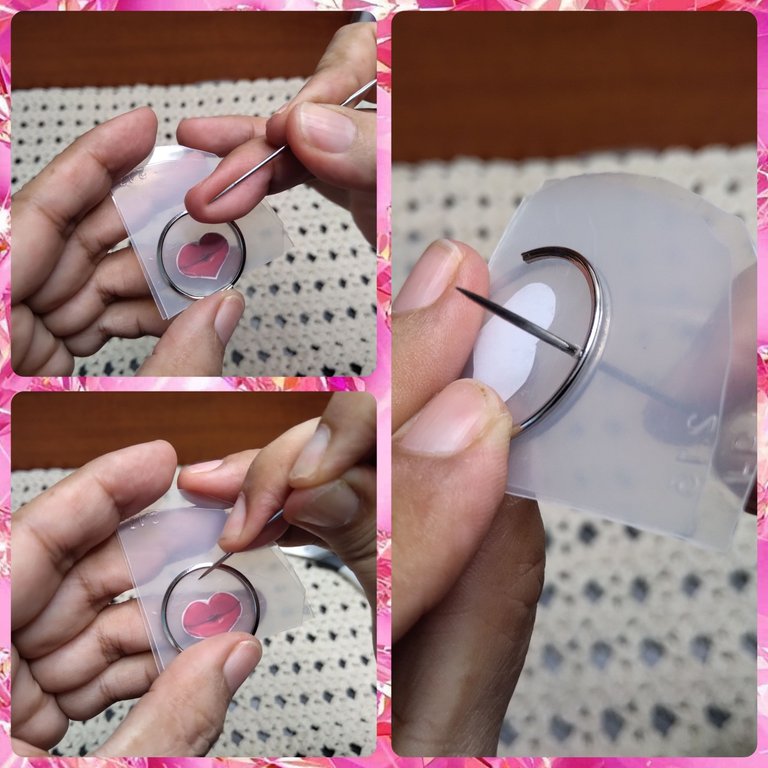
💋 Ahora vamos a perforar con una aguja en la parte superior del stickers pinchado los dos plásticos. Por ese hoyo pasaremos la argolla de bisutería. Trata de que el agujero quede cerca del aro para llaveros.
💋 Now we are going to pierce with a needle in the upper part of the punctured stickers the two plastics. Through that hole we will pass the costume jewelry ring. Try to keep the hole close to the key ring.
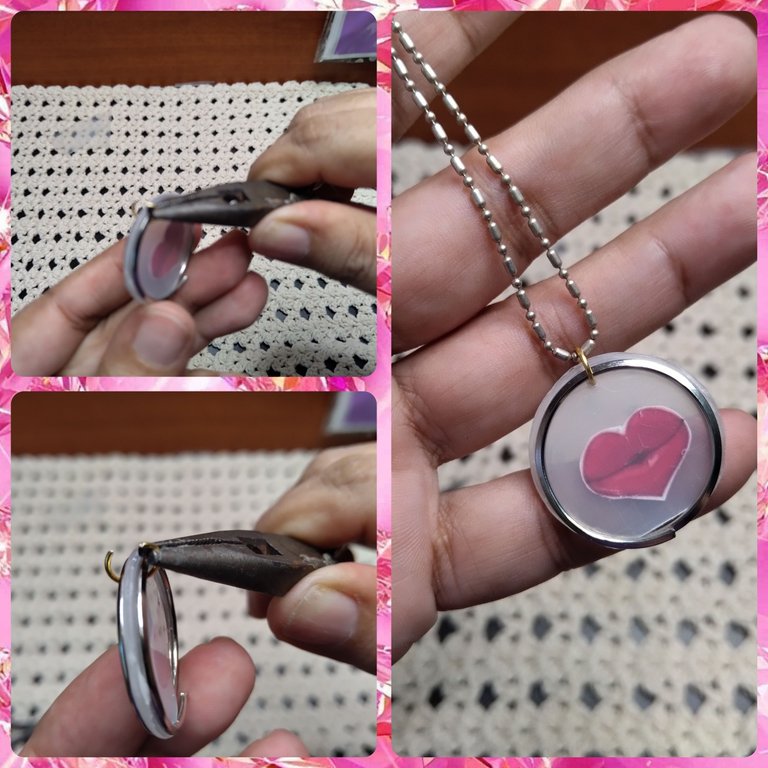
💋 El próximo paso es recortar todo el plástico sobrante. Hay que hacerlo con cuidado procurando que no se mueva el encapsulado.
💋 Después vamos a quemar toda la orilla para reducir el poquito de plástico que todavía se ve fuera del aro. Ten mucho cuidado de no quemarte 😃
💋 The next step is to trim off all the excess plastic. We have to do it carefully trying not to move the encapsulation.
💋 Then we are going to burn the entire edge to reduce the little bit of plastic that is still visible outside the rim. Be very careful not to burn 😃
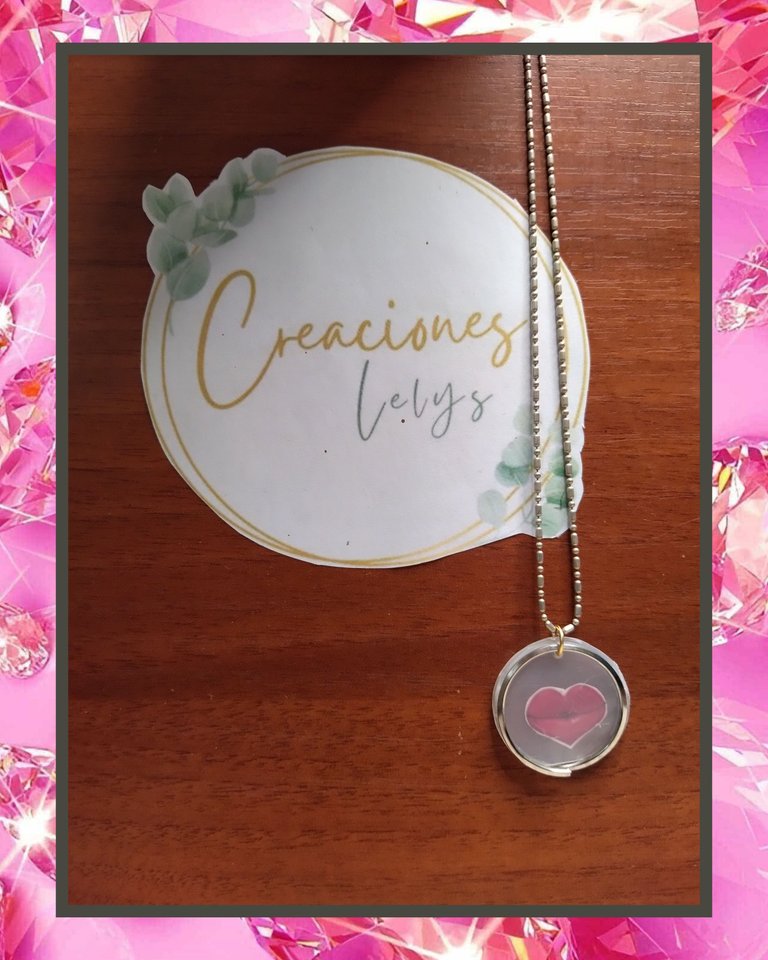
💋 Finalizamos colocando la argolla de bisutería y montando nuestro dije en la cadena o collar. Y así se ve.
💋 We finish by placing the jewelry ring and mounting our pendant on the chain or necklace. And that's how it looks.
Como les mencioné anteriormente traten de que la parte abierta del llavero quede sobre la figura elegida. El mío quedó abajo y no pude corregir porque ya había quemado el plástico. Pero me encantó hacer esta prueba.
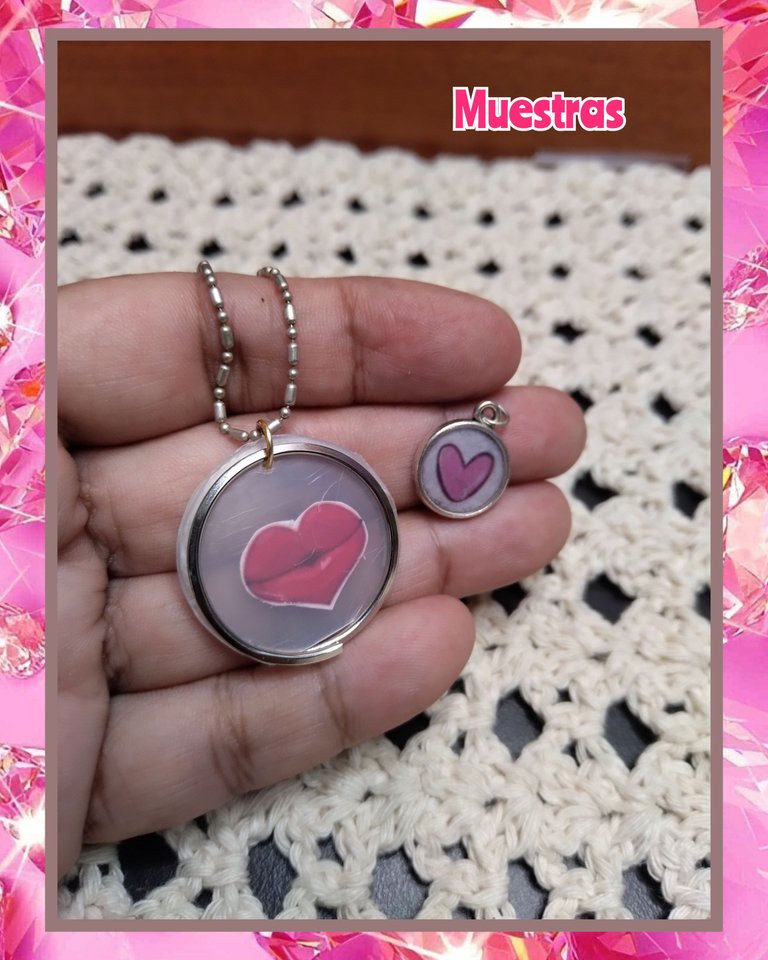
⬇️ Acá abajo les dejo la primera muestra trabajada en resina (dije pequeño) y la muestra hecha con material reciclado. En la muestra de resina usé una base redonda especial para dijes y un stiker de corazón.
Muchas gracias por leer. Todas las fotos son de mi propiedad. Edité con Polish. Usé el traductor de Deelp. Hasta pronto.
As I mentioned before, try to make sure that the open part of the key ring is over the chosen figure. Mine was at the bottom and I couldn't correct it because I had already burned the plastic. But I loved doing this test.
⬇️ Below is the first sample made in resin (small pendant) and the sample made with recycled material. In the resin sample I used a special round base for charms and a heart stiker.
Thank you very much for reading. All photos are my property. I edited with Polish. I used Deelp translator. See you soon.