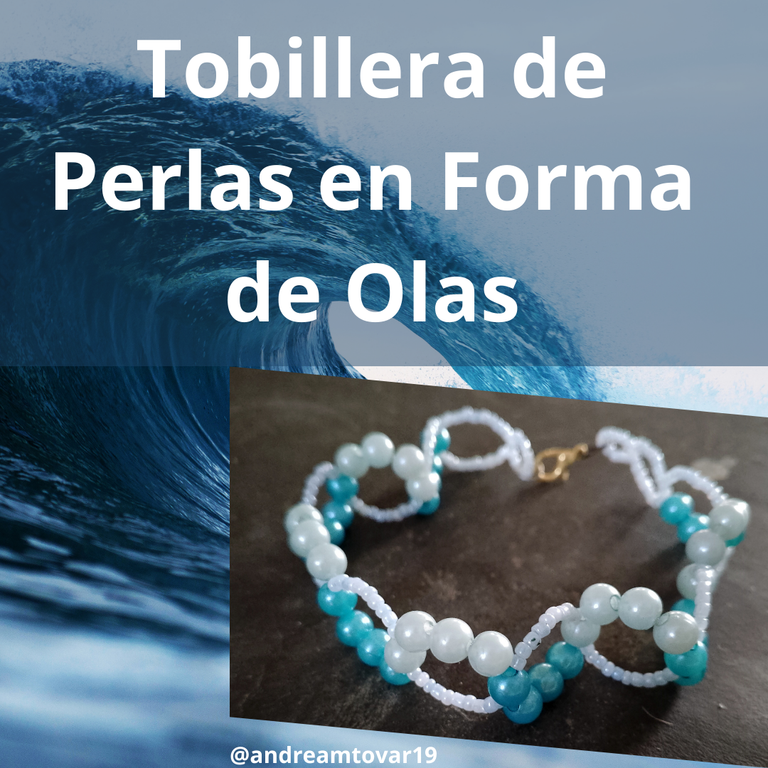

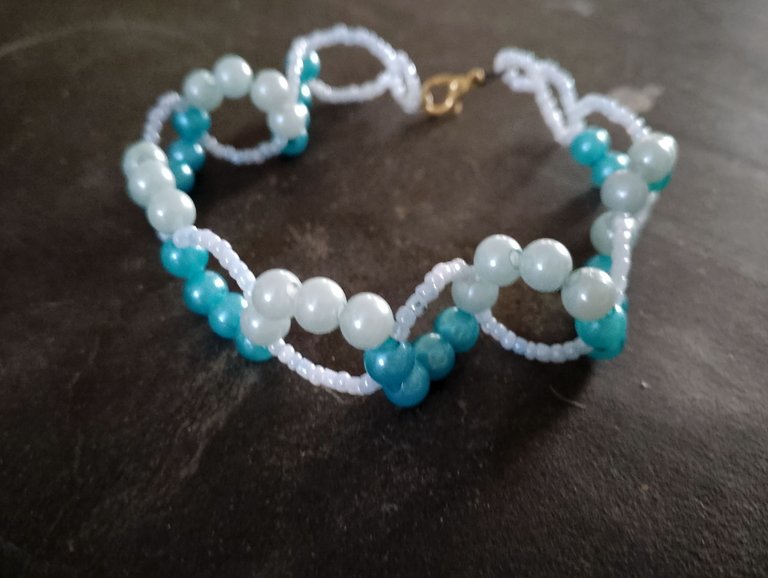
Hola queridos amigos de Hive y de esta hermosa comunidad de Jewelry, en esta oportunidad les quiero compartir como hice está bella tobillera de perlas en dos tonos del color azul. Para hacer esta tobillera quise hacerla en forma de ondas que asemejan a las olas. Esta tobillera es muy fácil de hacer, solo necesitamos 20 minutos para terminarla, los pasos son muy simples y repetitivos por lo que resulta muy fácil completarla y no es muy laboriosa. Está es una opción de tobillera que me encantaría llevarme a la playa cuando quiera porque me encanta su forma.
Materiales:
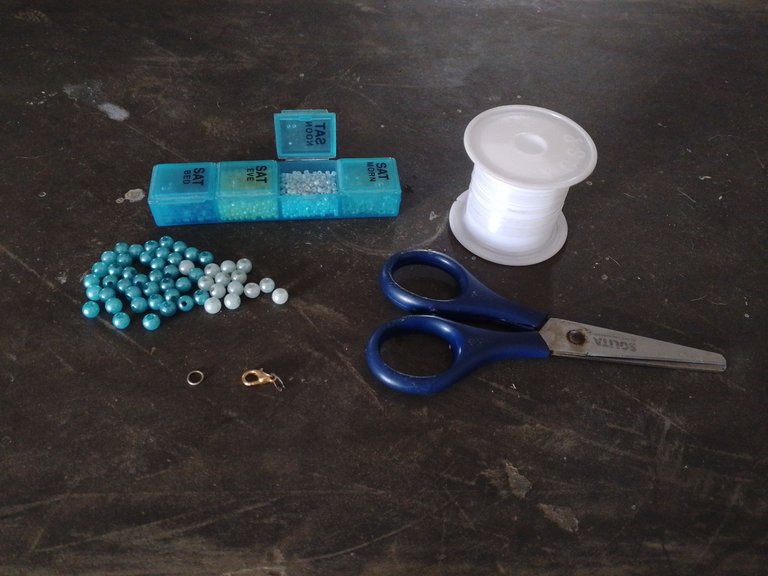
🩵24 Perlas color azul claro y tamaño pequeña
🩵20 Perlas de color azul intenso y tamaño pequeño
🩵 Mostacillas de color azul claro.
🩵Broche y Argolla.
🩵 1,5 mt. de nylon 0,3.
Procedimiento
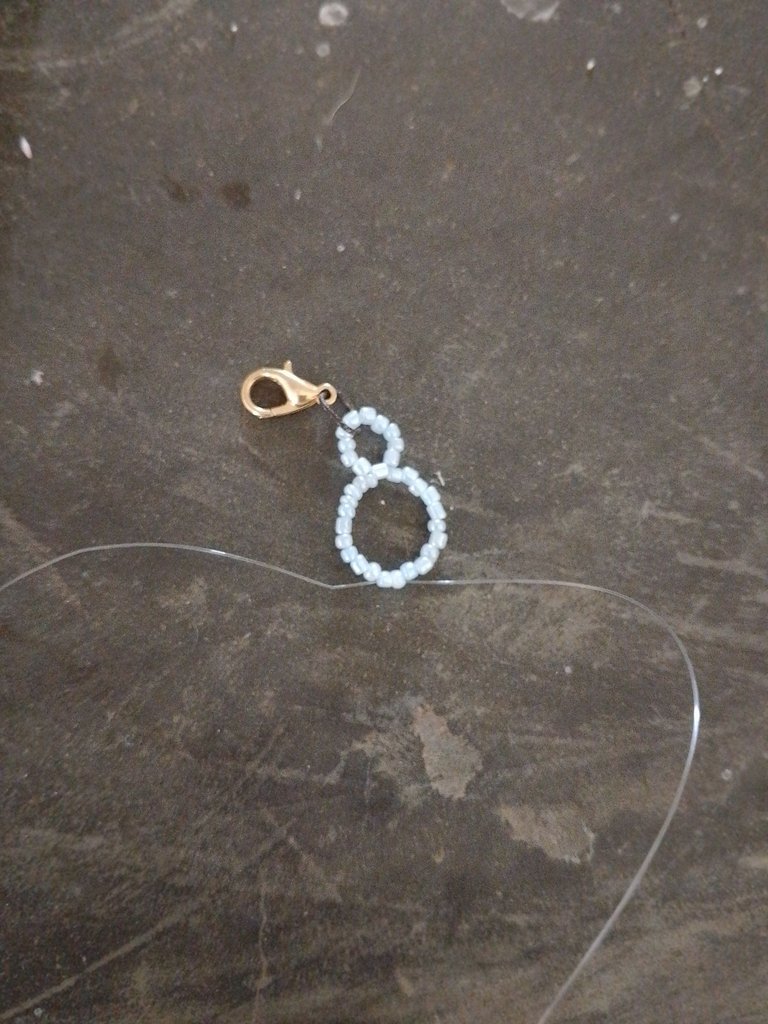
Empezamos insertando en el nylon 5 mostacillas de color azul claro, el broche, 5 mostacillas más de color azul claro y cruzamos por una nueva mostacilla de color azul claro. Agregamos en cada nylon 10 mostacillas de color azul claro más y cruzamos por una nueva mostacilla de color azul claro.
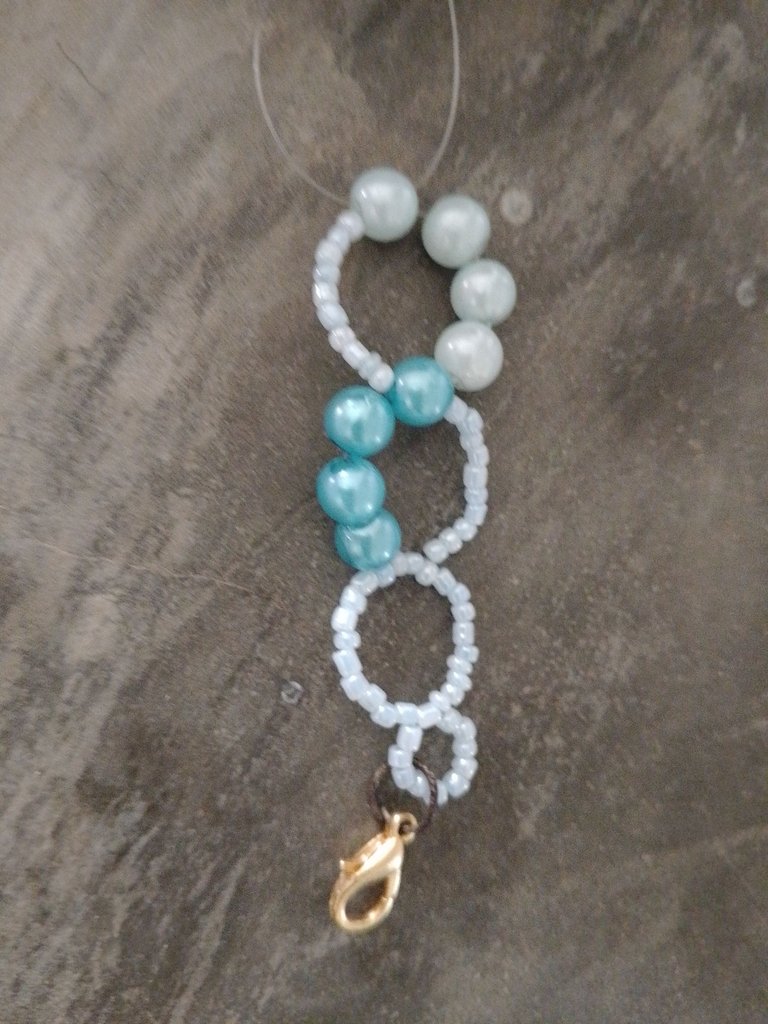
En uno de los nylon insertamos 10 mostacillas de color azul claro y en el otro nylon agregamos 4 perlas de color azul intenso cruzando los nylon por la última perla que insertamos. Agregamos en el nylon opuesto a las mostacillas anteriormente 10 mostacillas de color azul claro y en el otro nylon, el opuesto a las perlas anteriores, añadimos 4 perlas de color azul claro y tamaño pequeño, cruzando nuevamente por la última perla que insertamos.
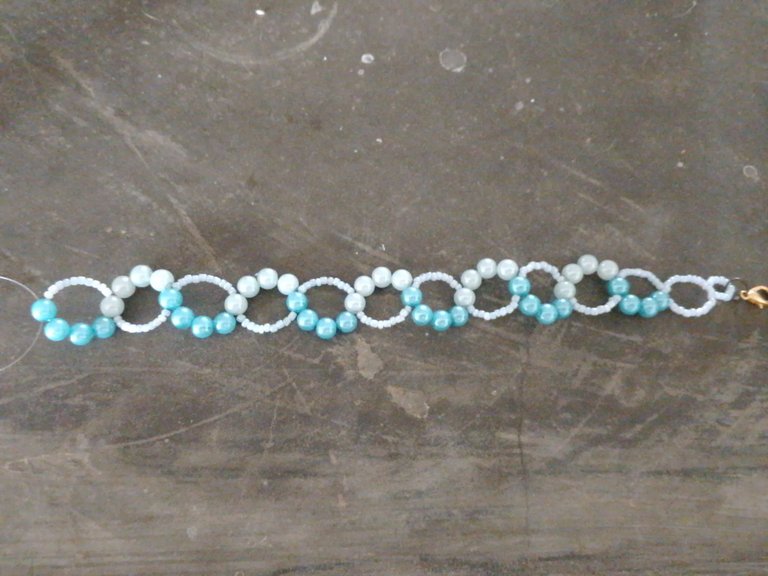
Repetimos el paso anterior insertando en el nylon opuesto a las mostacillas anteriores 10 mostacillas de color azul claro y en el otro nylon agregamos 4 perlas de color azul intenso cruzando los nylon por la última perla que insertamos. Agregamos en el nylon opuesto a las mostacillas anteriormente agregadas 10 mostacillas de color azul claro y en el otro nylon, el opuesto a las perlas anteriores, añadimos 4 perlas de color azul claro y tamaño pequeño, cruzando nuevamente por la última perla que insertamos. Repetimos esto 3 veces más. Volvemos a insertar en el nylon opuesto a las mostacillas anteriores 10 mostacillas de color azul claro y en el otro nylon agregamos 4 perlas de color azul intenso cruzando los nylon por la última perla que insertamos. Agregamos en el nylon opuesto a las mostacillas anteriores 10 mostacillas de color azul claro y en el otro nylon, el opuesto a las perlas anteriores, añadimos 4 perlas de color azul claro y tamaño pequeño para luego cruzar los nylon por una nueva mostacilla de color azul claro.
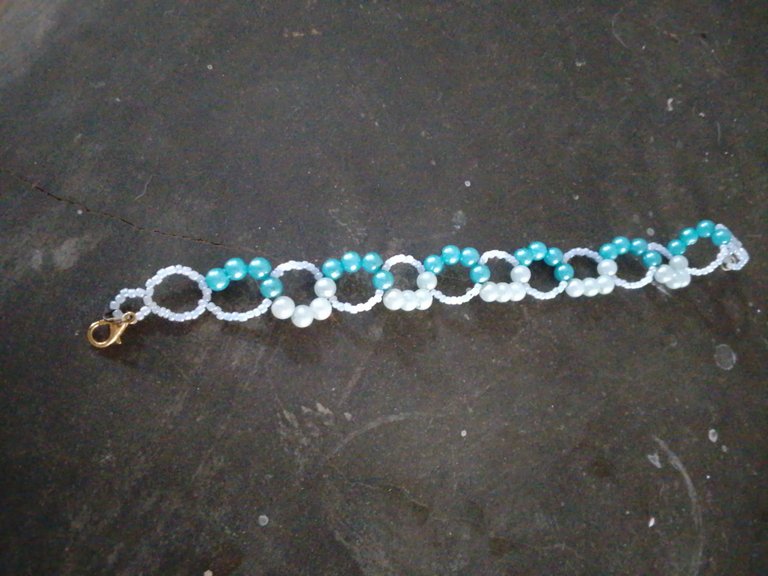
Para terminar en cada nylon agregamos 10 mostacillas de color azul claro y cruzamos por una nueva mostacilla de color azul. Agregamos en uno de los nylon 5 mostacillas de color azul claro, la argolla, 5 mostacillas de color azul claro más y anudamos bien. Cortamos el nylon que nos ha sobrado y listo.
Que Dios los Bendiga a todos 🙏
Feliz noche
- Fotos de mi autoría y fueron tomadas con un celular Infinix Hot 40i
- Traductor usado: DeepL
- Edición de fotos y separadores hechos con la app Editor de fotos Canva.

Hello dear friends of Hive and this beautiful Jewelry community, in this opportunity I want to share with you how I made this beautiful pearl anklet in two shades of blue color. To make this anklet I wanted to make it in the shape of waves that resemble waves. This anklet is very easy to make, we only need 20 minutes to finish it, the steps are very simple and repetitive so it is very easy to complete it and it is not very laborious. This is an anklet option that I would love to take to the beach whenever I want because I love the shape.
Materials:
🩵24 Light blue beads and small size.
🩵20 Pearls of intense blue color and small size.
🩵 Light blue colored beads.
🩵Brooch and ring.
🩵 1,5 mt. of nylon 0, 3.
Procedure
We start by inserting in the nylon 5 light blue beads, the clasp, 5 more light blue beads and cross through a new light blue bead. We add on each nylon 10 more light blue beads and cross through a new light blue bead.
In one of the nylons we insert 10 light blue beads and in the other nylon we add 4 intense blue beads crossing the nylons by the last bead we inserted. We add in the nylon opposite to the previous beads 10 light blue beads and in the other nylon, the opposite to the previous beads, we add 4 small size light blue beads, crossing again through the last bead we inserted.
We repeat the previous step inserting in the nylon opposite to the previous beads 10 light blue beads and in the other nylon we add 4 intense blue beads crossing the nylons by the last bead we inserted. We add in the nylon opposite to the previously added beads 10 light blue beads and in the other nylon, the opposite to the previous beads, we add 4 small size light blue beads, crossing again through the last bead we inserted. We repeat this 3 more times. We insert again in the nylon opposite to the previous beads 10 light blue beads and in the other nylon we add 4 intense blue beads crossing the nylons by the last bead we inserted. We add in the nylon opposite to the previous beads 10 light blue beads and in the other nylon, the opposite to the previous beads, we add 4 small size light blue beads and then cross the nylons by a new light blue bead.
To finish on each nylon we add 10 light blue beads and cross through a new blue bead. We add in one of the nylons 5 light blue beads, the ring, 5 more light blue beads and knot well. Cut the leftover nylon and that's it.
May God Bless you all 🙏
Happy evening
- Photos of my authorship and were taken with an Infinix Hot 40i cell phone.
- Translator used: DeepL
- Photo editing and dividers made with Canva photo editor app.