Mi versión español.
¡Bienvenido a mi blog!
Hola a toda mi gente de esta comunidad, @jewelry, deseándole una felices pascuas de resurrección, que esta semana santa le permita disfrutar en compañía de sus seres querido y sobre todo le traiga paz, felicidad de la que merece.
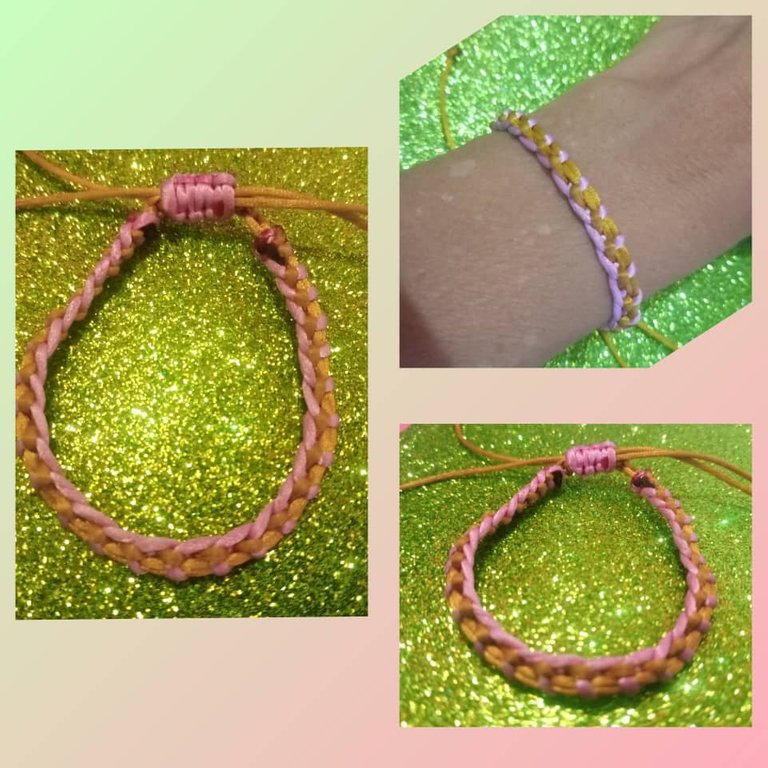
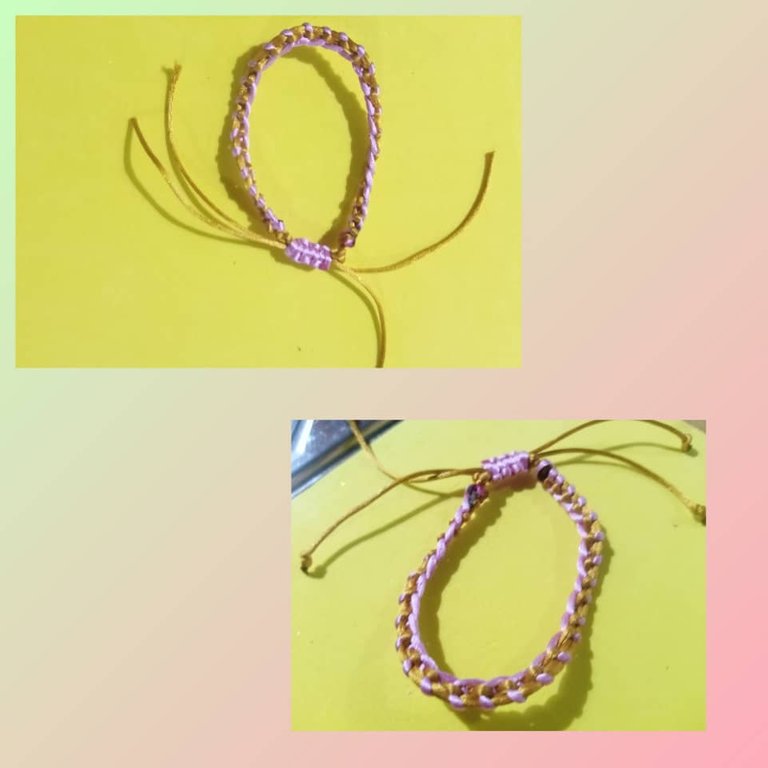
Hoy les traigo otra de mis creatividades, una linda pulsera macramé con nudo cruzado, esta pulsera es hecha con hilo de cola de ratón, de color rosada y marrón claro, la puede elaborar para los días de semana santa donde salimos a compartir a la playa, rio y no relajamos compartimos con nuestro familiares y amigos, además es fácil y sencilla de hacer, se la puede regalar a una amiga, o prima lo puede lucir con cualquier atuendo, porque son muy práctica y la vez un bello arte que realiza con tu propias mano.

- Empecemos a mostrarle los materiales y el paso a paso.
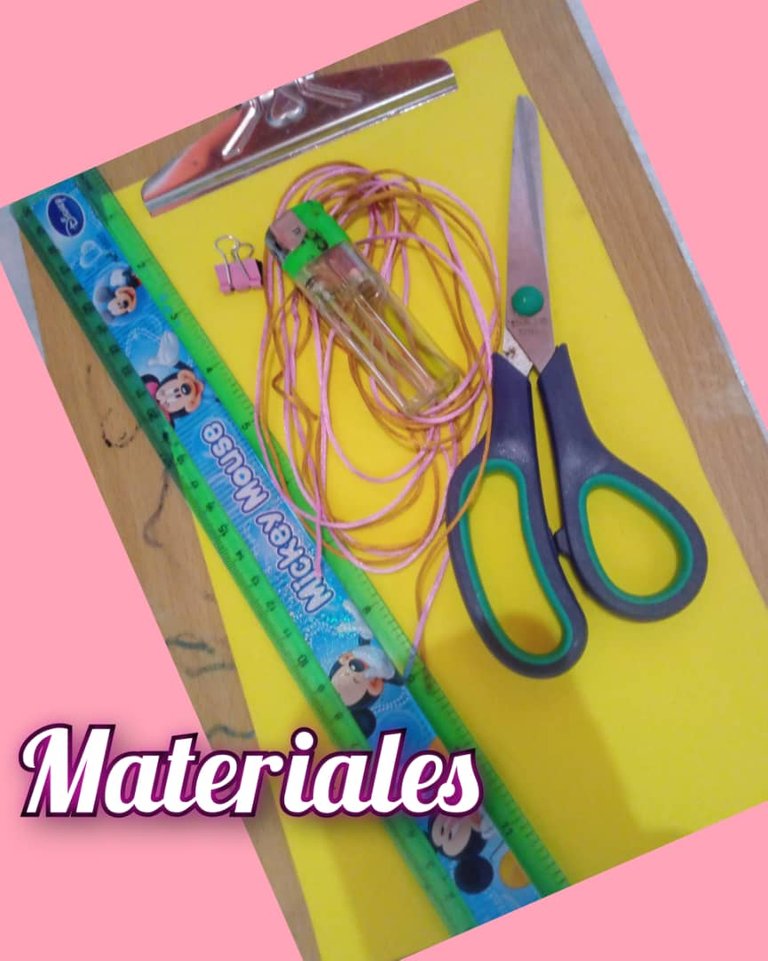
Materiales.
- 1 metro de color rosado.
- 1 metro de color marrón.
- 90 centímetro de color marrón para el centro.
- 1 tijera.
- 1 encendedor.
- 1 pinza.
- 1 regla.
Paso.
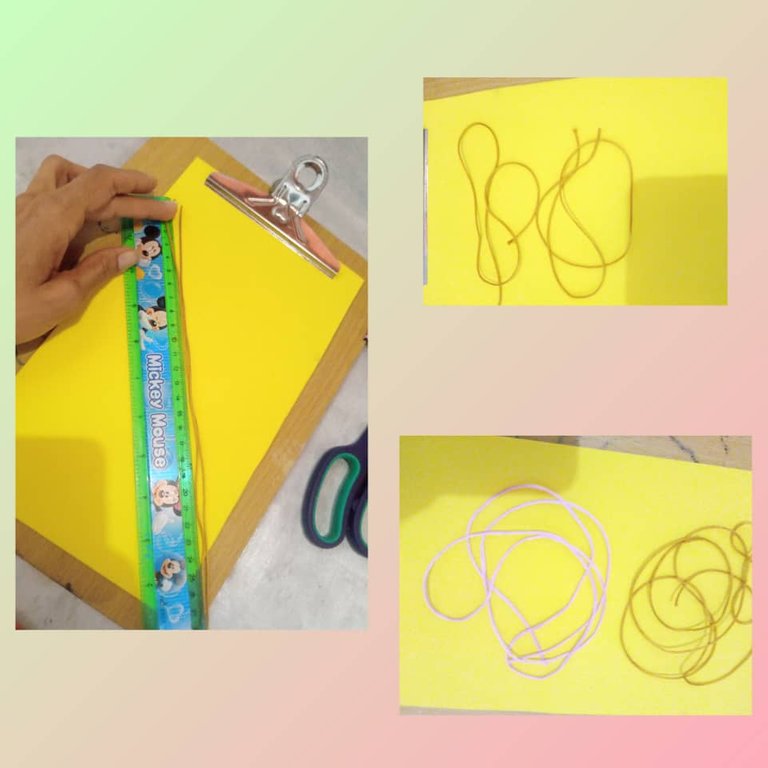
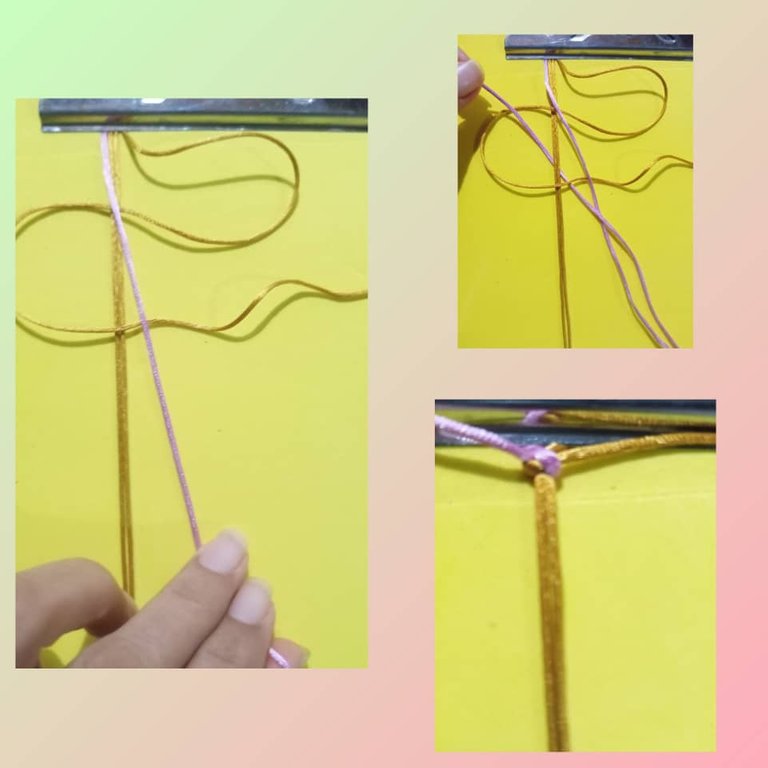
- Primero medimos los hilos para el hilo del centro son dos pedazo de 45 centímetro, luego mido 1 metro de color rosado y 1 metro de color marrón para los lados de la pulsera.
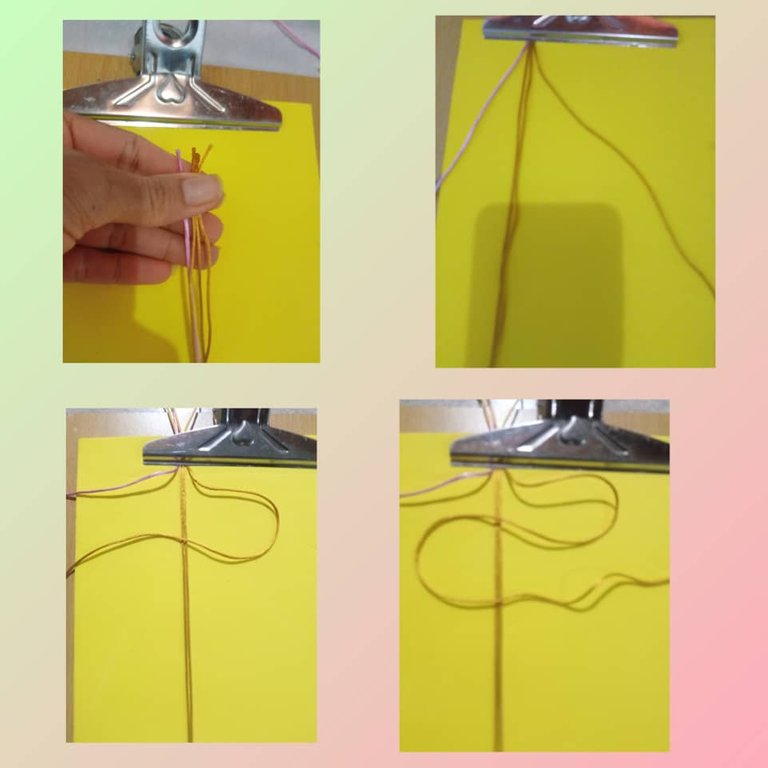
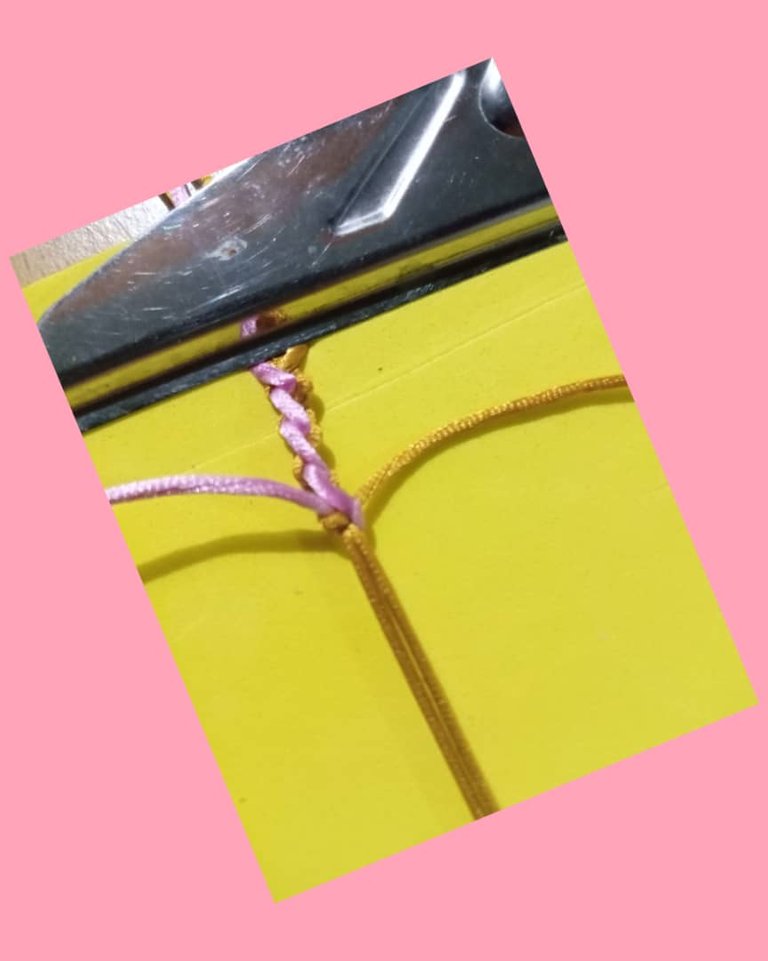
- Vamos a coger los dos hilo del centro de 45centimetro y los dos 1 metro que van hacia los lados y lo pongo en la tabla y lo apretamos con el gancho recordando que dejamos 12 centímetro para el cierre de la pulsera y la parte de debajo de la tabla apretó los dos hilo del centro con un gancho que quede bien estirado, dejando el hilo de cola de ratón color rosado hacia la izquierda y el hilo de cola de ratón color marrón hacia la derecha.
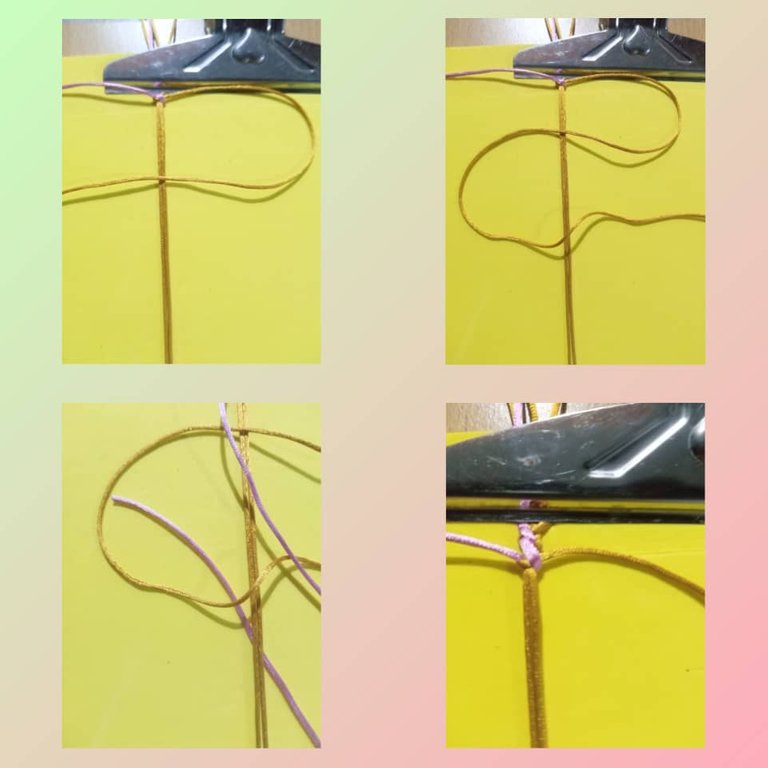
- Comenzamos cogiendo el hilo de la derecha de color marrón y lo estiramos hacia la izquierda primero formamos una P, volvemos a tirar el mismo hilo de color marrón hacia la derecha no tiene que quedar una especie de una S sobre los dos hilo central. Ahora vamos coger hilo del color rosado de la izquierda y lo vamos a pasar hacia la derecha por encima del resto de los hilos, tomamos el extremo del hilo del color rosado de la izquierda y lo pasamos por debajo de los hilos centrales sacando por el agujero que se ha formado, ahora podemos estirar los hilo hasta arriba formando el primer nudo.
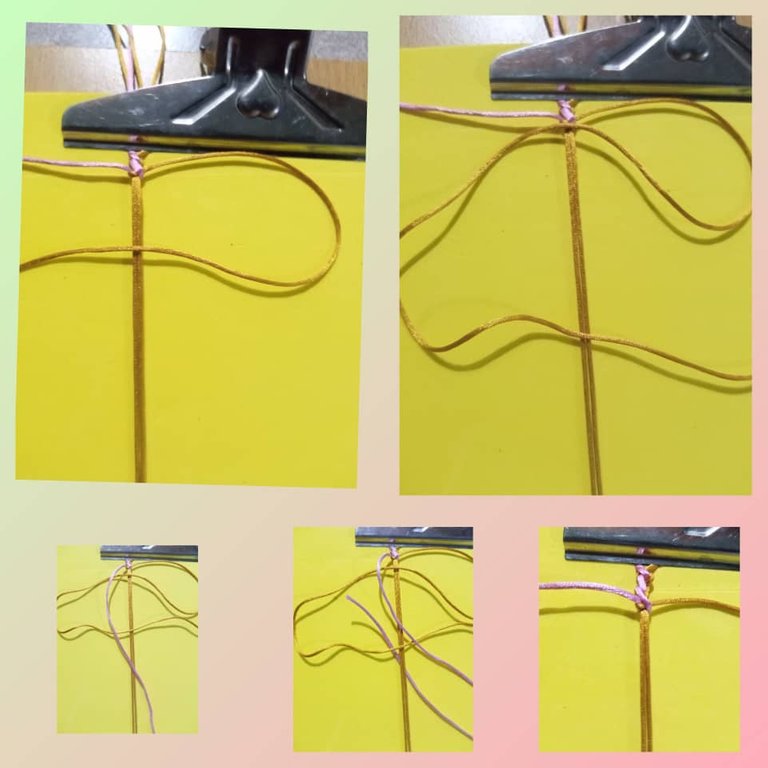
- Siempre el hilo de la mano derecha formando una especie de S y el hilo de la izquierda pasa hacia la derecha por encima del resto de los hilos, cogemos el extremo del hilo izquierda y lo pasamos por debajo de los hilos central, sacando por el agujero , jalamos hacia arriba los dos hilos y formamos el segundo nudo.
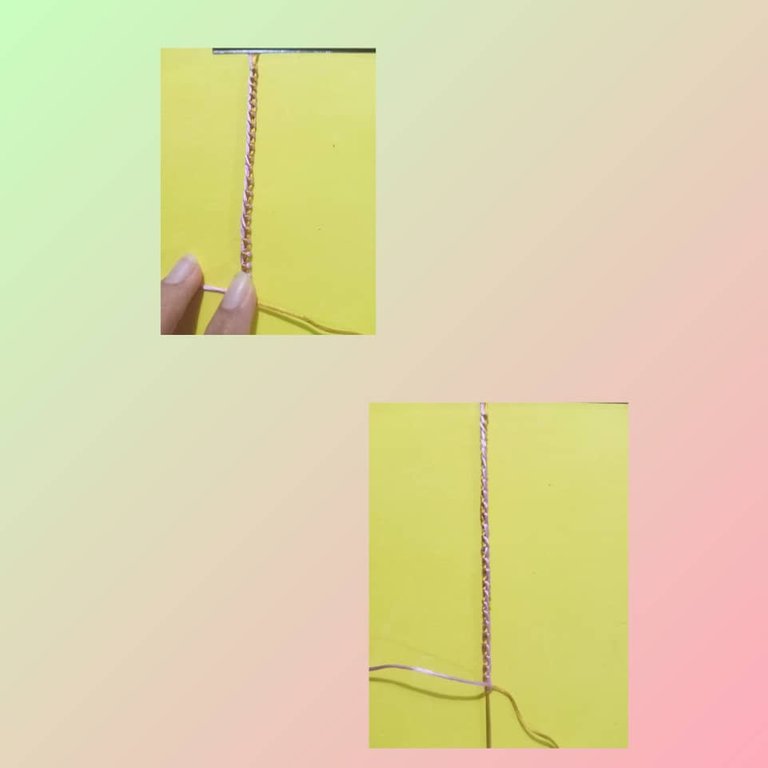
- Así vamos haciendo a lo largo de la pulsera realizando el mismo paso, tomando el de la mano de la derecha formando una especie de S y el hilo de la izquierda pasa hacia la derecha por encima del resto de los hilos, cogemos el extremo del hilo izquierdo y lo pasamos por debajo de los hilos central, sacando por el agujero, jalamos hacia arriba los dos hilos y formamos el 3 y 4 nudo. Vea que va agarrando forma.
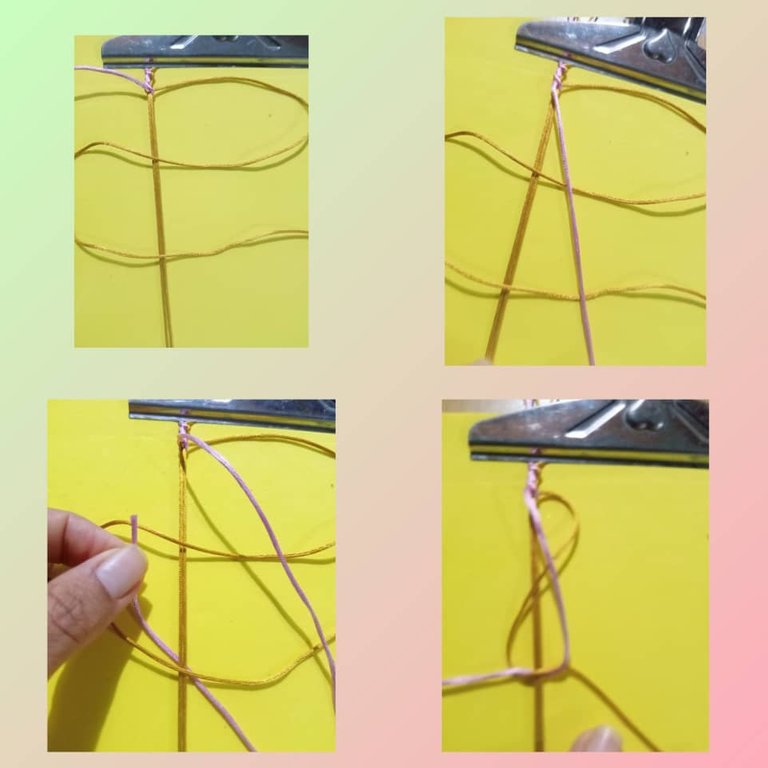
Seguimos el mismo procedimiento hasta llevar 22 nudos que es el final de la pulsera.
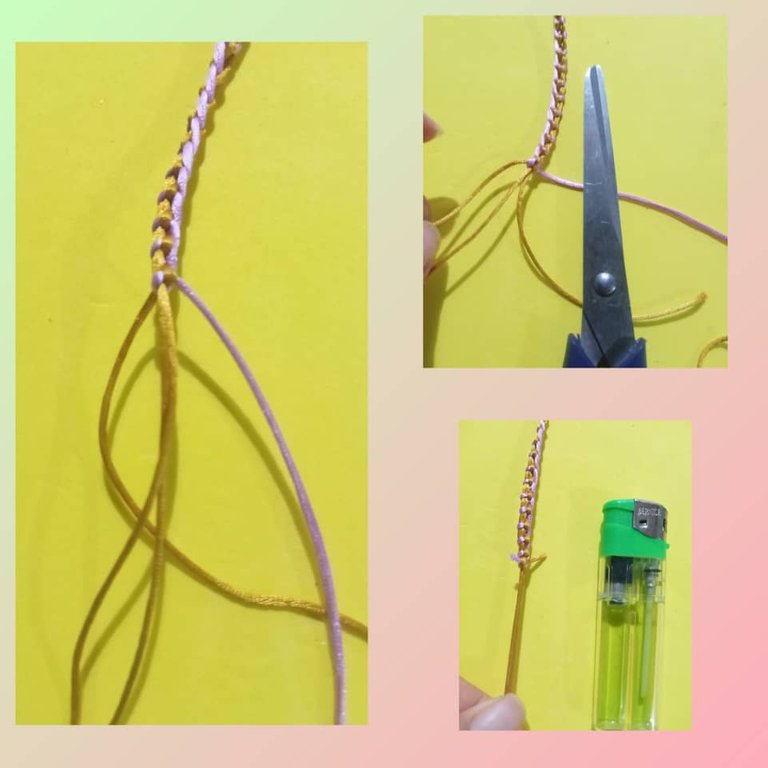
La amarramos al final con un nudo normal cortamos y quemamos lo sobrante para que no se desasga. Tomo el otro extremo de la pulsera hacemos el mismo procedimiento amarramos bien cortamos los hilo sobrantes, quemamos con el encendedor.

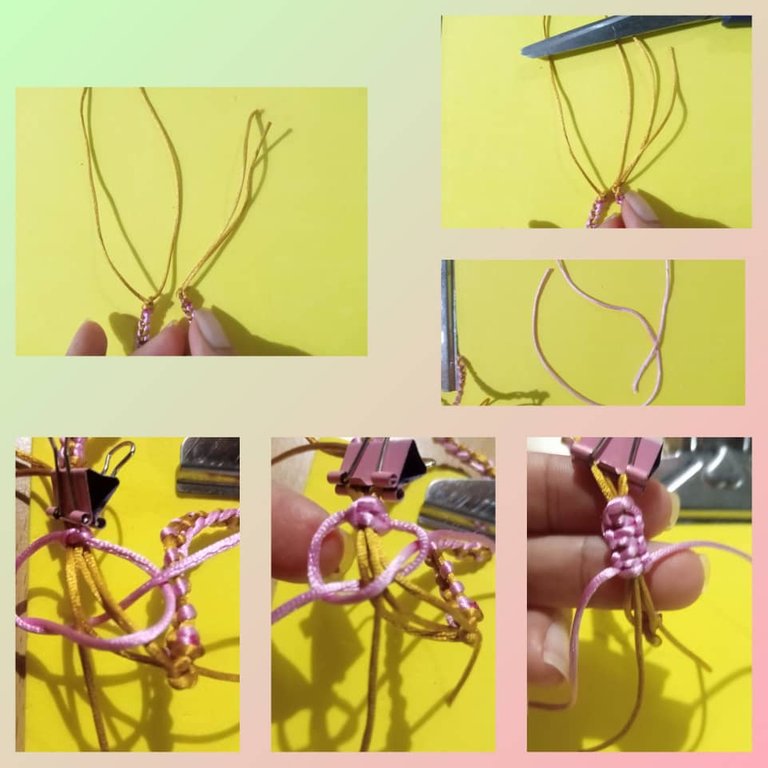
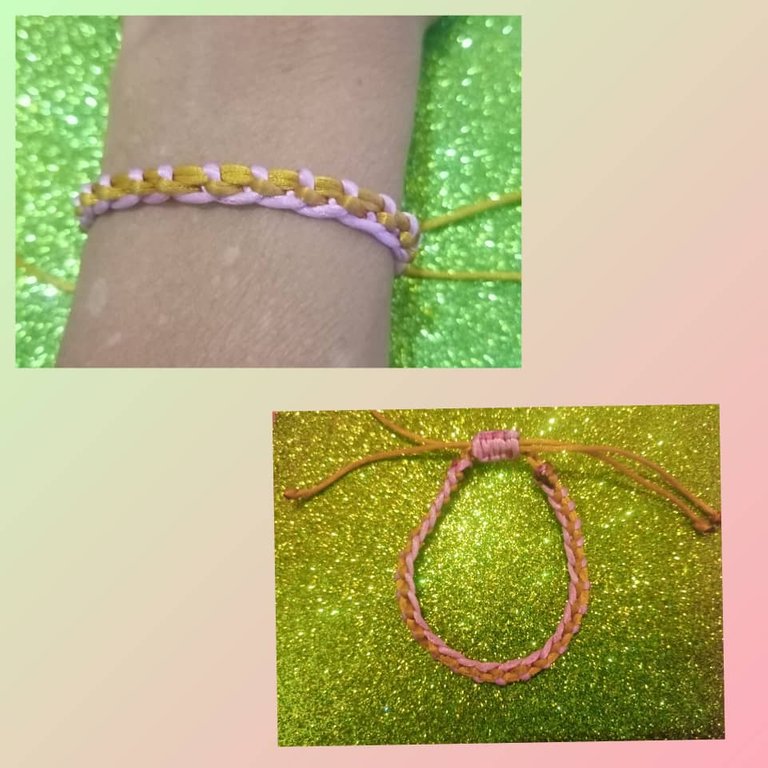
- Comienzo hacer el cierre de la pulsera con un nudo plano hasta llegar 4 nudo le cortamos los hilo sobrante y lo quemamos con el encendedor para que no se desasga. Ya tengo la pulsera lista.
- Vea como quedo muy linda y sus colores muy juveniles y coqueta para la chica lucirla en esta temporada de playa o rio donde quiera usarla.
Tenga un feliz días y bendecidos para todos muchas gracias por leer mi post.
Las fotos son mías, tomadas con teléfono alcatel , editadas con incollage y traducidas con Deepl.
Mi versión ingles.
¡Bienvenido a mi blog!
Hello to all my people of this community, @jewelry, wishing you a happy easter of resurrection, that this holy week allows you to enjoy in the company of your loved ones and above all bring you peace, happiness of which you deserve.
Today I bring you another of my creativities, a nice macrame bracelet with cross knot, this bracelet is made with mouse tail thread, pink and light brown, you can make it for the days of holy week where we go out to share to the beach, river and not relax we share with our family and friends, it is also easy and simple to do, you can give it to a friend, or cousin can wear it with any outfit, because they are very practical and at the same time a beautiful art that you make with your own hand.
- Let's start showing you the materials and the step-by-step.
Materials.
- 1 meter of pink color.
- 1 meter of brown color.
- 90 centimeter of brown color for the center.
- 1 scissors.
- 1 lighter.
- 1 tweezers.
- 1 ruler.
Step.
First we measure the threads for the center thread are two 45 centimeter piece, then I measure 1 meter of pink and 1 meter of brown for the sides of the bracelet.
- We are going to take the two 45centimeter center thread and the two 1 meter that go to the sides and put it on the board and tighten it with the hook remembering that we leave 12 centimeter for the closure of the bracelet and the part below the board tightened the two center thread with a hook that is well stretched, leaving the thread of mouse tail pink color to the left and the thread of mouse tail brown color to the right.
- We begin taking the thread of the right brown color and we stretch it towards the left first we form a P, we pull again the same thread of brown color towards the right it does not have to be a species of an S on the two central thread. Now we are going to take thread of the pink color of the left and we are going to pass it towards the right over the rest of the threads, we take the end of the thread of the pink color of the left and we pass it under the central threads taking out through the hole that has been formed, now we can stretch the threads up to the top forming the first knot.
- Always the right hand thread forming a kind of S and the left hand thread passes to the right over the rest of the threads, we take the end of the left hand thread and pass it under the central threads, pulling through the hole , pull up the two threads and form the second knot.
- So we are doing along the bracelet performing the same step, taking the one on the right hand forming a kind of S and the left thread passes to the right over the rest of the threads, we take the end of the left thread and pass it under the central threads, pulling through the hole, pull up the two threads and form the 3 and 4 knot. See that it is taking shape.
We follow the same procedure until we have 22 knots which is the end of the bracelet.
We tie it at the end with a normal knot, cut and burn the excess so that it does not come undone. I take the other end of the bracelet we do the same procedure we tie it well we cut the excess thread, we burn with the lighter.
- I start making the clasp of the bracelet with a flat knot until we reach 4 knot we cut the excess thread and burn it with the lighter so that it does not come undone. I have the bracelet ready.
- See how it looks very cute and its colors very youthful and flirty for the girl to wear it in this beach or river season wherever she wants to use it.
Have a happy day and blessed to all thank you very much for reading my post.
The photos are mine, taken with alcatel phone , edited with incollage and translated with Deepl.


