It's time to make the girls fall in love, beautiful dangling earrings (DAISY ISLAND).
Hola buenas noche para todos espero se encuentren bien les deseo un hermoso fin de semana que disfruten mucho, en esta hermosa noche les quiero compartir la elaboración de unos hermosos pendientes colgantes estos pendientes tan echo con piedras nacar dices que está piedra tiene varios significado dicen que representa a las mujeres y ese no es el único significados son tantos que está publicación no dará para darla a conocer a veces pensamos que las piedras que utilizamos en nuestra bisuterías son solo piedras pues les cuento que no cada piedra tiene un significado una historia y la verdad son muy bonitas así que debemos conocer cada piedra, como les dije estos pendientes están echo con esa hermosa piedra y lo que no puede faltar la técnica de alambrismo espero les guste este pequeño tutorial
Hello, good evening everyone, I hope you are well, I wish you a beautiful weekend that you enjoy a lot, on this beautiful night I want to share the preparation of some beautiful dangling earrings, these earrings so made with mother-of-pearl stones, you say that this stone has several meaning they say it represents women and that is not the only meanings there are so many that this publication will not give to make it known sometimes we think that the stones we use in our jewelry are just stones because I tell you that not every stone has a meaning one history and the truth are very beautiful so we must know each stone, as I told you these earrings are made with that beautiful stone and what cannot be missing is the technique of wire rope I hope you like this little tutorial
What do we need.
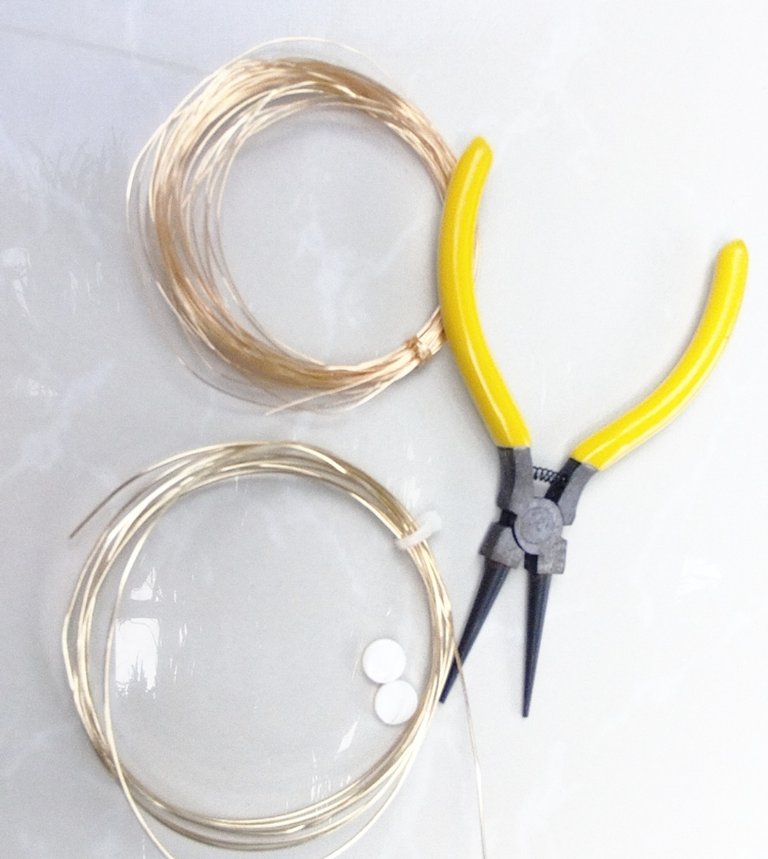
- piedras nácar
- alambre para visuteria calibre 20 . 26
- pinzas
mother-of-pearl stones
20 . ,26 gauge costume wire
tweezers
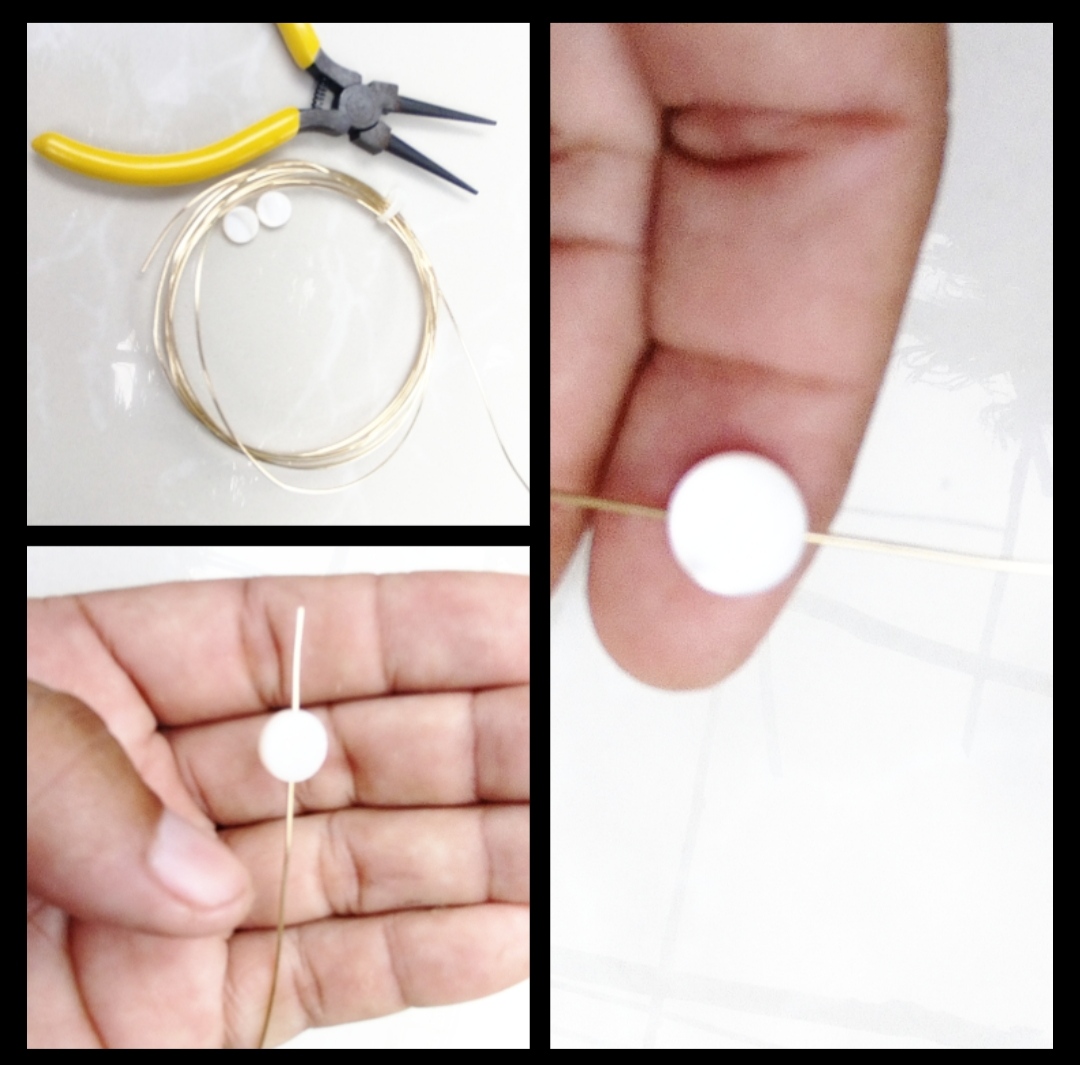
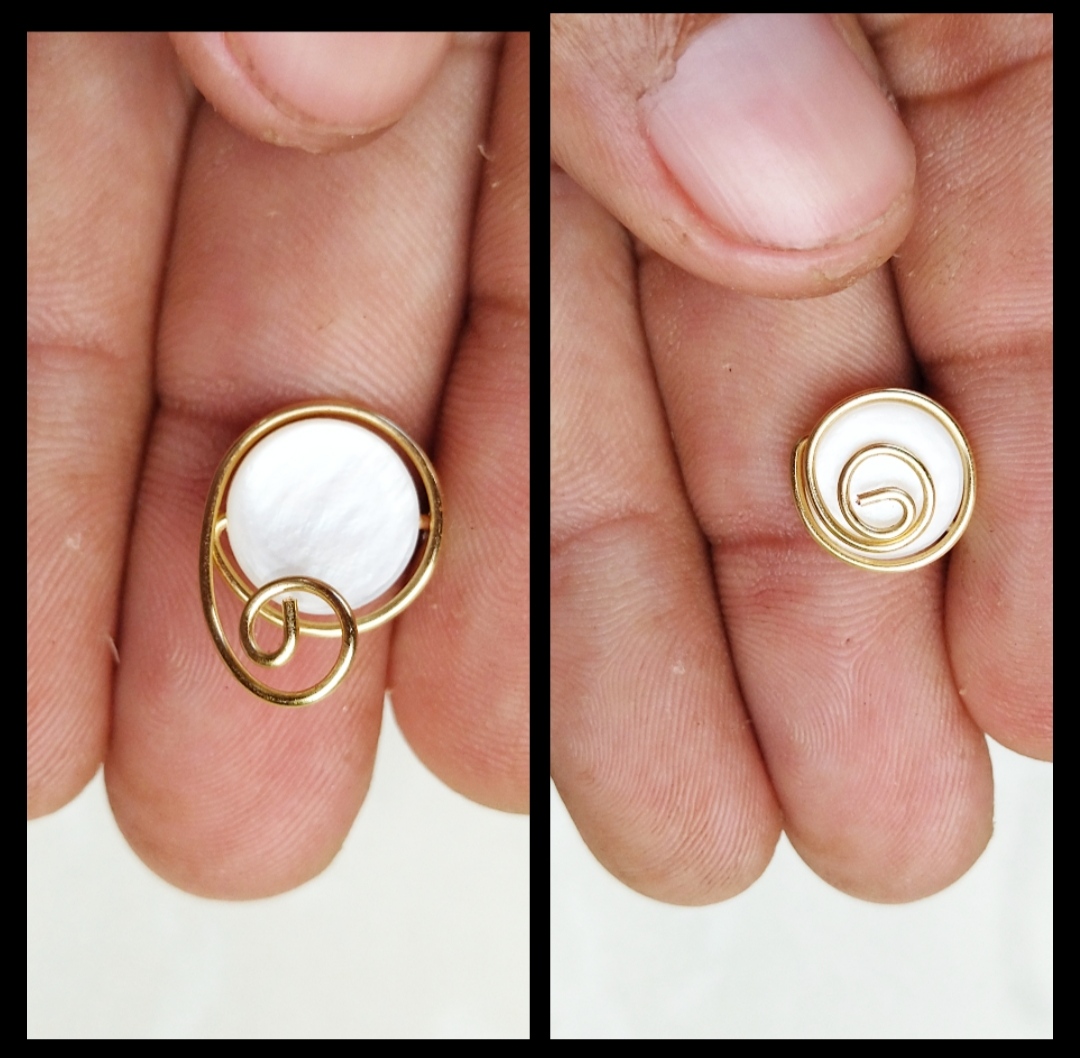
Paso 1: Para empezar con nuestro primer paso primero cortamos un trozo de sobre calibre 20 luego cortamos un trozo de unos anillos veinte centímetros luego meteremos nuestro nácar luego de insertar nuestro nácar nos fijamos que este casi o menos de la mitad unos sinco centímetros pasado hacia la parte de arriba
Step 1: To start with our first step, first we cut a piece of about 20 caliber then we cut a piece of about twenty centimeters rings then we will insert our mother-of-pearl after inserting our mother-of-pearl we check that it is almost or less than half a few sinco centimeters past to the top
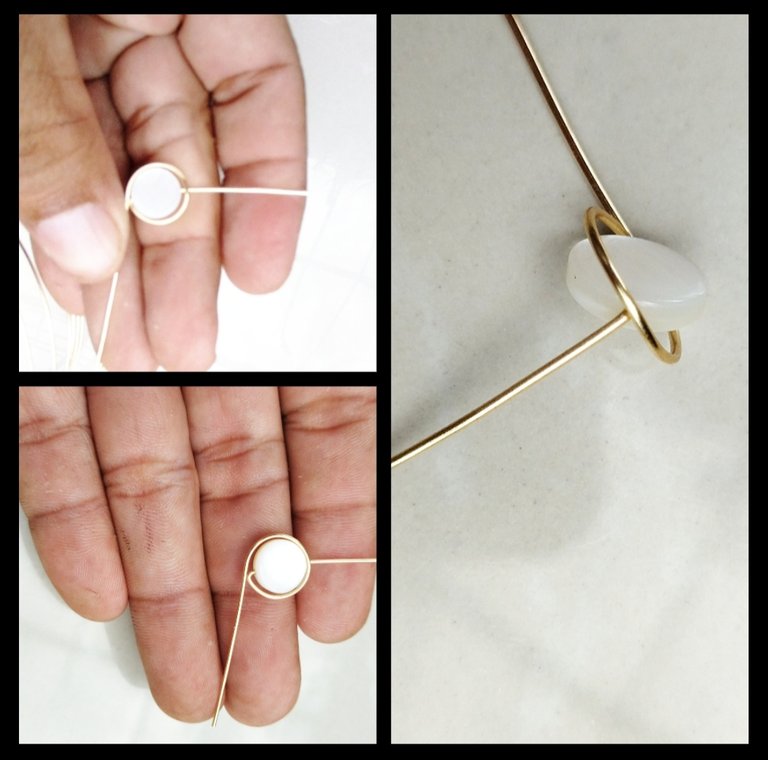
Paso 2: Como pueden ver el primer paso es super fácil los que siguen también son muy fáciles de hacer para este paso tomamos la el alambre y el nácar y la parte más larga del alambre la vamos a pasar o mejor dicho rodaremos el nácar con ese trozo de alambre como pueden ver en la foto todavía nos quedó un trozo de almabre del pedazo más largo ese pesado que nos quedó con la pinza redondo le daremos una vuelta haciendo un pequeño espiral también traten de que ese espiral quede en medio del nácar luego de tener el espiral listo es trozo de sobre que nos quedó arriba el que no utilizamos lo tomamos y solo lo doblaremos hacia atrás y listo ya tenemos nuestra primera pieza
Step 2: As you can see, the first step is super easy, the ones that follow are also very easy to do. For this step, we take the wire and the mother-of-pearl and we are going to pass the longest part of the wire, or rather, we will roll the mother-of-pearl with that piece of wire, as you can see in the photo, we still have a piece of wire left from the longest piece, the heavy one that we have with the round pliers, we will give it a turn making a small spiral, also try that this spiral is in the middle of the mother-of-pearl, after having the spiral ready, it is a piece of the envelope that was left on top, the one that we did not use, we take it and we will just fold it back and that's it, we already have our first piece
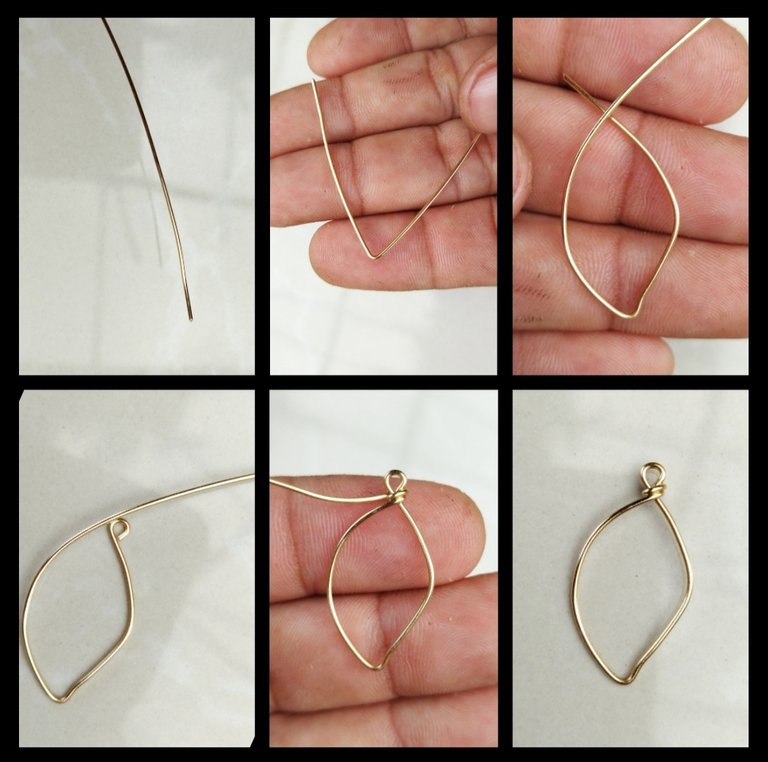
Paso 3: En este paso utilizaremos alambre veinte pinzas y un poquito de imaginación para empezar cortamos un trozo de alambre y aremos una V luego doblamos haciendo un Argo en cada lado y con nuestra pinzas en la punta de la V le damos un pequeño dobles hacia adentro luego con las pinzas aremos una pequeña argolla y luego con el otro trozo de alambre que no doblamos lo tomaremos y daremos unas vueltas al rededor de la pequeña argolla cortamos el exceso y listo
Step 3: In this step we will use wire, twenty pliers and a little bit of imagination to begin with, we cut a piece of wire and weave a V then we fold it making an Argo on each side and with our pliers at the tip of the V we give it a fold inwards then with the pliers we will make a small ring and then with the other piece of wire that we did not bend we will take it and we will give a few turns around the small ring we cut the excess and that's it
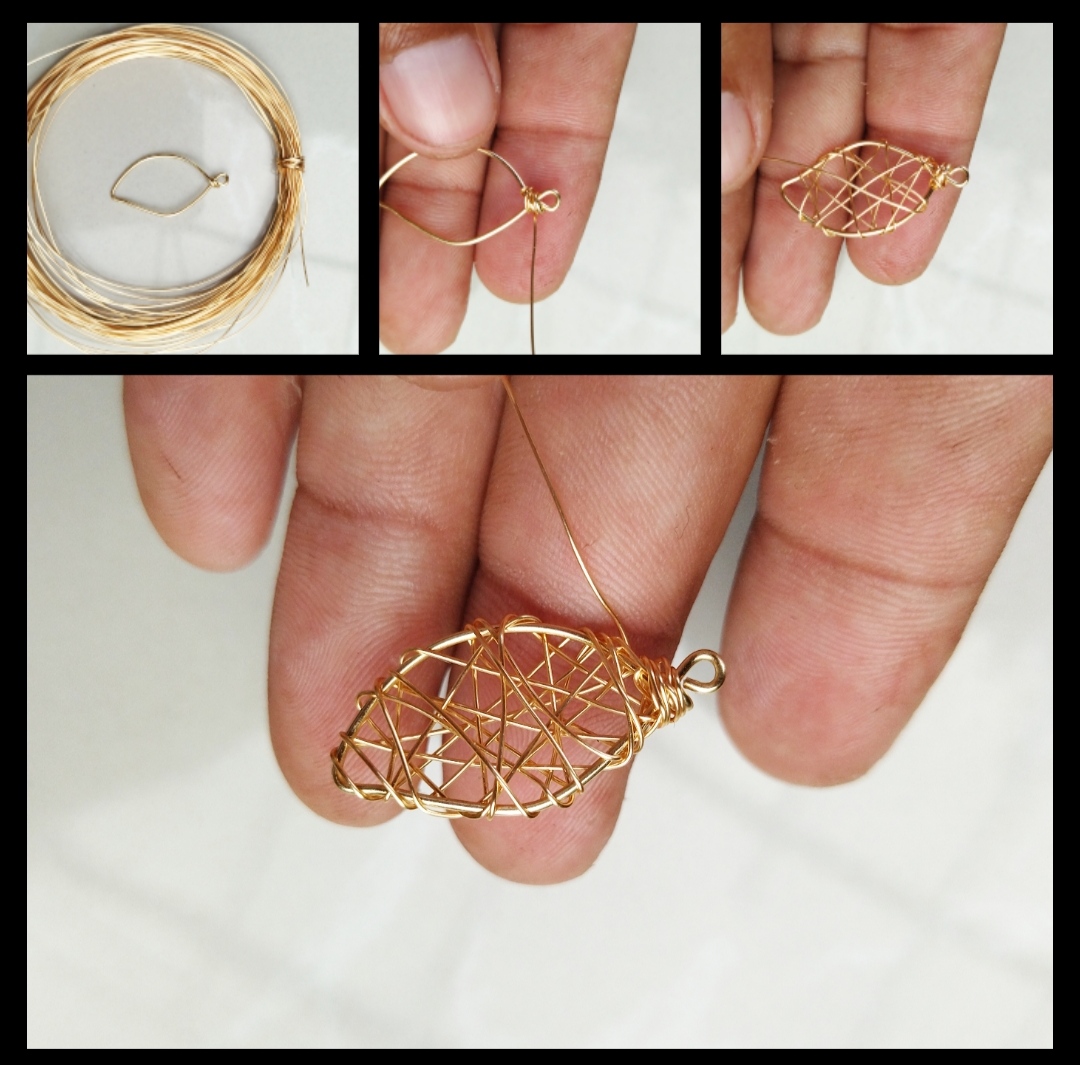
Paso 4: Cuarto y última paso para este paso adornaremos la hoja con que la adornaremos simplemente utilizaremos alambre calibre veintiséis cortamos un trozo de alsmbre lo suficientemente largo para poder hacer un tejido luego la punta de ese alambre la sujetarnos a la hoja justo en la argolla luego de asegurar muy bien el alambre empezaremos a cruzar el alambre este paso lo podemos hacer como queramos no hay un patrón mientras más albrw quedará un poco mejor pero no exageremos mucho luego cuando ya tengamos la hoja cubierta aseguramos el alambre justo donde empezamos esto es para que el empate quede en un solo lugar cortamos el exceso y listo ahora debemos unir las dos piezas la uniremos con alambre veintiséis tomamos primero la pieza que tiene el nácar y en la parte de abajo de la pieza aseguraremos el alambre luego metemos la hoja pasamos el alambre por la argolla y con la ayuda de la pinza aremos un redondo y aseguraremos dándole unas vueltas al rededor del mismo cortamos el exceso y listo ya tenemos unos hermosos pendientes de nácar espero les guste☺️👌🍃♥️🌹😊
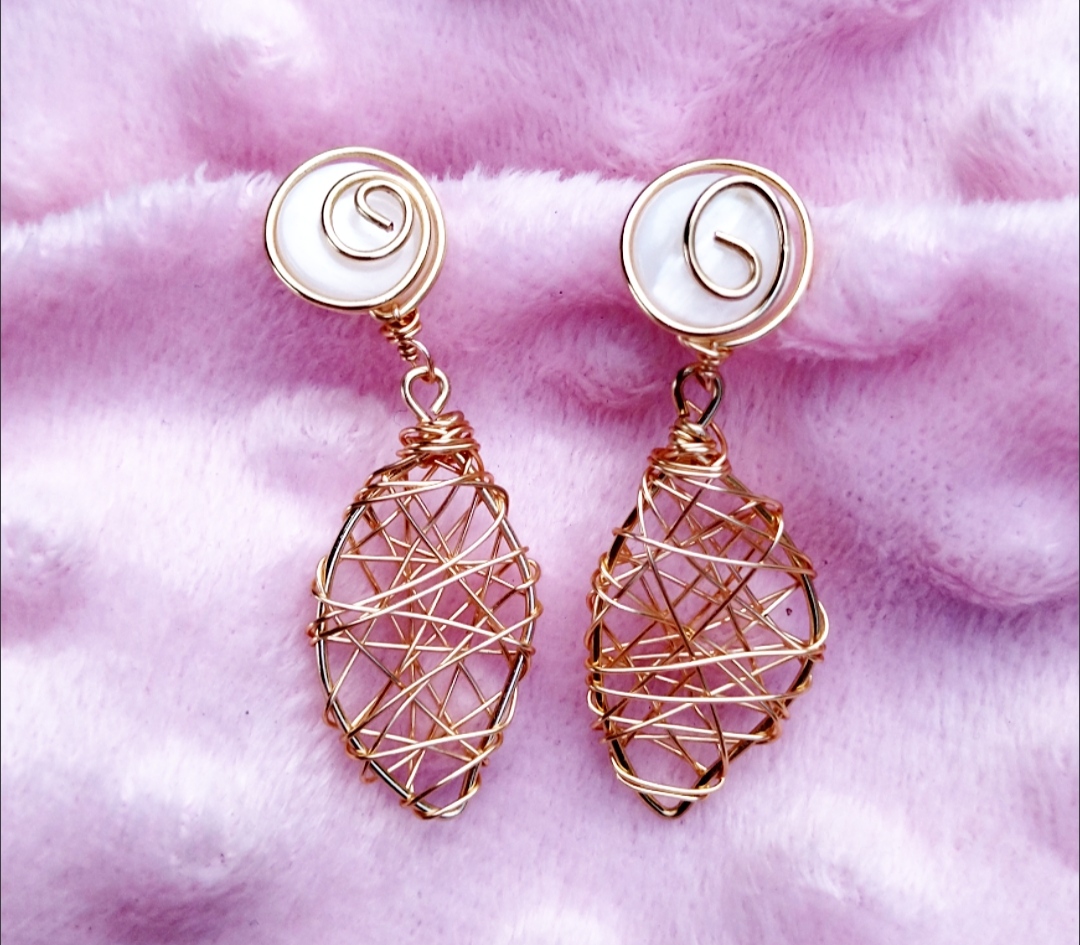
Step 4: Fourth and last step for this step we will decorate the leaf with which we will decorate it, we will simply use twenty-six gauge wire, cut a piece of wire long enough to be able to make a weave, then the tip of that wire will hold it to the leaf just right in the ring after securing the wire very well we will begin to cross the wire this step we can do as we want there is no pattern the more albrw it will be a little better but let's not exaggerate much later when we already have the sheet covered we secure the wire right where we started This is so that the tie remains in one place. We cut the excess and that's it. Now we must join the two pieces. We will join it with twenty-six wire. We first take the piece that has the mother-of-pearl and at the bottom of the piece we will secure the wire, then we put sheet we pass the wire through the ring and with the help of the pliers we will make a round and we will secure by giving it a few turns around it we cut the exc That and that's it, we already have some beautiful mother-of-pearl earrings, I hope you like it☺️👌🍃♥️🌹😊
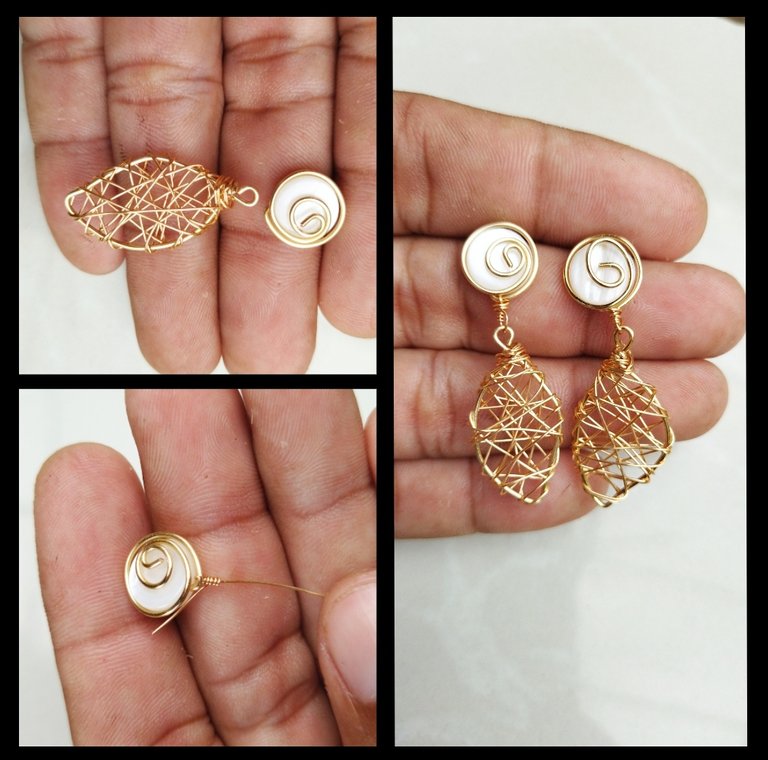
listo nuestros hermosos pendientes , espero que a las damas les guste, fue un gusto compartir con ustedes .
our beautiful earrings are ready, I hope the ladies like it, it was a pleasure to share with you.
Todas las Fotos son de mi autoría y fueron tomadas con mi Celular Redmi 9T
All Photos are my authorship and were taken with my Redmi 9T Cellphone


