It's time to make our girls fall in love, butterfly-themed earrings made with wire and stones.
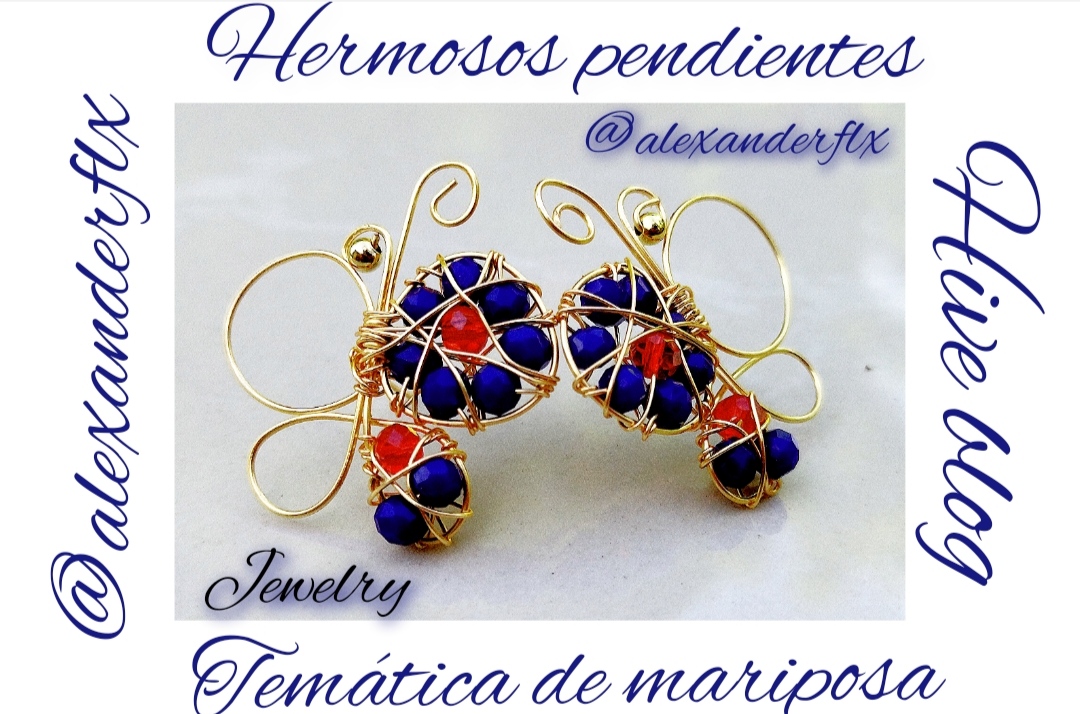
Hola feliz noche para todos espero se encuentren bien la noche de hoy les quiero compartir unos pendientes con temática de mariposa muy bonitos, está temática la elegí gracias a una amiga de esta hermosa comunidad ella quería ver unos pendientes con forma de mariposa y me lo hizo saber pues la noche de hoy quise complacerla espero le guste y también le guste a ustedes, estos pendientes están echo con la técnica de alambrismo y también utilizé piedras de bisutería azules y rojas, bueno chicos sin más que decir pasaremos al paso a paso.😉😉😉😉❤️❤️🦋🦋🦋😍😍🤍❤️
Hello, happy night to all, I hope you are well today. I want to share with you some very pretty butterfly-themed earrings. I chose this theme thanks to a friend from this beautiful community. She wanted to see some butterfly-shaped earrings and She let me know because tonight I wanted to please her, I hope she likes it and you also like it, these earrings are made with the wire technique and I also used blue and red costume jewelery stones, well guys without further ado we will move on to the step by step step.😉😉😉😉❤️❤️🦋🦋🦋😍😍 ❤️
What do we need.
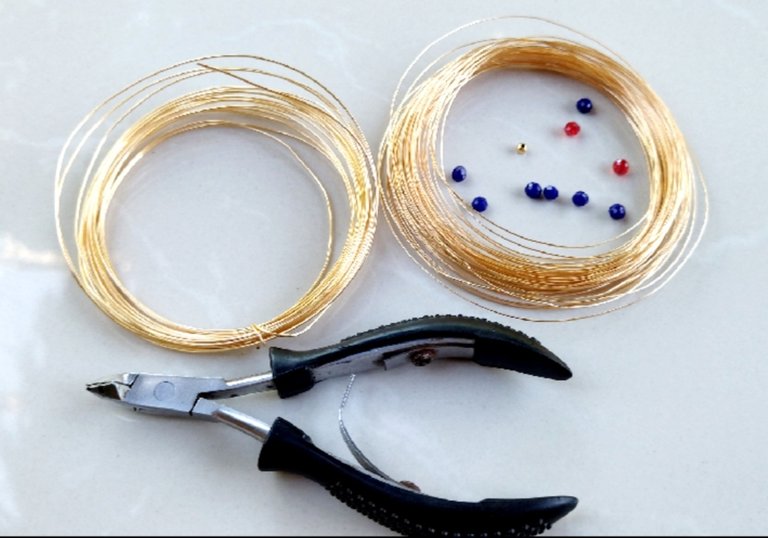
- piedras de bisutería
- alambre para bisutería calibre 22 y calibre y 26
- pinzas
jewelry stones
22-gauge and 26-gauge jewelry
tweezers
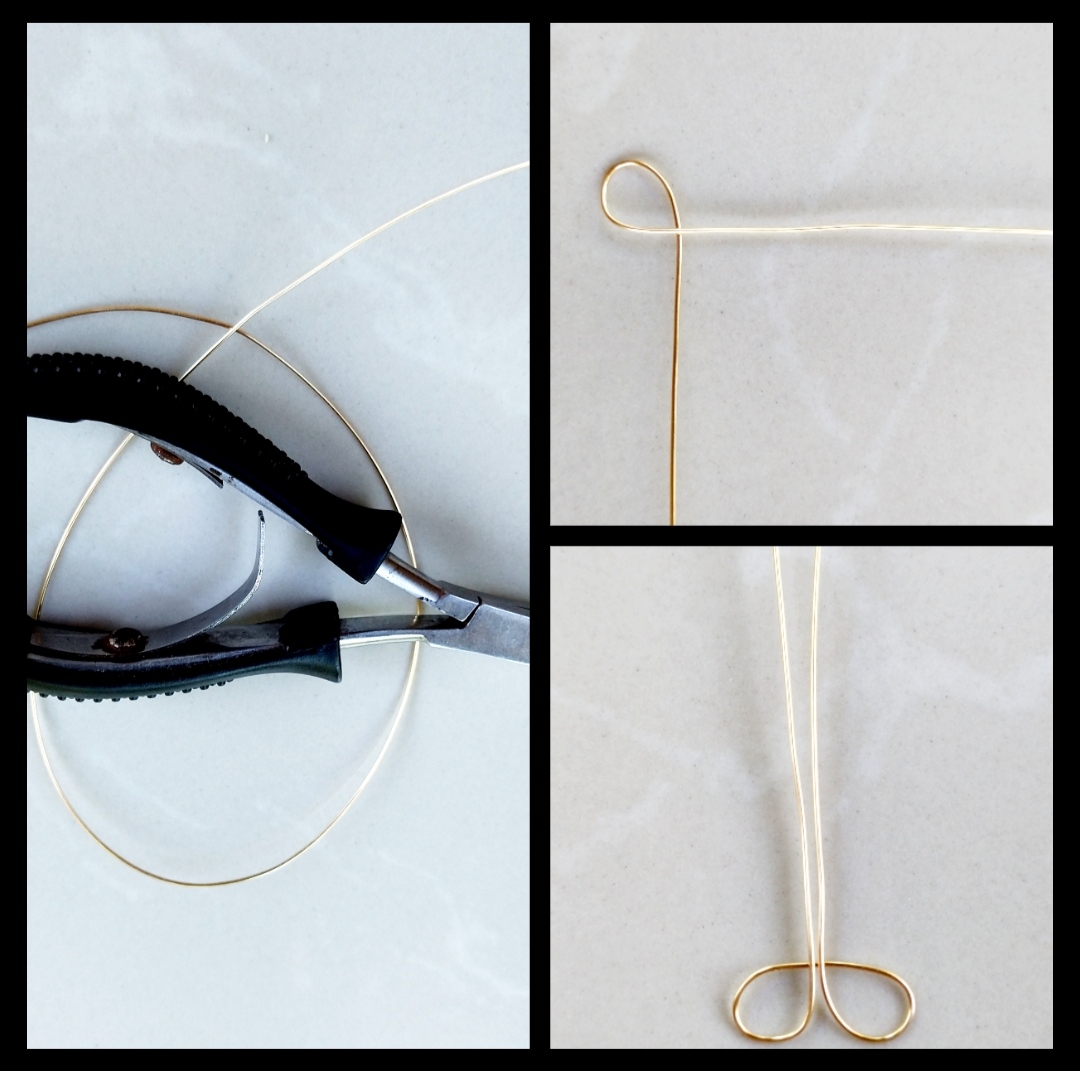
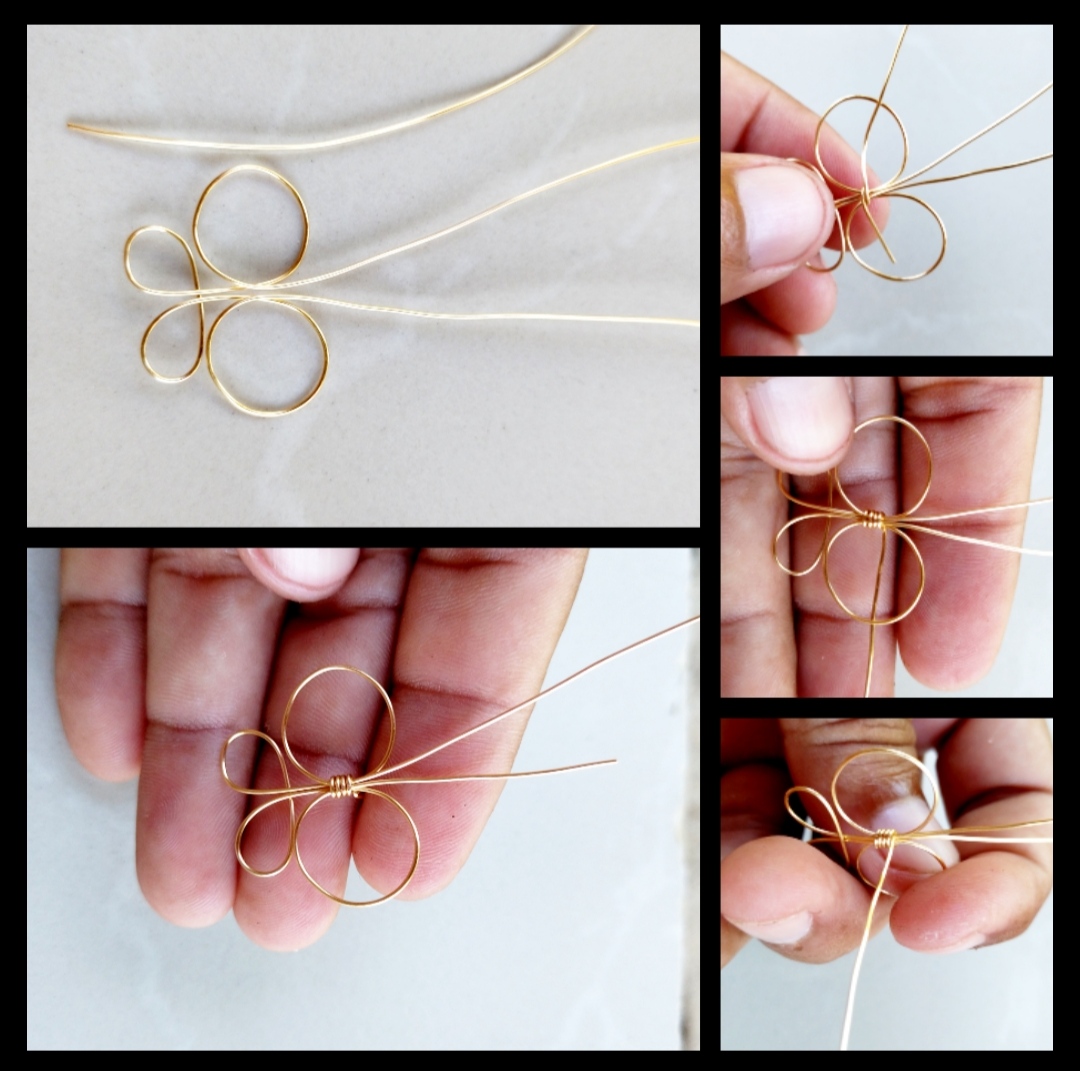
Paso 1:Para nuestro primer paso cortaremos un trozo de alambre de unos veinticinco centímetros luego de tener el alambre y las pinzas doblaremos el alambre haciendo un círculo pequeño y luego aremos otro tratemos de que nos queden del mismo tamaño también tratemos de que nos quede como vemos en la foto como pueden ver también nos quedaron dos pelos de alambre con esos dos pelos aremos dos redondo uno por cada trozo de alambre y nos quedarán como vemos en la foto .
Step 1: For our first step we will cut a piece of wire of about twenty-five centimeters after having the wire and the pliers we will bend the wire making a small circle and then we will make another one we will try to make them the same size we will also try to make them It will stay as we see in the photo, as you can see, we also have two wire hairs left. With those two hairs, we will make two round ones, one for each piece of wire, and they will stay as we see in the photo.
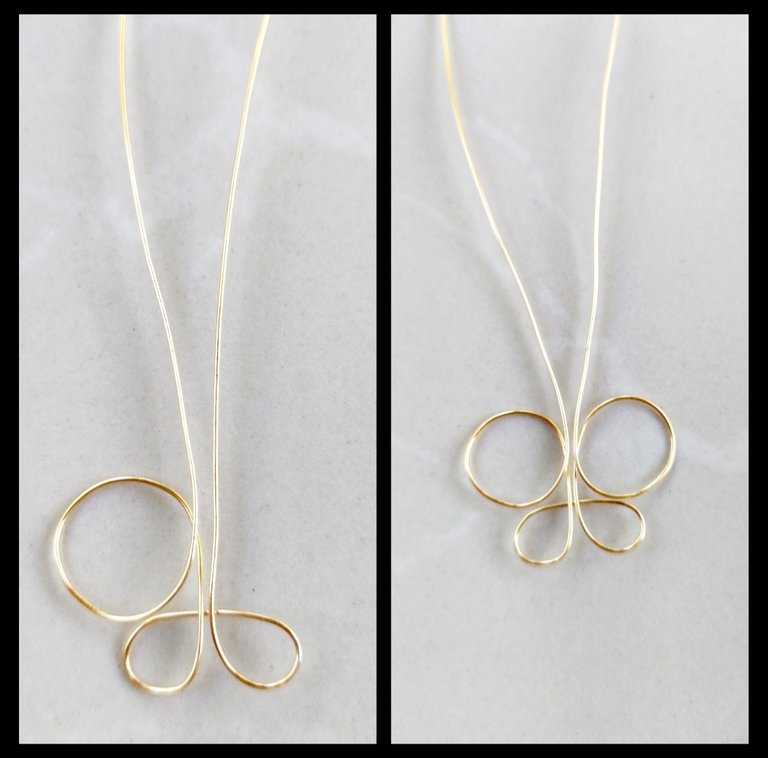
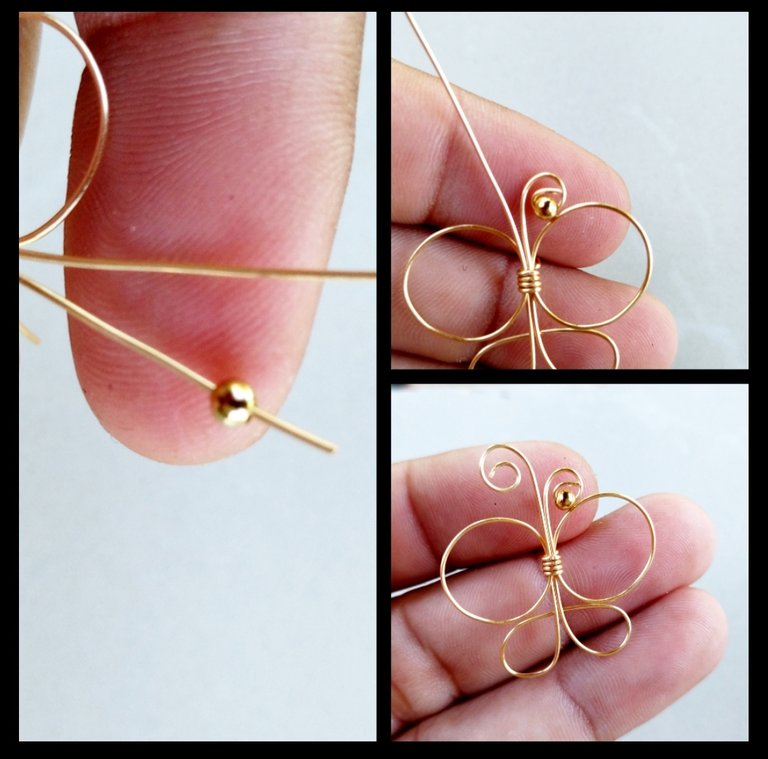
Paso 2: Como podemos ver ya la mariposa está tomando forma pero debemos asegurar o tratar de que las dos alas queden pegadas como lo aremos cortaremos otro trozo de alamvre no muy grande y lo entorcharemos en el medio de la mariposa uniendo las dos parte y de esa forma aseguramos de que las dos alas no se deforme con este mismo trozo de alambre aremos el palito para poder poner en la oreja les recuerdo apretar muy bien el alambre que entorchamos en el medio de la mariposa, luego pondremos una piedra dorada en uno de los dos almabre estos dos alambre serán las antenas solo debemos darle unas vueltas en espiral y decorar unas de las puntas con una piedra y listo super fácil .
Step 2: As we can see the butterfly is already taking shape but we must ensure or try to make the two wings stick together as we will cut another piece of wire, not very large, and we will twist it in the middle of the butterfly joining the two part and in this way we make sure that the two wings are not deformed with this same piece of wire we will make the stick to be able to put it in the ear I remind you to tighten the wire that we twisted in the middle of the butterfly very well, then we will put a gold stone In one of the two wires, these two wires will be the antennas. We just have to give it a few turns in a spiral and decorate one of the ends with a stone and that's it, super easy.
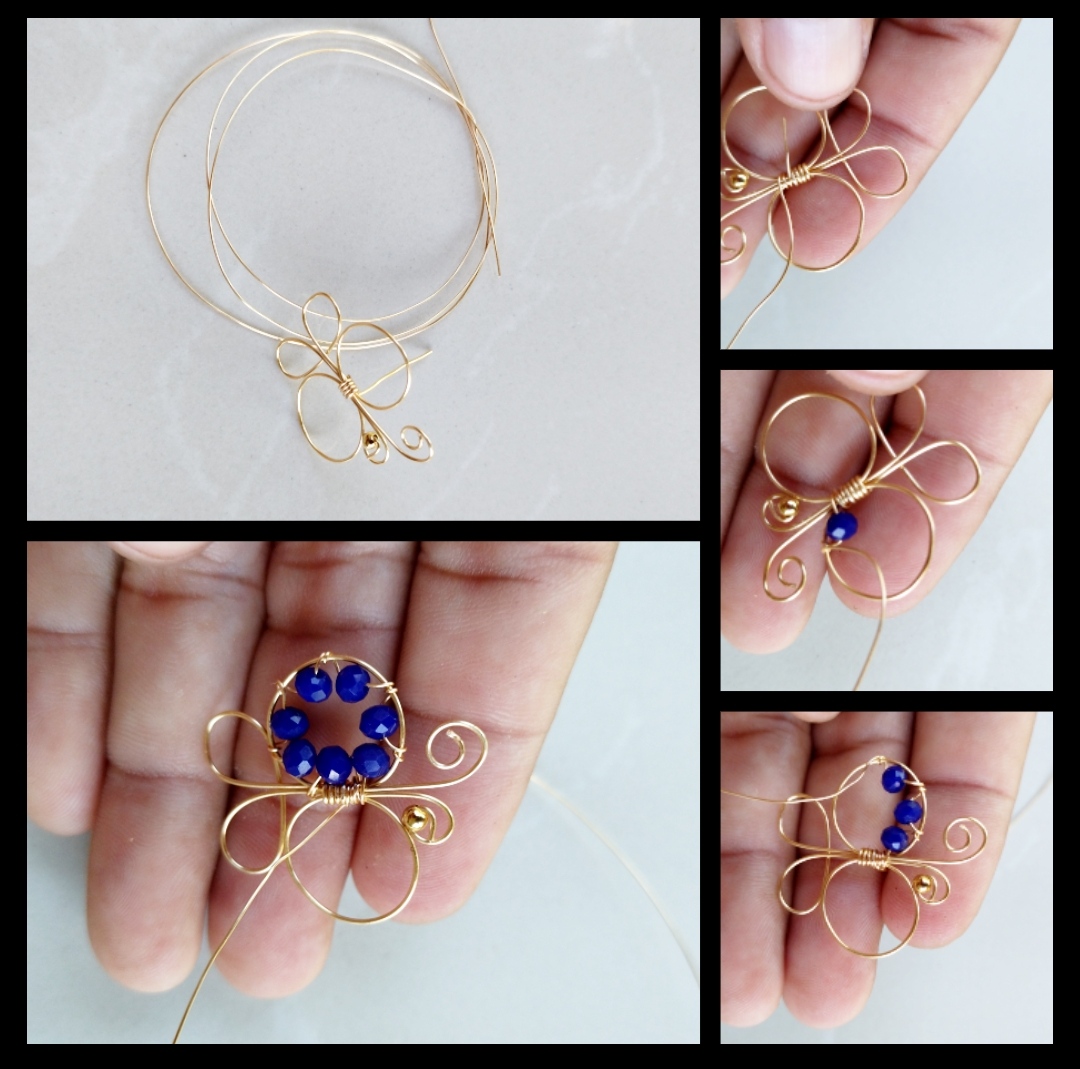
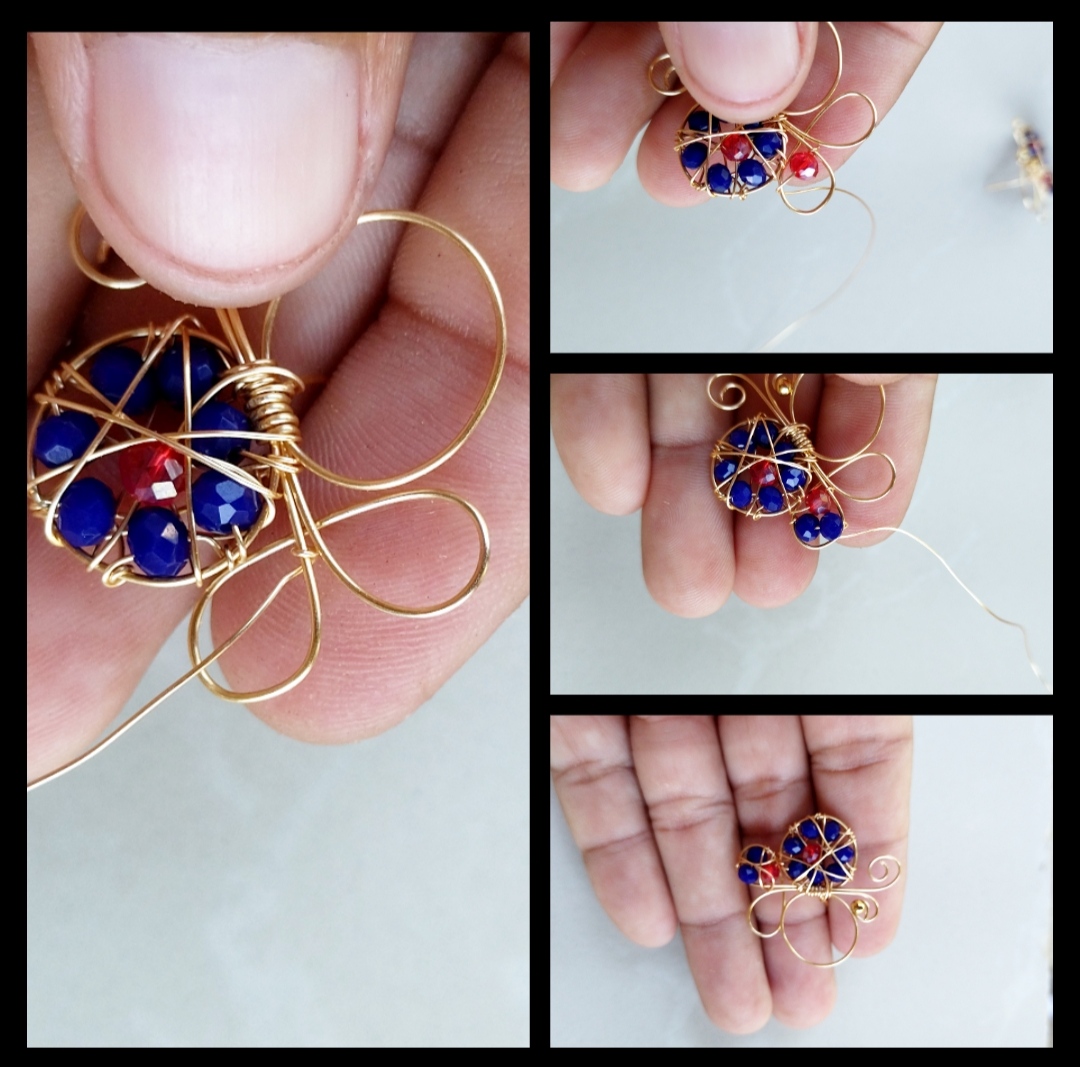
Paso 3: Ahora le pondremos unas piedras a nuestra mariposa como pueden ver los pasos son muy fáciles para este paso trabajaremos con la base que es la mariposa y también utilizaremos alambre calibre veintiséis piedras azul y rojas para empezar cortaremos un trozo de alambre y entorcharemos o fijaremos la punta de la base luego de fijar el alambre meteremos una piedra azul y daremos dos vueltas así como pueden ver en la foto y así seguiremos asta tener en borde cubierto una sugerencia no cortemos el alambre sigamos trabajando con el mismo alambre pero sin cortarlo.
Step 3: Now we will put some stones to our butterfly as you can see the steps are very easy for this section we will work with the base that is the butterfly and we will also use twenty-six gauge wire blue and red stones to start we will cut a piece of wire and we will twist or fix the tip of the base after fixing the wire we will put a blue stone and we will go around it twice as you can see in the photo and we will continue like this until we have a covered edge a suggestion let's not cut the wire let's continue working with the same wire but without cutting it.
Paso 4: Para este paso seguiremos decorando nuestra mariposa, para seguir decorando recuerdan que les dije que no cortaran el alambre bueno ese alambre lo tomaremos y meteremos una piedra roja y luego la pondremos en medio de las azules y aseguramos dándole unas vueltas a la base luego la decoramos dándole unas vueltas y cruzando el alambre así como pueden ver en las fotos para la parte de abajo hice lo mismo asegure el alambre primero luego metí una piedra roja asegure dándole unas vueltas a la base y seguí metiendo dos azules y asegure de nuevo luego les di una vuelta al rededor cruzando el alambre, bueno amigos espero les guste fue un gusto compartir con ustedes será para la próxima un abrazo y feliz noche para todos 👍👍🌹🌹🌹😊🦋🦋🦋.
Step 4: For this step we will continue decorating our butterfly, to continue decorating remember that I told you not to cut the wire well we will take that wire and put a red stone and then we will put it in the middle of the blue ones and make sure to give it a few turns to the base then we decorated it by turning it a few times and crossing the wire as you can see in the photos for the bottom part I did the same secure the wire first then I put a red stone secure by turning the base a few times and I continued putting two blue ones and I assured them again then I gave them a walk around crossing the wire, well friends, I hope you like it, it was a pleasure to share with you, it will be a hug for the next time and happy night for all 👍👍🌹🌹🌹😊🦋🦋🦋.
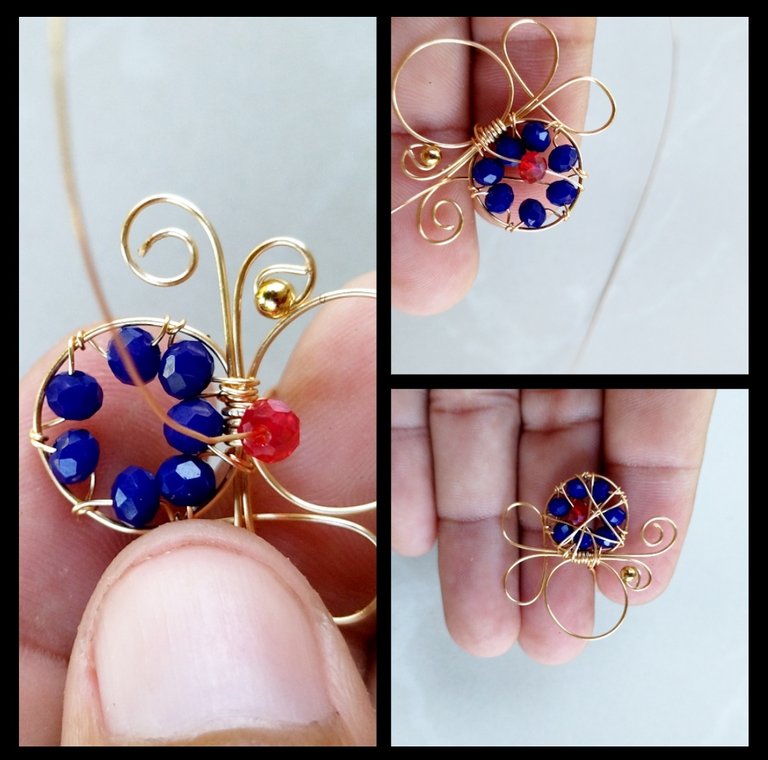
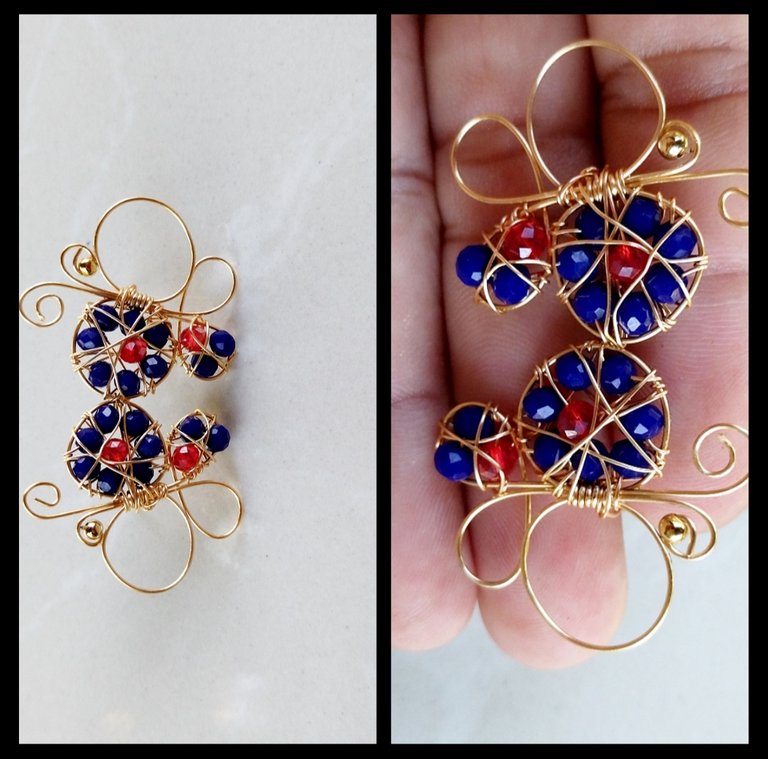
listo nuestros hermosos pendientes , espero que a las damas les guste, fue un gusto compartir con ustedes .
ready our beautiful earrings, I hope the ladies like it, it was a pleasure to share with you.
Todas las Fotos son de mi autoría y fueron tomadas con mi Celular Redmi 9T
All Photos are my authorship and were taken with my Redmi 9T Cellphone
