It's time to make the girls fall in love, beautiful fan-shaped earrings (DAISY ISLAND).

Hola feliz noche para todas y todas en especial espero se encuentren muy muy bien como pueden ver ya tenía mucho rato perdido ya eran casi dos meses sin publicar en la plataforma pero la verdad estaba haciendo muchas cosas y no tenía mucho tiempo mi tiempo estaba medido como saben tengo un hijo con autismo y logre inscribirlo en una escuela especial entonces me tocaba llevarlo a la escuela y con el pasaje super caro me tocaba quedarme por allá así que regresaba después del medio día un poco cansado no tenía mucho ánimo de escribir también me dediqué un poco a mi emprendimiento entonces como les dije el tiempo no era mi mejor aliado ahorita no estoy llevando a mi hijo a la escuela así que tengo un poco más de tiempo, por eso les traigo estos hermosos zarcillos con forma de abanico muy lindos y muy fácil de hacer espero a las chicas les guste siempre a sido un gusto compartir con usted bueno sin más que decir pasaremos al paso a paso 🥰😉🌞💋
Hello, happy night to all of you, and especially to all of you, I hope you are very, very well, as you can see, I had already lost a lot of time, it had been almost two months without posting on the platform, but the truth was I was doing a lot of things and I didn't have much time. It was measured as you know I have a son with autism and I managed to enroll him in a special school so I had to take him to school and with the super expensive ticket I had to stay there so I returned after noon a little tired I didn't feel like writing much I also dedicated a bit to my entrepreneurship so as I told you, time was not my best ally right now I am not taking my son to school so I have a little more time, that's why I bring you these beautiful fan-shaped tendrils, very cute and very easy to do I hope the girls like it, it's always been a pleasure to share with you, well, without further ado, we'll go step by step 😉🌞💋
What do we need.
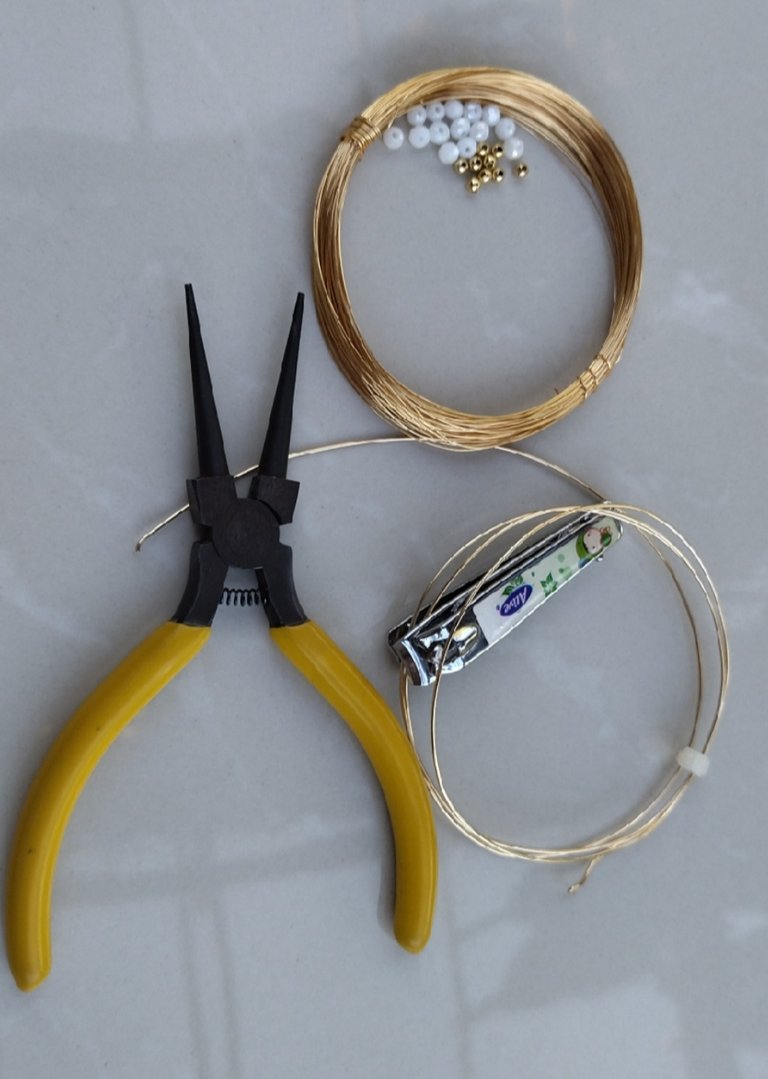
- cristales y balines de acero
- alambre para bisuteria calibre 20 y 26
- pinzas
crystals and steel pellets
20 and 26 gauge wire for jewelry
tweezers
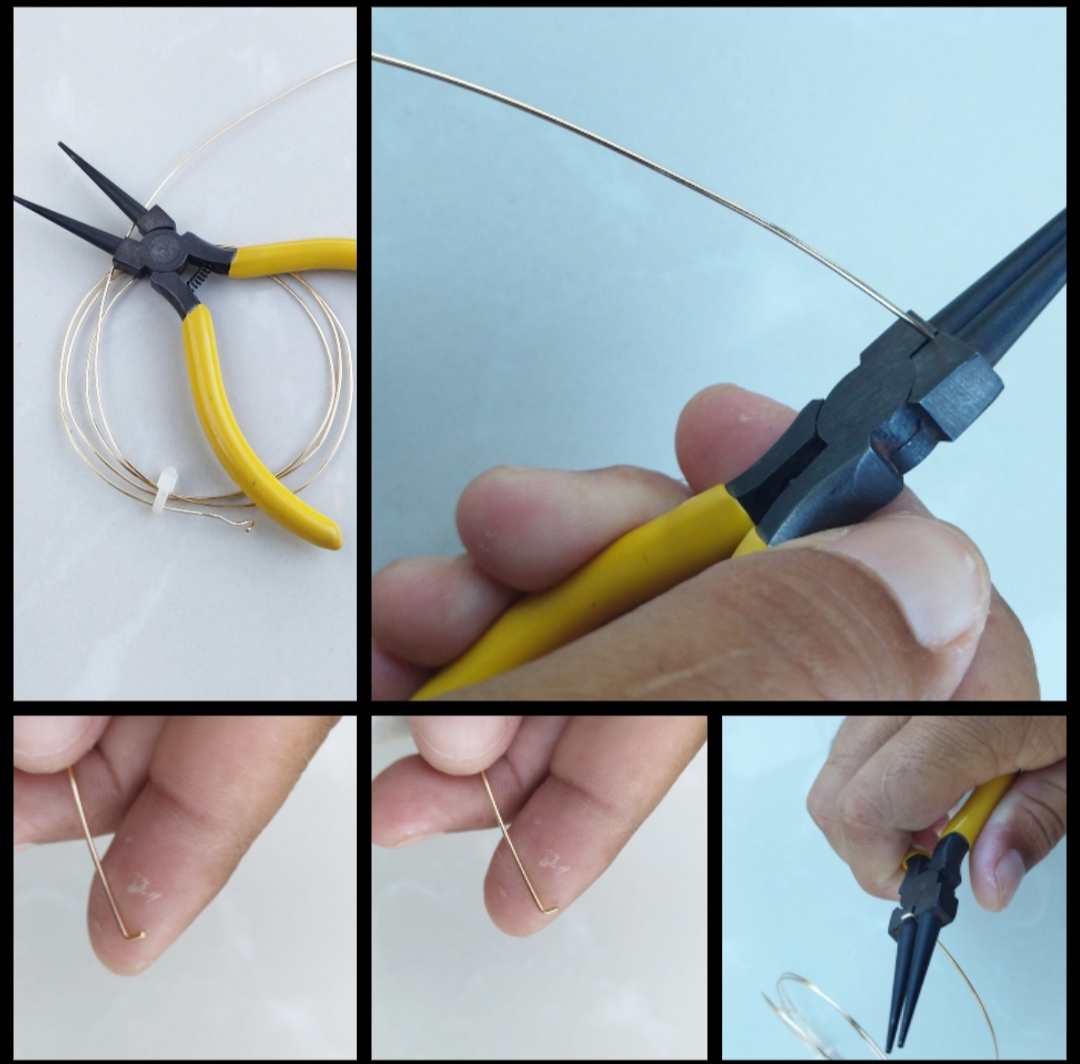
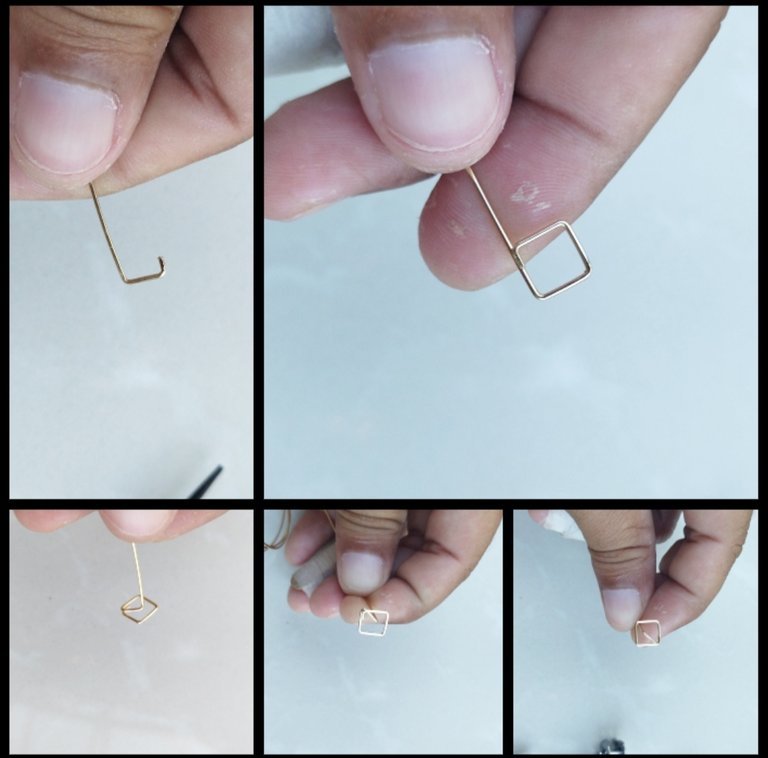
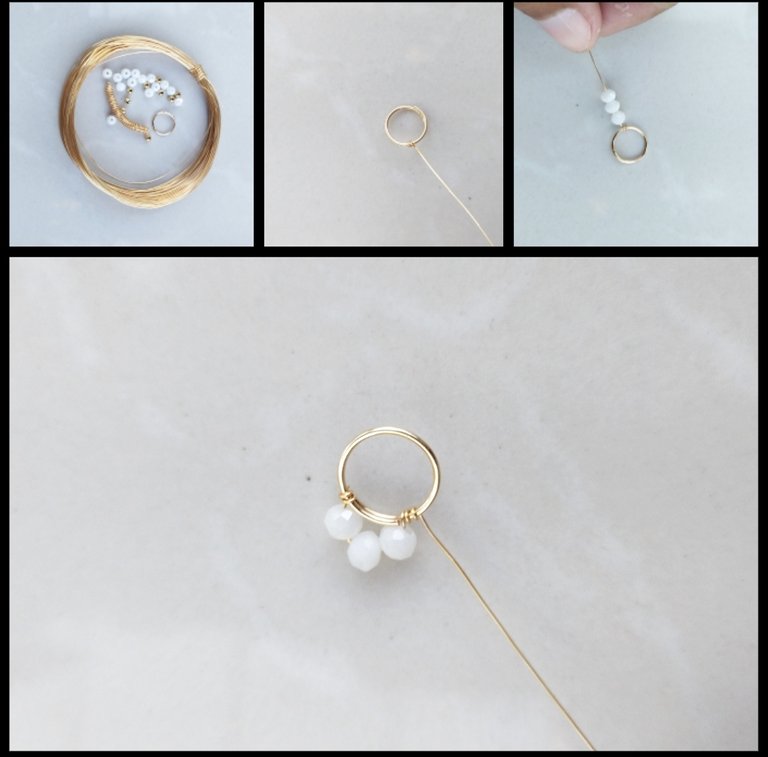
Paso 1: Para nuestro primer paso tomaremos alambre calibre veinte y pinzas ahora aremos un cuadrado lo mejor que podamos como pueden ver en la foto yo utizo lo último de la pinza porque porque así el cuadrado saldrá mejor los cuadrados lo hacemos con una pinza plata pero como no tengo pinza plana debo improvisar, primero aremos un pequeño dobles en la punta luego aremos los cuatro lado de nuestro cuadrado luego de terminal con el cuadrado doblamos el alambre dejándolo cruzar el cuadrado luego doblaremos hacia atrás tratando de que ese dobles quede en medio del cuadrado cortamos el exceso recuerden que deben dejar el palito del zarcillos un poco largo no lo corten todo.
Step 1: For our first step we will take twenty gauge wire and pliers now we will make a square as best we can as you can see in the photo I use the last of the pliers because that way the square will come out better we do the squares with a plier silver but since I don't have a flat plier I have to improvise, first we will make a small double at the end then we will make the four sides of our square after terminal with the square we bend the wire letting it cross the square then we will bend backwards trying to make that double stay in Cut the excess in the middle of the square. Remember to leave the tendril stick a little long, don't cut it all.
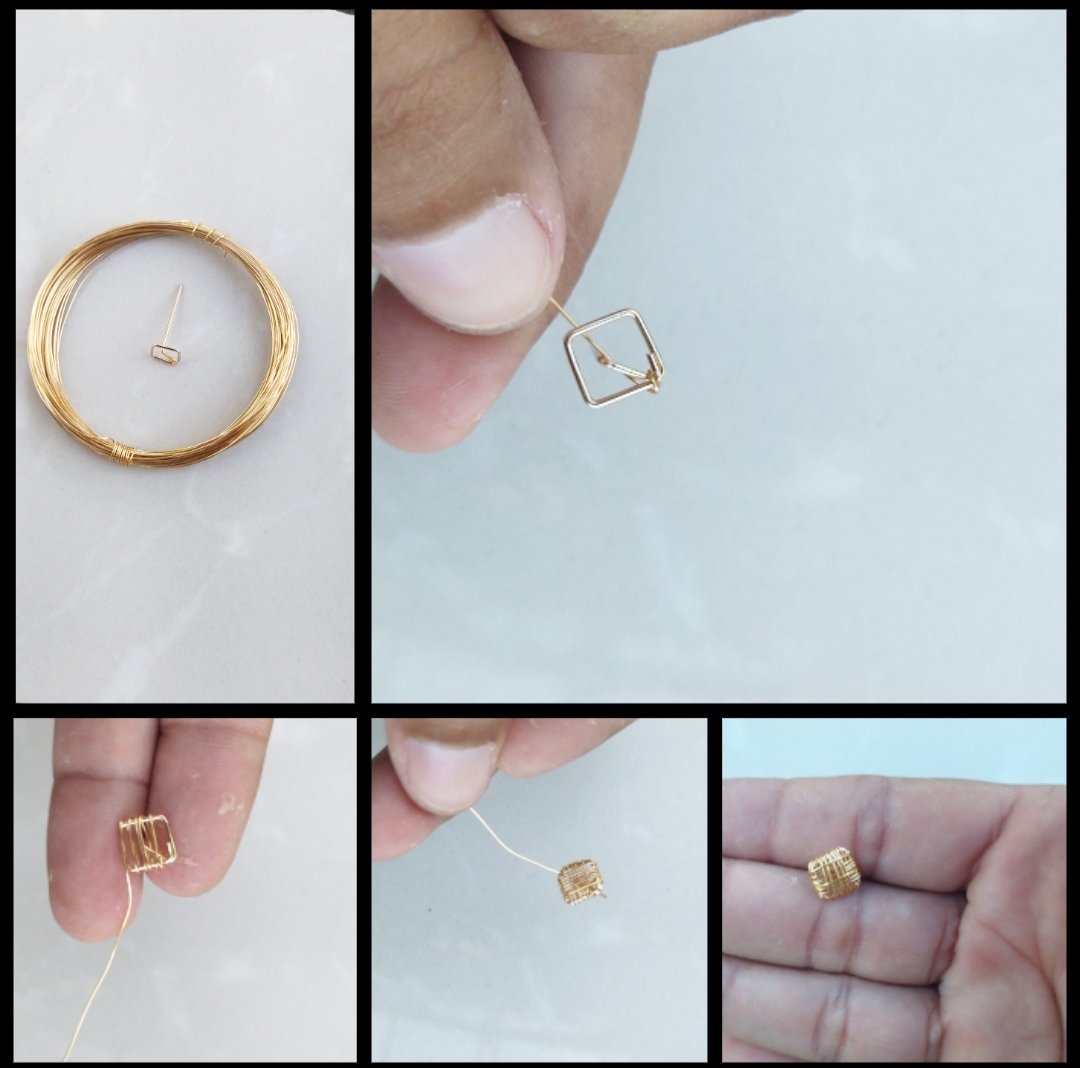
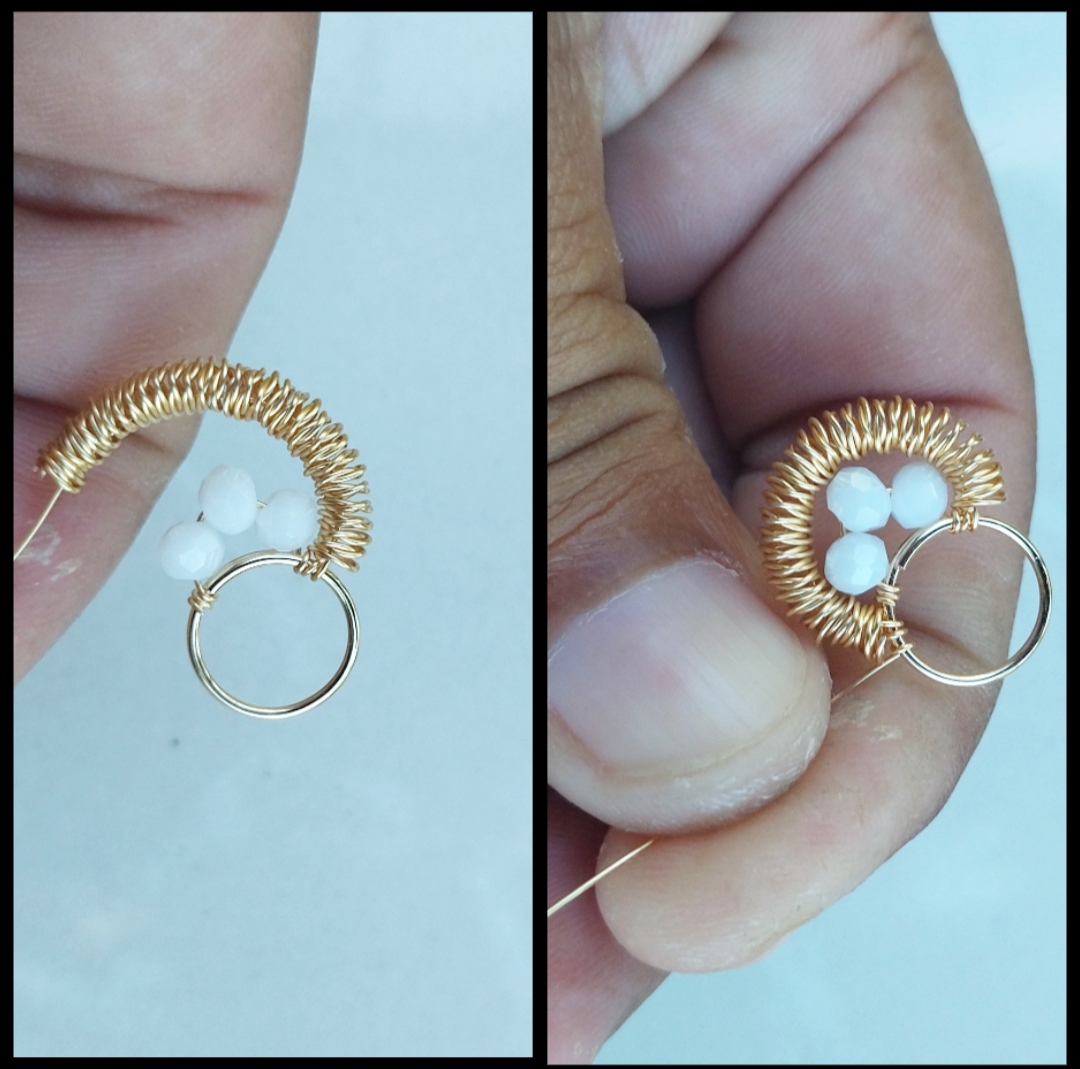
Paso 2: Para empezar con nuestro segundo paso debemos tomar alambre calibre veintiséis la base que hicimos en el primer paso y un poco de paciencia primero tomamos el alambre y la pieza aseguramos lanpulta del alambre en la base luego le daremos varias vuelta al rededor de base en una sola dirección luego sin cortar aremos lo mismo hacia el otro lado y así rellenaremos el cuadrado traten de que queden un poco separado así les daremos un mejor efecto. .
Step 2: To start with our second step we must take twenty-six gauge wire the base that we made in the first step and a little patience first we take the wire and the piece we secure the wire lanpult in the base then we will turn the wire several times around the base in one direction then without cutting we will do the same to the other side and fill in the square so try to make them a little separated so we can give them a better effect.
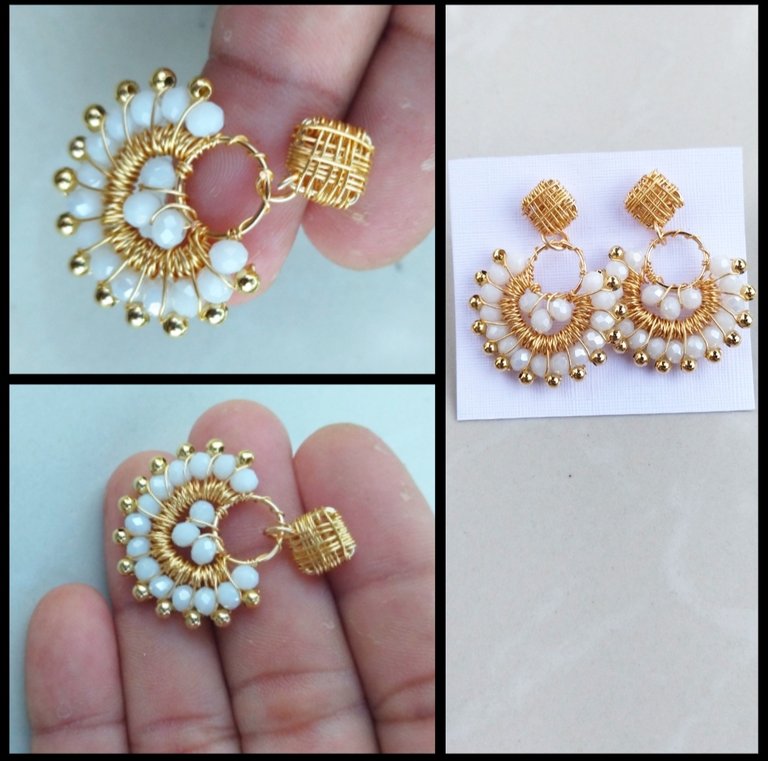
Paso 3:en este tercer paso debemos hacer un redondo que ya yo lo tengo este redondo puede ser tan grande como ustedes quieran como pueden ver en la foto también tengo un trozo de alambre como un tubo ese lo hice de la siguiente manera disculpen por no pasar la foto para hacer esa pieza solo entorchamos alambré calibre veintiséis luego lo entorchamos an redodor de un palito largo y listo hacia hacemos esa pieza también utilizaremos cristales blanco y balines de tres milímetros ahora empezamos primero tomamos un trozo de alambre calibre veintiséis y lo aseguramos en el redondo luego metemos tres piedras blancas y aseguramos del otro lado seguimos metiendo un pedacito del alambre que entorchamos lo aseguramos nuevamente y volveremos a meter varios cristales blanco y aseguramos nuevamente así como pueden ver en la foto
Step 3: in this third step we must make a round one that I already have, this round can be as big as you want as you can see in the photo I also have a piece of wire like a tube that I did as follows Excuse me for not passing the photo to make that piece, we only twist twenty-six gauge wire, then we twist it around a long stick and that's it, we're going to make that piece, we'll also use white crystals and three-millimeter pellets. We secure it in the round, then we insert three white stones and secure on the other side, we continue inserting a little piece of the wire that we twisted, we secure it again and we will insert several white crystals and secure again as you can see in the photo
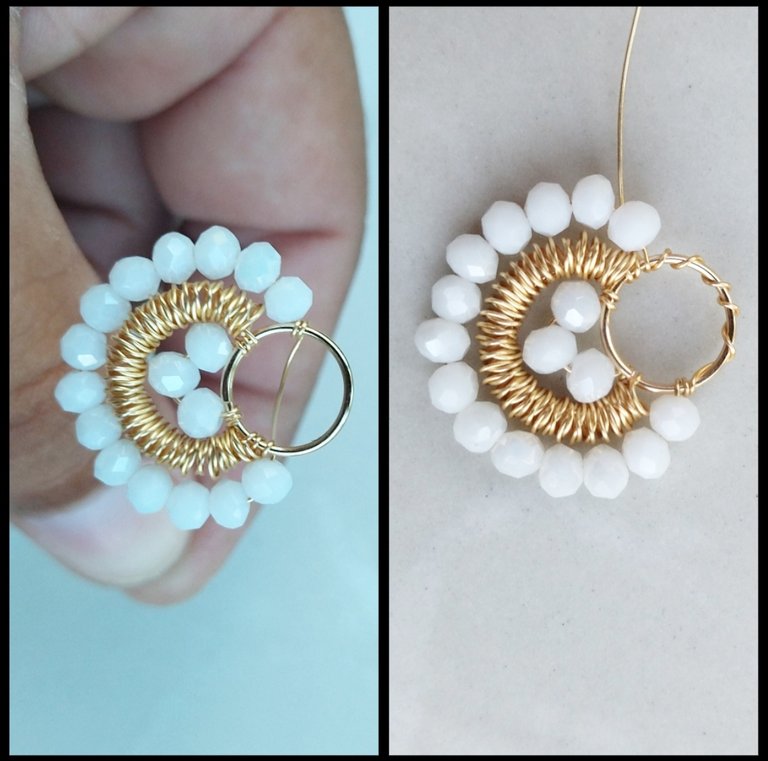
Paso 4: bueno ya estamos terminando para nuestro último paso terminaremos de adornar nuestro abanico para eso seguiremos utilizando el mismo trozo de alambre que utilizamos en el paso anterior para empezar solo le damos unas vueltas a ese alambre llevándolo hacia el otro extremo del abanico luego metemos un balín y lo sujetamos para poder pasar el alambre entre las tres piedras blancas y el alambre dorado regresamos el alambre y metemos otro balín y así asta llegar al otro extremo del abanico luego de terminal con los balines cortamos el exceso y aremos un redondo pequeño con alambre calibre veinte para poder unir las dos pieza luego de unir las dos pieza cerramos el redondo tratemos de que nos quede muy bien serrado y listo ya tenemos unos hermosos zarcillos con forma de abanico 😇💓📍🌙🥰💕🌞💋😉😉😉
Step 4: well we are finishing for our last step we will finish decorating our fan for that we will continue using the same piece of wire that we used in the previous step to start we just give that wire a few turns taking it to the other end of the fan fan then we put a ball and we hold it to be able to pass the wire between the three white stones and the golden wire we return the wire and we put another ball and so until we reach the other end of the fan after terminal with the balls we cut the excess and plow a small round with twenty-gauge wire to be able to join the two pieces, after joining the two pieces, we close the round, let's try to make it very well serrated and that's it, we already have some beautiful fan-shaped tendrils 😇💓📍🌙 💕🌞💋😉😉 😉
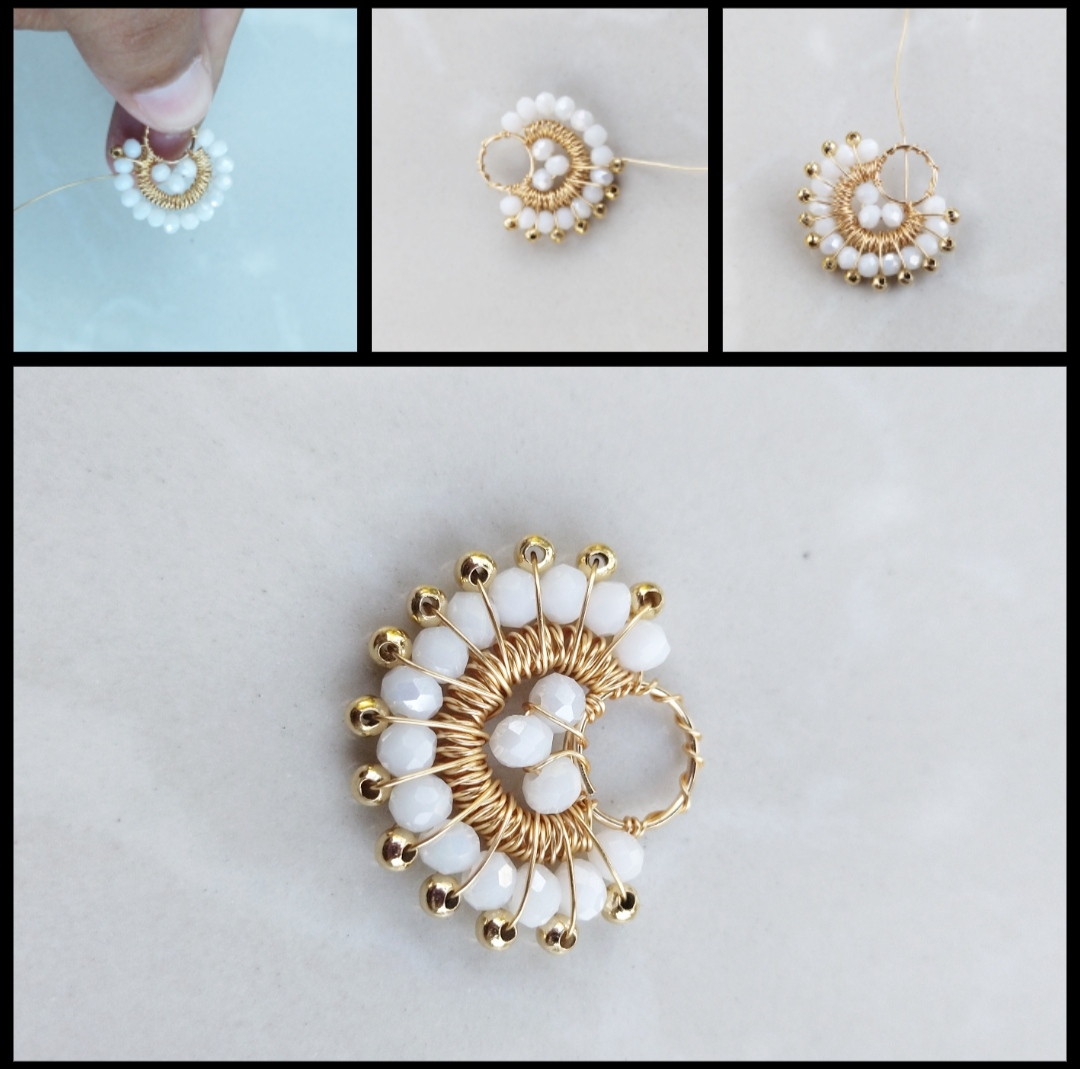
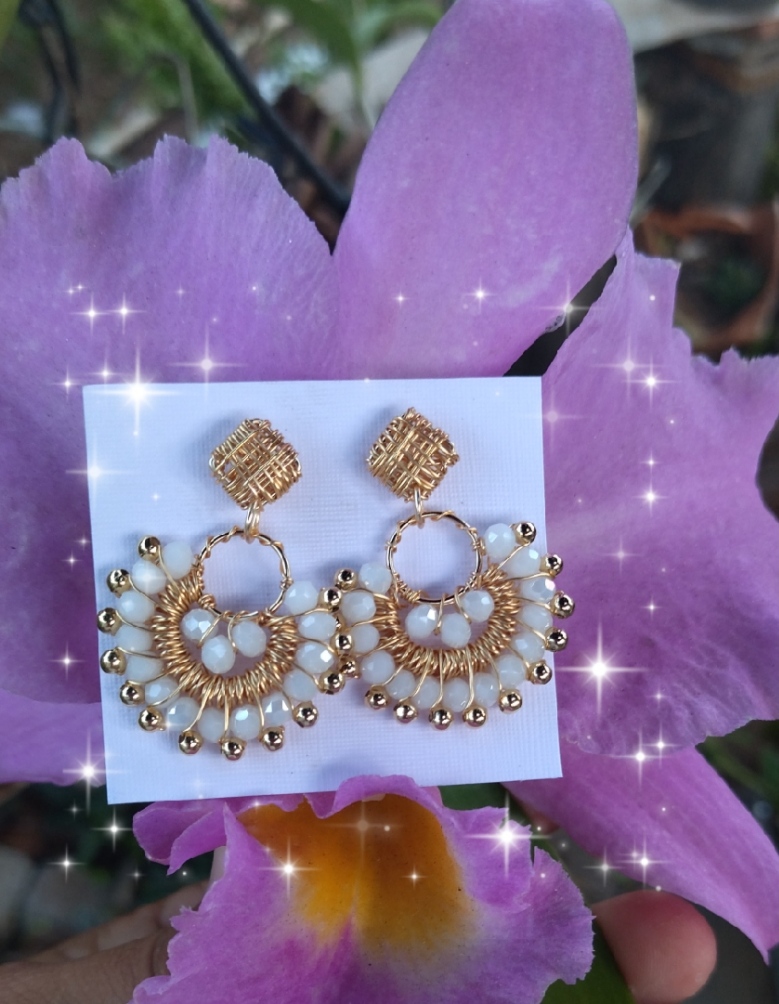
listo nuestros hermoso collar s , espero que a las damas les guste, fue un gusto compartir con ustedes .
ready our beautiful necklace s, I hope the ladies like it, it was a pleasure to share with you.
Todas las Fotos son de mi autoría y fueron tomadas con mi Celular Redmi 9T
All Photos are my authorship and were taken with my Redmi 9T Cellphone


