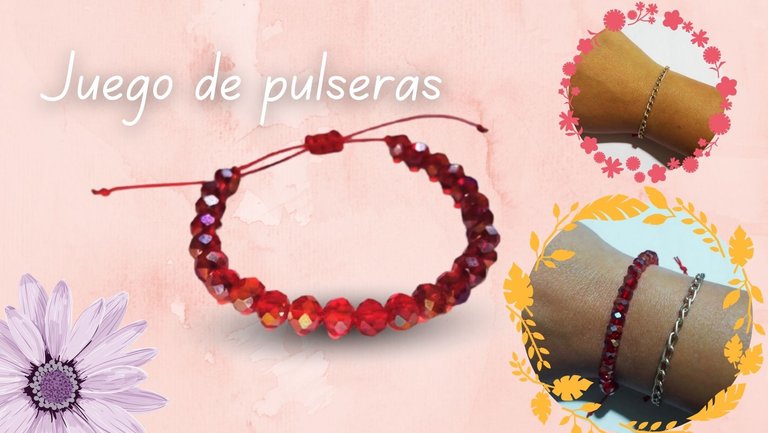
Hola, amigos, soy nueva en esta comunidad, hace poco volví a hacer accesorios, era algo que no hacía desde que era una niña, sin embargo, nunca es tarde para volver a reencontrarte con tus antiguos hobbies. Recuerdo que empecé a realizar accesorios y me empezó a gustar este mundo gracias a una vecina que una vez me regaló una bolsa llena de todo tipo de piedritas y abalorios, desde ese momento comencé a crear muchas cosas, incluso un día mi papá me regaló unos hermosos swarovski al ver mi interés en crear accesorios.
Empecé nuevamente comprando materiales, y quise hacer unas pulseras que considero son bastante sencillas para un principiante, además son elegantes.
Materiales para dos pulseras:
✅Hilo chino rojo (70 cm aproximadamente)
✅Cristales de 4 mm
✅Cadena dorada
✅Encendedor
✅Cinta métrica
Hello, friends, I am new to this community, I recently started making accessories again, it was something I had not done since I was a child, however, it is never too late to rediscover your old hobbies. I remember that I started making accessories and I started to like this world thanks to a neighbor who once gave me a bag full of all kinds of pebbles and beads. From that moment on I started creating many things, one day my dad even gave me some beautiful swarovski seeing my interest in creating accessories.
I started buying materials again, and I wanted to make some bracelets that I consider to be quite simple for a beginner, and they are also elegant.
Materials for two bracelets:
✅Red Chinese thread (approximately 70 cm)
✅4mm crystals
✅golden chain
✅Lighter
✅Measuring tape

Procedimiento para la pulsera 1:
Primero corté 30 cm de hilo e hice un nudo en un extremo y luego quemé la punta del hilo con el encendedor, luego comencé a introducir cada uno de los cristales rojos.

Procedure for bracelet 1:
First I cut 30 cm of thread and tied a knot at one end and then burned the end of the thread with the lighter, then I began to insert each of the red crystals.

Luego volví a hacer otro nudo en el otro extremo del hilo y nuevamente quemé esa punta para evitar que se deshilachara. Después doblé a la mitad la pulsera y alineé los cristales y les hice un nudo al final de cada hilera de los cristales para que los mismos no se movieran de lugar.

Then I tied another knot at the other end of the thread and again burned that end to prevent it from fraying. Then I folded the bracelet in half and lined up the crystals and tied a knot at the end of each row of crystals so that they wouldn't move out of place.


Finalmente comencé a hacer el nudo corredizo para abrir y cerrar la pulsera.
El nudo corredizo se realiza cruzando ambos extremos de la pulsera, se le introduce un hilo de aproximadamente 10 cm por debajo del resto de los hilos; el extremo izquierdo se pasa por encima de los demás hilos, bajamos el de la derecha por debajo y lo pasamos por detrás de todos los hilos y de abajo hacia arriba lo metemos por el agujero que se nos ha creado a la izquierda, apretamos bien y ya tendríamos el primero. Hacemos lo mismo con el de la derecha, pasamos el extremo del hilo por encima de los demás hilos, bajamos el otro (izquierdo) y lo pasamos por detrás de los demás hilos y de abajo hacia arriba lo cerramos metiéndolo por el agujero que se ha hecho a la derecha, apretamos nuevamente y tenemos el segundo listo. Siempre alternando derecha e izquierda, repetiremos estos pasos hasta lograr el largo del nudo deseado. Finalmente, cuando hemos culminado el nudo cortamos el sobrante del hilo y quemamos sus extremos.
Finally I started tying the slipknot to open and close the bracelet.
The sliding knot is made by crossing both ends of the bracelet, a thread approximately 10 cm below the rest of the threads is inserted; The left end is passed over the other threads, we lower the right end below and pass it behind all the threads and from bottom to top we put it through the hole that has been created on the left, we tighten well and we would already have the first. We do the same with the one on the right, we pass the end of the thread over the other threads, we lower the other one (left) and pass it behind the other threads and from bottom to top we close it by putting it through the hole that has been made. done to the right, we press again and we have the second one ready. Always alternating right and left, we will repeat these steps until we achieve the desired length of the knot. Finally, when we have completed the knot, we cut off the excess thread and burn its ends.


Procedimiento para la pulsera 2
Para la segunda pulsera cortamos dos pedazos de hilo de 17 cm cada uno, introducimos uno de los hilos por un agujero de la cadena y lo doblamos a la mitad, hacemos un nudo en el extremo y quemamos con el encendedor, procedemos a hacer lo mismo con el otro lado, por último, hacemos un nudo corredizo.

Procedure for bracelet 2
For the second bracelet we cut two pieces of thread of 17 cm each, we introduce one of the threads through a hole in the chain and fold it in half, we tie a knot at the end and burn it with the lighter, we proceed to do the same With the other side, finally, we make a sliding knot.


Y ya tenemos nuestro juego de pulseras que podemos con un bonito outfit, espero les haya gustado. ¡Hasta un próximo post!
And we now have our set of bracelets that we can wear with a nice outfit, I hope you liked it. Until a next post!


