Hola queridos compañeros un gusto saludarles!
Es un placer para mi estar nuevamente delante de esta gran familia de hive y la gente bonita de @jewerly,hoy he venido a traerles una hermosa pera de 3 colores,y es que definitivamente las flores me encantan,por eso les he traído esta hermosa pulsera con flores de colores convidado con un toque de macrame,y dándole un toque de brillo con estos balines dorados,
Los materiales utilizados en la elaboración de esta hermosa y colorida pulsera de flores son todos reutilizados o reciclados y son los siguientes:
🌺8 MOSTACILLAS COLOR VERDE
🌺6 MOSTACILLAS COLOR VERDE
🌺6 MOSTACILLAS DE COLOR ROSADO
🌺6 MOSTACILLAS DEVCOLOR AMARILLO
🌺3 PERLAS DORADAS MEDIANAS
🌺2 MOSTACILLAS PEQUEÑAS
🌺50cm DE HILO CHINO 0.8 MILÍMETROS
🌺150cm DE HILO CHINO DE 1MILIMETROS
🌺1 TIJERA
🌺1 ENCENDEDOR
🌺CINTA ADHESIVA O TEIPE
🌺1 TROZO DE PITILLO

La elaboración de nuestra pulsera consta de varios pasos que se los voy a mostrar a continuación
Paso 1
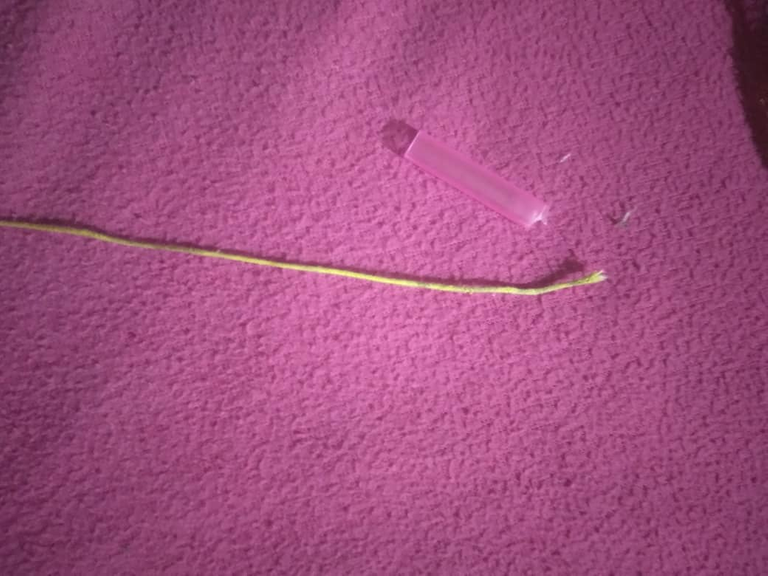
Lo primero que haremos será tomar nuestro hilo de 50cm y con la ayuda de nuestro pitillo haremos un nudo franciscano en uno de los extremos

De derecha a izquierda le daremos un aproximado de 6 vueltas,cuando hayamos terminado,tomamos el hilo y lo pasamos por el interior del pitillo,sacándolo poco a poco con mucho cuidado Tiramos de el y tenemos nuestro nudo
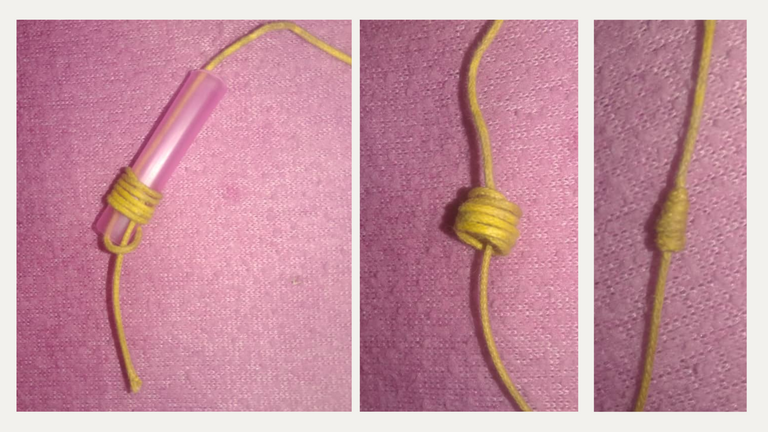
Lo siguiente q haremos será cortar el excedente, y sellamos con nuestro encendedor

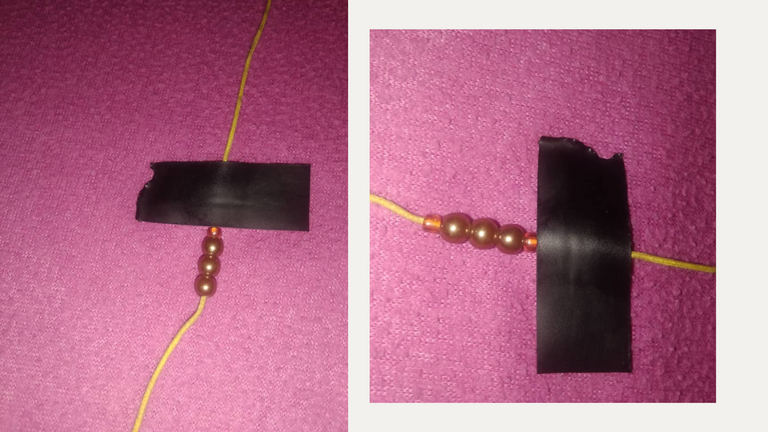
Paso 2
Lo siguiente que haremos será dejar un aproximado de 7 cm de nuestro hilo,le colocamos cinta elástica para que nos se nos mueva y trabajemos con comodidad,

Lo siguiente q haremos será quemar con nuestro encendedor las puntas para que entren fácilmente las perlas.
Tomaremos el extremo del hilo y introduciremos principalmente 1 mostacillas de las pequeñas,seguido de las 3 perlas y por último la otra mostacilla pequeña
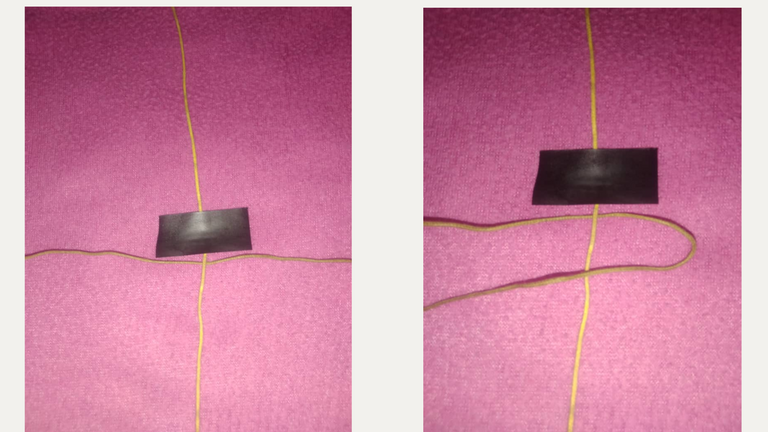
Paso 3
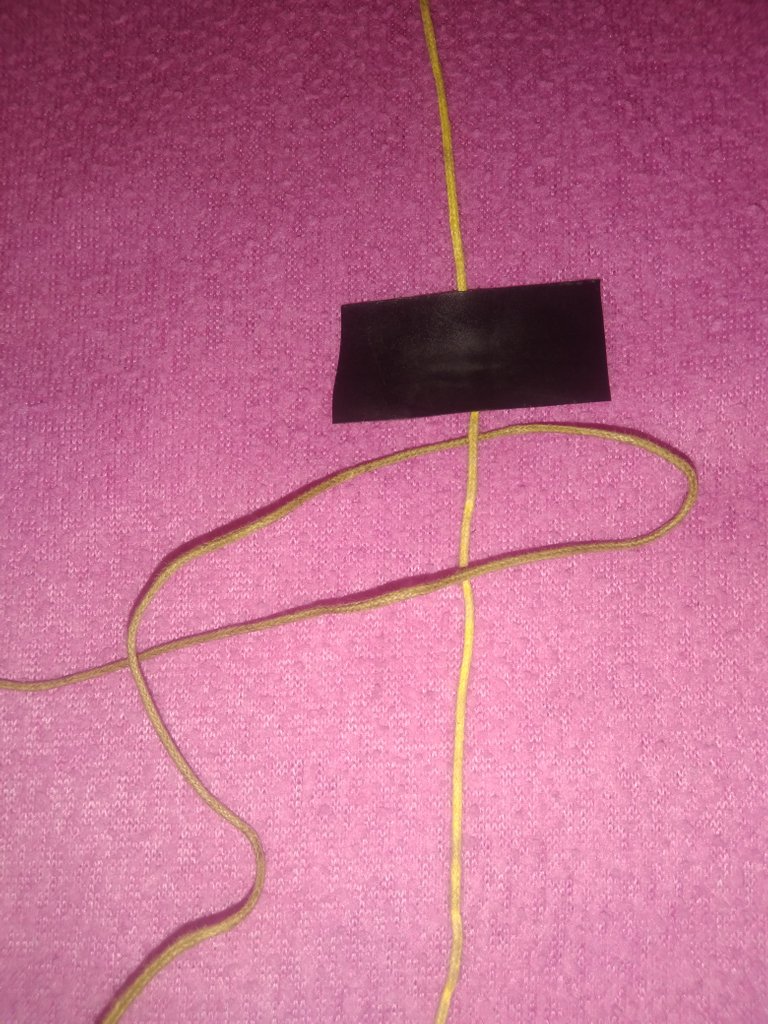
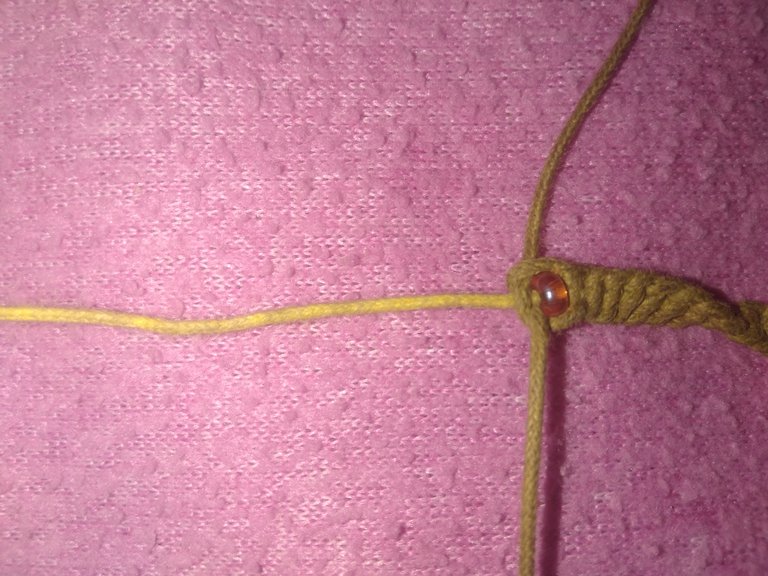
Apartaremos nuestra mostacillas y introduciremos el hilo de 150cm por debajo del anterior,lo hubicamos en el centro para comenzar a tejer.
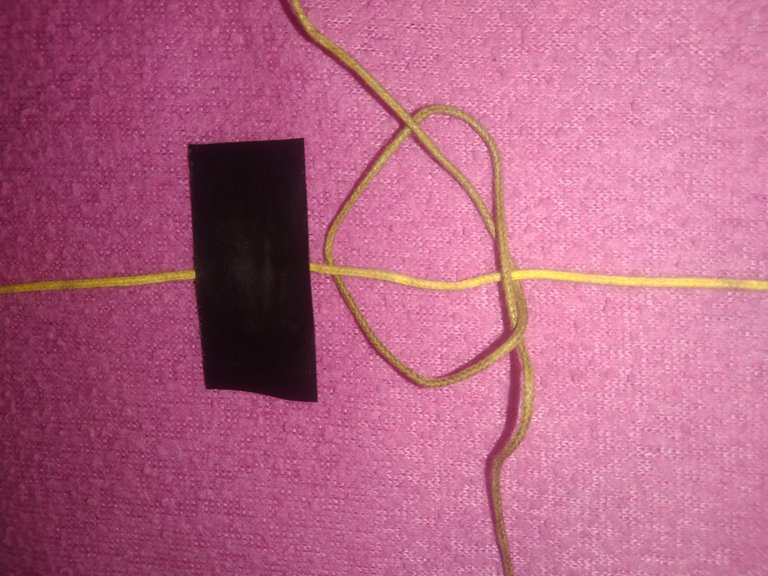
Tomamos el hilo de la derecha,lo pasamos por encima del que está en el centro
El de la izquierda lo pasamos por encima del anterior.
y a su vez por debajo de la intercesión de los hilos,Paso por el bucle halo y aprieto.
Paso 4
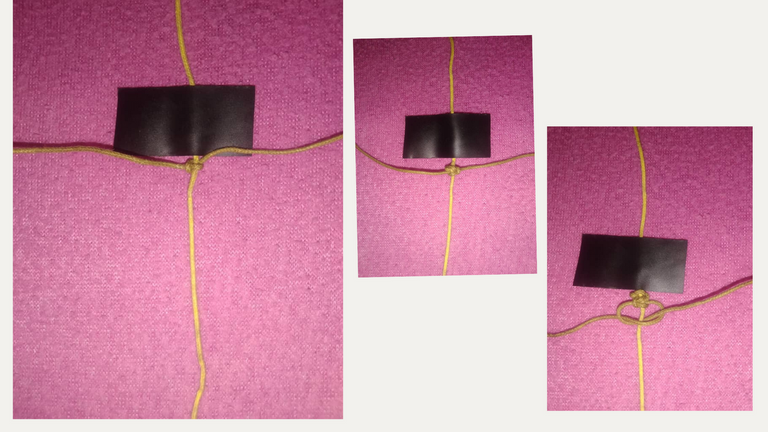
Ahora pasamos el hilo de la izquierda por encima del que está en el centro

el de la derecha por encima del de la izquierda pasamos por la intercesión del medio sacamos por el bucle y halamos nuevamente y tenemos nuestro nudo plano completo.

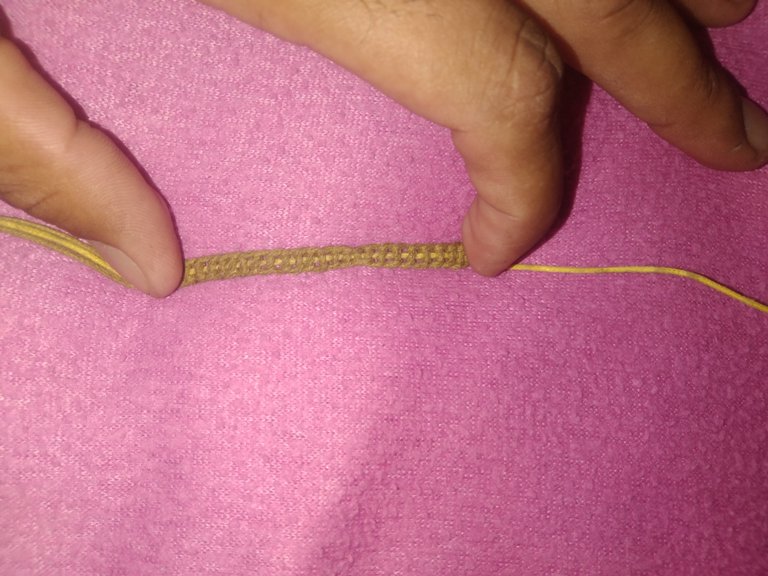
Seguiremos el tejido de derecha a izquierda y de izquierda a derecha,con el mismo procedimiento hasta tener el largo que usted desea.
Paso 5
Lo siguiente es llevar nuestra mostacilla pequeña,y vamos a seguir tejiendo con la misma técnica,de derecha a izquierda y de izquierda a derecha.
Paso 6
Llego el momento de hacer nuestras flores,para ello Tomaremos 2 mostacillas de color verde y la introduciremos por ambos extremos de nuestro hilo,haremos 2 nudos ya que estas serán las hojas de nuestras coloridas flores.
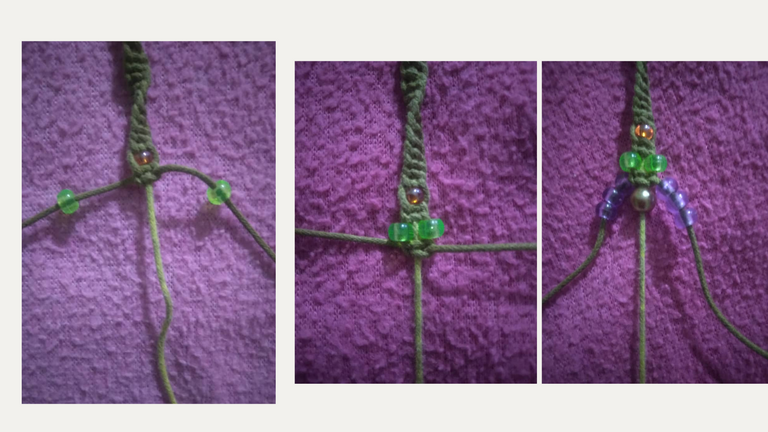
Continuaremos con nuestro proceso y nuevamente tomaremos los extremos de cada hilo y introduciremos 3 mostacillas de color morado por ambos lados,luego subiremos la perla dorada y comenzaremos a formar nuestra colorida flor,ya completado el proceso,seguiremos con la técnica del nudo plano con la que venimos trabajando .
Paso 7
El próximo paso es terminar nuestras flores coloridas,seguiremos el mismo procedimiento del paso anterior,colocando2 mostacillas verdes haremos 2 nudos y luego 3 mostacillas en cada hilo,en este caso de color amarillo,colocamos nuestra perla y cerramos la flor con nuestra técnica del nudo plano.

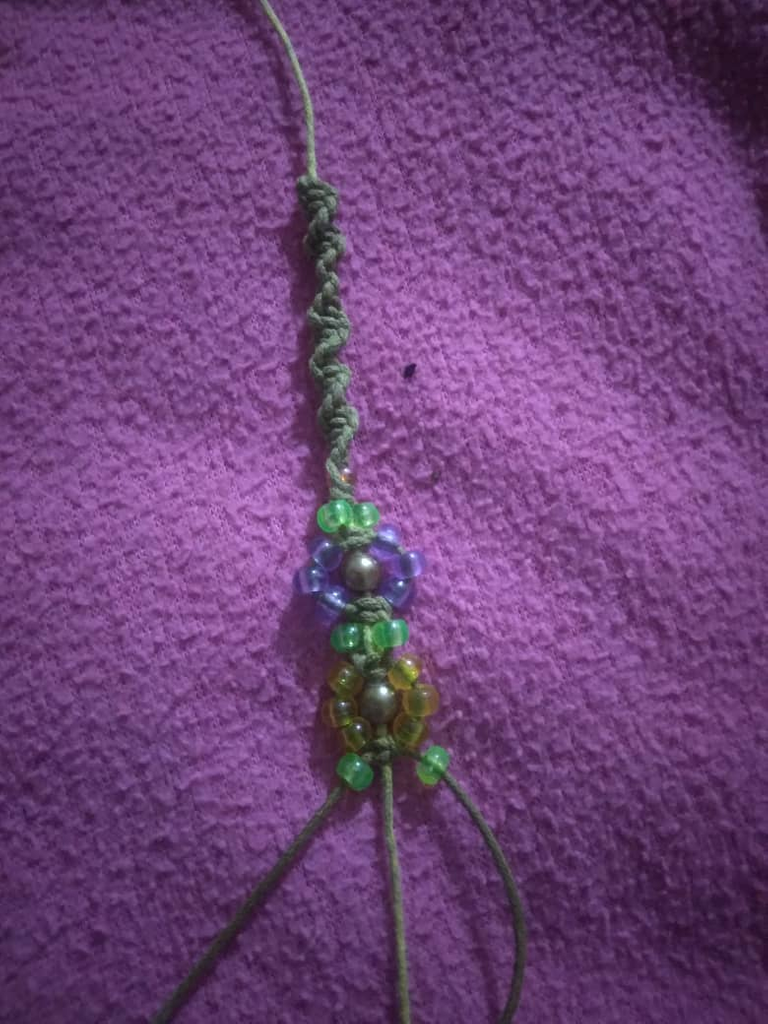
Seguiremos el mismo proceso para completar nuestra última flor,estas quedaron de la siguiente manera.
Paso 8
Habiendo incorporado la última mostacilla pequeña,seguiremos el mismo tejido hasta llegar al mismo tamaño que el anterior
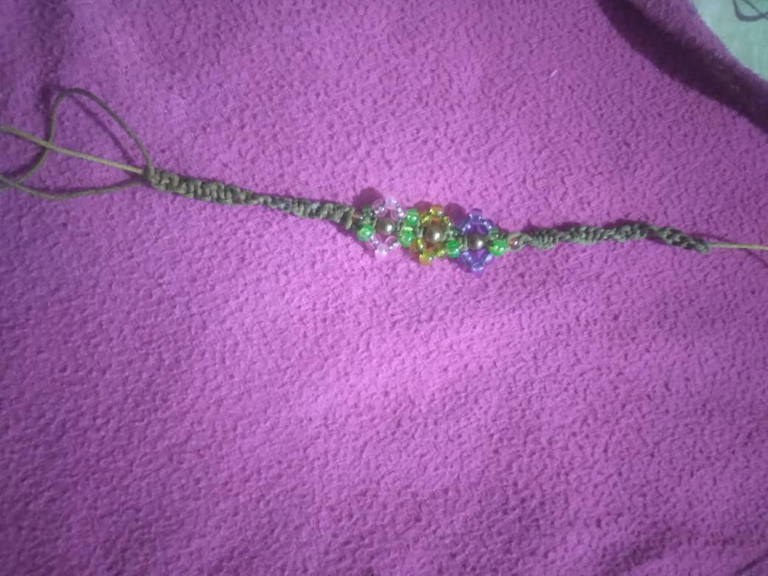
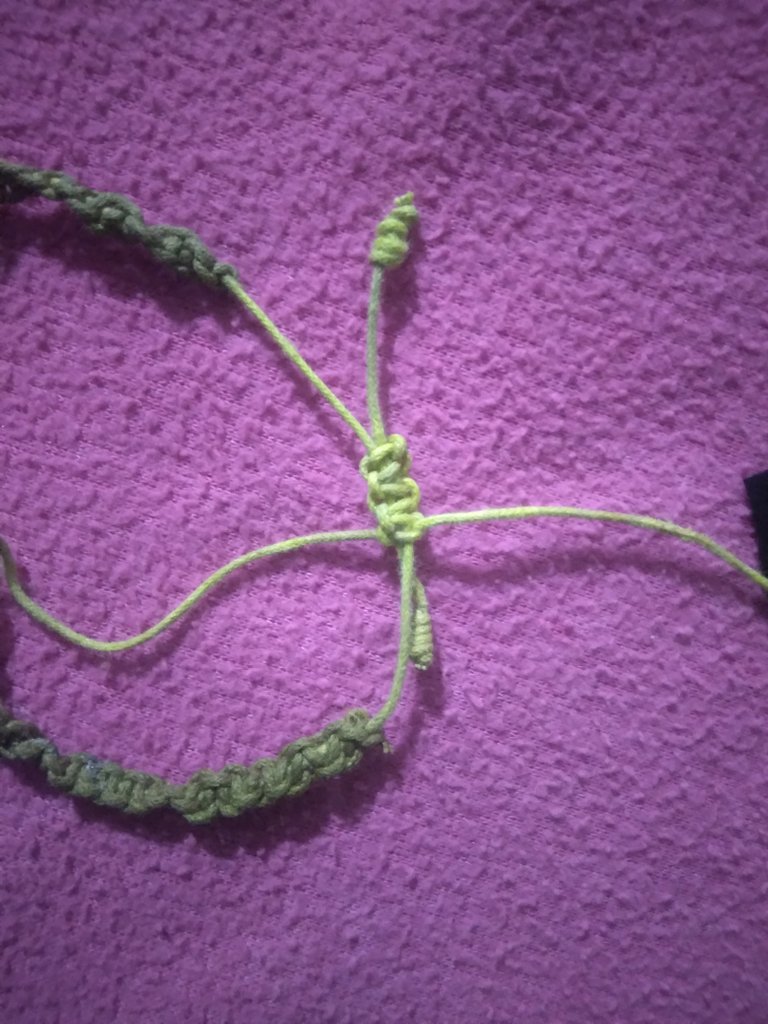
Lo siguiente es cortar el excedente sellar con nuestro encendedor,en el hilo que nos quedo realizaremos un nudo franciscano de la misma manera que al iniciar el procedimiento
Paso 9
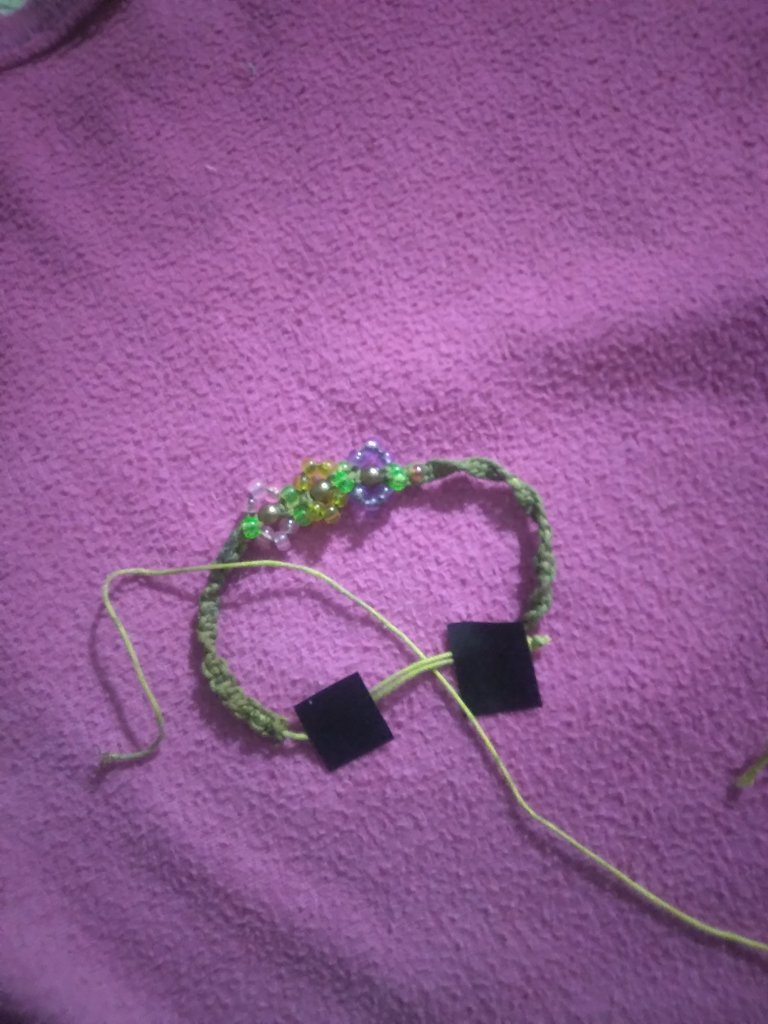
Ya para cerrar la pulsera la hubicamos de esta manera vamos a colocarle cinta elástica para que no se nos mueva
Con 20 cm de hilo que nos haya quedado introduciremos por debajo de nuestros hilos,realizaremos varios nudos planos y ya está cerrada nuestra pulsera.
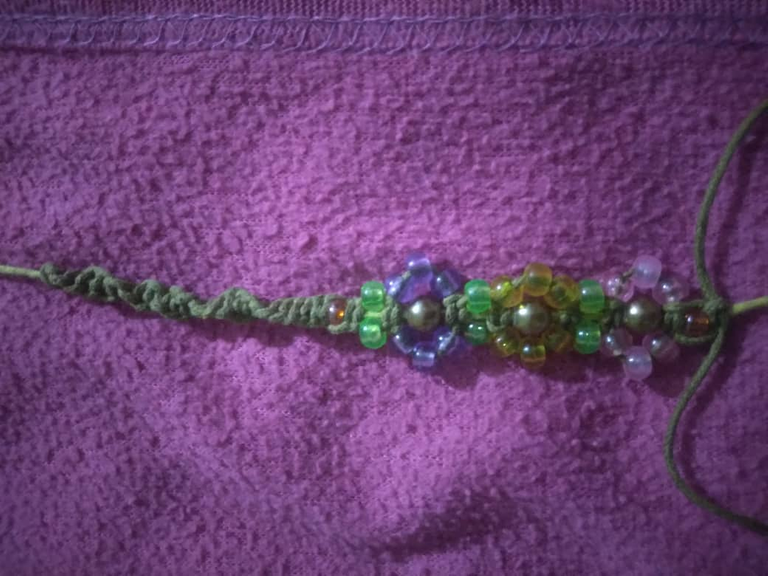
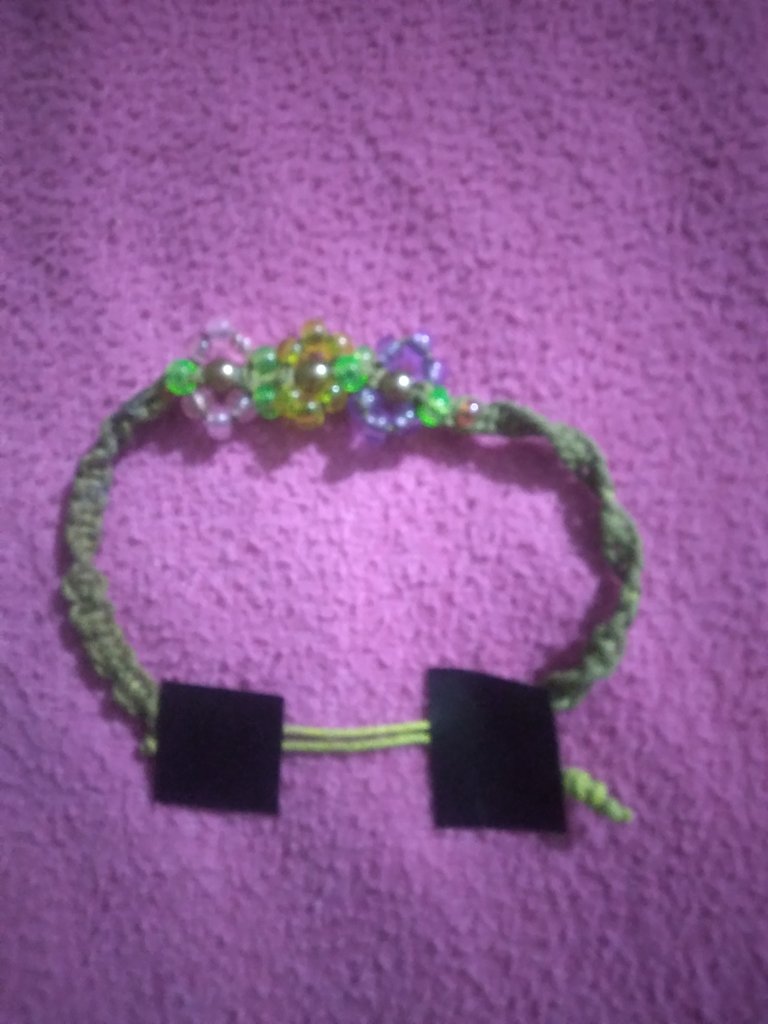
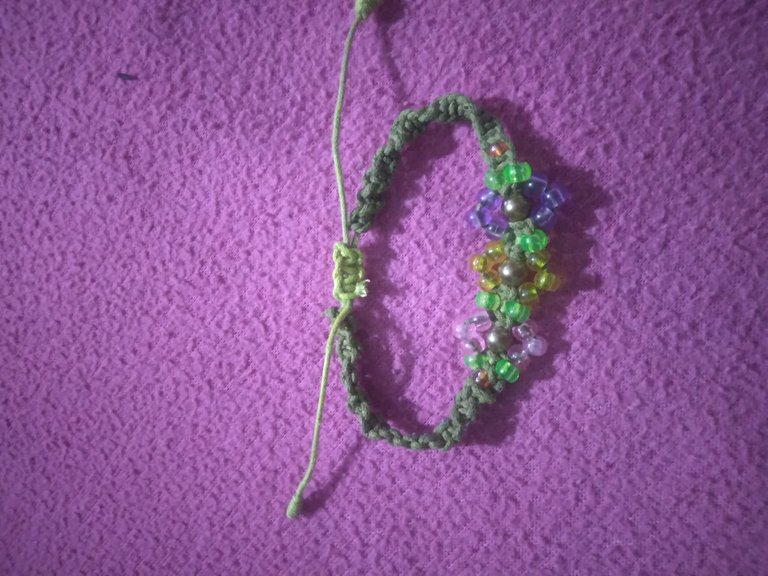
De este modo hemos culminado con el proceso de elaboración de esta hermosa pulsera colorida,Este tipo de flores esta de moda en estos dias,si ustedes quieren pueden hacerlas de diferentes colores o combinar,todo depende de su creatividad.espero que les haya gustado este paso a paso. Espero sus comentarios o sugerencias gracias por su atención se les quiere🤗
Que Dios me los bendiga EXITOS!
Las fotos las edite mediante la aplicación editor de fotos polish
las fotos son de mi autoria y fueron tomadas por mi teléfono Samsung A01.
Traductor utilizado:Deelp traductor
los separadores fueron editados mediante la aplicación editor de fotos canva .
Hello dear colleagues, it's a pleasure to greet you!
It is a pleasure for me to be again in front of this great family of hive and the beautiful people of @jewerly,today I have come to bring you a beautiful pear of 3 colors,and is that I definitely love flowers,that's why I have brought you this beautiful bracelet with colorful flowers convidado with a touch of macrame,and giving it a touch of glitter with these golden ballerinas,
The materials used in the elaboration of this beautiful and colorful flower bracelet are all reused or recycled and are as follows:
🌺8 GREEN COLORED BEADS.
🌺6 GREEN BEADS
🌺6 PINK COLORED BEADS
🌺6 BEADS OF YELLOW COLOR
🌺3 MEDIUM GOLDEN BEADS
🌺2 SMALL BEADS
🌺50cm of 0.8 millimeter Chinese thread
🌺150cm OF 1MILLIMETER CHINESE THREAD
🌺1 SCISSOR
🌺1 LIGHTER
🌺ADHESIVE TAPE OR TEIPE
🌺1 PIECE OF STRAW
The elaboration of our bracelet consists of several steps that I am going to show you next
Step 1
The first thing we will do is to take our 50cm thread and with the help of our straw we will make a Franciscan knot at one end.
From right to left we will give it approximately 6 turns, when we have finished, we take the thread and we pass it through the inside of the straw, taking it out little by little with great care.
The next thing to do is to cut the excess, and seal it with our lighter.
Step 2
The next thing we will do is to leave approximately 7 cm of our thread, we put elastic tape on it so that it will move and we can work comfortably.
The next thing we will do is to burn the ends with our lighter so that the beads can easily enter,
We will take the end of the thread and we will introduce mainly 1 small bead, followed by the 3 pearls and finally the other small bead.
Step 3
We will put aside our beads and we will introduce the thread of 150cm below the previous one, we will place it in the center to begin to weave.
We take the thread on the right, we pass it over the one in the center.
the one on the left, we pass it over the previous one.
and in turn underneath the yarn intersection, I pass through the halo loop and tighten.
Step 4
Now pass the yarn on the left over the one in the center.
the one on the right over the one on the left, pass through the middle intersection, pull through the loop and pull again and we have our complete flat knot.
We will continue weaving from right to left and from left to right, with the same procedure until we have the length you want.
Step 5
The next step is to take our small bead, and we will continue weaving with the same technique, from right to left and from left to right.
Step 6
It's time to make our flowers, for this we will take 2 green beads and introduce them at both ends of our thread, we will make 2 knots as these will be the leaves of our colorful flowers.
We will continue with our process and again we will take the ends of each thread and we will introduce 3 beads of purple color for both sides, then we will raise the golden pearl and we will begin to form our colorful flower, already completed the process, we will continue with the technique of the flat knot with which we have been working.
Step 7
The next step is to finish our colorful flowers,we will follow the same procedure of the previous step,placing 2 green beads we will make 2 knots and then 3 beads in each thread,in this case yellow,we place our pearl and close the flower with our flat knot technique.
We will follow the same process to complete our last flower, these were as follows.
Step 8
Having incorporated the last small bead, we will follow the same weaving until we reach the same size as the previous one.
The following is to cut the excess, seal it with our lighter, in the thread that is left we will make a Franciscan knot in the same way as at the beginning of the procedure.
Step 9
Now to close the bracelet we place it in this way we will place elastic tape so that it does not move.
With 20 cm of thread that we have left we will introduce under our threads, we will make several flat knots and our bracelet is already closed.
In this way we have culminated with the process of making this beautiful colorful bracelet,This type of flowers is fashionable these days,if you want you can make them in different colors or combine,it all depends on your creativity.I hope you liked this step by step. I look forward to your comments or suggestions thank you for your attention you are loved🤗
May God bless you all SUCCESS!
I edited the photos using the polish photo editor application.
The photos are my own and were taken by my Samsung A01 phone.
Translator used:Deelp translator
The separators were edited using the photo editor application canva .


