Our conundrum was what to do with a narrow sloping sandy walkway next to the garden cottage cum bnb that is in a shaded area. There is no need for anyone to walk there, but it needed some sprucing up!
We had spent quite a bit in the past on planting sods of shade grass, tried it on two occasions but the gorgeous thick green grass soon turned into a dull straw colour until it eventually died!
We soon realised we would have to do something different and use manmade material; someone's suggestion of artificial grass however was a definite no-no!
Hubby who is a retired civil engineer, decided to build a permeable walkway on the side of the garden cottage, between the concrete boundary wall and the one side of the cottage, using a concrete grass block filled with pebbles, not grass!
This image below shows the pathway with the cottage wall on the left hand side - the cottage was built with pink quartzite sheared blocks; enhanced by colours used in the pathway.
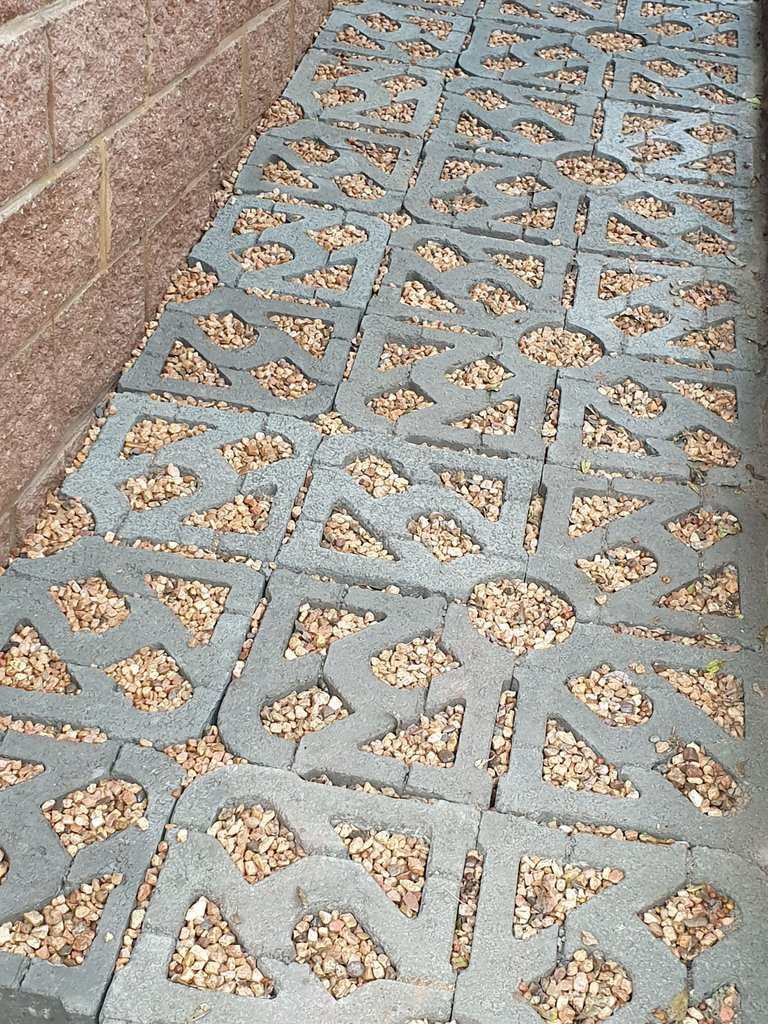
When I first saw these concrete grass blocks, they were an ugly dark colour, but that was because it was not properly cured at that stage.
I was totally ignorant of the amount of work that had to be done before the pretty pathway would be complete and we could start planting in the existing planters we built previously in an attempt to grow vegetables! Of course not having enough sun there plus having wild monkeys that troop through the garden, we had very little crop, so gave up on that!
The pathway was built on a slightly sloped area which had to be shaped before the trench was dug.
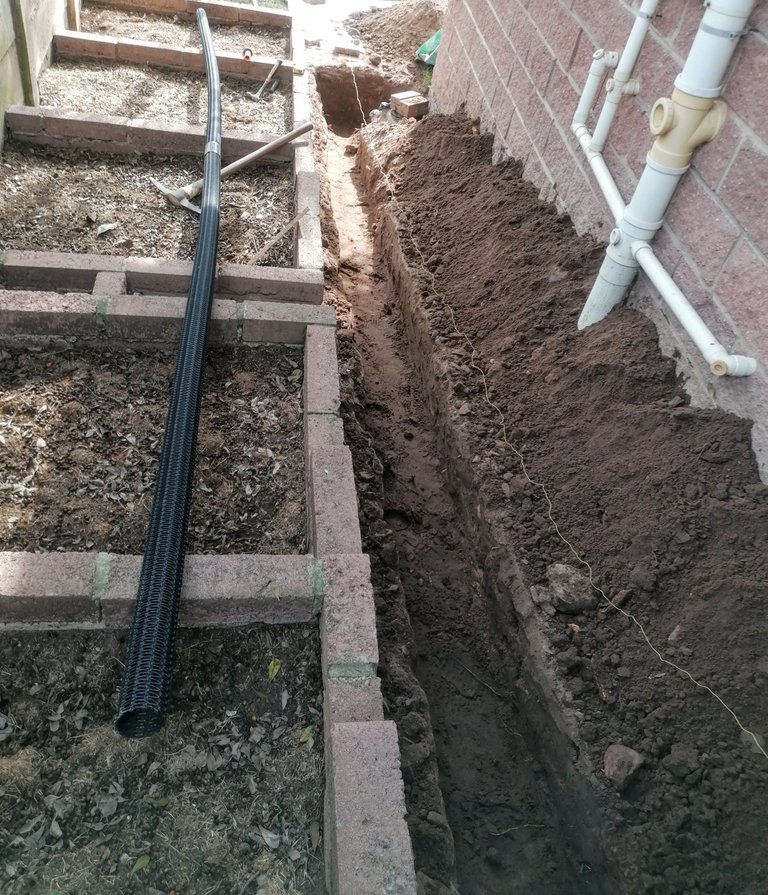
Hubby explained that the trench had to be dug in the centre of the pathway, for the placing of a French drain consisting of a geo-pipe placed in a stone wrapped geo-fabric.
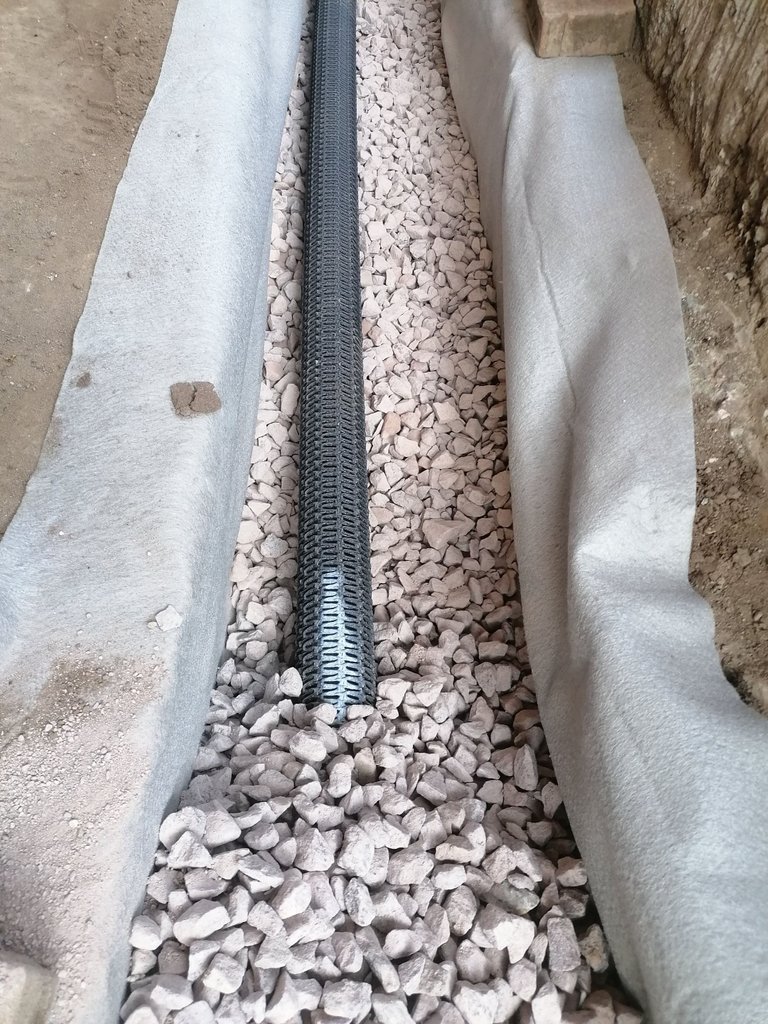
This was to catch run-off and seepage water during heavy rainfall to prevent erosion of the natural ground.
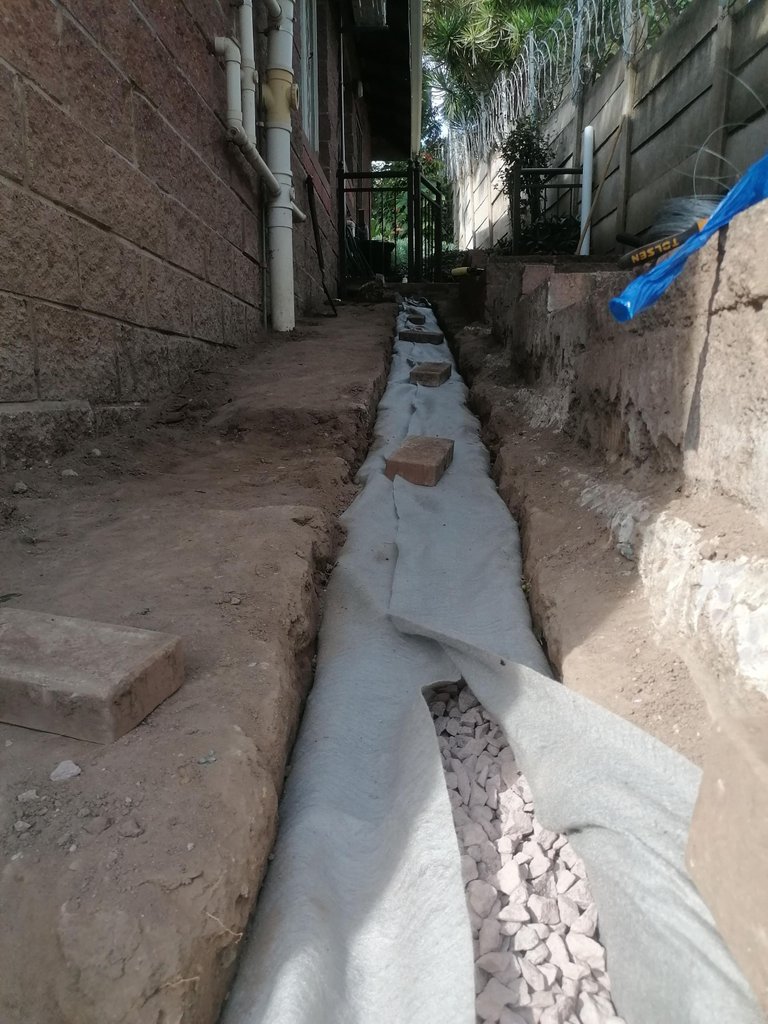
There was an existing inlet grid at the top of the walkway to collect surface water from the paved patio. This inlet is connected to an existing storm-water pipe and the new geo-pipe was connected into this pipe lower down which leads into a large soak-pit hubby built years previously.

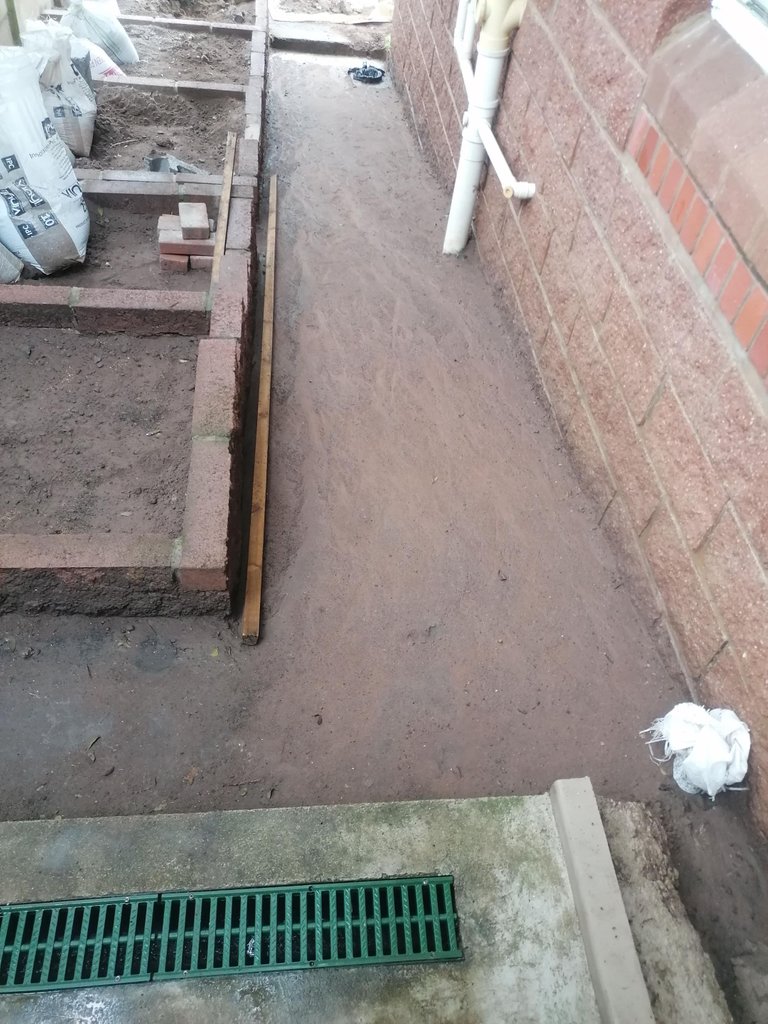
The ground was now finally shaped and at the right level, in readiness for the placing of the blocks.
Not until it was covered with a geo-fabric topped with Umgeni sand!
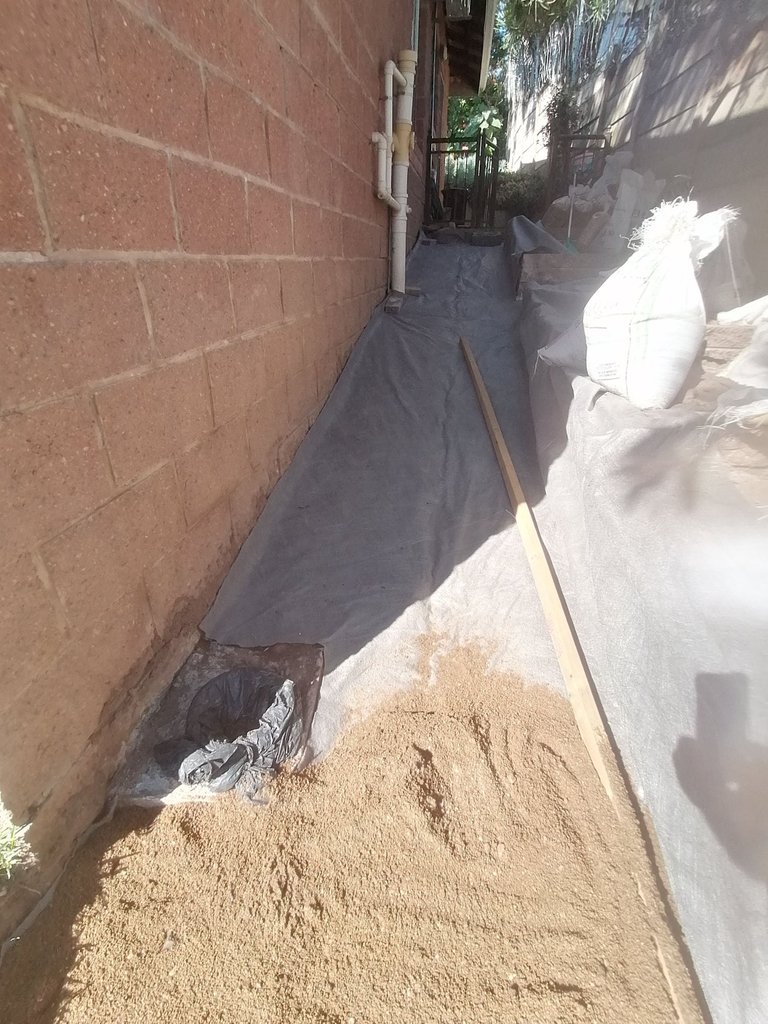
I stopped asking questions and checking progress at this stage as I was only interested in seeing the job completed!
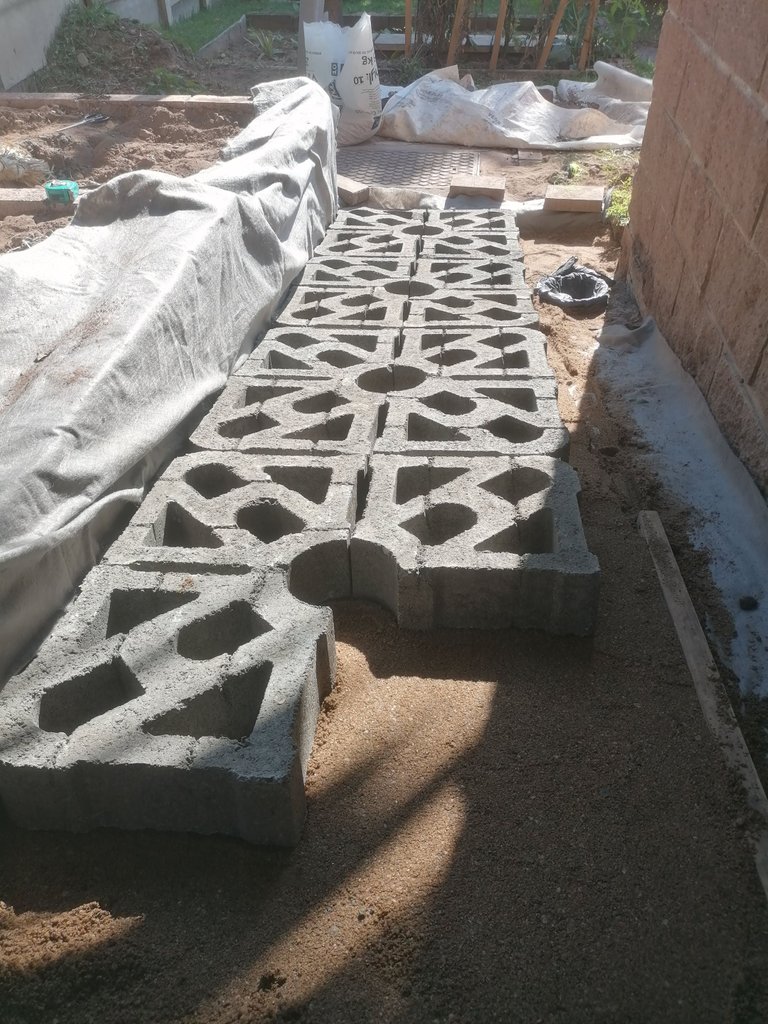
This is when I became interested again!
The grass blocks were filled with a combination of concrete stones at the bottom and Duzi pebbles on top.
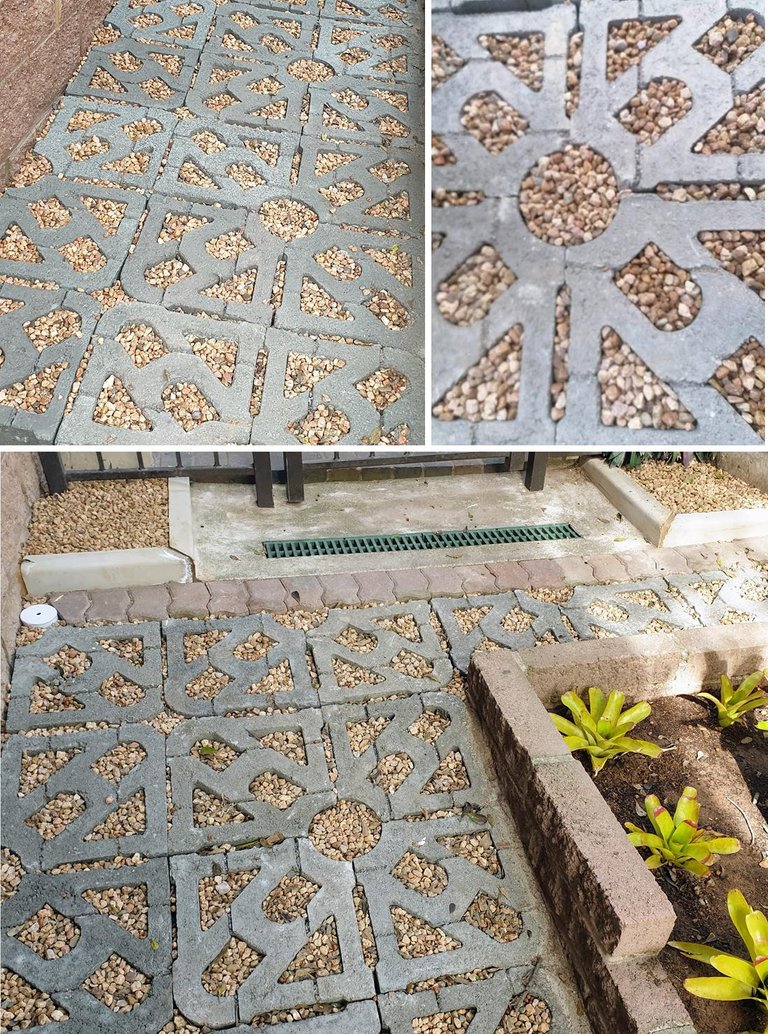
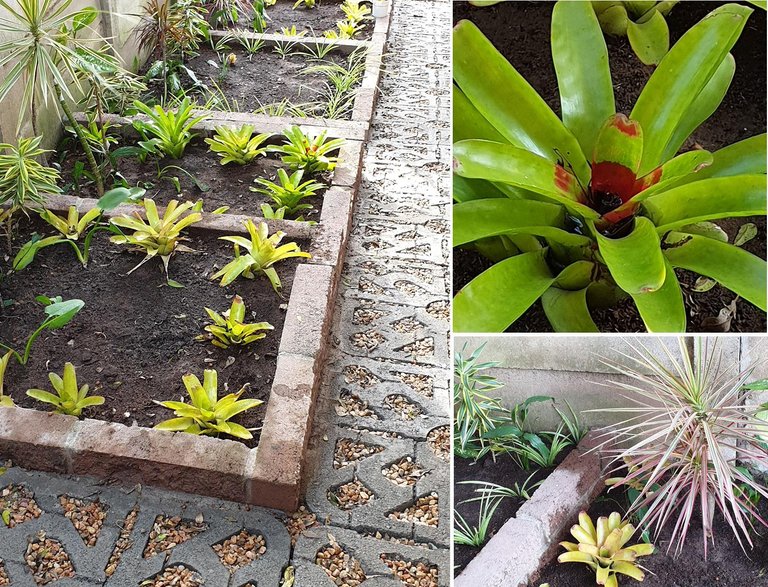
We're being very careful in selecting shade plants and have started planting. We're sure this area will be as lush as the rest of our garden soon, but are very happy with the way this pathway has turned out, although that section of the garden is still a work in progress as we now have a large Wild Plum Tree that's roots are starting to pop up from underground just around the corner from the pathway, so that will be our next project.


Banner created by @zord189
Original Content by @lizelle
Thank you for stopping by
Copyright @lizelle – All Rights Reserved

Do you know this Badge?

It says "Thank you for partnering with the Papillon Foundation by participating in the
Weekly Hive Charity Giveaway."
Do you want this Badge?
If you like this badge and if you want to help too, you can learn more about @combination and the badge in their blog post:
Some Exciting News! Badge release!

CLICK IMAGE IF YOU WISH TO JOIN SILVER BLOGGERS:

Banner created by @derangedvisions
[//]:# (!pinmapple -29.888832 lat 30.923004 long Lily's Cottage, Queensburgh d3scr)


