Para los que no conocen este programa es una herramienta vectorial, basados en software libre, cuyos formatos de archivos son en .svg, este formato tiene como ventaja que permite obtener una gran calidad de la imagen y adaptarla a cualquier tamaño sin perder la nitidez.
Está disponible para diferentes sistemas operativos como Linux, Windows y Mac. Se puede descargar en la siguiente dirección link
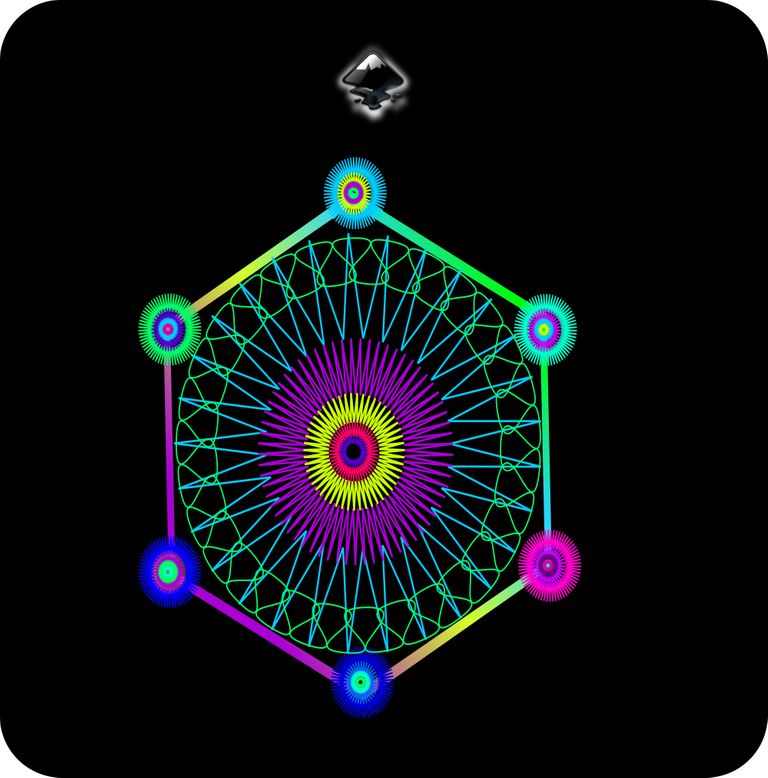
A continuación les voy a mostrar los pasos:
Diseño Abstracto Hexagonal en Inkscape:
Paso 1:
Abrimos el programa Inkscape y presionamos clic en la opción de crear estrellas y polígonos, se selecciona el polígono de seis esquinas.
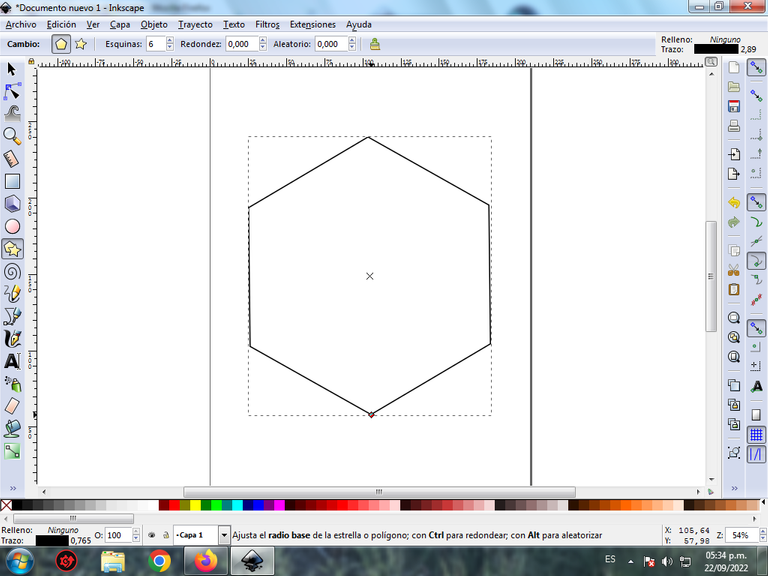
Paso 2:
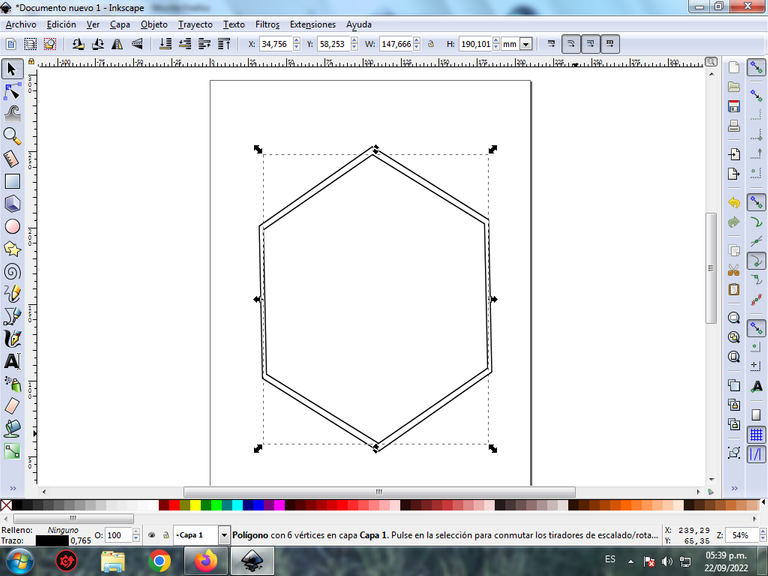
Se duplica el mismo polígono con las teclas Control + D y se desplaza para que este quede centrado dentro de la figura Hexagonal.
Paso 3:
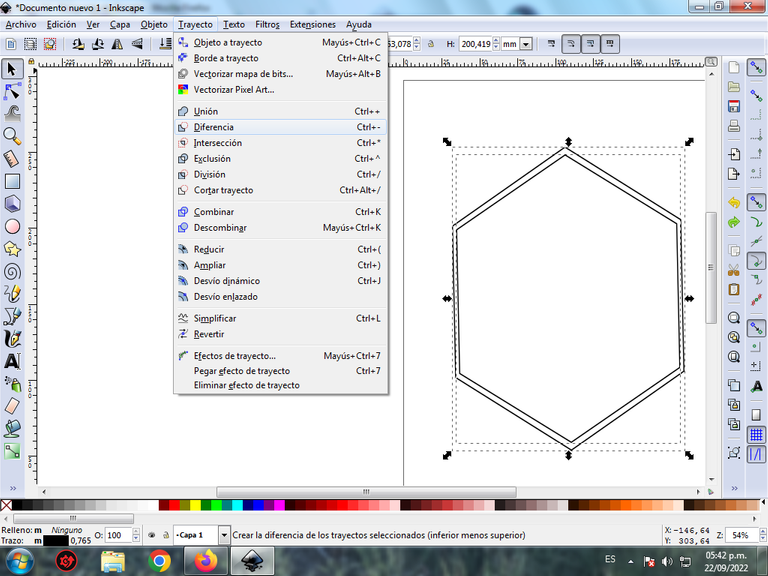
Como necesito que este polígono se vea sólo los bordes, entonces seleccionamos el primero y luego el del centro, y le damos clic en la barra de menú Trayecto - Diferencia y de esta forma se elimina el del centro, quedando solo su borde.
Paso 4:
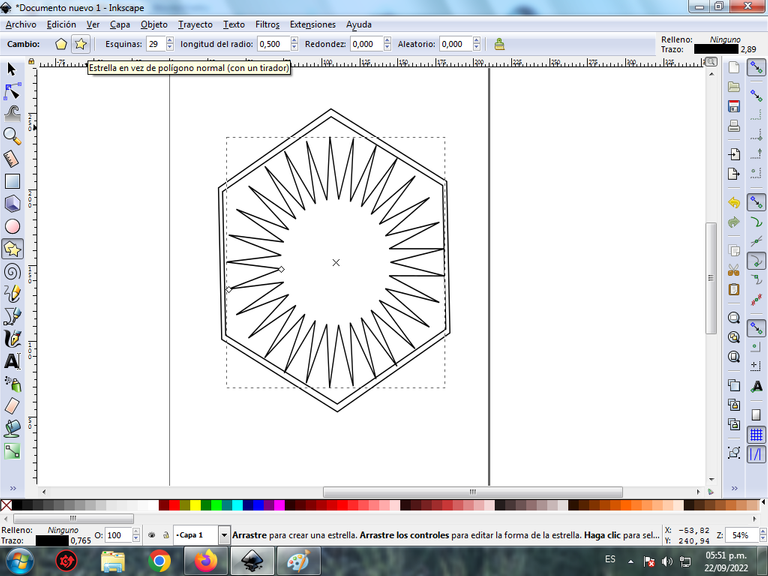
Le damos en la opción de crear estrellas de 29 esquinas y longitud de radio 0,500, para darle el efecto, abarcando toda la figura en el centro del polígono hexagonal.
Paso 5:
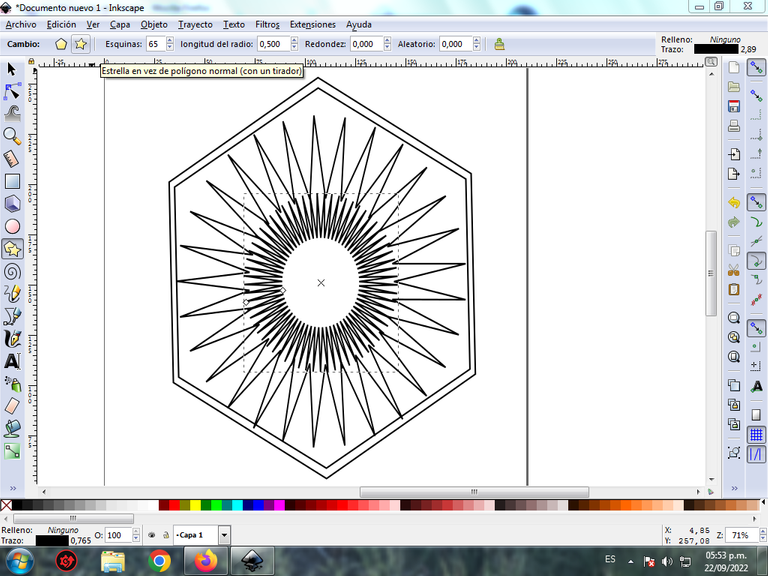
Se inserta nuevamente otra estrella de 65 esquinas, con longitud de radio 0,500
Paso 6:
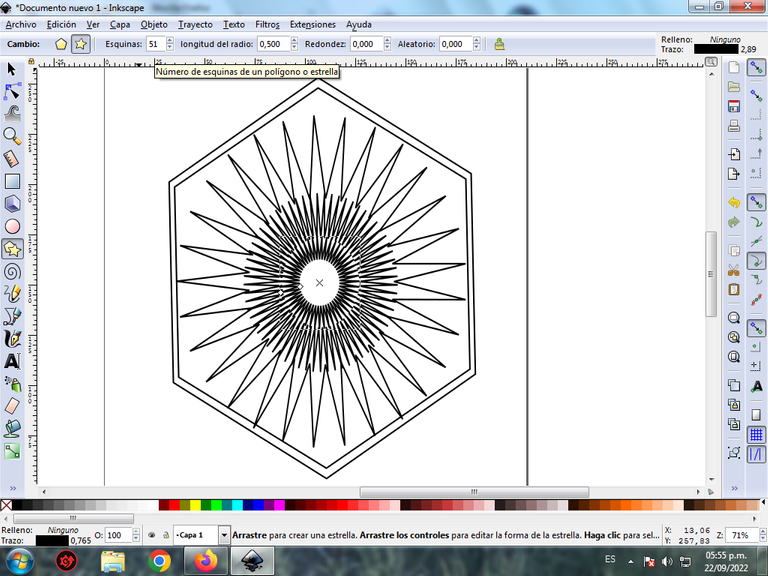
Continuamos insertando la siguiente estrella de 51 esquinas con la misma longitud de radio.
Paso 7:
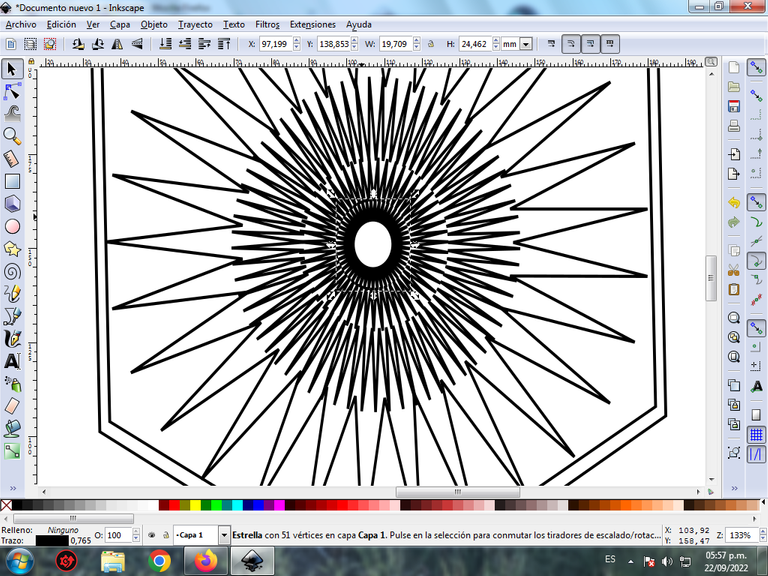
Por último se inserta la estrella de 30 esquinas.
Paso 8:
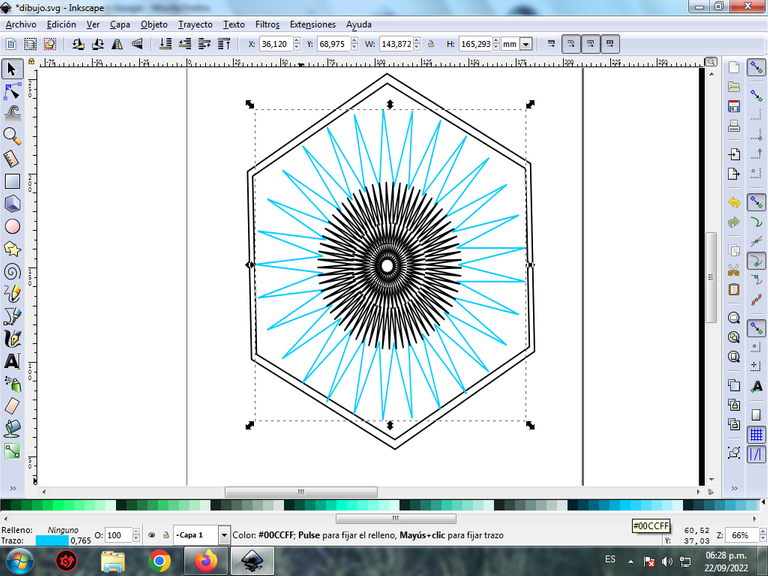
Se selecciona la estrella, y se aplica el color azul claro desde la paleta de colores, para que sea solamente a los bordes debemos presionar la tecla Shift en nuestro teclado y luego el color.
Paso 9:
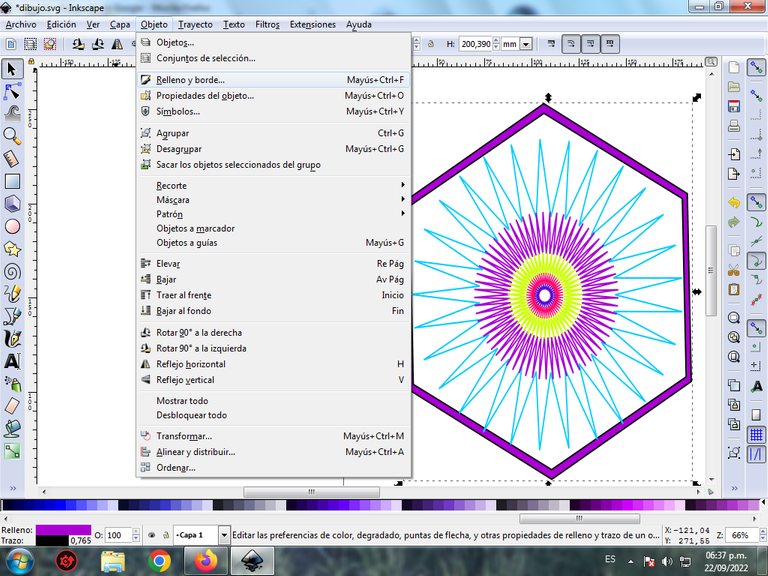
Continuamos aplicando los colores al resto de las figuras, procedemos a eliminar los bordes del la figura hexagonal, le damos clic en la barra de menú Objeto – Rellenos y bordes.
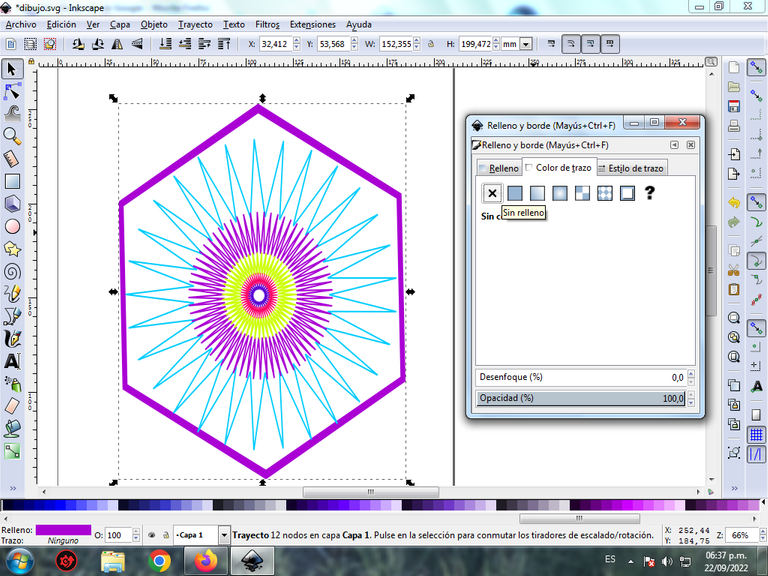
Se selecciona la pestaña de color de trazo, y presionamos clic en la X para borrar el borde de la figura, quedando así.
Paso 10:
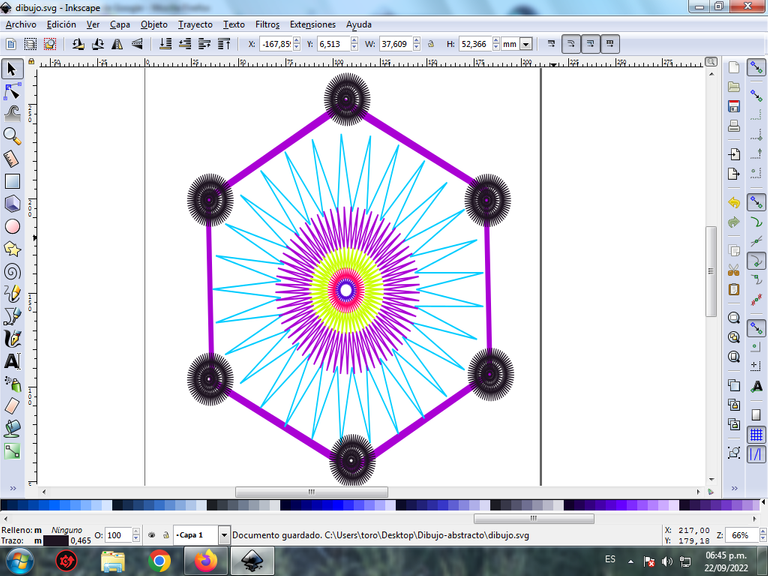
Se insertan varias figuras tipo estrellas, aplicando los pasos como se describen al principio y se ubican en cada una de las puntas de la figura hexagonal.
Paso 11:
Se aplica el color a cada una de las figuras utilizando la paleta de colores.
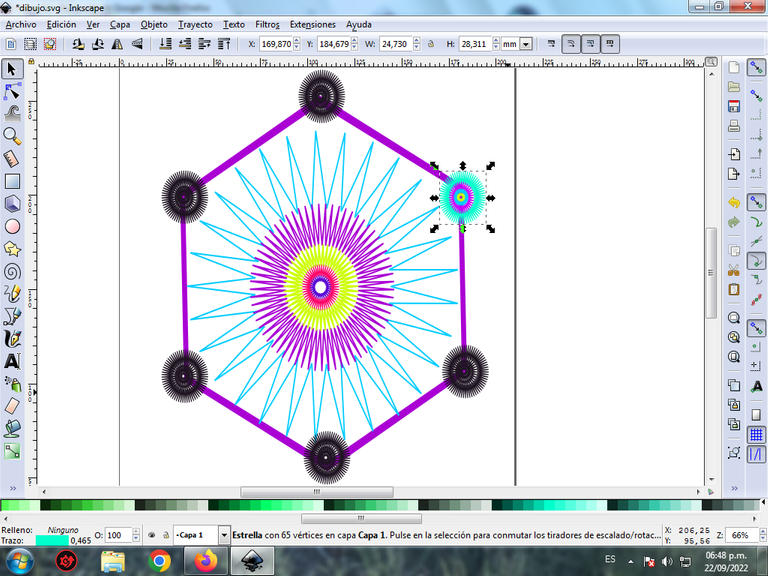
Paso 12:
Trazamos una figura tipo estrella, de 22 esquinas, longitud de radio 0,780 y redondez 1,340
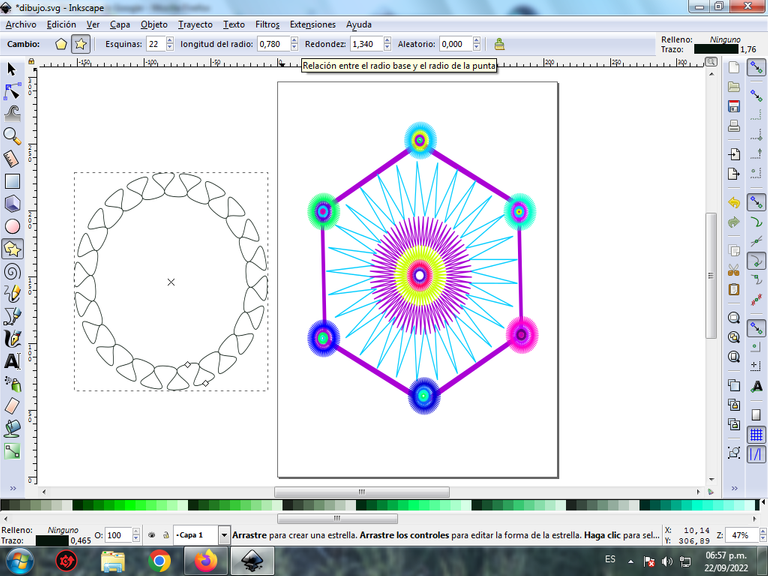
Paso 13:
Se desplaza la figura en el centro del Hexágono, quedando así.
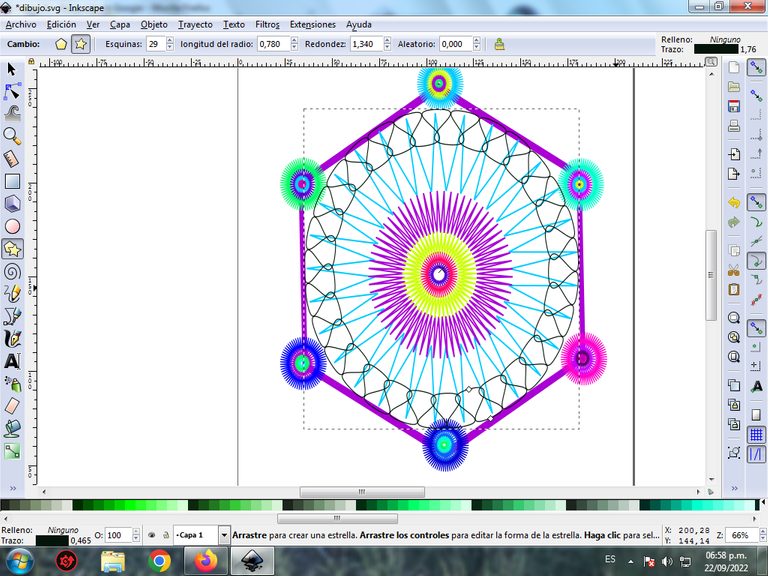
Paso 14:
Se aplica el color a la figura tipo estrella y se procede a realizar un degradado a la figura hexagonal desde la barra de herramienta de crear y editar degradado.
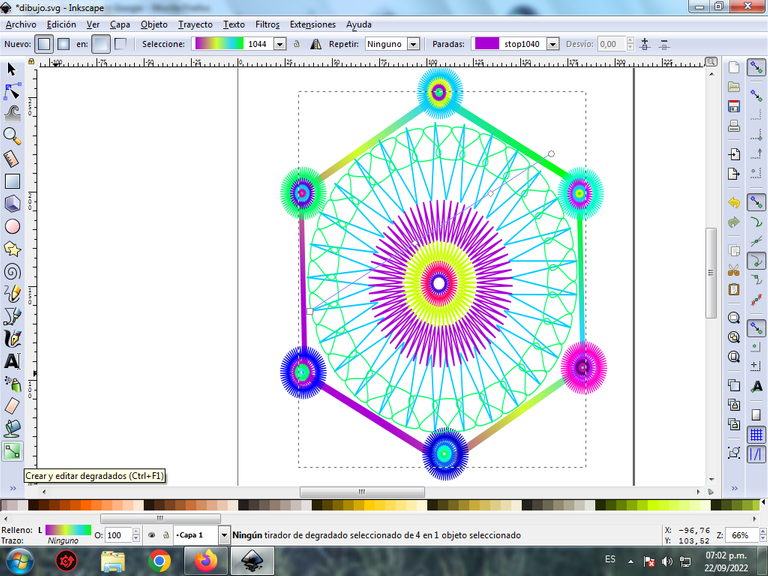
Paso 15:
Se inserta un fondo color negro para visualizar el efecto de cada una de las figuras diseñadas anteriormente.

De esta forma finalizamos nuestro diseño, espero que les haya gustado, nos vemos en una próxima publicación.
English
For those who do not know this program, it is a vectorial tool, based on free software, whose file formats are in .svg, this format has the advantage that it allows obtaining a great image quality and adapting it to any size without losing its sharpness.
It is available for different operating systems such as Linux, Windows and Mac. It can be downloaded at the following address link

I will show the steps below:
Hexagonal Abstract Design in Inkscape:
Step 1:
We open the Inkscape program and click on the option to create stars and polygons, the polygon with six corners is selected.

Step 2:
The same polygon is duplicated with the Control + D keys and moved so that it is centered inside the Hexagonal shape.

Step 3:
As I need this polygon to see only the edges, then we select the first one and then the one in the center, and we click on the Path - Difference menu bar and in this way the one in the center is eliminated, leaving only its edge.

Step 4:
We give it the option to create stars with 29 corners and radius length 0.500, to give it the effect, covering the entire figure in the center of the hexagonal polygon.

Step 5:
Another star with 65 corners is inserted again, with radius length 0.500

Step 6:
We continue by inserting the next 51 corner star with the same radius length.

Step 7:
Finally, the star with 30 corners is inserted.

Step 8:
The star is selected, and the light blue color is applied from the color palette, so that it is only to the edges we must press the Shift key on our keyboard and then the color.

Step 9:
We continue applying the colors to the rest of the figures, we proceed to eliminate the edges of the hexagonal figure, we click on the menu bar Object – Fills and edges.

The stroke color tab is selected, and we click on the X to erase the border of the figure, leaving it like this.

Step 10:
Several star-like figures are inserted, applying the steps as described at the beginning and are located at each of the points of the hexagonal figure.

Step 11:
The color is applied to each of the figures using the color palette.

Step 12:
We draw a star-like figure, with 22 corners, radius length 0.780 and roundness 1.340

Step 13:
The figure is moved in the center of the Hexagon, remaining like this.

Step 14:
The color is applied to the star-type figure and a gradient is made to the hexagonal figure from the create and edit gradient toolbar.

Step 15:
A black background is inserted to visualize the effect of each of the previously designed figures.

In this way we finish our design, I hope you liked it, see you in a future publication.
