Have you ever thought that you have all the tools it takes to get a job done?? Well I have a… lot of tools. I got random tools that I have only used once, just to get the job done right. If anyone that I know every has the same issue… “Hey, I got one, wanna borrow it?” is always my response. My tools are like friends and family tools… borrow what you need.
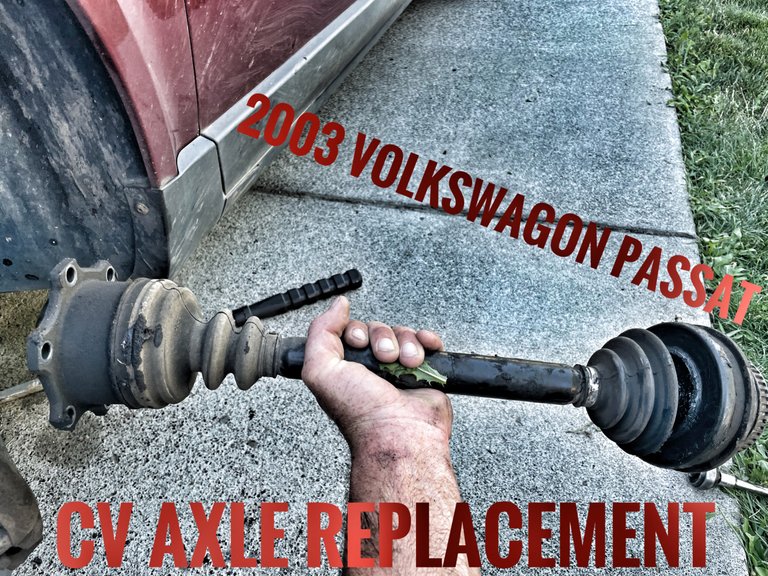
My sister-in-law has been saying that she has been hearing a clicking noise when she turns. I knew the exact problem with her 2003 Volkswagon Passat V6. One of the CV (Constant Velocity) joints is bad in her front axle. Each front axle has 2 of them.
Normally my Brother-in-law will come over use my tools and driveway and I will give him some advice on how to get at things. With him out of town working, I gotta take care of my family. That’s what the Splatts’ do. It’s only 95F outside, why not change a front CV Axle real fast… even though I have never done one on a Volkswagen before…
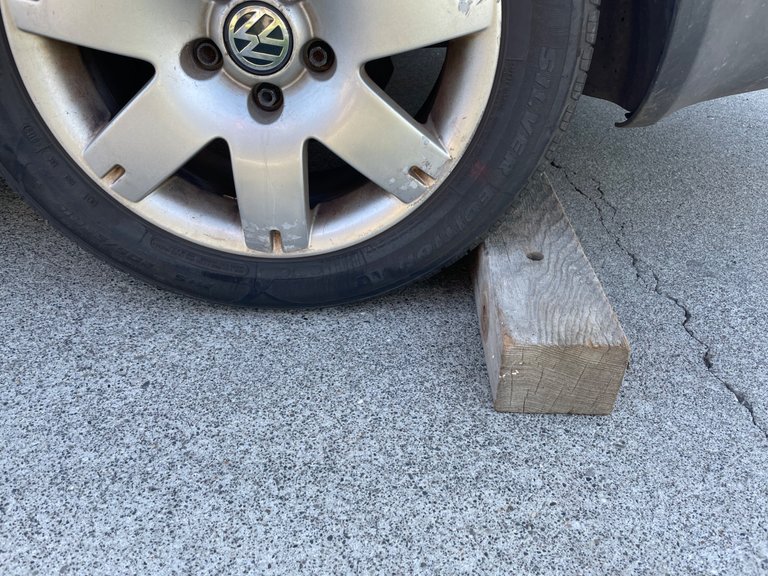
After working a 10hr day, I came home had a little refreshment and got to work on this car. Since I’m gonna be lifting the front wheels off the ground, I always set the parking brake and throw a chunk of wood behind the real wheels.
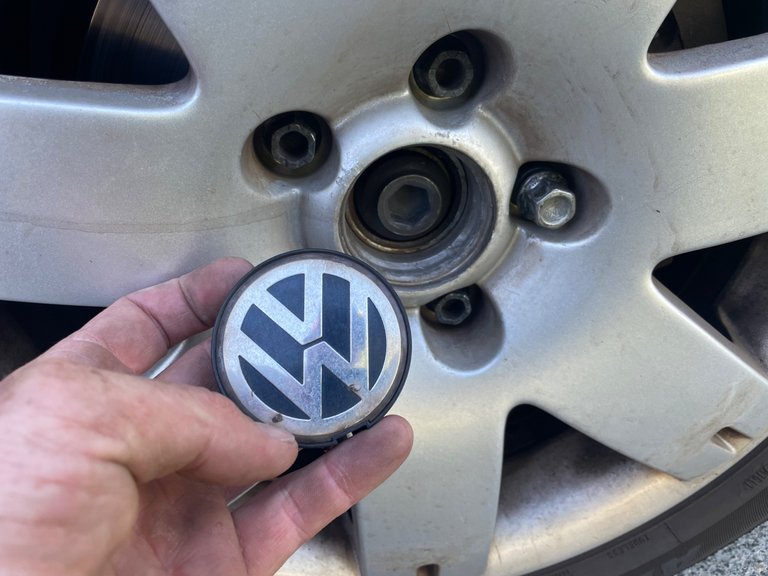
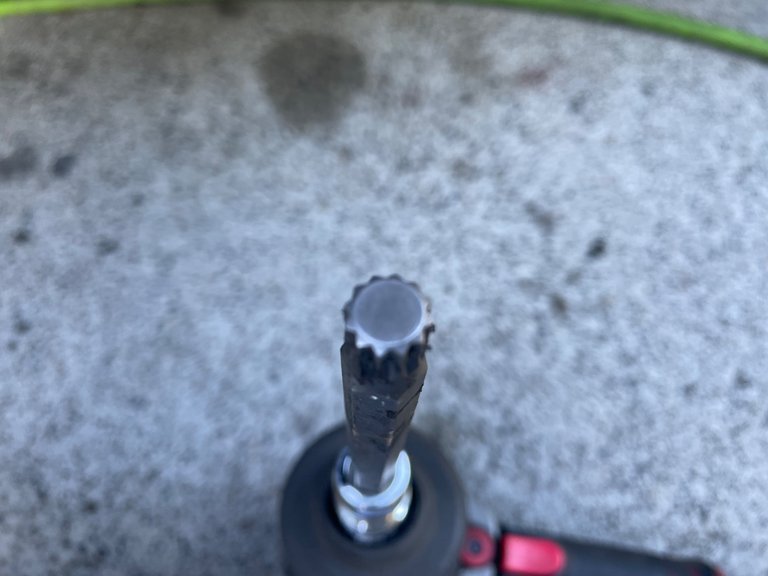
Before you go jacking the vehicle in the air, break all the wheel lug bolts loose using a 17mm socket. Also the axle bolt need to be broke loose. So remove that little center cap with a flat head screwdriver and that gives you access to the axle bolt
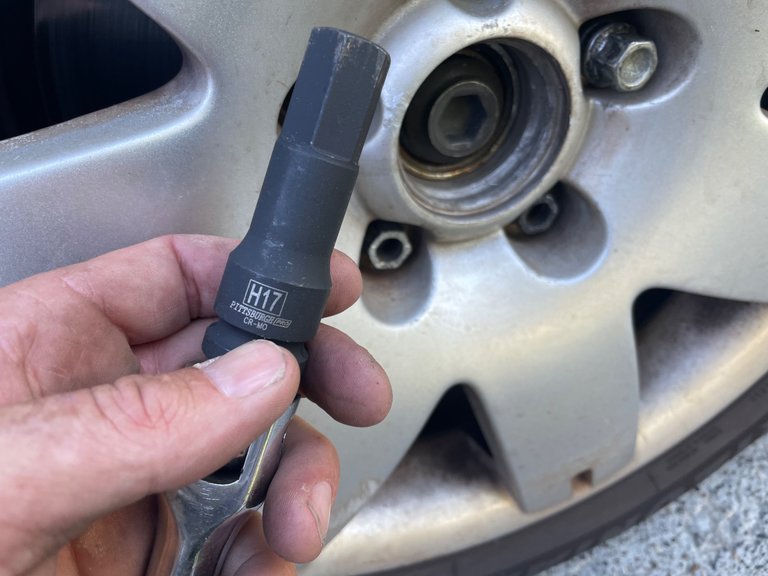
To loosen the axle bolt you will need a 17mm Hex head socket. I just slapped it on my air impact gun and gave it one good hit and it was loose.
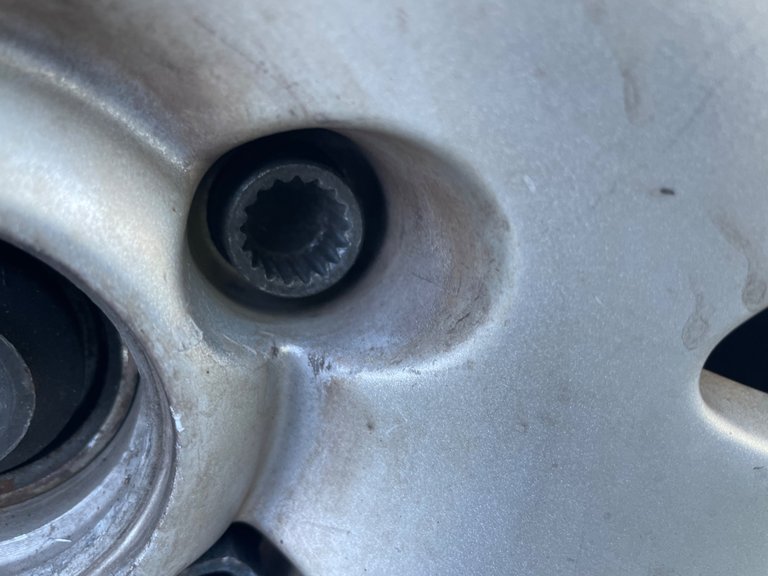
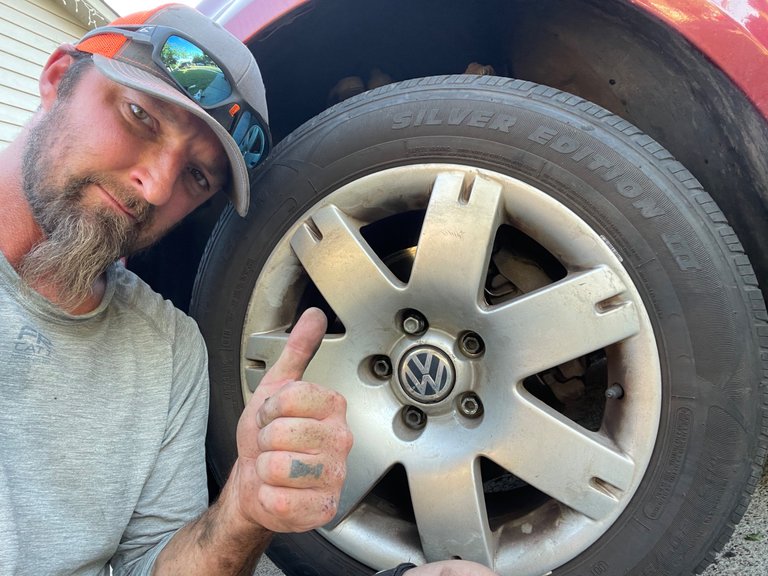
Then I cracked the lug bolts loose. Yes, lug bolts, they aren’t lug nuts. Plus they have a sort of anti-theft wheel lug bolt that takes a special key. I’m glad it was in the center console…
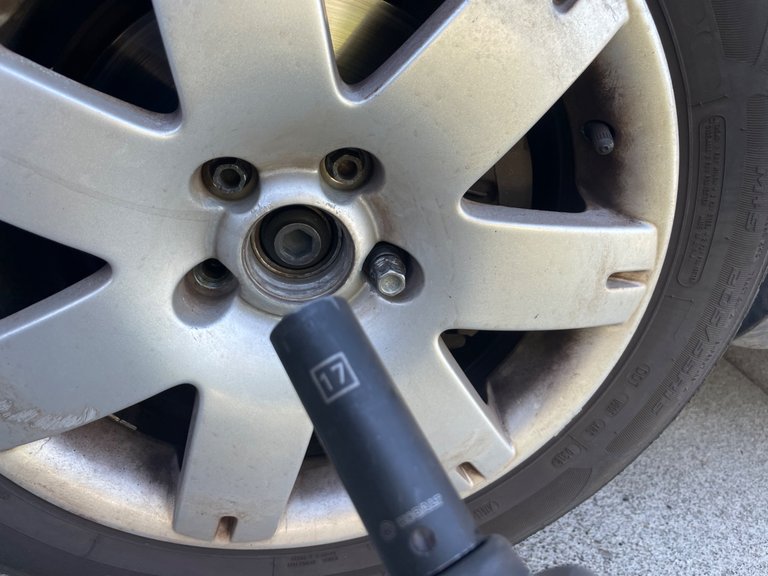
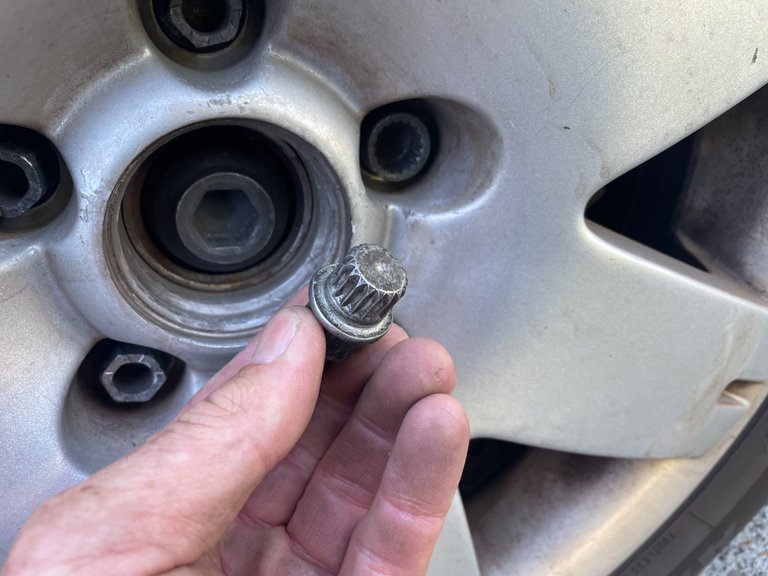
The Key allows a 17mm socket to fit on the other end.
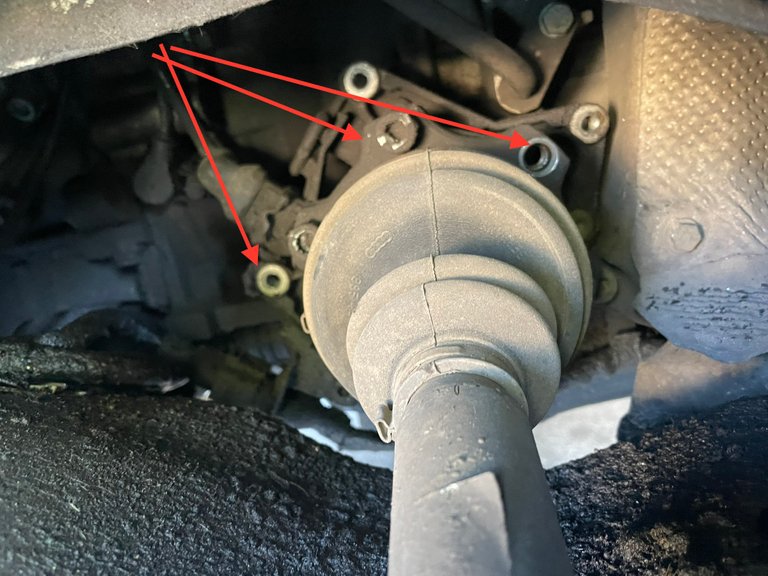
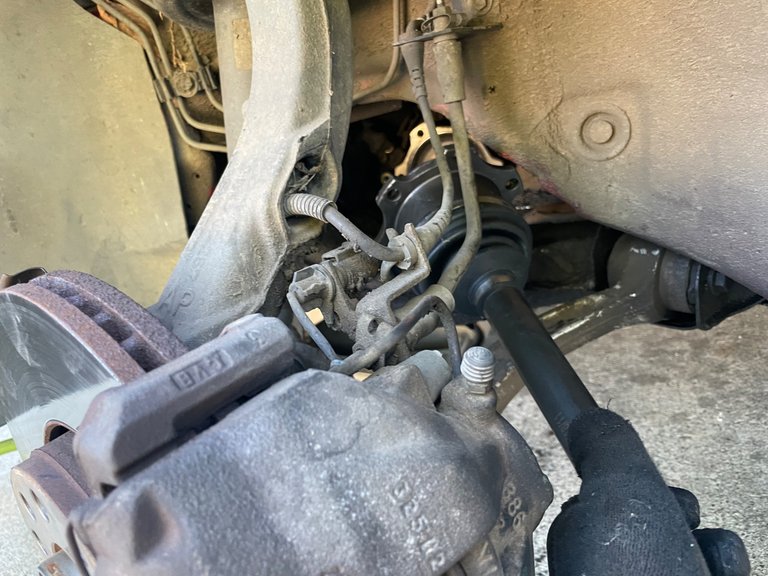
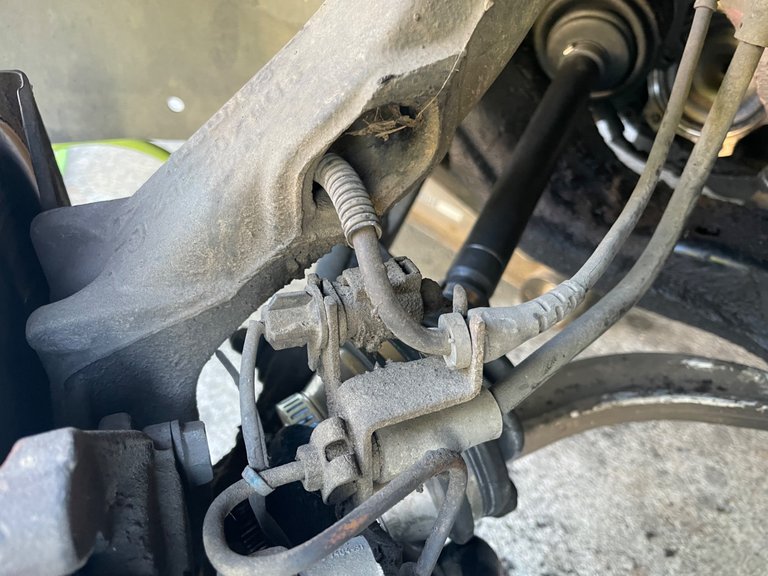
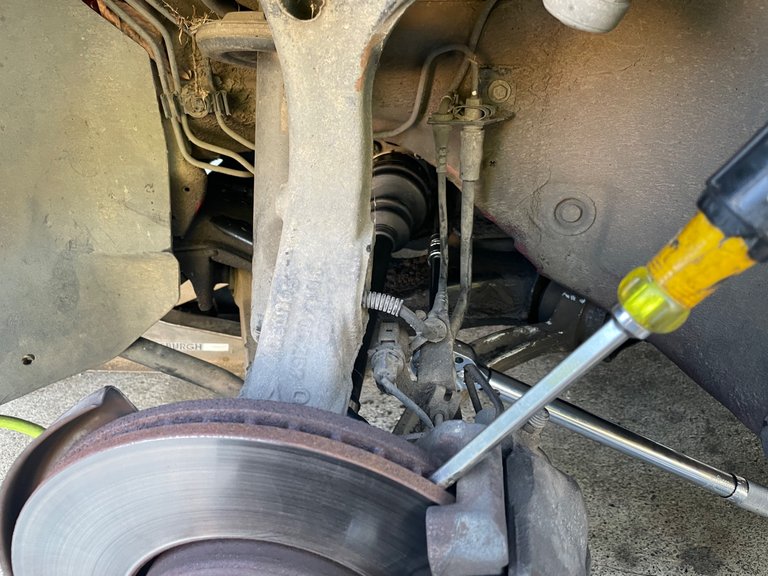
Once the tire is removed, there is a heat shield that covers the inner CV joint. A 6mm hex socket and an extension reaches in there nicely. This is the driver side and to better gain access turn the wheel all the way to the right. There are 3 bolts that hold the heat shield in place.
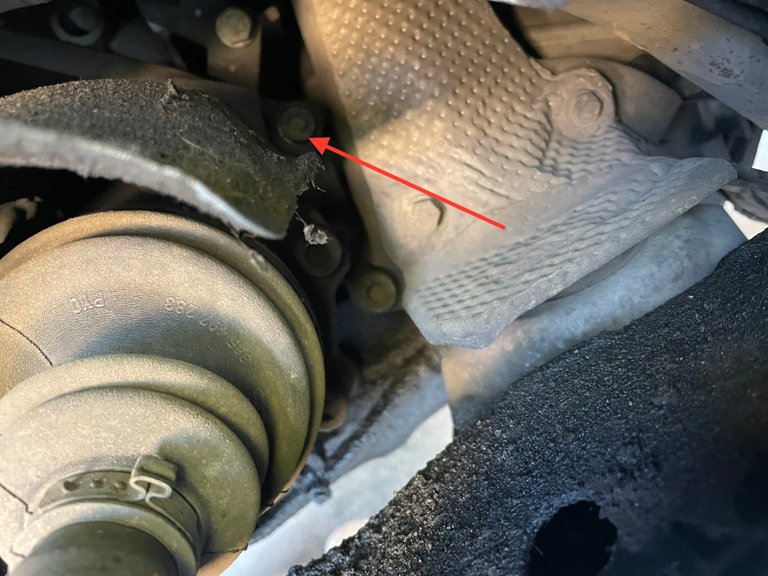

With heat shield out of the way, you can now access the 6 bolts that hold the CV axle in place. This is where a special socket is required. Looking at the bolts you may think it’s a torqs or a hex or a star. Well it’s non of the above. It’s called a Triple Square. It’s like the male version of a 12 point socket. This is the one type of socket that I don’t have. Luckily 1 out of the 4 auto parts stores here in town had a set
You will need a 10mm Triple Square socket to remove the 6 bolts.
If you just try to use a wrench the axle will turn. Just hit it with an impact driver and the bolts come right out. You will have to rotate the axle in order to gain access to each bolt.
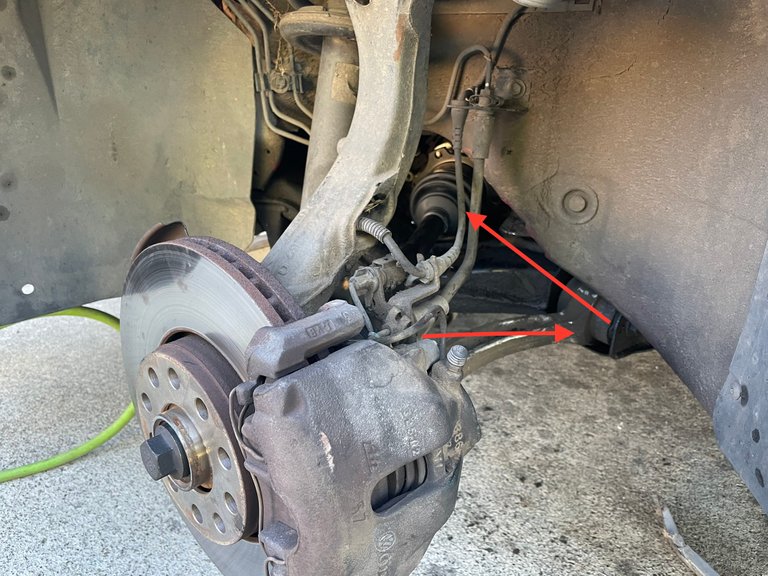
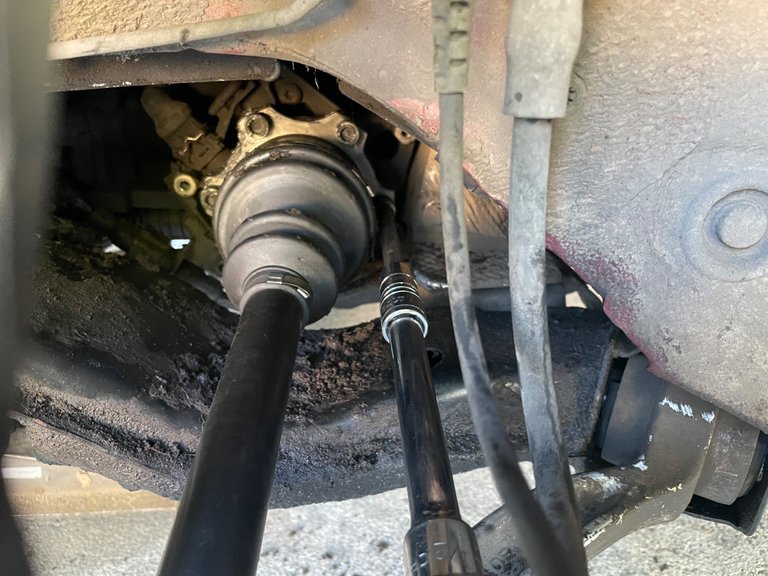
Once those are removed, finish removing the axle bolt then slide the engine side of the axle toward the front of the car. This will give you room to slide the axle out of the hub and out of the vehicle.
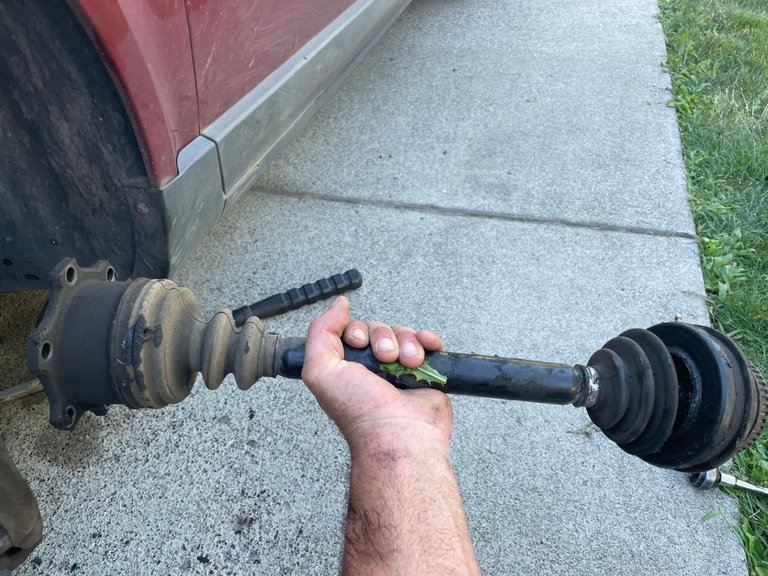
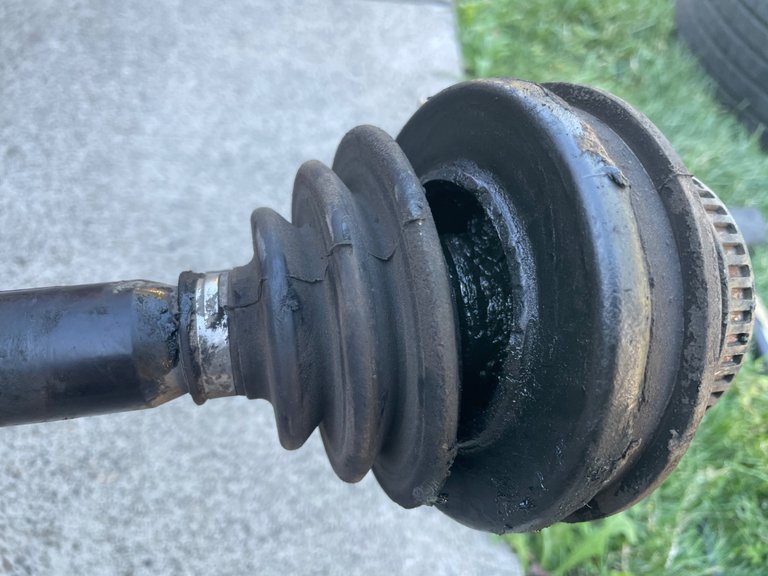
The rubber boot covering the CV joint was tore. This causes dirt and other debris to get inside and ruin the joint.
The Install
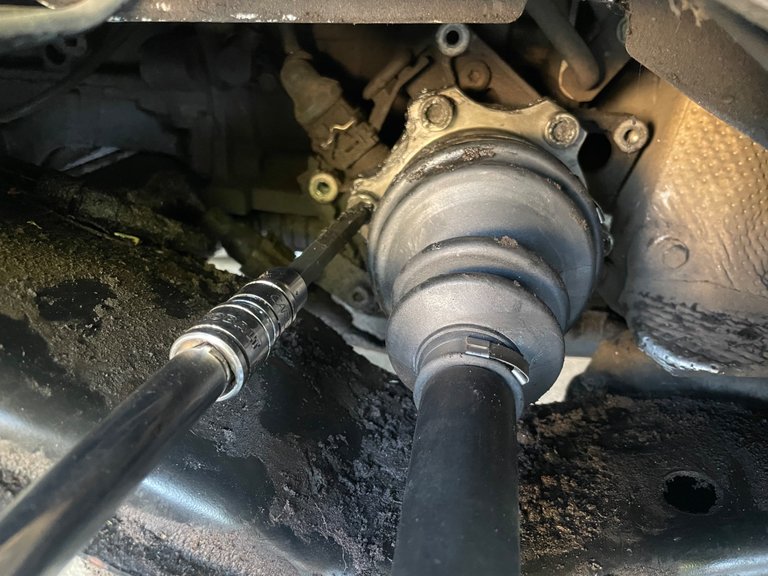
This new, not rebuilt CV axle was $130. Not bad if you ask me. I prefer new over rebuilt whenever I can. To install the new axle, slide the engine side of the axle in first
Then gently work the other end into the wheel hub. It has gear splines on it so you are going to need to look from the outside and line things up. Once lined up it should slide right in.
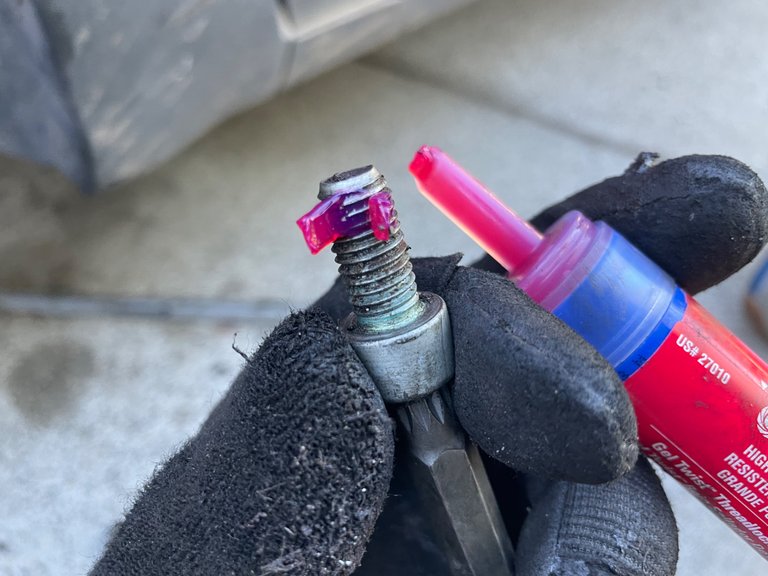
Install the axle bolt finger tight, then position the engine side of the axle in place. Install all 6-10mm triple square bolts finger tight. I went ahead and put a little red lock tight on them before installing.
When tightening these bolts you are going to want to go in a star pattern. Yet again the axle is going to want to spin. So stick a screwdriver into the brake rotor and against the break caliper. This will keep it from turning.
You will have to rotate the axle in order to get to all the bolts. Go around to each bolt and snug them up but don’t torque them down. Then once they are all snugged up continue in the star pattern and torque them to 33 foot pounds.
Next is to reinstall the heat shield. I place the bolt on the socket attached to an extension. Put the bolt through the hole in the heat shield. One hand holds the heat shield in place while the other turns the bolt.
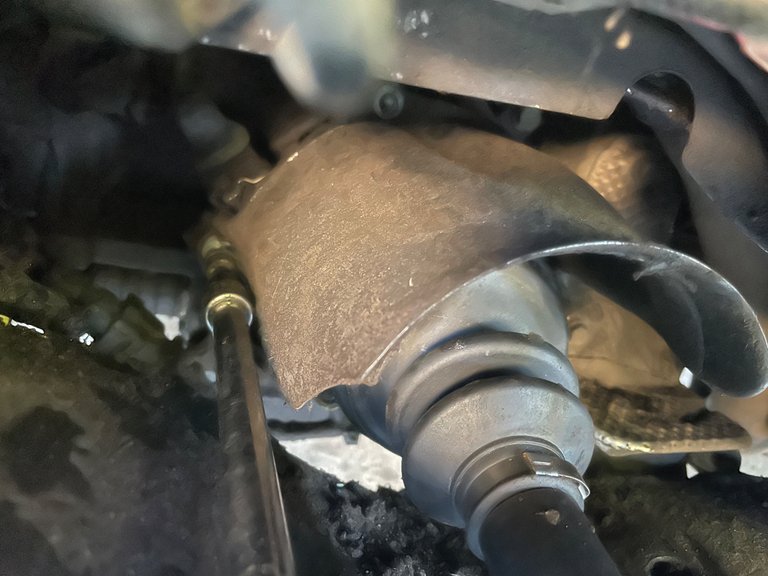

There are no torque specs on these 3 bolts so just get them good and tight.
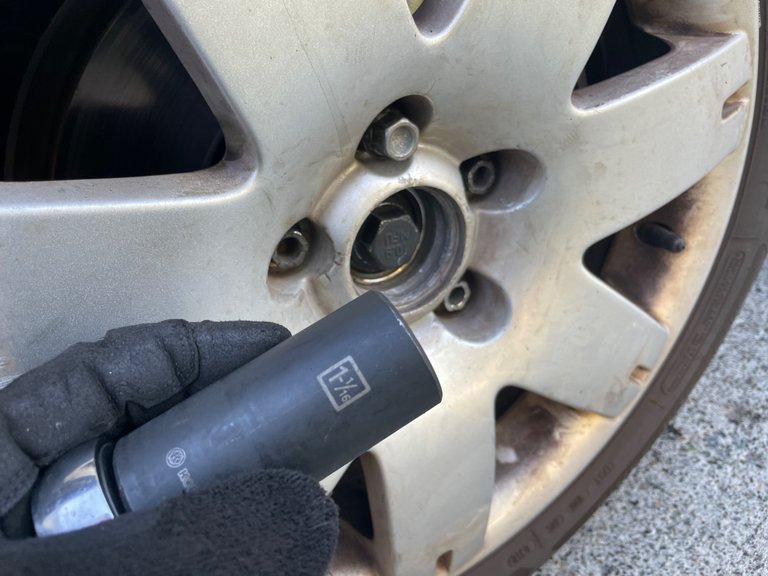
Tighten the axle bolt but don’t torque it down. Just snug it up. Then install the wheel on the vehicle. Lower the vehicle to the ground. The new CV axle will come with a new axle bolt. This one is an 1-1/16 socket instead of a 17mm hex.
Set your torque wrench to 140 foot pounds and tighten the axle bolt.
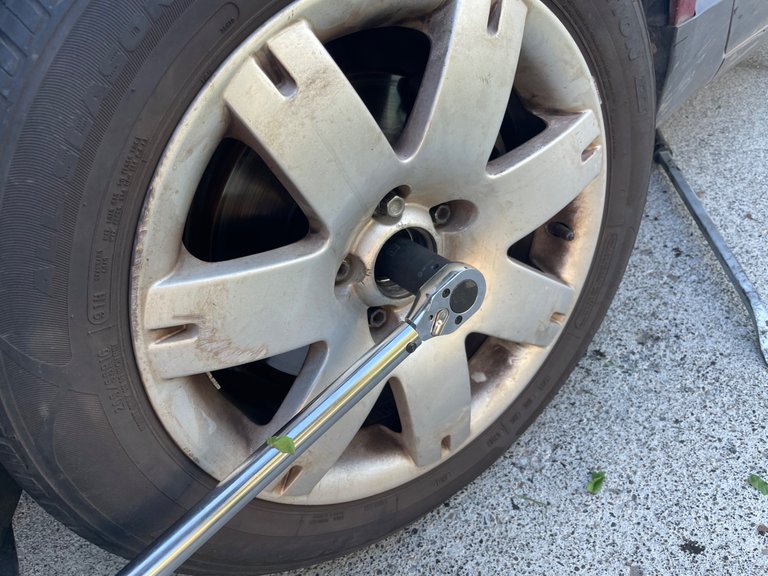
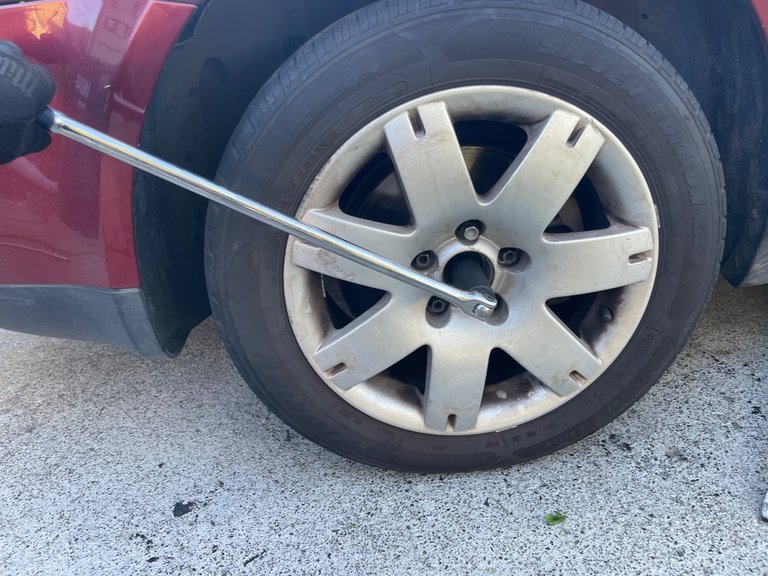
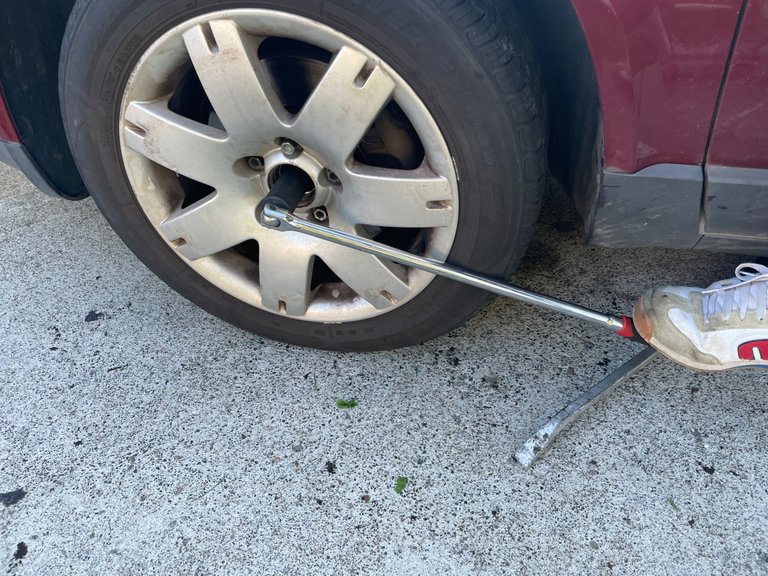
To finalize the torque on the axle bolt you need to get a breaker bar. I used a 24 inch breaker bar and it worked great. So once you have reached your 140 foot pounds of torque, you need to go an additional 180 degrees. This will finalize the torque for the axle bolt
You may have to stand on it in order to get the full 180 degrees.
This took me about an hour and a half to complete. That’s including time to take photos and watching the meat on the grill. So I bet if one just sat down and did it… it would probably take about an hour. Overall not a bad little job and pretty straight forward relatively pretty easy if you got all the right tools.
Time to clean up this little mess and get my grub on! Thanks for stopping by and checking out another DIY automotive repair done by yours truly. This probably saved my Sister-in-law about $500 from what I have seen on the internet for the cost of a shop doing this.

Do It Yourself
And
Save $$$

Your Random
Dose of...