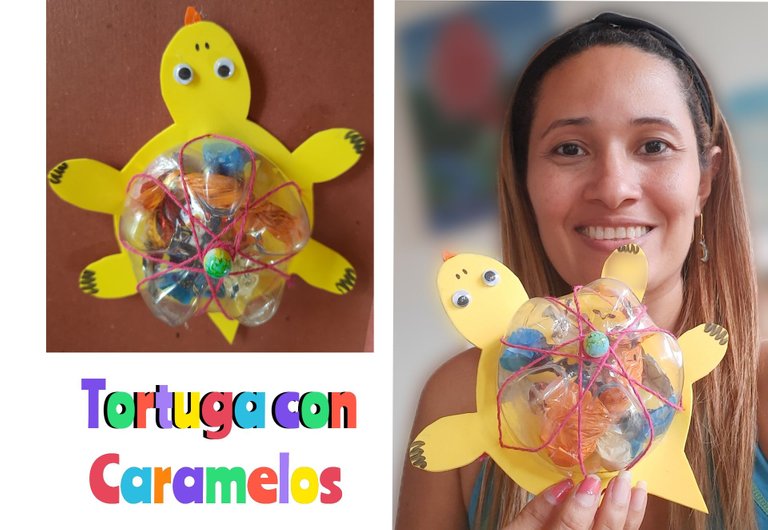


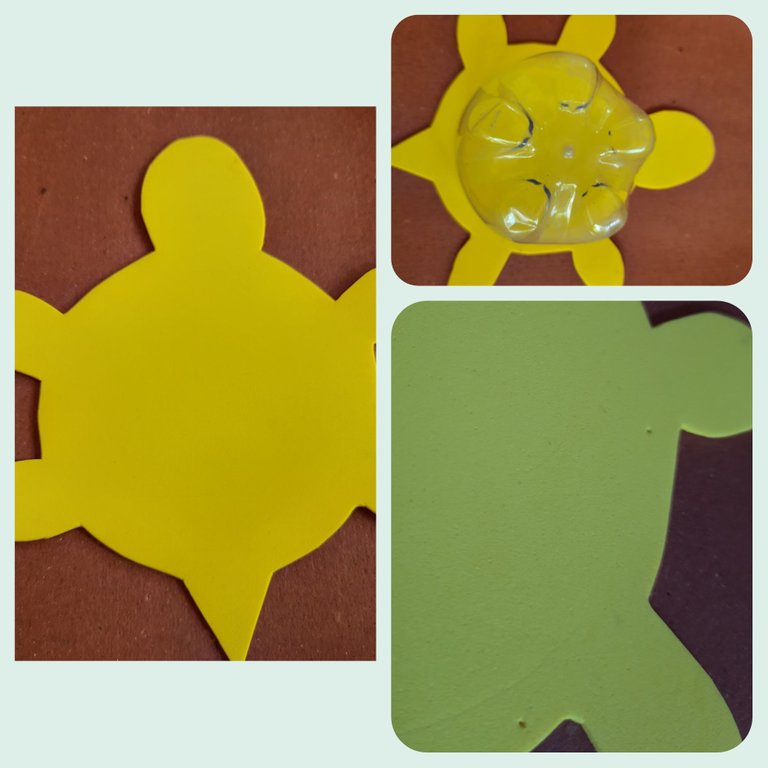
Bienvenidos a mi blog, hoy deseo compartir con ustedes una linda manualidad en forma de tortuga, qué sirve para dar regalos o para guardar dulces, a los niños les encanta esta clase de manualidades y sobre todo si se trata de dulces.
Las manualidades a ellos les encanta y les aseguro que esta será una de ellas,, les invito a ver este pequeño tutorial, manos a la obra.

Welcome to my blog, today I want to share with you a cute turtle-shaped craft, which is useful for giving gifts or for storing candy, children love this kind of crafts and especially if it is candy.
They love crafts and I assure you that this will be one of them, I invite you to watch this little tutorial, let's get to work.
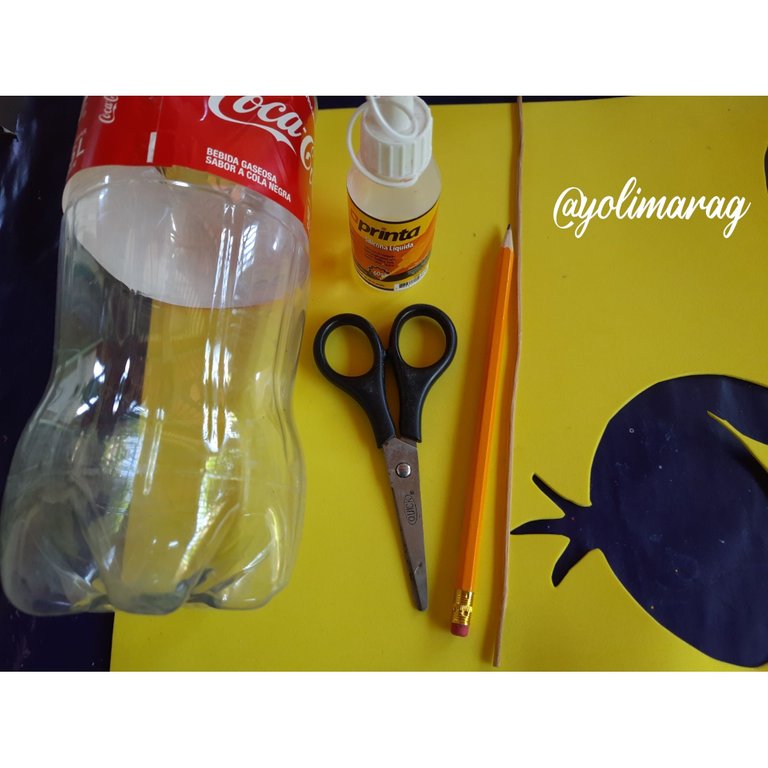
Materiales:
🌸 Foami
🌸 Silicón
🌸 Tijera.
🌸 Botella de Plástico
🌸 Una piedra redonda
🌸 Pabilo de color.
🌸 Marcador
🌸 Ojos acrílicos
Materials:
🌸 Foami
🌸 Silicone
🌸 Scissors.
🌸 Plastic bottle
🌸 A round stone
🌸 Colored wick.
🌸 Marker
🌸 Acrylic eyes
Paso a Paso / Step by Step
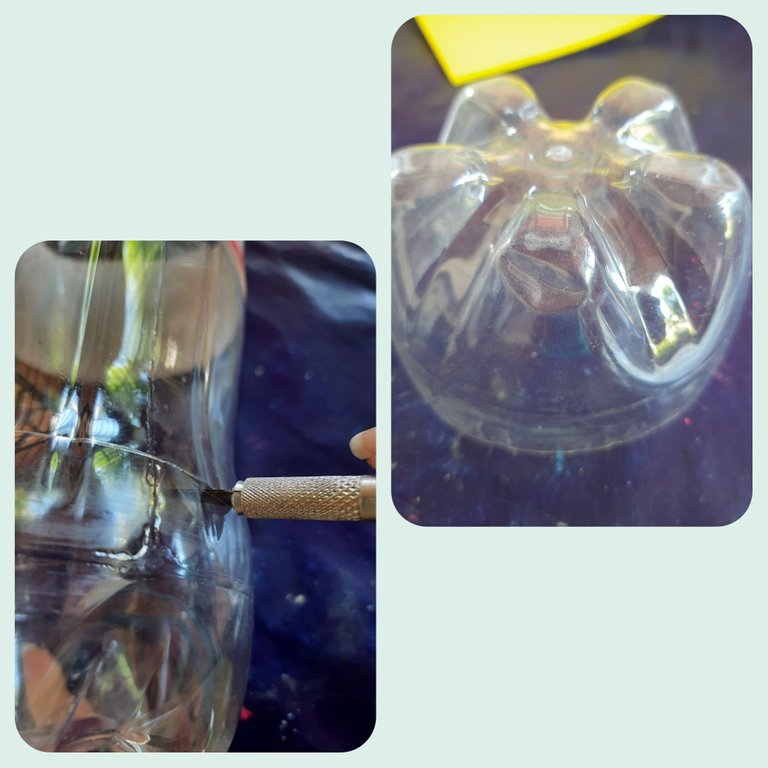
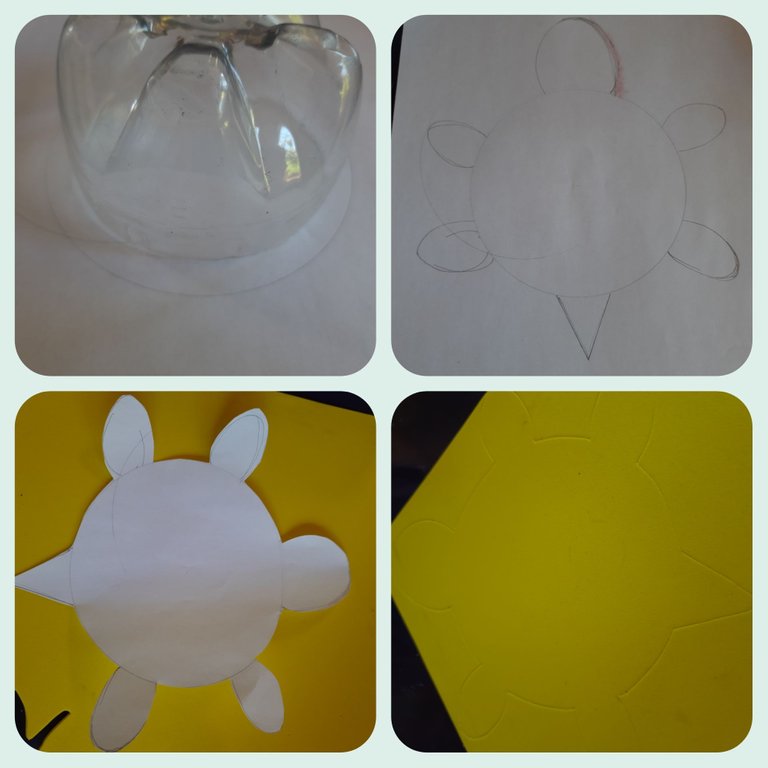
Con la parte que cortamos vamos a medir aproximadamente un centímetro más de la circunferencia, y vamos a dibujarla, a partir de allí procederemos a hacer nuestro molde de tortuga.
Lo haremos en una hoja, luego lo recordaremos y lo pasaremos a nuestro foami.
With the part that we cut we are going to measure approximately one centimeter more of the circumference, and we are going to draw it, from there we will proceed to make our turtle mold.
We will do it on a sheet of paper, then we will remember it and transfer it to our foami.
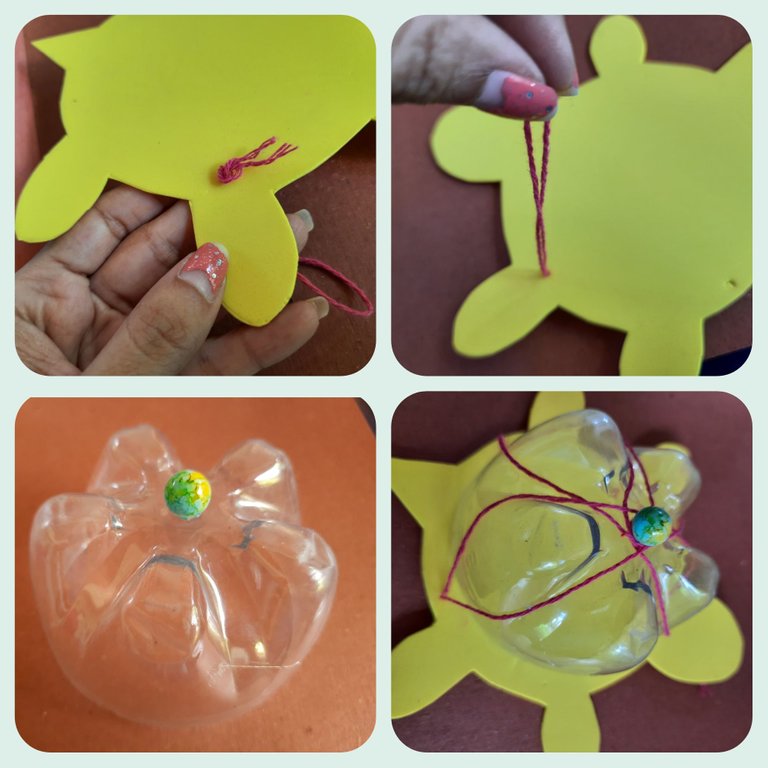
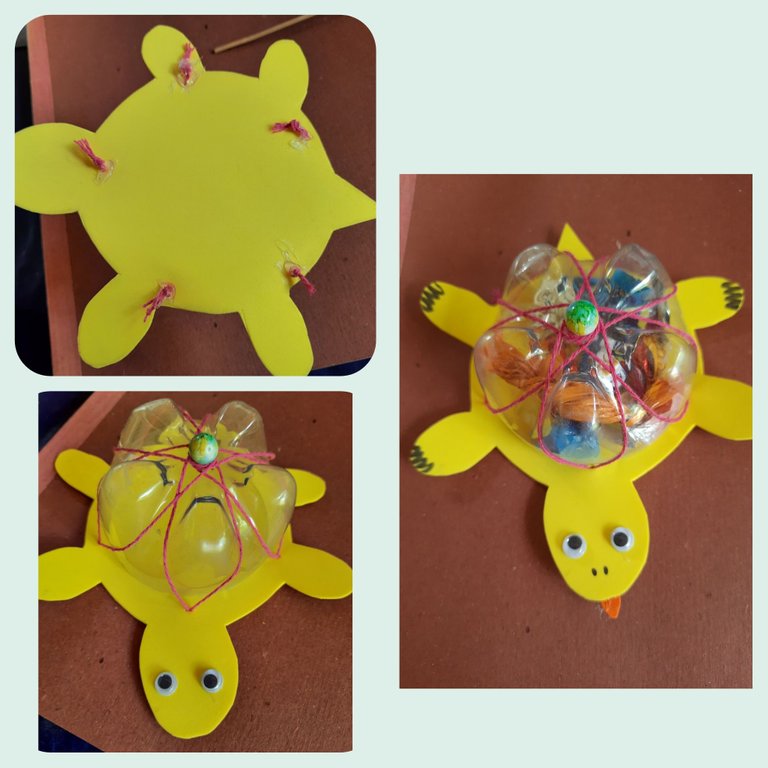
En la parte de plástica pegaremos arriba una bolita de plástico para que sostenga los hilos que luego colocaremos.
En el foami y los huequitos que hicimos vamos a colocar la tiras de pábulo y ayudaremos abajo, el Pabilo arriba debe llegar a la piedra para cerrar y que quede como una bóveda.
In the plastic part we will glue a plastic ball on top to hold the threads that we will place later.
In the foami and the little holes we made we will place the strips of pabulum and we will help below, the wick on top must reach the stone to close it and make it look like a vault.
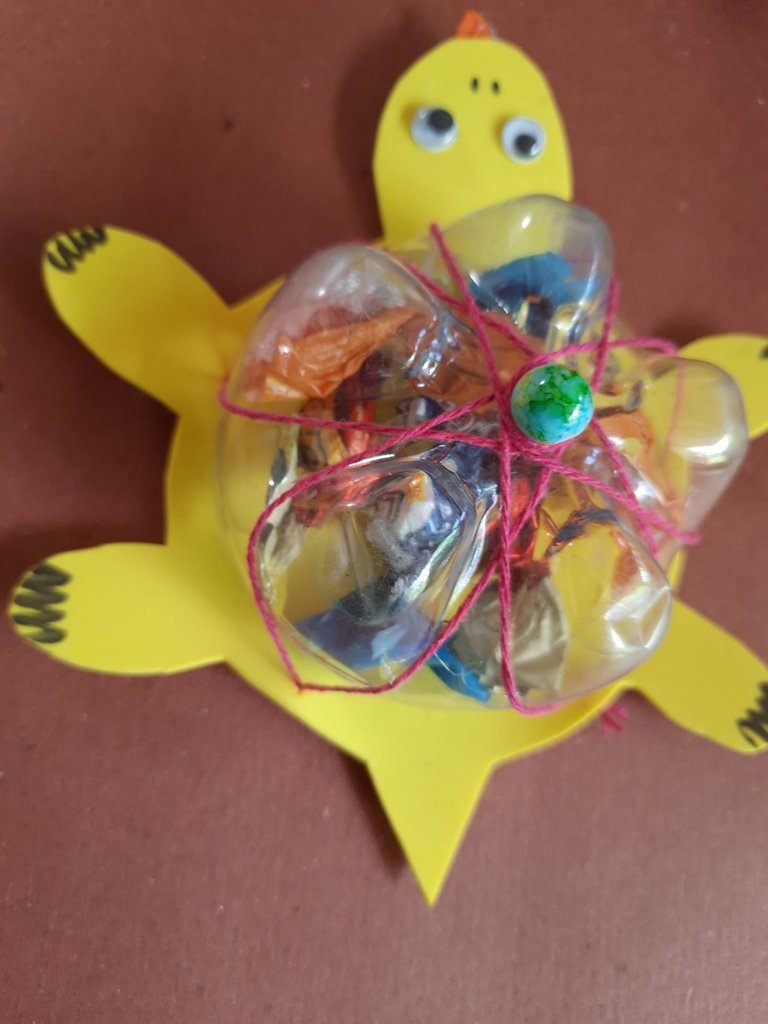
Y así a quedado este pequeño tutorial, espero que les gustará, gracias por ser parte de mi blog, nos vemos en una próxima publicación, bendiciones 😘.
And that's how this little tutorial turned out, I hope you like it, thanks for being part of my blog, see you in a next post, blessings 😘.
Fotos principal editada con Canva.
Fotos de mi Autoría derechos reservados
Cámara: Samsung A20S
Traducido con www.DeepL.com/Translator (versión gratuita)
Photos edited with Canva
Photos by me Author's rights reserved
Quote> Camera: Samsung A20S
Translated with www.DeepL.com/Translator (free version)