Hola amigas y amigos, espero que estén genial. Hoy quiero compartir con ustedes esta fácil, colorida y hermosa técnica de diseño de uñas que podrás realizar con cositas que seguro tienes en tu hogar y no te faltan si eres coqueta.
Hello friends and friends, I hope you are great. Today I want to share with you this easy, colorful and beautiful nail design technique that you can do with little things that you surely have in your home and if you are flirtatious.
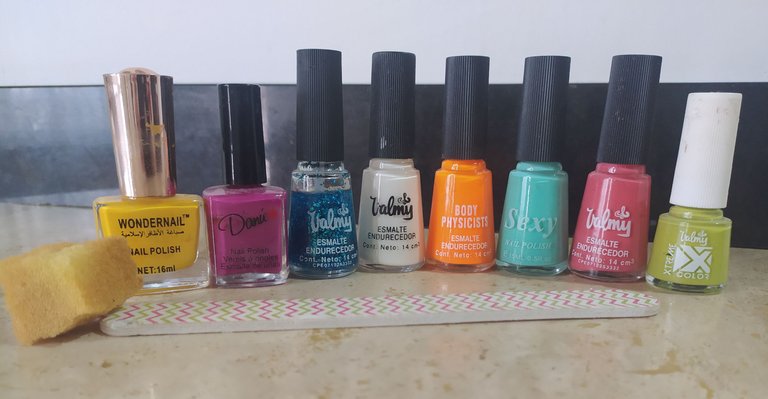
✓Para realizarla solo debes tener a la mano los siguientes materiales:
✓To carry it out, you should only have the following materials on hand:
• Esmaltes de uñas de diferentes colores.
• Nail polishes of different colors.
• Un pequeño pedazo de esponja o goma espuma.
• A small piece of sponge or foam rubber.
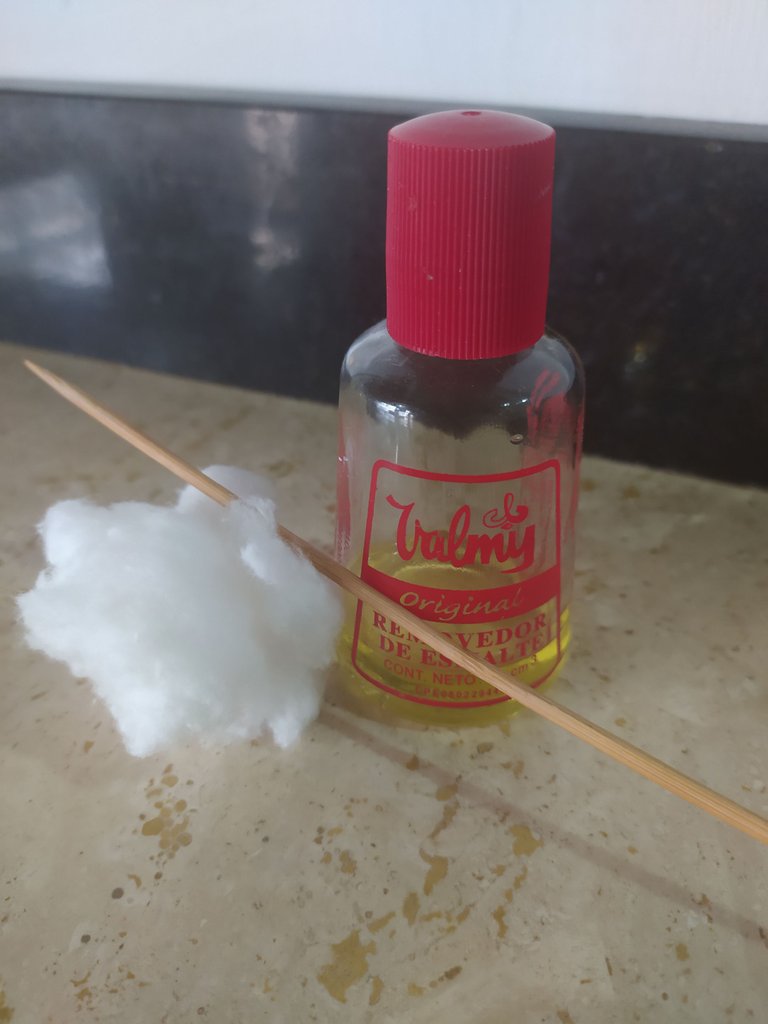
• Removedor de esmalte.
•Polish remover.
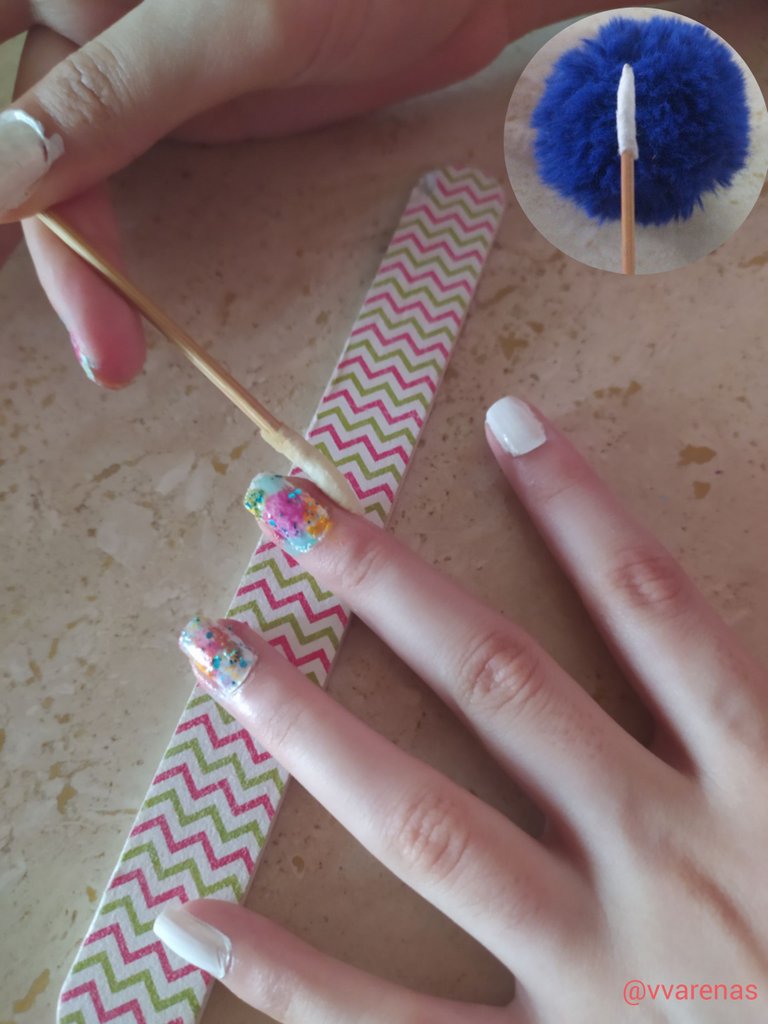
• Algodón.
•Cotton.
• Palito de altura.
• Height stick.
✓Instrucciones:
✓Instructions:
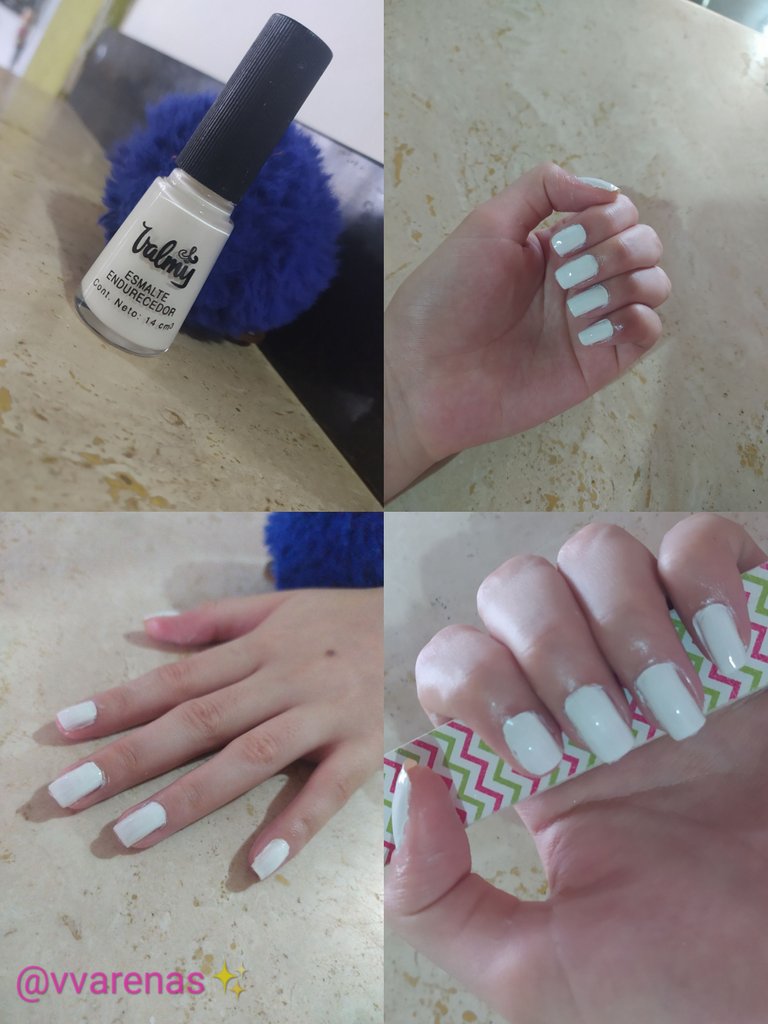
Paso 1: Debes pintar todas tus uñas con un esmalte de color blanco. Puede ser del color de su preferencia pero en lo particular les recomiendo que sea blanco para que el contraste entre todos los colores se vea mejor.
Step 1: You must paint all your nails with a white polish. It can be the color of your preference but in particular I recommend that it be white so that the contrast between all the colors looks better
Paso 2: Luego con el pequeño pedazo de esponja o goma espuma, procedes a aplicarle esmaltes de diferentes colores en la dirección y combinación que desees.
Step 2: Then with the small piece of sponge or foam rubber, you proceed to apply enamels of different colors in the direction and combination you want
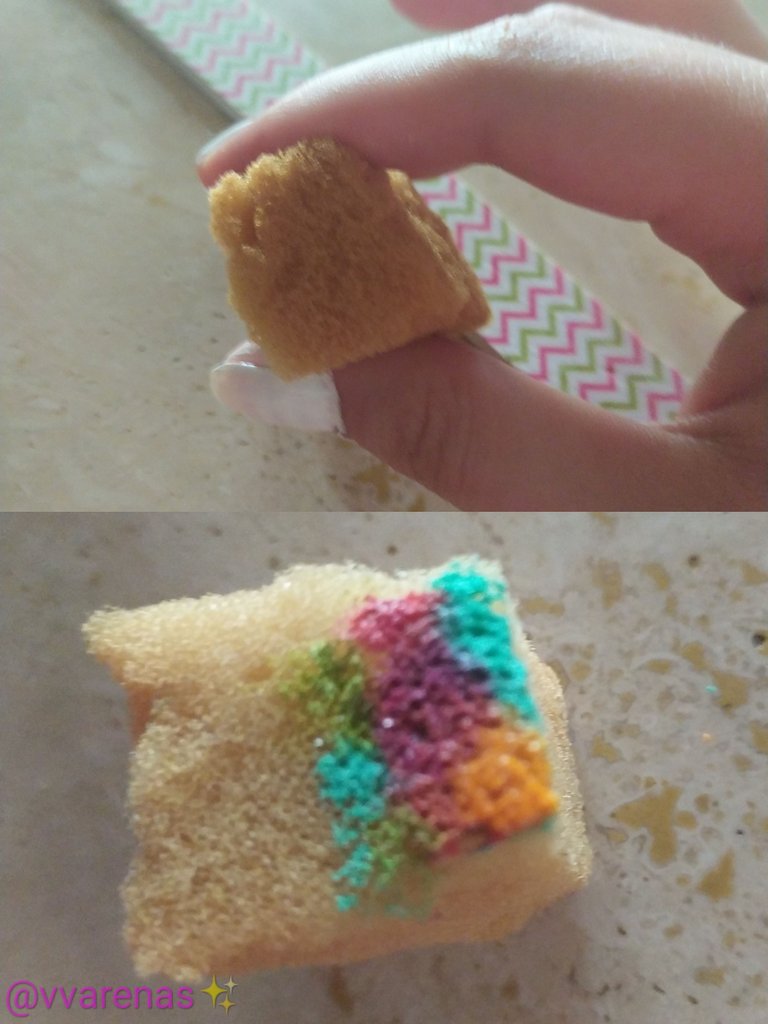
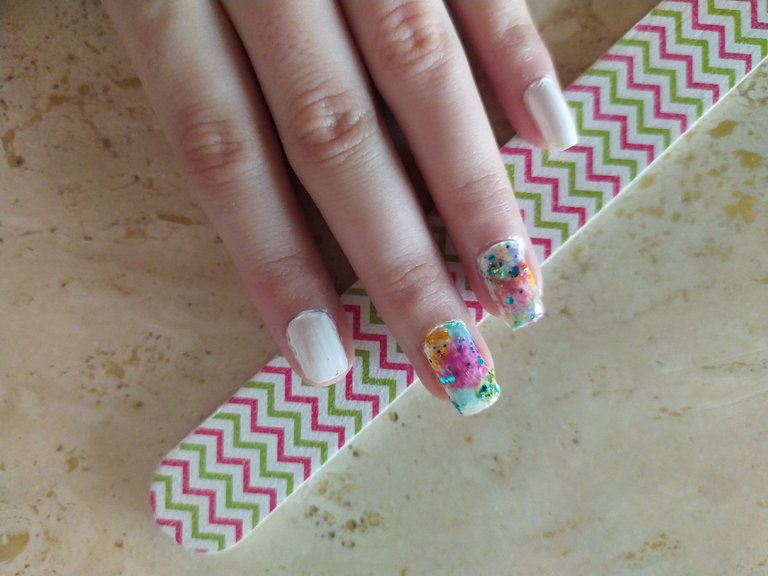
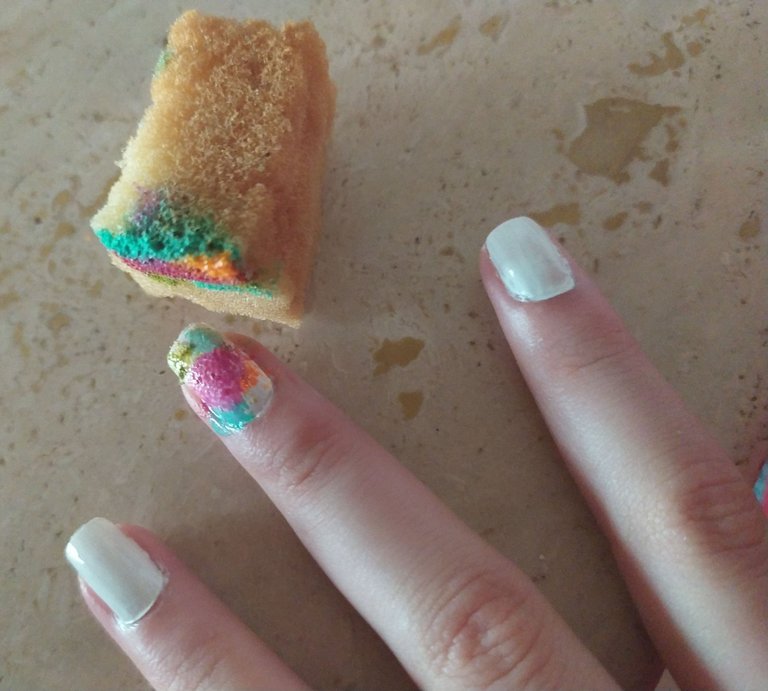
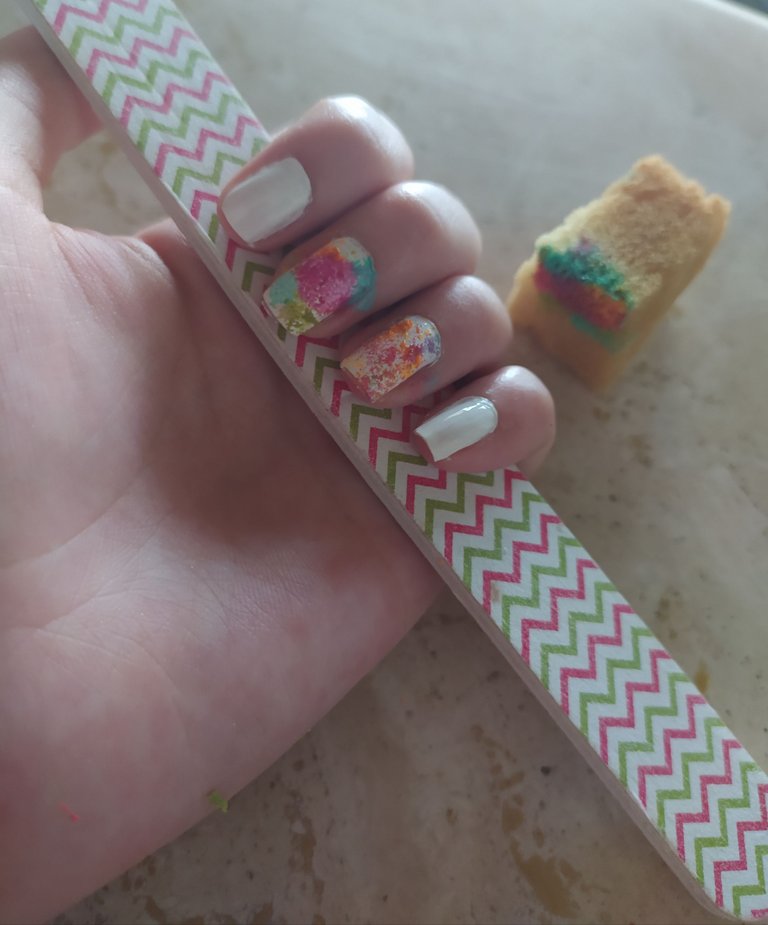
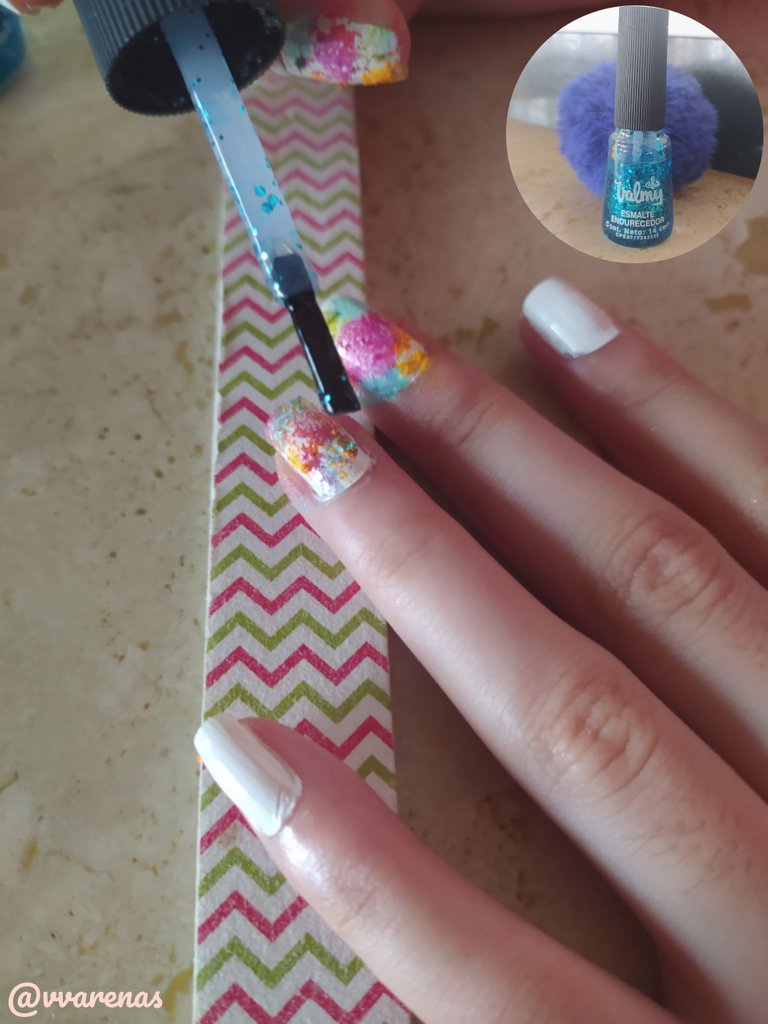
Paso 3: Luego de aplicar todos los colores a la esponja o goma espuma, procedes a pulsarla en pequeños toques sobre las uñas con fondo blanco que desees. Yo elegí las uñas de los dedos anular y medio para realizar esta técnica.
Step 3: After applying all the colors to the sponge or foam rubber, you proceed to press it in small touches on the nails with a white background that you want. I chose the nails of the ring and middle fingers to perform this technique
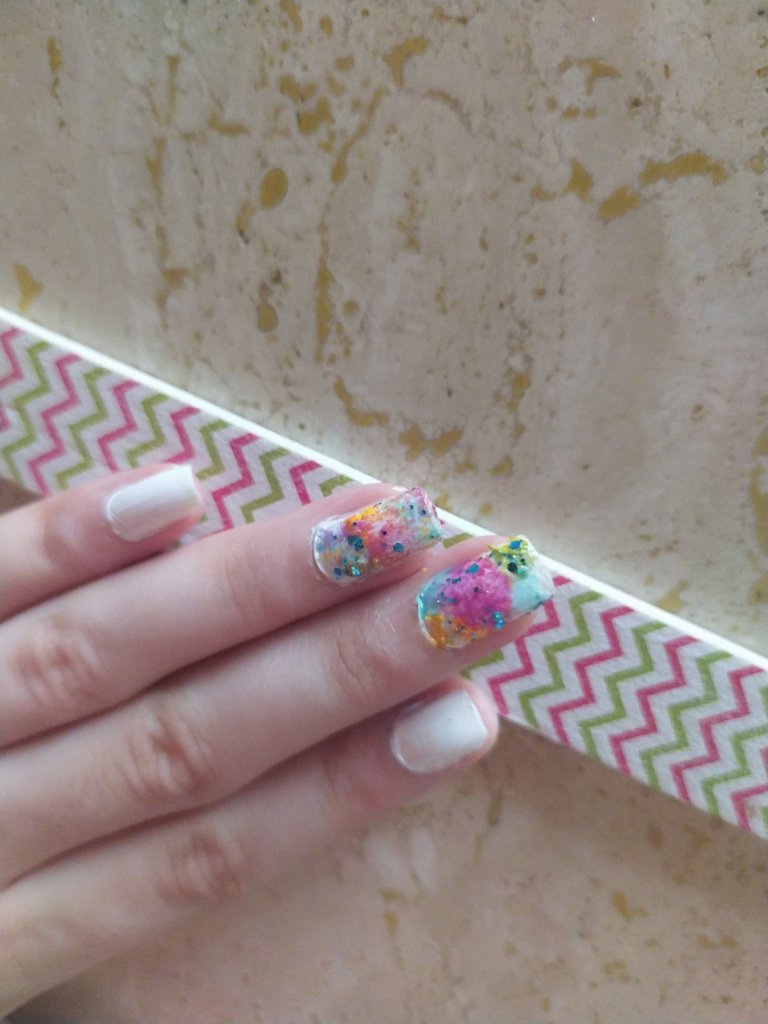
Paso 4: Una vez realizada la técnica de seguro notarás que también se pinto o mancho un poco más que las uñas. Es en este momento que se necesita el algodón, removedor de esmalte y palo de altura. Tomarás un pequeño pedazo de algodón y lo enrrollarás en la punta del palito de altura y procederás a remover todo el esmalte que quedó por fuera de la uña.
Step 4: Once the technique is done, you will surely notice that it also painted or stained a little more than the nails. It is at this time that you need the cotton, nail polish remover, and tall stick. You will take a small piece of cotton and roll it around the tip of the height stick and proceed to remove all the polish that was left on the outside of the nail.
Paso 5: Luego de que todos tus dedos estén impecables sin residuos de esmalte, aplicarás un esmalte transparente endurecedor. Particularmente yo apliqué un esmalte transparente con brillos azules porque me gusta como queda el resultado pero si no cuentas con uno de ese tipo puedes aplicar uno que sea solo transparente. El objetivo de este paso es que sellé, unifique y endurezca todos los colores que fueron aplicados, no es indispensable así que si gustas lo puedes omitir.
Step 5: After all your fingers are flawless with no polish residue, you will apply a clear hardener polish. I particularly applied a transparent enamel with blue glitters because I like how the result looks, but if you don't have one of that type, you can apply one that is only transparent. The objective of this step is that I seal, unify and harden all the colors that were applied, it is not essential so if you like you can omit it.
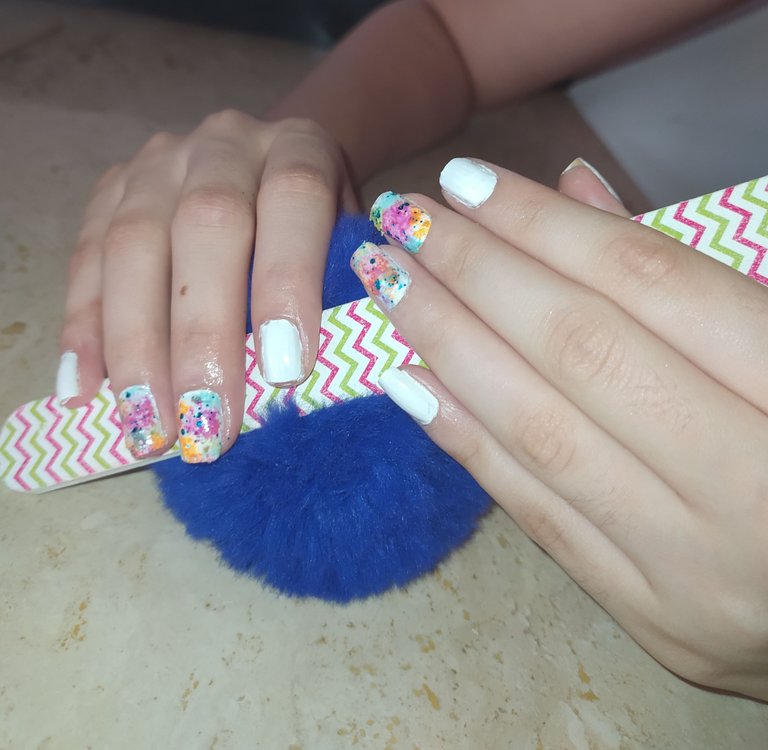
Y listo gente hermosa, este es el resultado de esta fácil y colorida técnica de diseño de uñas que podrás realizar en tan solo cinco (5) sencillos pasos. ¡Anímate a realizarlo! Lo amarás tanto como yo💕.
And ready beautiful people, this is the result of this easy and colorful nail design technique that you can do in just five (5) easy steps. Dare to do it! You will love it as much as i do💕
🔴NOTA🔴
🔴NOTE🔴
Para esta técnica yo escogí un fondo blanco en todas mis uñas, y colores naranja, verde, rosado, morado, amarillo, turquesa y esmalte transparente con brillos azules, pero tú te puedes animar a realizarlo con los colores de tu preferencia y gusto, incluso con más o menos colores.
For this technique I chose a white background on all my nails, and orange, green, pink, purple, yellow, turquoise and transparent enamel with blue glitters, but you can be encouraged to do it with the colors of your preference and taste, even with more or less colors.