¡Hola a todos! Espero que estén pasando un excelente día ☺ y unas felices fiestas☃. Uno de mis pasatiempos favoritos es hacer origami "el arte de plegar papel", y aprovechando que estamos en esta linda época el día de hoy les mostrare como elabore en origami una estrella de cuatro puntas para decorar nuestro árbol navideño. Solo necesitamos de una hoja de papel o cartulina y mucha imaginación. Espero les guste y disfruten del proceso:
Hi all! I hope you are having a great day ☺ and happy holidays☃. One of my favorite hobbies is making origami "the art of folding paper" , and taking advantage of the fact that we are in this beautiful time today I will show you how to make a star in origami four-pointed to decorate our Christmas tree. We only need a sheet of paper or cardboard and a lot of imagination. I hope you like it and enjoy the process:
✩⋆Paso a paso⋆✩
✩⋆Step by Step⋆✩
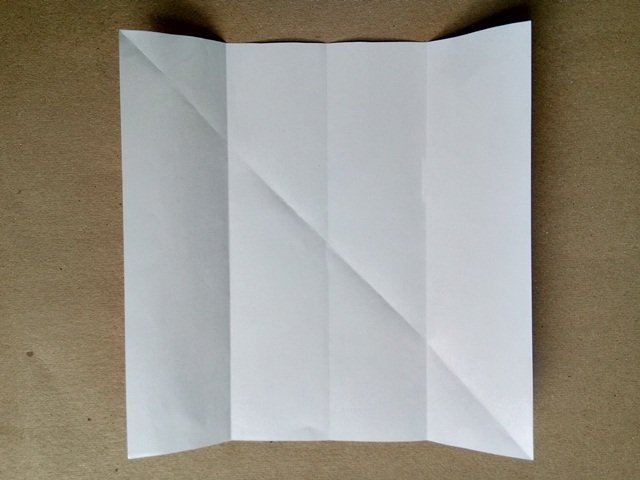
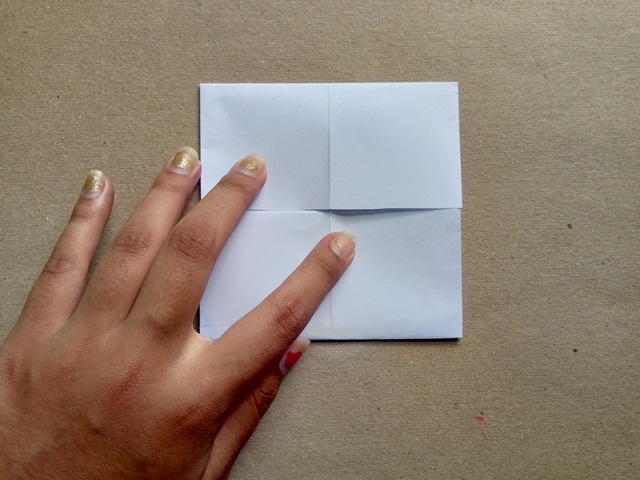
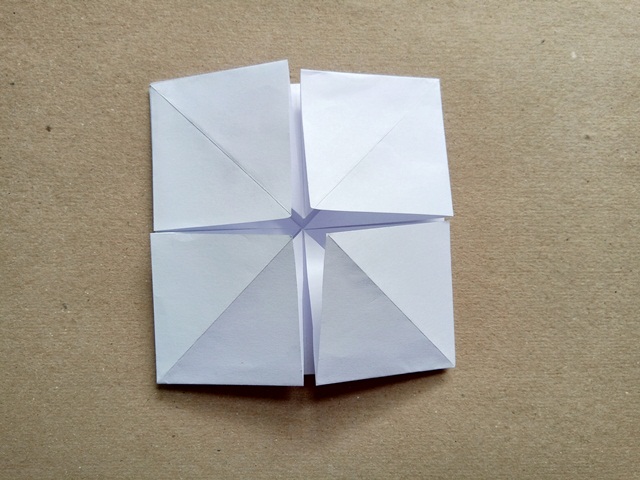
Paso 1. Para empezar tome un cuadrado de papel y lo doble a la mitad. El origami no requiere de instrumentos ni mediciones, los pliegues dibujan y estas van indicando la secuencia de los dobleces. Después deshice el doblez y luego lleve los dos extremos al centro. Ya habiéndonos quedado un rectángulo doblaremos ambos extremos al centro y se formara nuevamente un cuadrado.
Step 1. To begin take a square of paper and fold it in half. Origami does not require instruments or measurements, the folds draw and these indicate the sequence of the folds. Then I undo the fold and then bring the two ends to the center. Having already been left with a rectangle, we will bend both ends to the center and a square will be formed again.
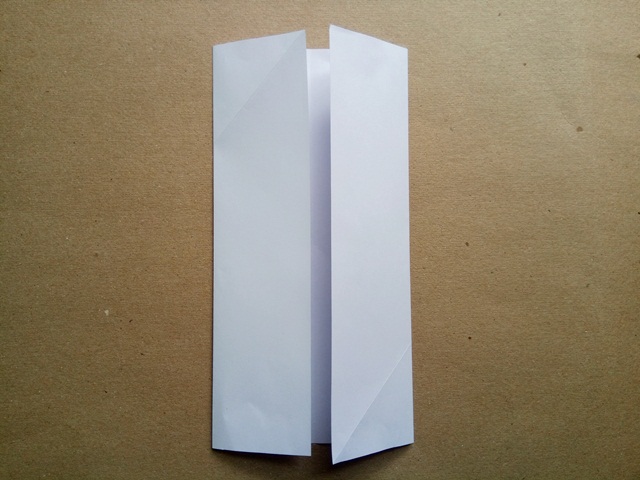
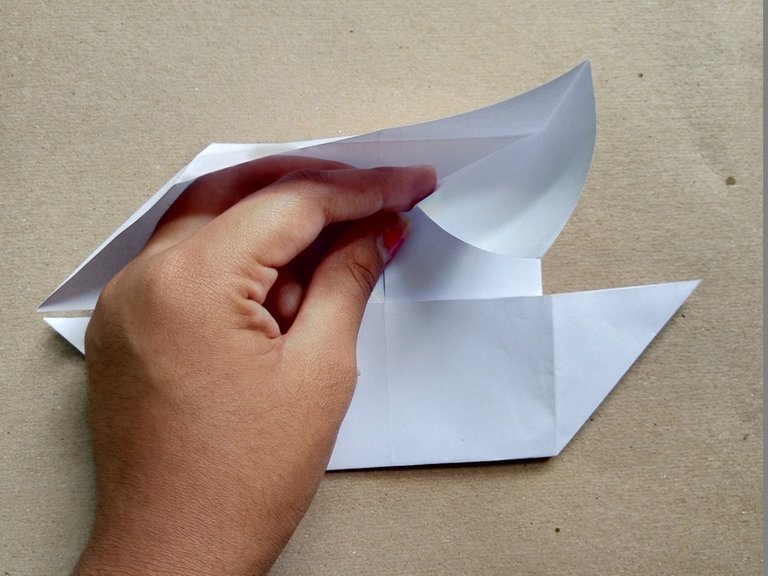
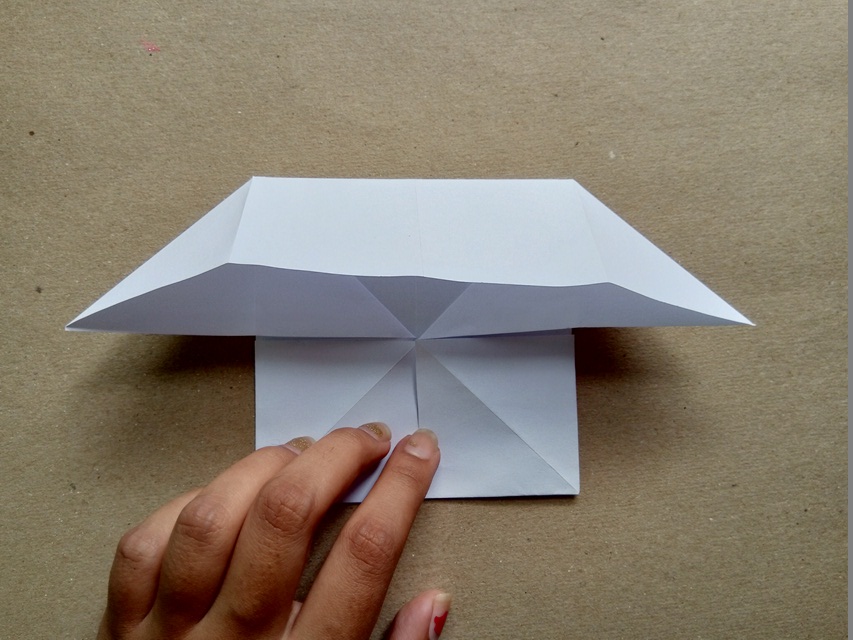
Paso 2. A continuación vamos a abrir la figura con mucHo cuidado de la siguiente manera para que podamos formar estos picos en cada uno de los lados. Posteriormente vamos a abrir esos "picos" y llevar la punta al centro de la figura, como se muestra en la cuarta imagen ↷↷.
Step 2. Next we are going to open the figure with great care in the following way so that we can form these peaks on each side. Later we are going to open those "peaks" and bring the point to the center of the figure, as shown in the fourth image ↷↷.
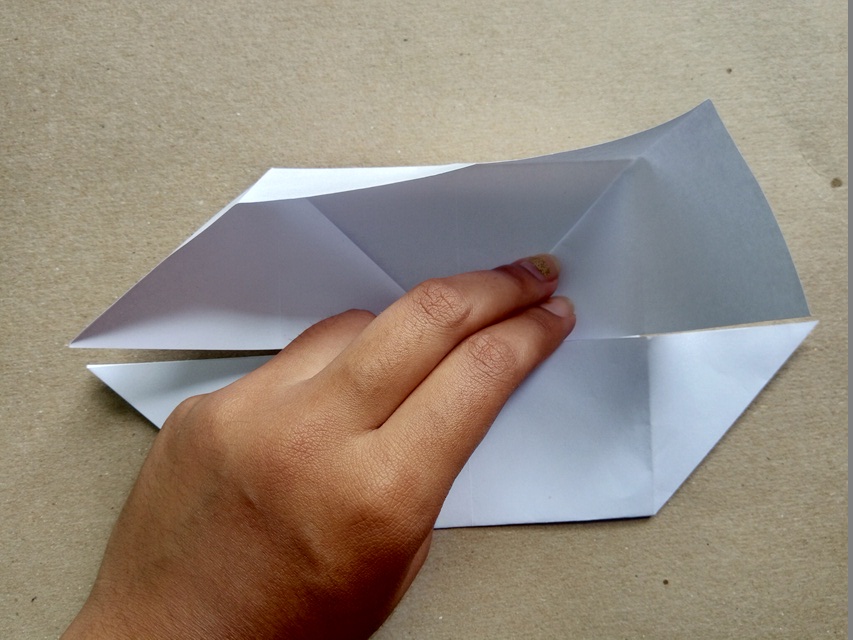
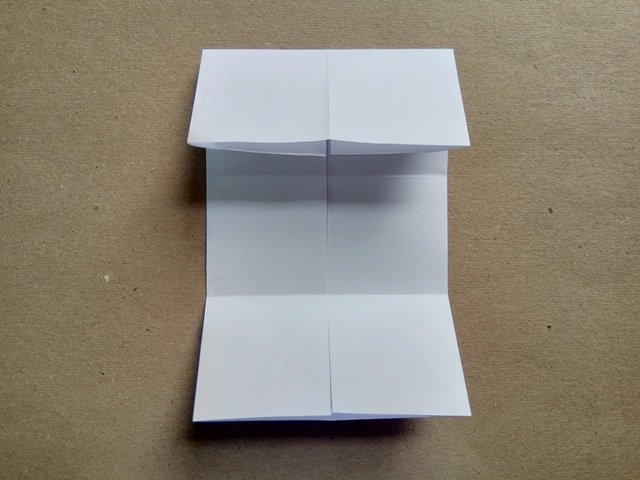
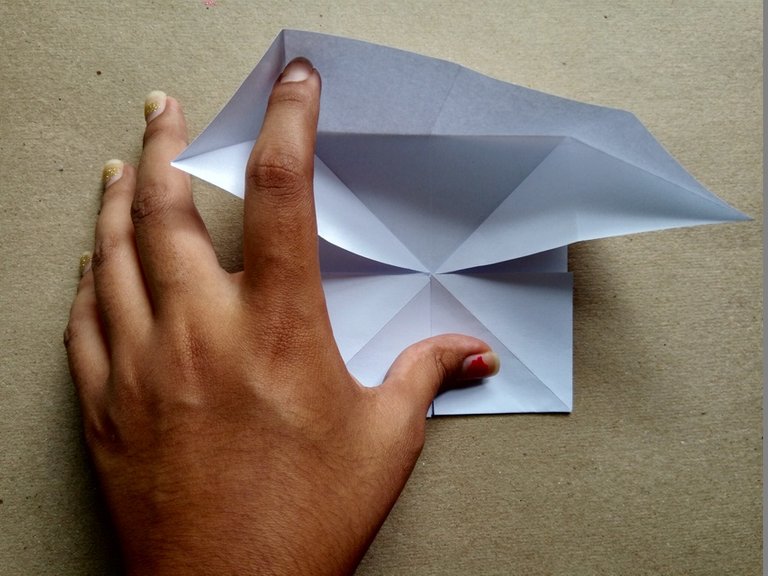
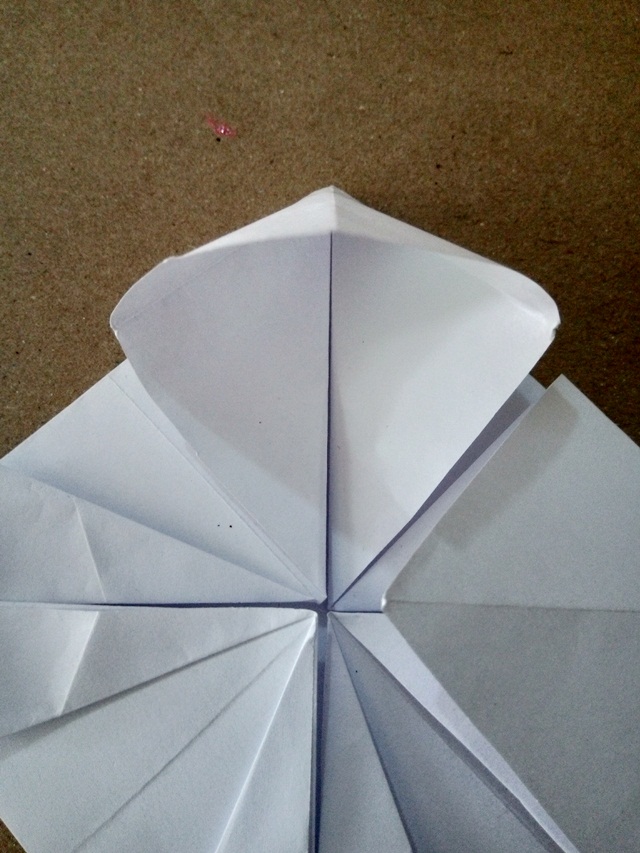
Paso 3. Así mismo vamos a continuar abriendo la figura y plegando los picos como mencione anteriormente, dándole forma a varios cuadrados pequeños unidos. Sé que parece que son muchos dobleces y todavía no aparece ninguna figura pero les aseguro que es mucho más fácil hacerlo que escribirlo y el resultado se logra en pocos minutos✰彡.
Step 3. Likewise, we are going to continue opening the figure and folding the peaks as mentioned above, shaping several small squares joined. I know it seems that there are many folds and no figure appears yet but I assure you that it is much easier to do it than to write it and the result is achieved in a few minutes✰ 彡.
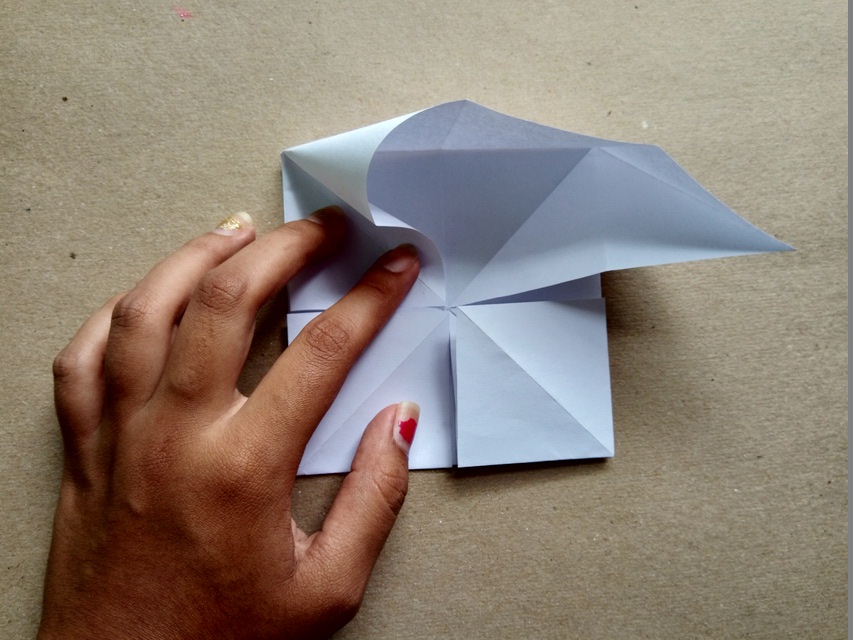
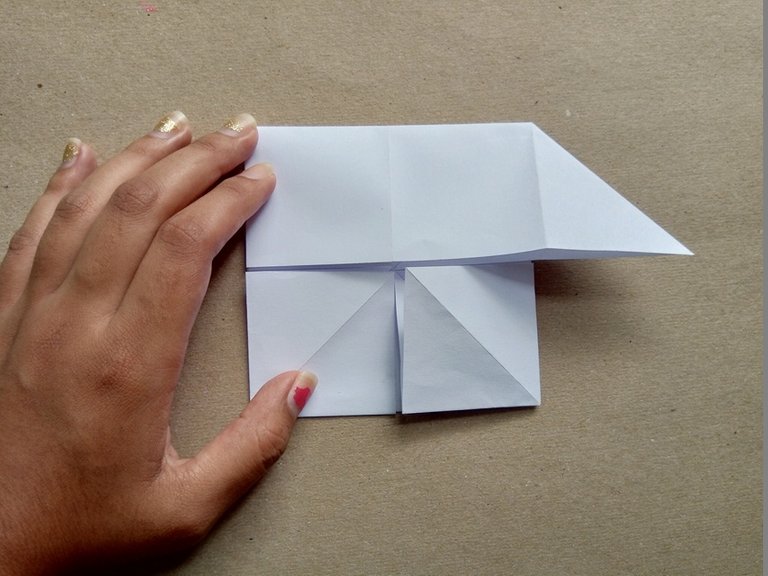
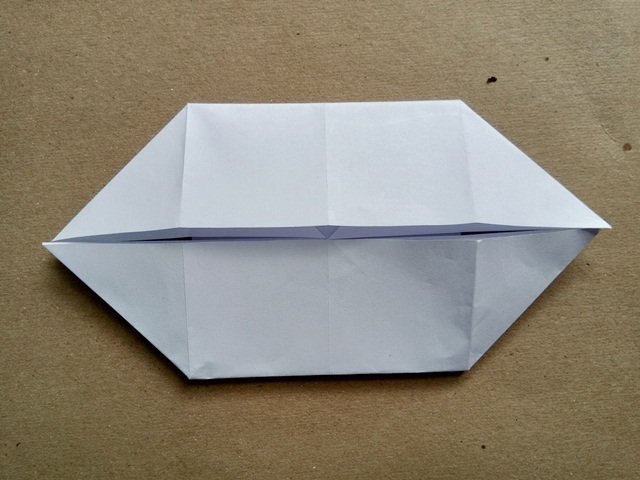
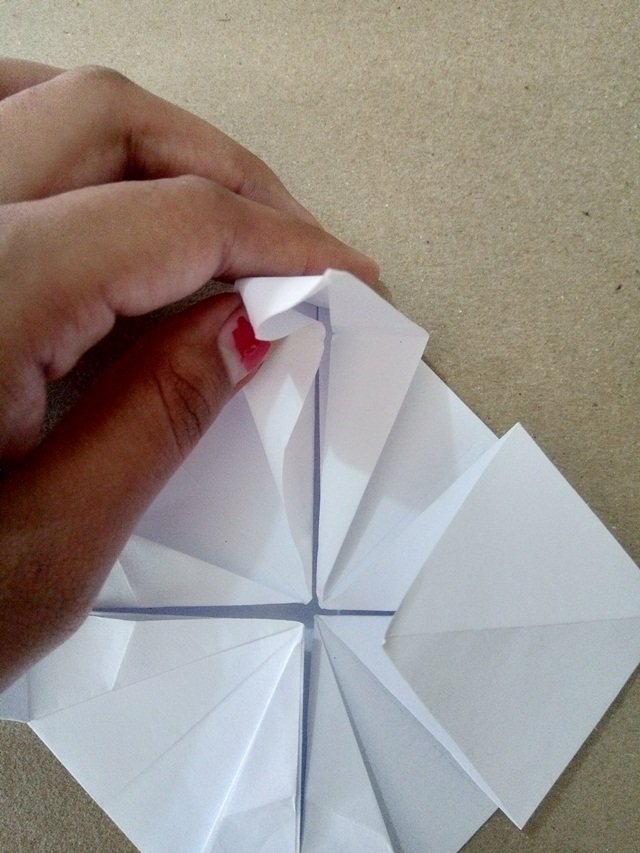
Paso 4. Ahora si, vamos a hacerle las puntas a nuestra estrella, como se indica en la segunda y tercera foto, ahora nuestra figura empieza a tomar mejor forma. De esta manera terminariamos la primera parte ¡yupi!.
Step 4. Now, we are going to make the points to our star, as indicated in the second and third photos, now our figure begins to take better shape. In this way we would finish the first part yupi!

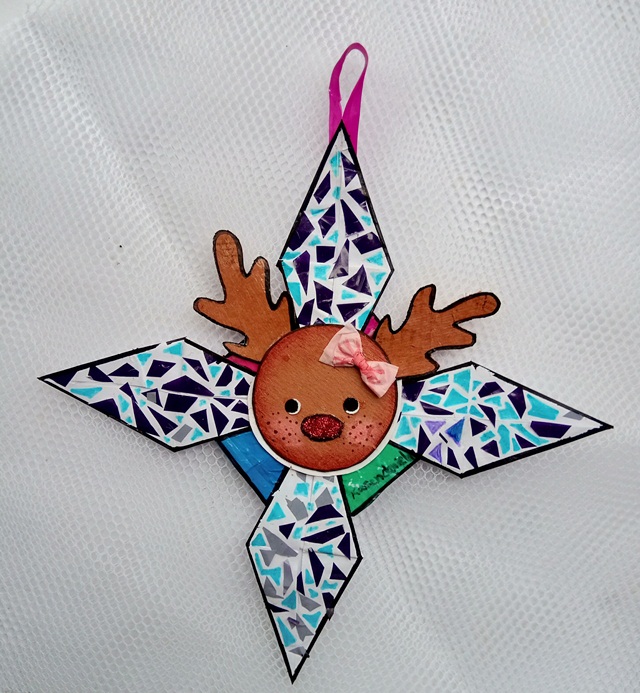
Paso 5. Seguidamente vamos a una de mis partes favoritas: ¡Decorar!, podemos poner toda nuestra imaginación colocarle los detalles que queramos, distintos colores y lo que nos recuerde la navidad!. Hasta los momentos mi figura parece sacada de un circo jeje, solo me falta agregarle un detalle más y ¡listo!:
Step 5. Next we go to one of my favorite parts: Decorate! We can put all our imagination into it, place the details we want, different colors and what reminds us of Christmas !. So far my figure seems taken from a circus hehe, I just need to add one more detail and that's it !:

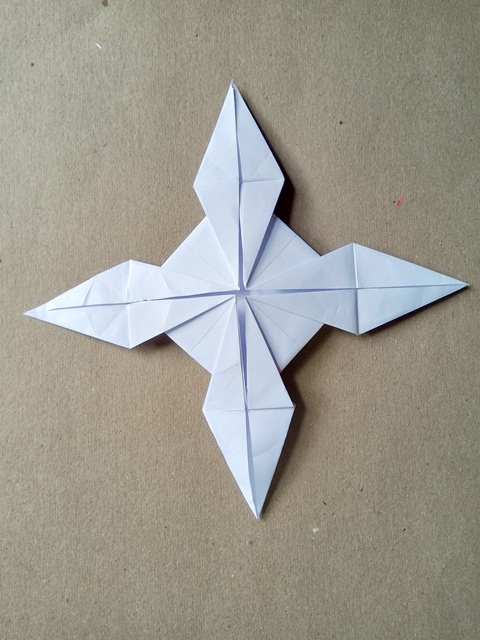
⋆✩⋆Resultado final⋆✩⋆
⋆✩⋆Final result⋆✩⋆
☜♥☞𝔊𝔯𝔞𝔠𝔦𝔞𝔰 𝔦𝔫𝔣𝔦𝔫𝔦𝔱𝔞𝔰 𝔭𝔬𝔯 𝔳𝔦𝔰𝔦𝔱𝔞𝔯 𝔪𝔦 𝔭𝔬𝔰𝔱. ℌ𝔞𝔰𝔱𝔞 𝔩𝔞 𝔭𝔯ó𝔵𝔦𝔪𝔞, 𝔟𝔶𝔢!!☜♥☞
Infinite thanks for visiting my post. Until next time, bye!
Las imágenes fueron tomadas por un telefono celular: Nokia 3.1