Hola a todos!, deseo que estén pasando una bonita mañana, tarde o noche . Hoy les quiero mostrar cómo realizar esta bonita decoración inspirada en la serie animada: Candy Candy, específicamente dibuje a la dulce y tierna protagonista Candy. Este es un pequeño regalo para mi mamá, es ella quien me ha hablado de la serie ya que ella solía verla cuando era pequeña, por ello este dibujo fue hecho con mucho cariño (づ ̄ ³ ̄)づ♥*. Está hecha con materiales reciclados y pequeñas cosas que me sobraron de otras manualidades, me encanta reciclar y darle una nueva vida algo que se daba por perdido. Espero les guste y disfruten del paso a paso:
Hello everyone! I wish you are having a nice morning, afternoon or night. Today I want to show you how to make this beautiful decoration inspired by the animated series: Candy Candy, specifically draw the sweet and tender protagonist Candy. This is a small gift for my mother, she is the one who has told me about the series since she used to see it when she was little, so this drawing was made with great affection (づ  ̄ ³ ̄) づ ♥ *. It is made with recycled materials and small things that I left over from other crafts, I love to recycle and give a new life to something that was given for lost. I hope you like it and enjoy the step by step:

✩⋆Materiales | Materials⋆✩
A sheet of paper Cardboard Scraps of cardboard Colored pencils Silicone glue
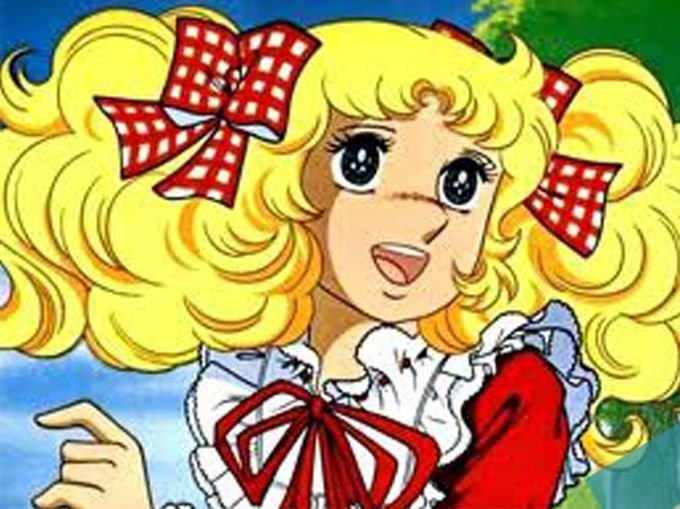
Imagen Guía
✩⋆Paso a paso | Step by Step⋆✩
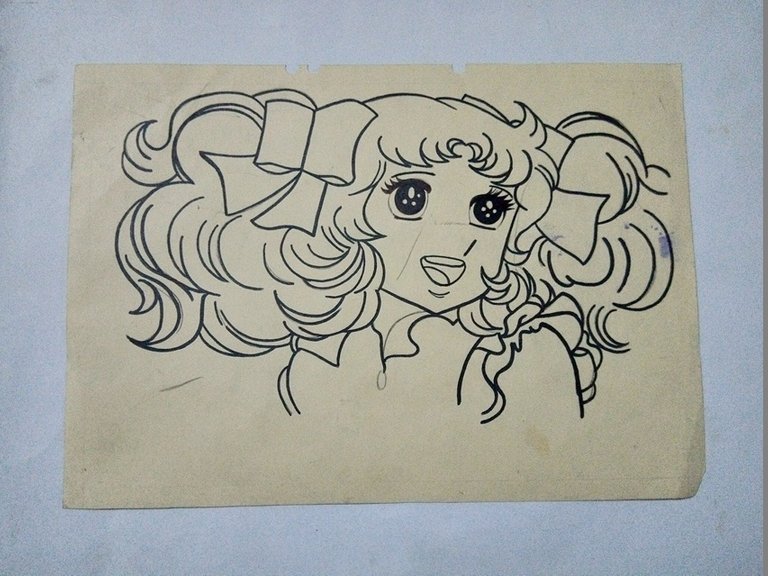
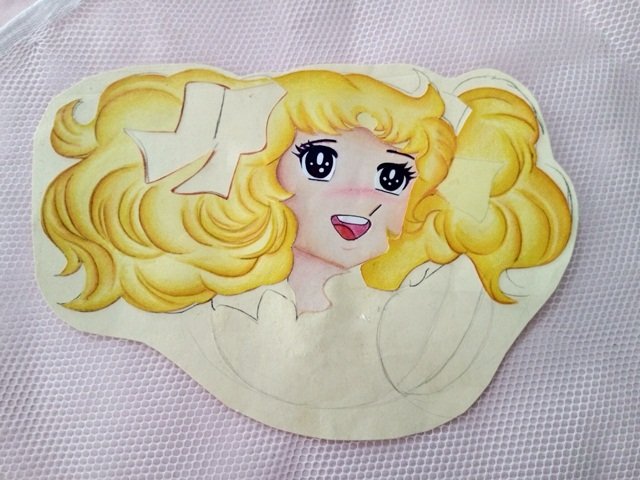
Step 1. To start, draw Candy on a white sheet to have her as a guide. Then transfer that design to cardboard

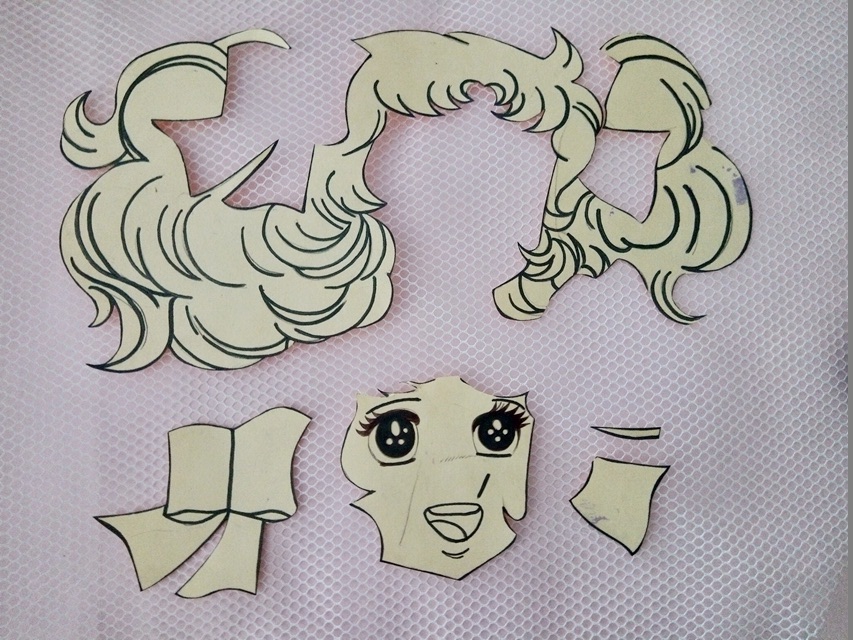
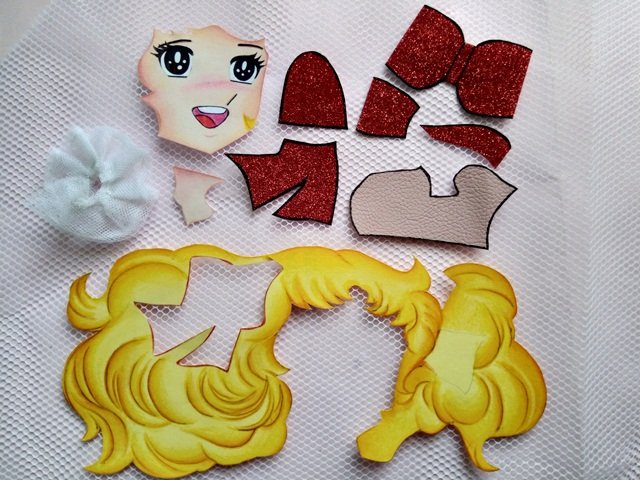
Paso 2. Después recorte el dibujo en piezas separadas para utilizarlas como patrones. Seguidamente recorte esas piezas en distintas texturas utilice cartón para su voluminoso cabello, papel para hacer su bonito rostro, cartulina para los lazos y tela para el vestido; todos estos materiales son reciclados. Luego de recortarlos acentué con colores el pelo y el rostro de Candy.
Step 2. Then cut the drawing into separate pieces to use as patterns. Then cut these pieces into different textures, use cardboard for her voluminous hair, paper to make her pretty face, cardboard for the bows and fabric for the dress; all these materials are recycled. After trimming them, I accentuated Candy's hair and face with colors.
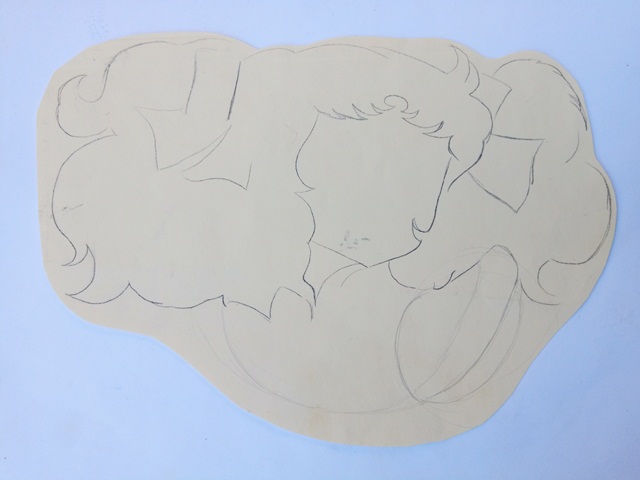
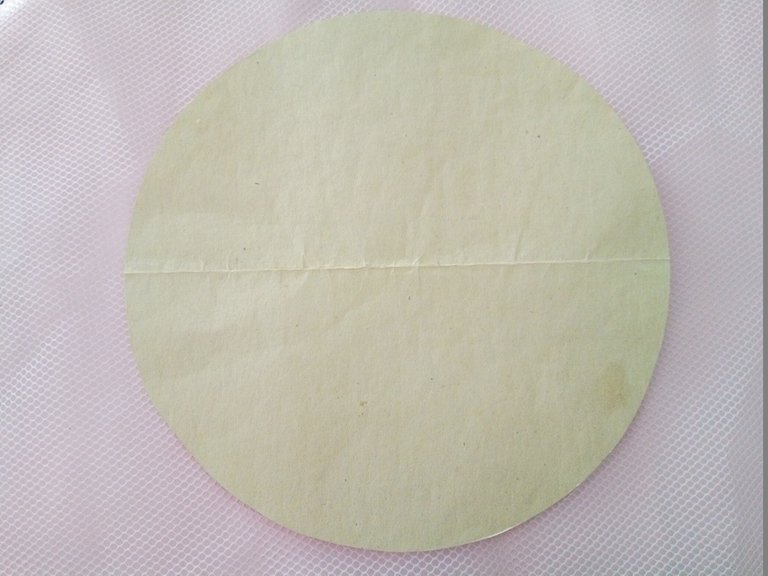
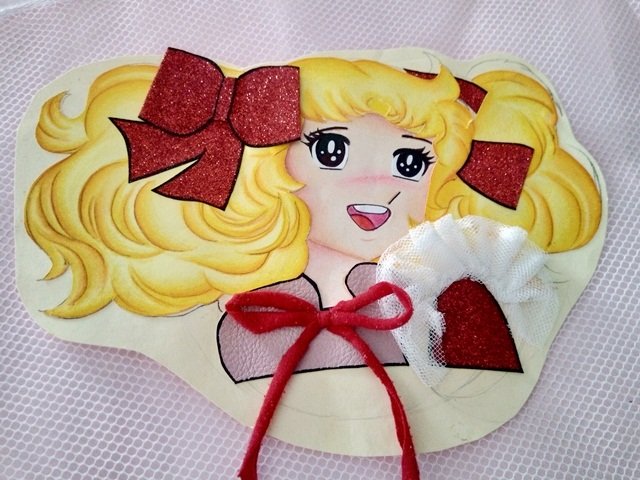
Paso 3. A continuación recorte en cartón dos piezas, en una marque la silueta de Candy utilizando el dibujo que hice al inicio, y en la otra recorte un círculo el cual nos servirá como fondo.
Step 3. Next, cut two pieces out of cardboard, in one mark Candy's silhouette using the drawing I made at the beginning, and in the other cut out a circle which will serve as a background.
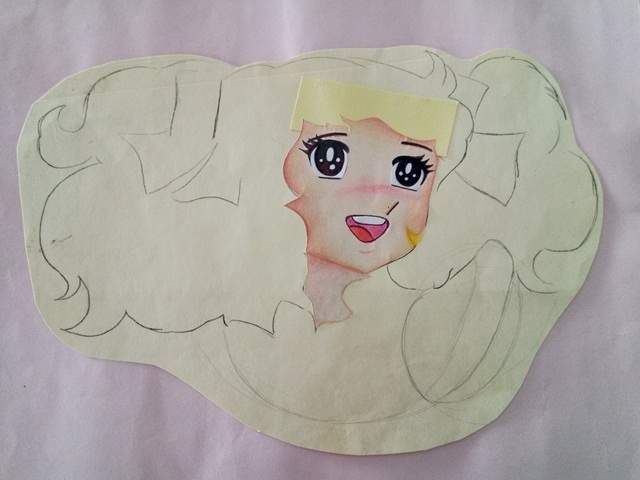
Paso 4. Ahora vamos a proceder a darle vida y forma a nuestra obra maestra :P . Tome la pieza de cartón en donde realice la silueta de Candy y proseguí a pegarle las piezas que había recortado, empezando por el rostro.
Step 4. Now we are going to proceed to give life and shape to our masterpiece :P. I took the piece of cardboard where I made the silhouette of Candy and I continued to glue the pieces that I had cut out, starting with the face

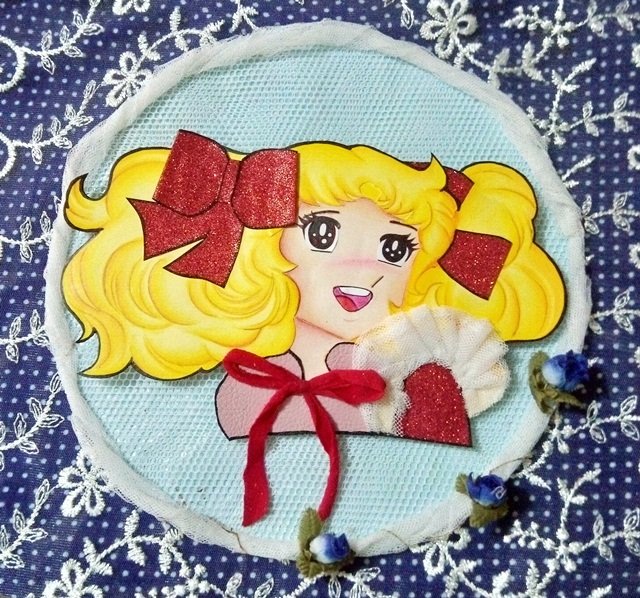
Paso 5. Por último pero no menos importante, hice el fondo a nuestro querido dibujo para ello forre el circulo de cartón que recorte anteriormente y lo forre con tela azul y tela blanca de maya. Para finalizar agregué los últimos detalles:
Step 5. Last but not least, I made the background to our beloved drawing. For this, line the cardboard circle that I cut out previously and line it with blue fabric and white mesh fabric. To finish I added the last details:
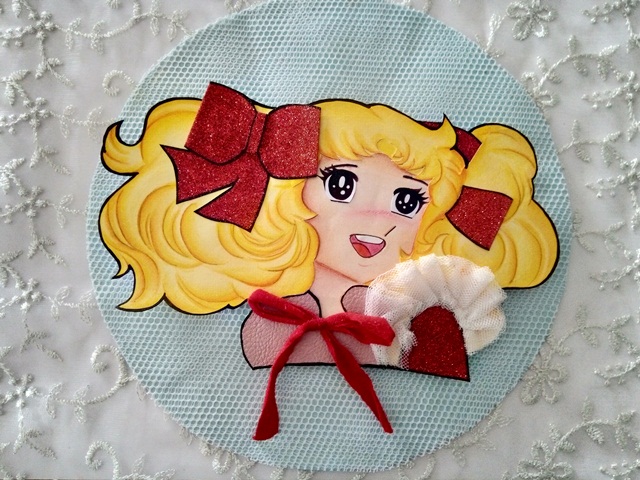
⋆✩⋆Resultado final | Final result⋆✩⋆