

Spanish
Con las buenas buenas, queridos Hivers.
Me encuentro por aquí para compartir una linda elaboración de adornos y torta. Esto debido a que lo estábamos realizando, mi esposo y yo, para el cumpleaños de mi sobrina Abby, para su primer año. Como el tema del cumpleaños es de Moana, decidimos que realizaríamos el barco de Moana, para colocarle las velas decorativas y se viera bien. Y para colocar el barco realizamos una montaña y el mar. Espero que guste la idea, de igual manera te invito a que te quedes a ver y leer estas elaboraciones.

Ingredientes a usar para el biscocho:
3 tazas de harina de trigo
3 tazas de azúcar
10 huevos
1 cucharadita de Polvo de hornear
Vainilla al gusto
Ingredientes a usar para la crema de chocolate:
2 tazas de leche
2 huevos
1 taza de azúcar
3 cucharadas de maicena
Vainilla al gusto
100 gramos de bebida achocolatada
Materiales a usar para la decoración:
Anime
Papel de ceda de color verde y azul
Pega
Tijera
Papel lustrillo de color blanco y verde
Pintura de color rojo
Cartón
4 paletas de helado
Silicón en barra
Elaboración de la vela para el barco y donde va a ir la torta:
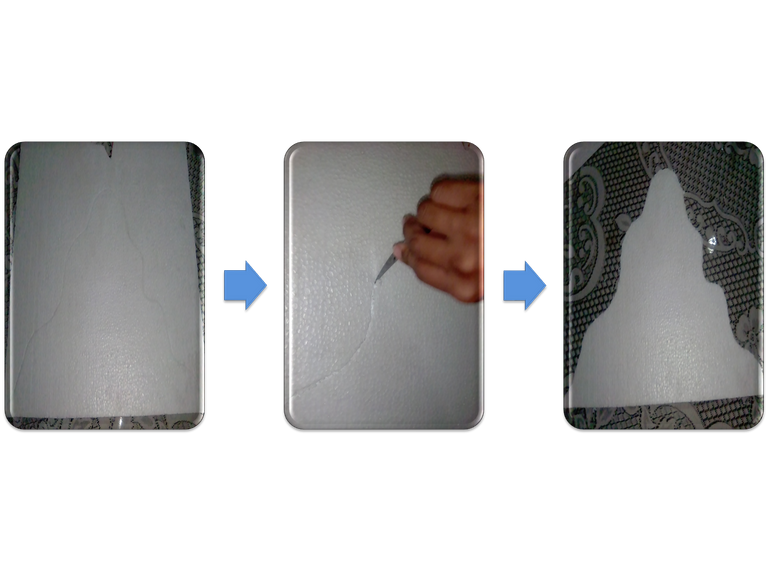
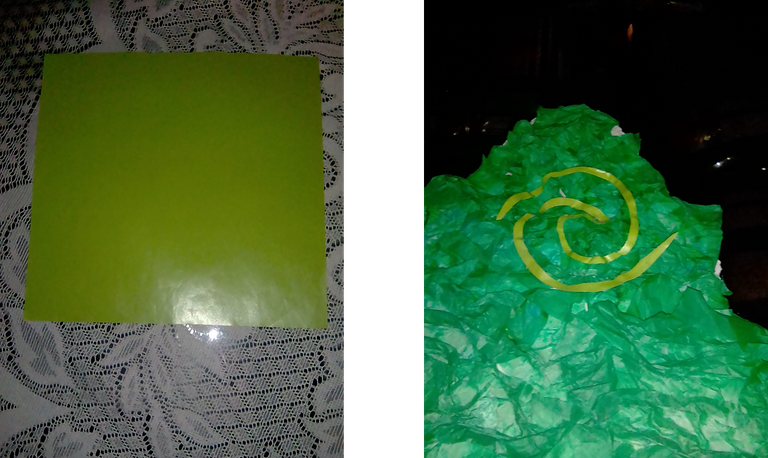
Comenzare con el anime, voy a dibujar una montaña y luego cortare la figura.
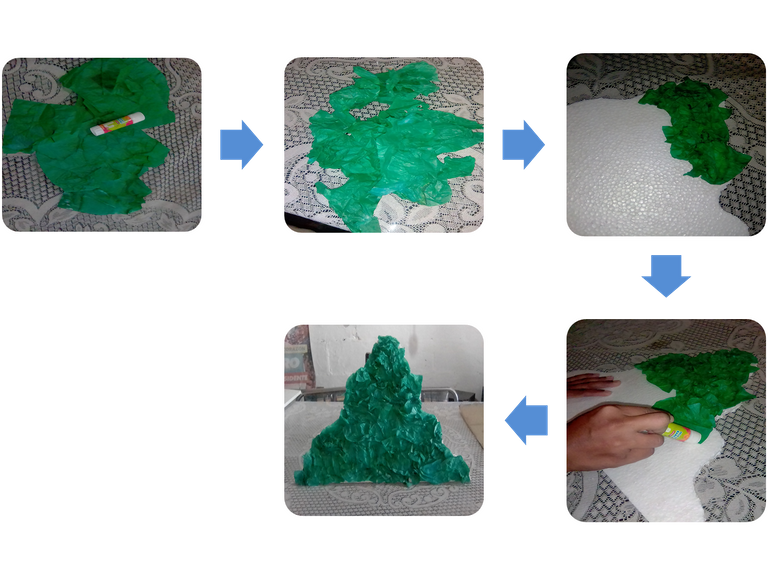
Para darle color a la montaña usare papel de ceda verde, unos trozos que tenía guardados. Paso la pega en barra por un pedazo de la montaña, agarro los pedazos de papel los arrugo un poco y los pego de manera que se vea como relieve. Continúo hasta cubrir toda la montaña.
Paso siguiente, en un pedazo de papel lustrillo de color verde, realizo el símbolo de Tefiti, para luego pegarlo en la montaña.
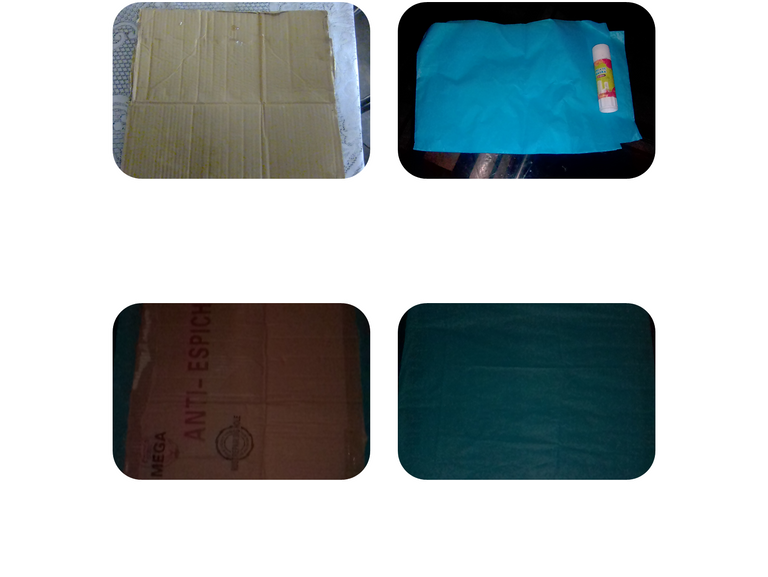
Voy con el pedazo de cartón, con el simularé que es el mar. Agarro papel celofán de color azul, lo pego por un lado del cartón, le doy la vuelta y pego por los bordes. Listo. Reservo hasta el momento de la fiesta, que es donde lo armare.
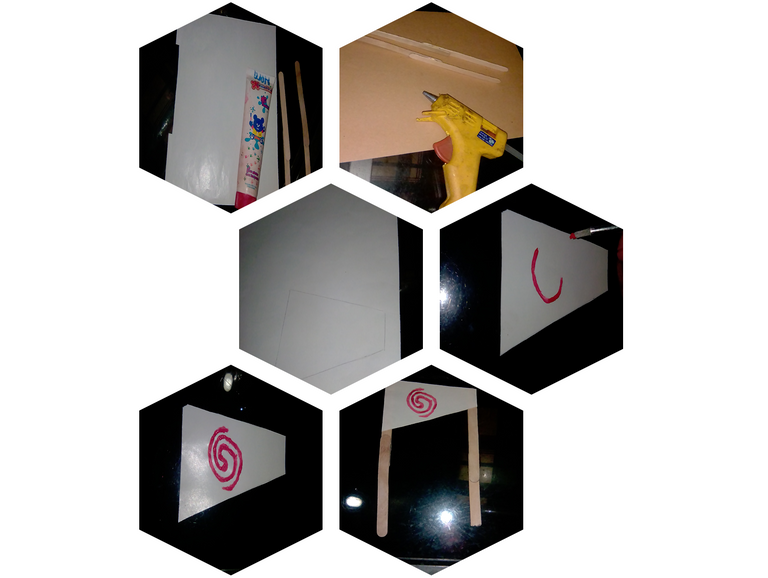
Me toca hacer la vela para el barco. Aquí usare las paletas, la pintura roja, el papel lustrillo de color blanco y el silicón en barra. Primero pego las paletas, luego dibujo la forma de la vela en el papel lustrillo, lo recorto y uso la pintura roja para realizar el símbolo que lleva, luego la pego a las paletas. Listo, a reservar hasta el momento de usar.
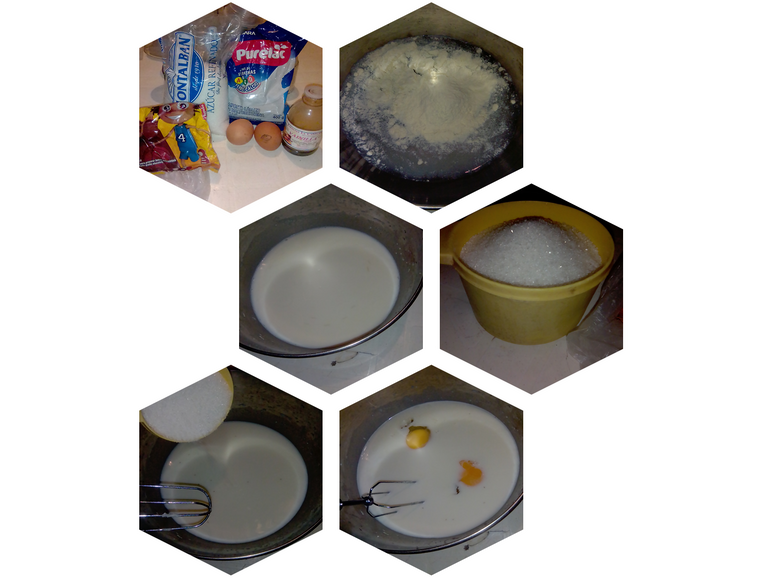
Preparación de la crema de chocolate:
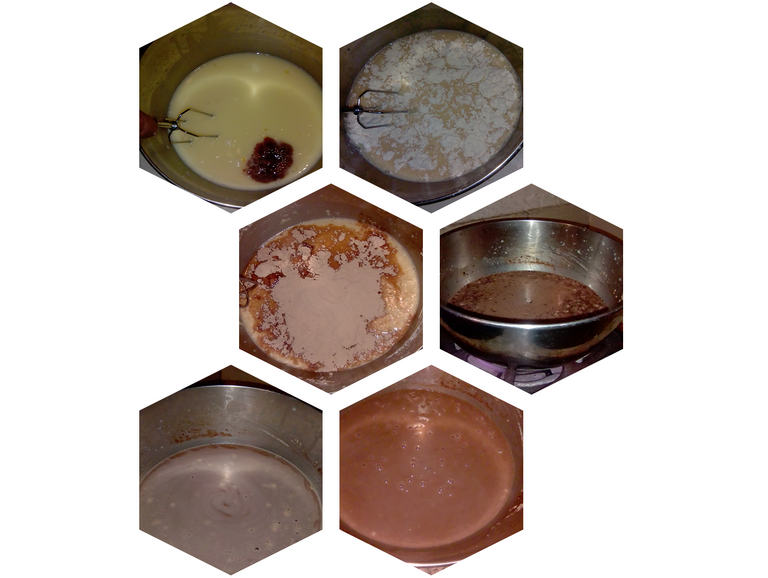
Lo primero que realizo es colocar todos los ingredientes a la mano, luego agarro una olla, agrego 2 tazas de agua y un poco de leche en polvo, mezclo para que se vea la leche; allí mismo iré colocando todos los ingredientes. Primero la azúcar, luego los huevos, vainilla la maicena, la bebida achocolatada, lo mezclo y monto en la cocina. Hay que remover de vez en cuando para que no se pegue, dejamos que hierva y espese, esa es la manera que se sabe que esta lista la crema. Cuando esta lista, bajo y dejo que se enfríen antes de usarla.
Preparación del biscocho:
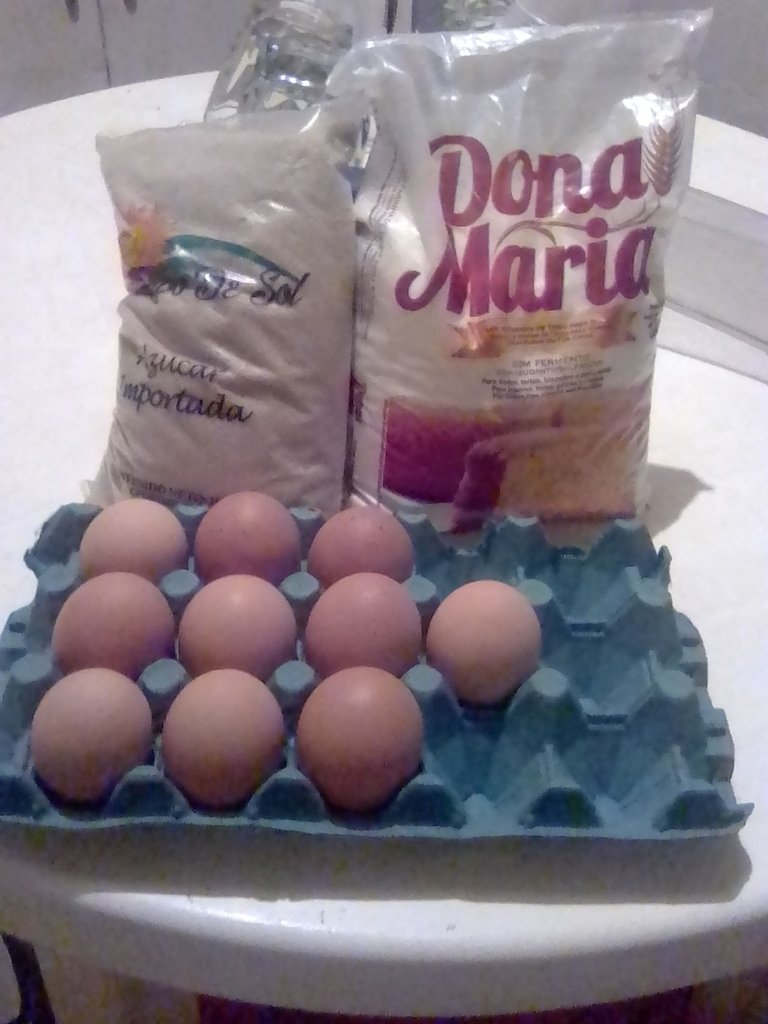
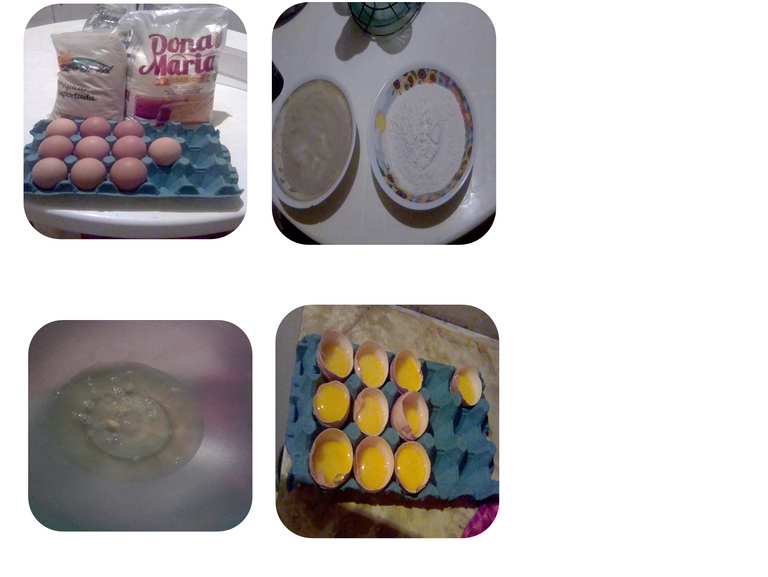
Comienzo con medir el azúcar y la harina, luego procedo a partir los huevos y colocar la clara en un bol y la yema la dejo en la cascara.
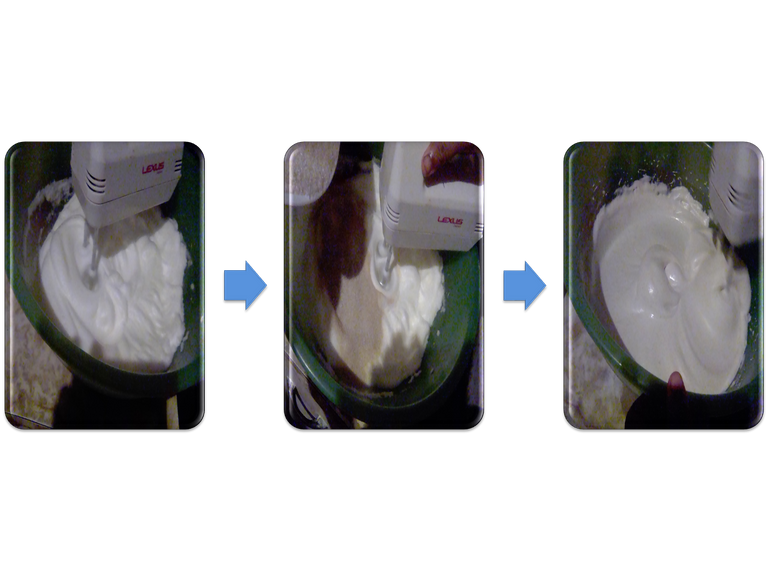
Ahora con ayuda de una batidora eléctrica bato las claras a punto de nieve.
Cuando está listo le agrego poco a poco el azúcar, bato hasta que se integren.
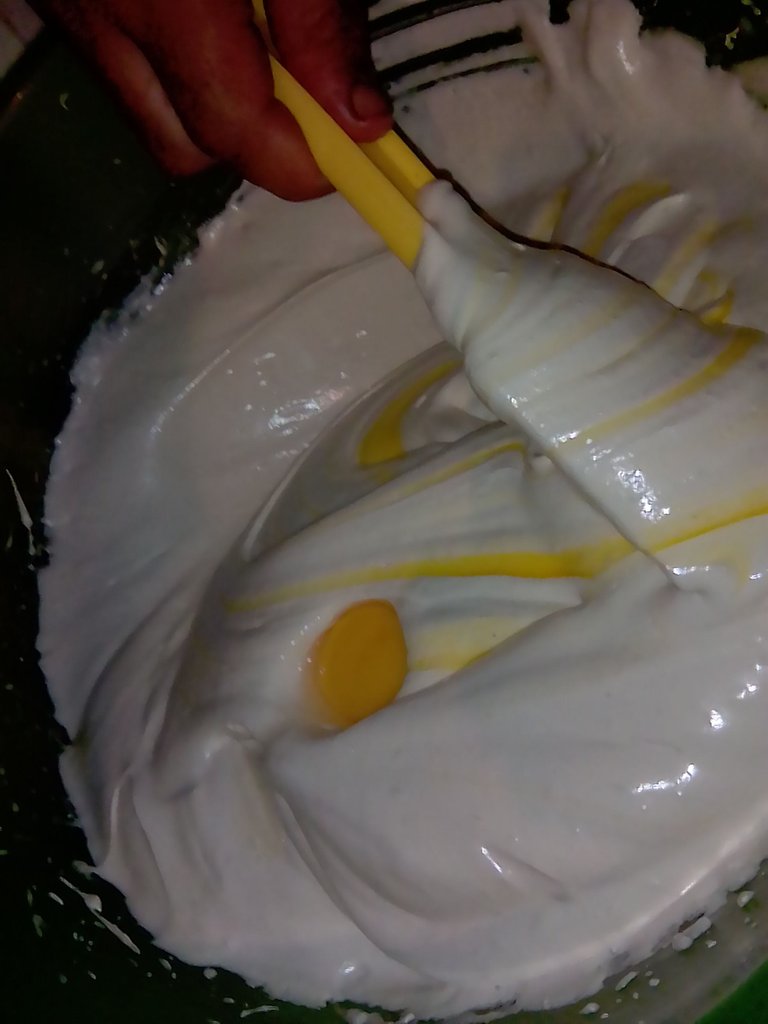
Ya con esta parte lista, dejo de usar la batidora eléctrica. Busco una paleta y voy echando las yemas y bato de manera envolvente para que la mezcla no se baje.
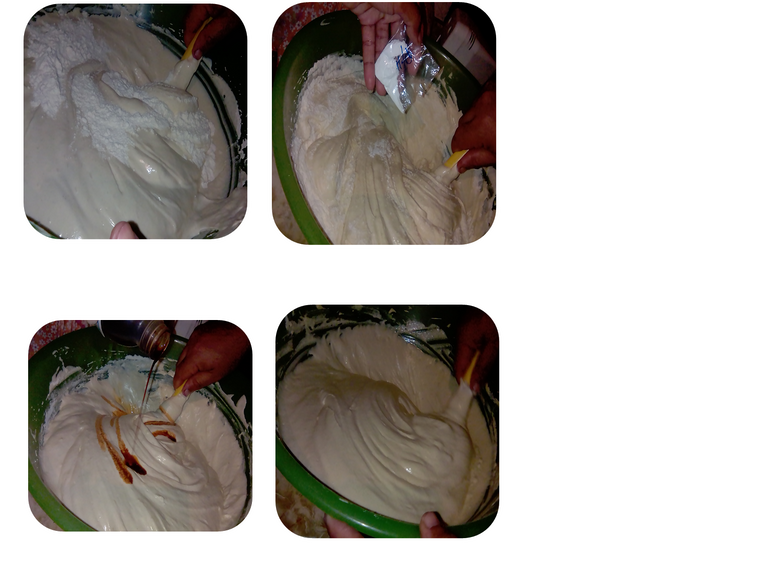
Continúo con la harina, el polvo de hornear y la vainilla. Mezclo muy bien para que todo se integre.
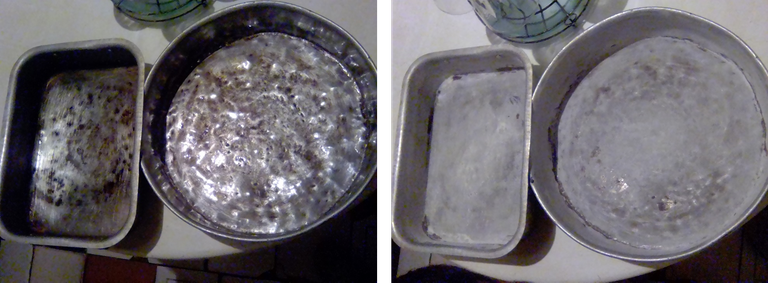
Es momento de ir con las torteras donde se cocinaran. Las limpio, agrego aceite y harina para que no se vaya a pegar la torta.
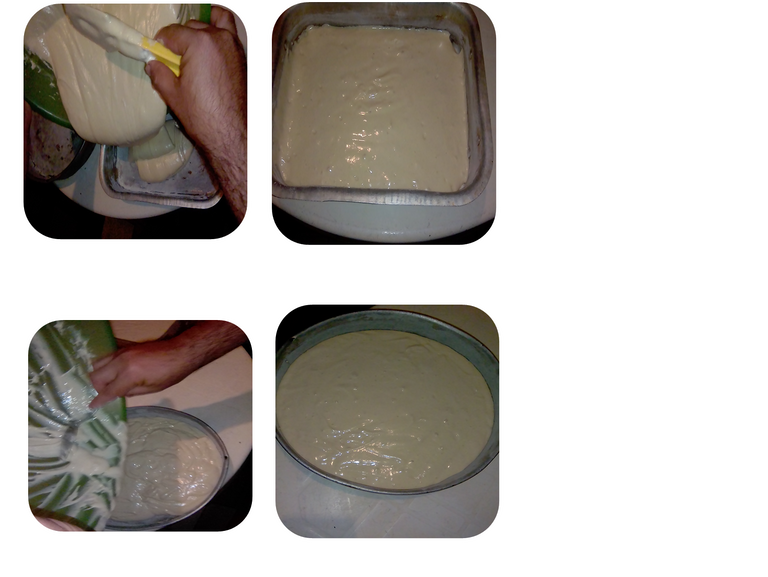
Vacío la mezcla en las torteras y luego al horno, alrededor de media hora o cuarenta minutos.
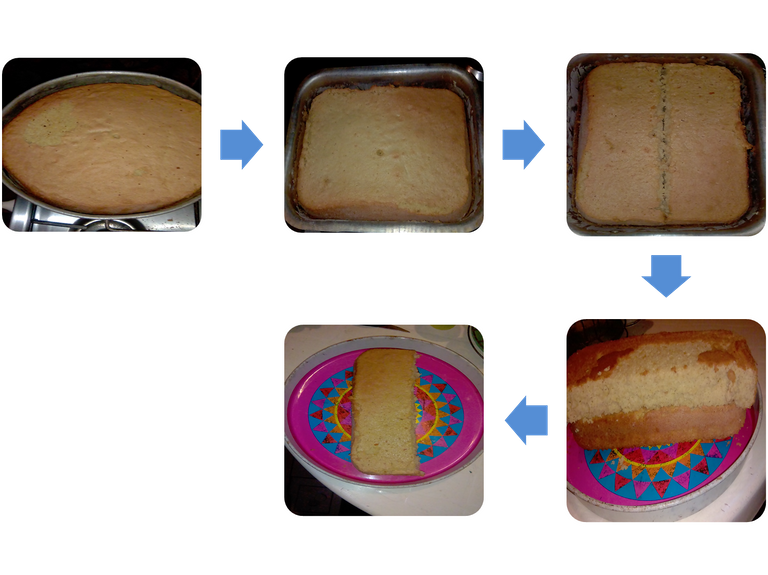
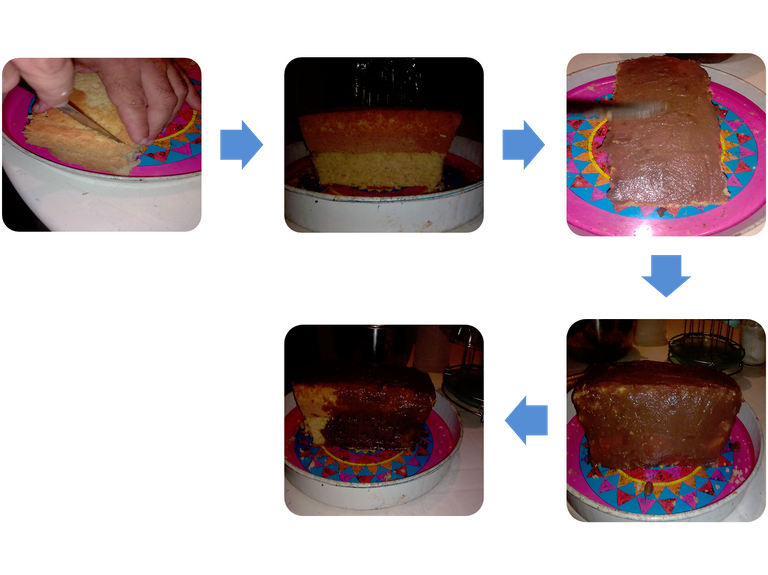
Cuando están listas las despego, dejo que se enfríen y después procedo con la tortera pequeña y cuadrada a cortarla por la mitad, coloco una mitad en una bandeja, luego coloco la otra encima, se le realizan unos cortes por los lados de manera que se parezca al barco de Moana. Cuando ya está lista la forma, es momento de cubrir con la crema de chocolate. Le coloco la vela del barco para ver cómo queda. Y mis hijos allí queriendo comerse la torta, jejeje…
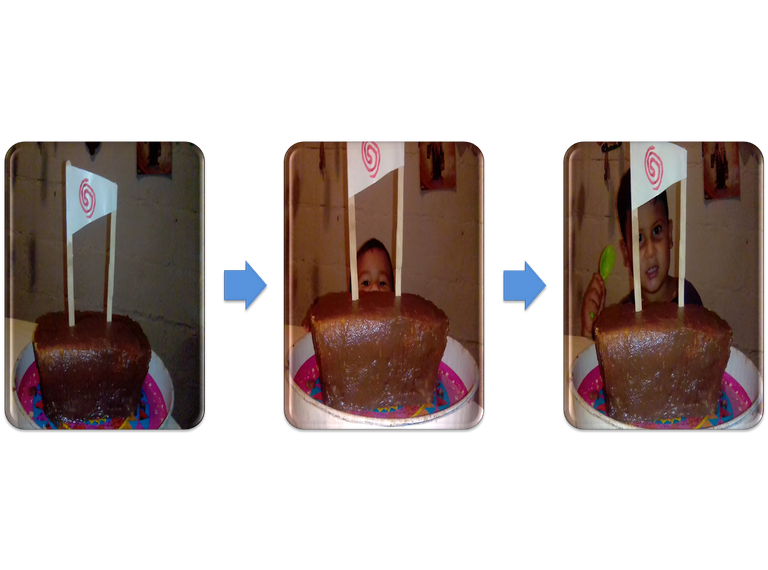
Todo esto lo realice junto con mi esposo y un día antes. Para poder llevar la torta desarmada hasta donde vive mí hermana, puesto que es más cómodo.
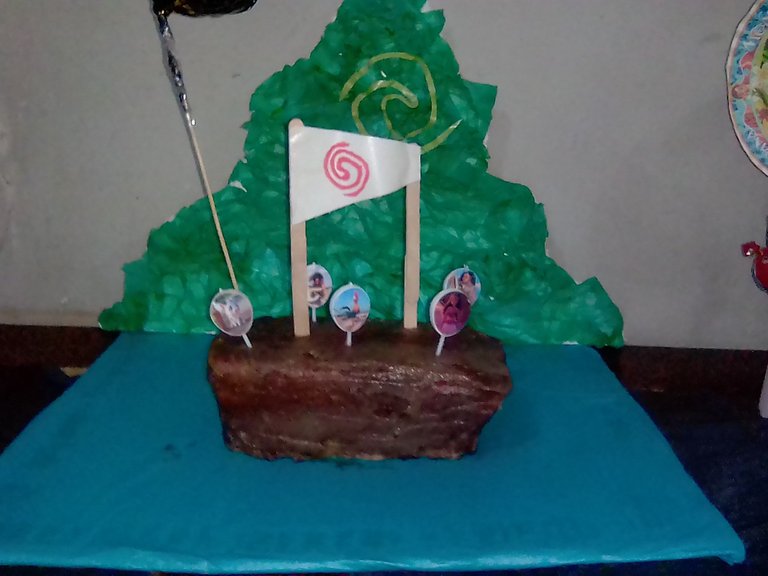
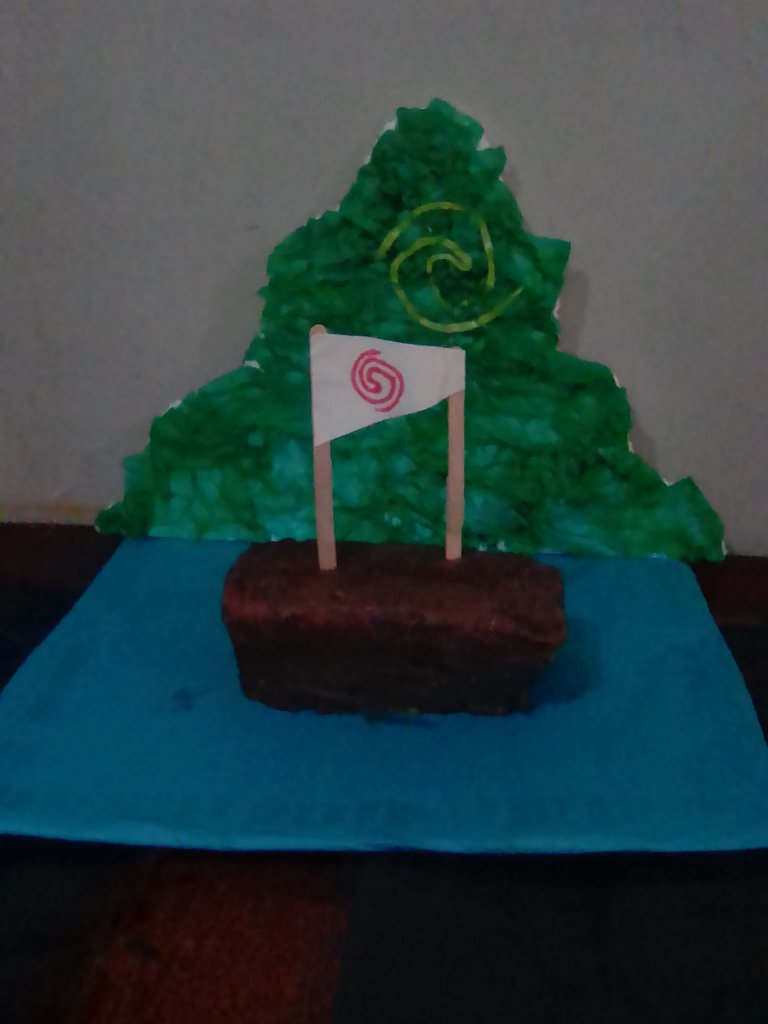
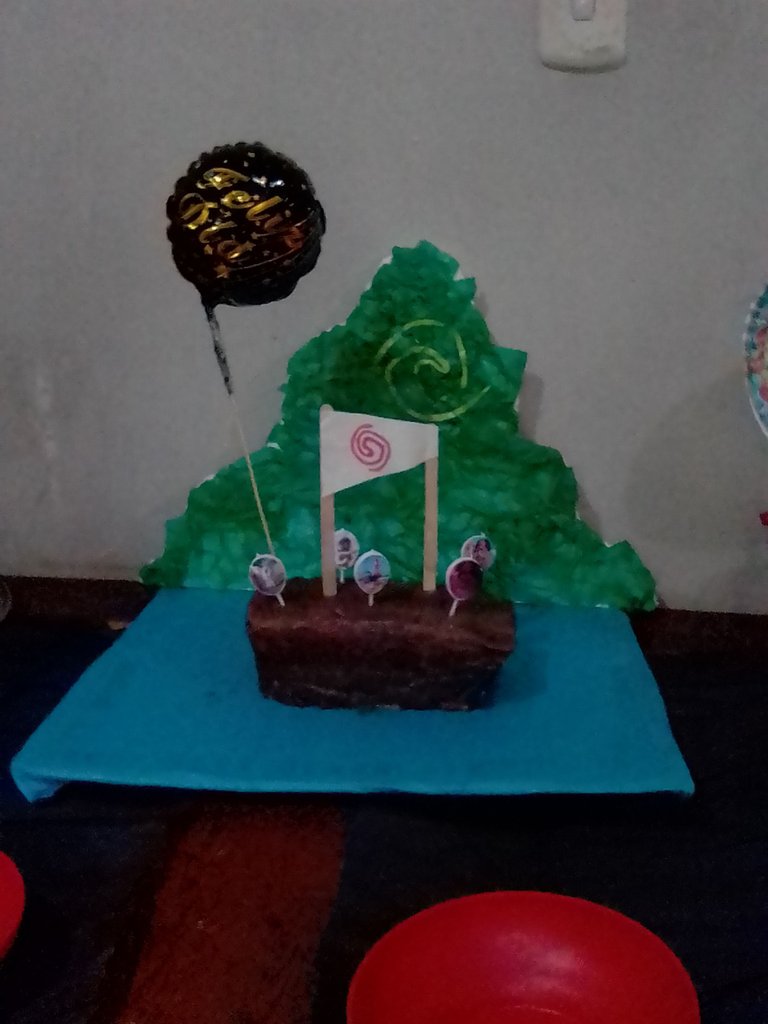
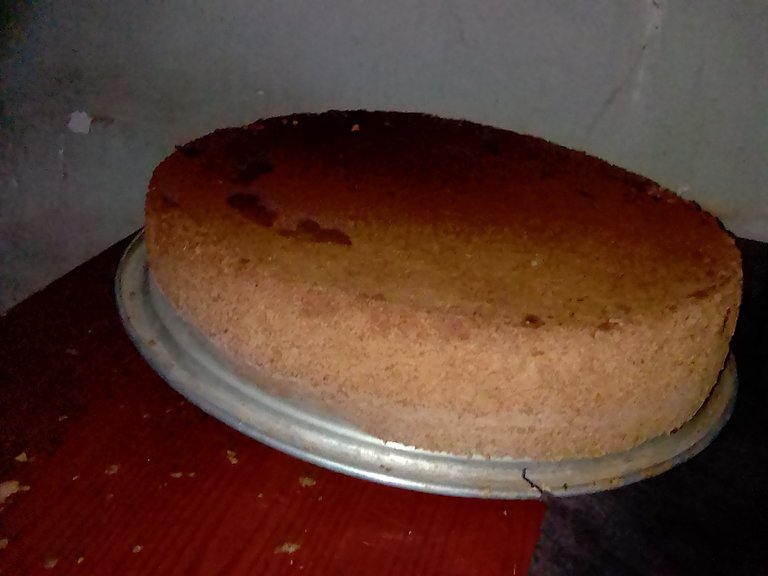
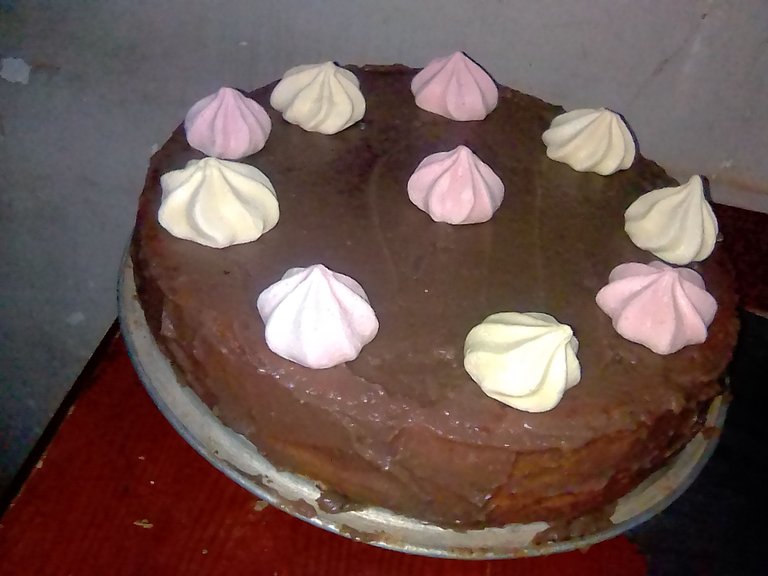
Aquí dejo las fotos con la torta ya armada para la fiesta y con las velas decorativas y un pequeño globo de feliz día. Tambien la otra torta que realizamos, a esa se le echo la crema de chocolate por encima y se le colocaron unos suspiros para decorar.

Gracias por quedarte a leer y ver. Espero que esto te de buenas ideas para alguna ocasión. Nos vemos en un próximo post.
English
With good cheer, dear Hivers.
I'm over here to share a cute ornament and cake making. This because we were making it, my husband and I, for my niece Abby's birthday, for her first birthday. Since the theme of the birthday is Moana, we decided that we would make Moana's boat, to place the decorative candles on it and it would look nice. And to place the boat we made a mountain and the sea. I hope you like the idea, and I invite you to stay and read these elaborations.

Ingredients to use for the biscocho:
3 cups of wheat flour
3 cups of sugar
10 eggs
1 teaspoon baking powder
Vanilla to taste
Ingredients to use for the chocolate cream:
2 cups milk
2 eggs
1 cup sugar
3 tablespoons cornstarch
Vanilla to taste
100 grams of chocolate drink
Materials to be used for decoration:
Anime
Green and blue wax paper
Glue
Scissors
White and green luster paper
Red paint
Cardboard
4 popsicle sticks
Silicone stick
Making the sail for the boat and where the cake will go:
I will start with the anime, I will draw a mountain and then cut out the figure.

To color the mountain I will use green lime paper, some pieces that I had saved. I put the glue stick on a piece of the mountain, grab the pieces of paper, crumple them a little and glue them so that it looks like relief. I continue until the whole mountain is covered.

Next step, on a piece of green lustrillo paper, I make the Tefiti symbol, and then glue it on the mountain.

I go with the piece of cardboard, with it I will simulate that it is the sea. I take blue cellophane paper, glue it on one side of the cardboard, turn it over and glue the edges. That's it. I reserve it until the time of the party, which is where I will assemble it.

It's my turn to make the sail for the boat. Here I will use the paddles, the red paint, the white luster paper and the silicone stick. First I glue the paddles, then I draw the shape of the sail on the lustrillo paper, cut it out and use the red paint to make the symbol on it, then I glue it to the paddles. Ready, set aside until ready to use.

Preparation of the chocolate cream:
The first thing I do is to place all the ingredients at hand, then I grab a pot, add 2 cups of water and a little powdered milk, mix so that the milk is visible; right there I will be placing all the ingredients. First the sugar, then the eggs, the vanilla, the cornstarch, the chocolate drink, I mix it and put it in the kitchen. You have to stir from time to time so it doesn't stick, let it boil and thicken, that's the way you know that the cream is ready. When it is ready, I lower and let it cool before using it.


Preparation of the biscocho:
I start with measuring the sugar and flour, then I proceed to crack the eggs and place the whites in a bowl and the yolk I leave it in the shell.


Now with the help of an electric mixer I beat the egg whites until stiff.
When it is ready I add the sugar little by little, beat until they are integrated.

Once this part is ready, I stop using the electric mixer. I find a paddle and add the egg yolks and beat in an enveloping way so that the mixture does not get low.

I continue with the flour, baking powder and vanilla. I mix very well so that everything is integrated.

It's time to go to the baking pans where they will be cooked. I clean them, add oil and flour so that the cake will not stick.

I pour the mixture into the tortillas and then bake them in the oven for about half an hour or forty minutes.

When they are ready I peel them off, let them cool and then proceed with the small square tortera to cut it in half, place one half on a tray, then place the other half on top, make some cuts on the sides so that it looks like Moana's boat. When the shape is ready, it is time to cover it with the chocolate cream. I put the sail of the boat to see how it looks. And my children there wanting to eat the cake, hehehe....


All this was done together with my husband and a day before. To be able to take the cake unassembled to where my sister lives, since it is more comfortable.
Here I leave the photos with the cake already assembled for the party and with the decorative candles and a small happy day balloon. Also the other cake we made, we put the chocolate cream on top and some sighs to decorate it.


Thanks for stopping by to read and watch. I hope this gives you good ideas for some occasion. See you in a future post.

Imágenes de mi propiedad
Texto traducido en Deepl
Baner y separador elaborado en Power point
