ESP/ENG- Bricolaje: Creativo porta relojes, elaborado con material de provecho/Tutorial-Paso a paso/DIY: Creative watch holder, made from scrap materials/Tutorial-Step by Step

in #hive-1484413 years ago

Buenas noches hermosa comunidad, espero hayan tenido un grandioso día, esta noche le presento un pequeño pero creativo trabajo creativo, ya que no quería tener los relojes mios y de mi novio regados decídi hacer un Porta relojes Con material de provecho, así que vamos a los materiales y luego al tutorial

242693271_942352313292769_3124648112577613922_n.jpg

Good evening beautiful community, I hope you had a great day, tonight I present you a small but creative creative work, since I didn't want to have mine and my boyfriend's watches scattered around I decided to make a Watch holder With useful material, so let's go to the materials and then to the tutorial
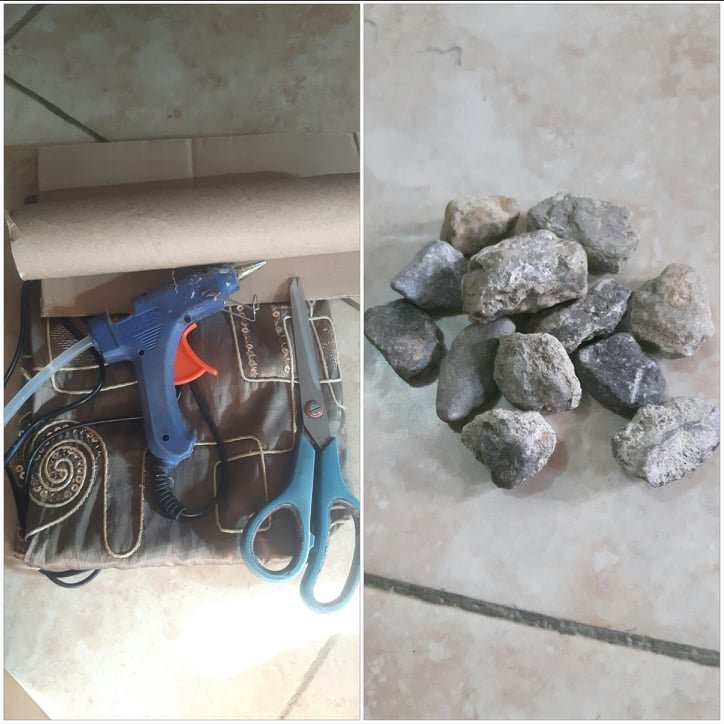
Materiales:
Tijeras
Pedazo de tela que ya no uses
Silicon caliente
Tubo de papel higiénico
Cartón
Piedras pequeñas

Materials:
Scissors
Piece of fabric you no longer use
Hot silicon
Toilet paper tube
Cardboard
Small stones

242578598_922094568378944_6571041955491991087_n.jpg

Tutorial

Lo primero que realizaremos será cortar un pedazo de tela la cual cubra el tubo de papel higiénico, y lo pegamos con silicona caliente a el

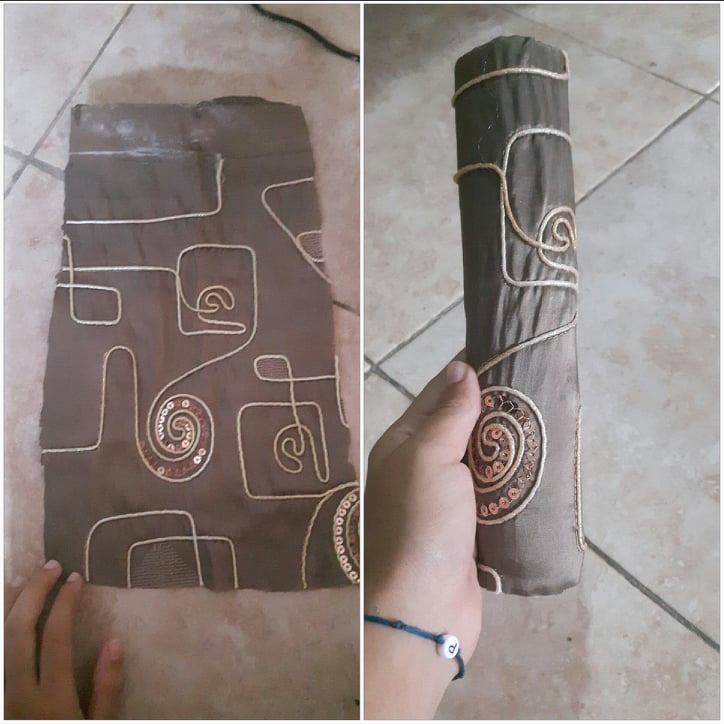
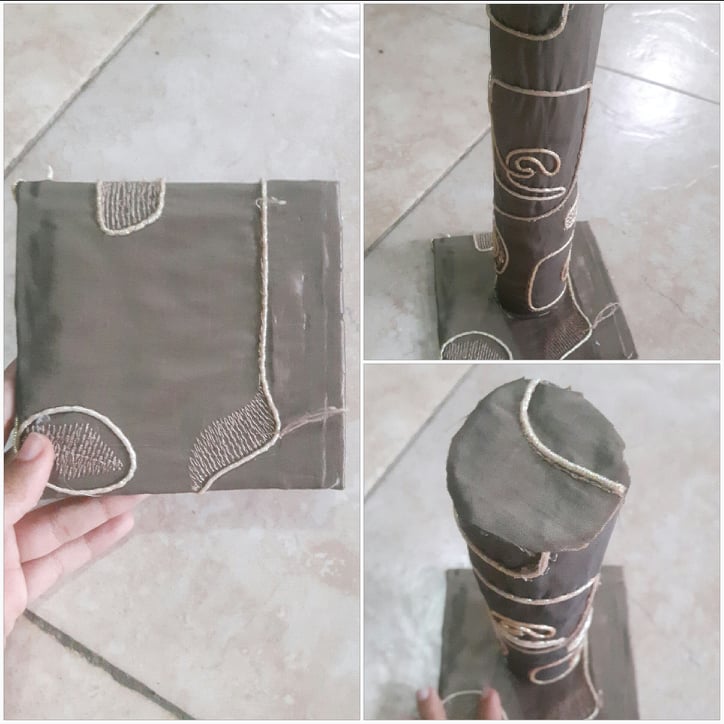
The first thing we will do is to cut a piece of cloth which will cover the toilet paper tube, and glue it with hot silicone to it

242423110_531305921294231_6722785666633192924_n.jpg

Bienvenidos a mi blog (2).png

Seguido cortaremos un cuadrado de cartón y luego un pedazo de tela cuadrado un poco mas grande que el cuadrado de cartón y pegaremos la tela en el pedazo de cartón cuadrado, esta sera la base

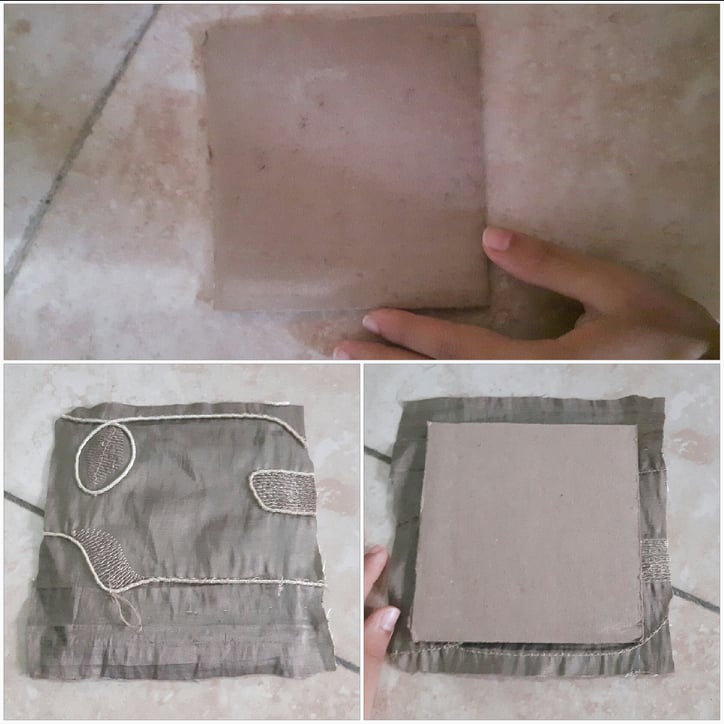
Next we will cut a square of cardboard and then a square piece of fabric a little bit bigger than the square of cardboard and we will glue the fabric on the square piece of cardboard, this will be the base

242765108_293246269297503_5319891192030086896_n.jpg

Bienvenidos a mi blog (2).png

Luego ya pegada la tela en el cuadrado, pegaremos el tubo de cartón ya forrado en el centro del cuadrado de cartón también forrado, le colocaremos dentro las piedras, más o menos que llegue a la mitad del tubo, esto es para que se sostenga bien y no se caiga por el peso de los relojes, luego tapamos el extremo abierto del tubo con un pedazo de tela

After gluing the fabric in the square, we will glue the cardboard tube already lined in the center of the cardboard square also lined, we will place inside the stones, more or less reaching the middle of the tube, this is so that it holds well and does not fall by the weight of the watches, then we cover the open end of the tube with a piece of fabric

242755086_1079017216172162_5811221010201250664_n.jpg

Bienvenidos a mi blog (2).png

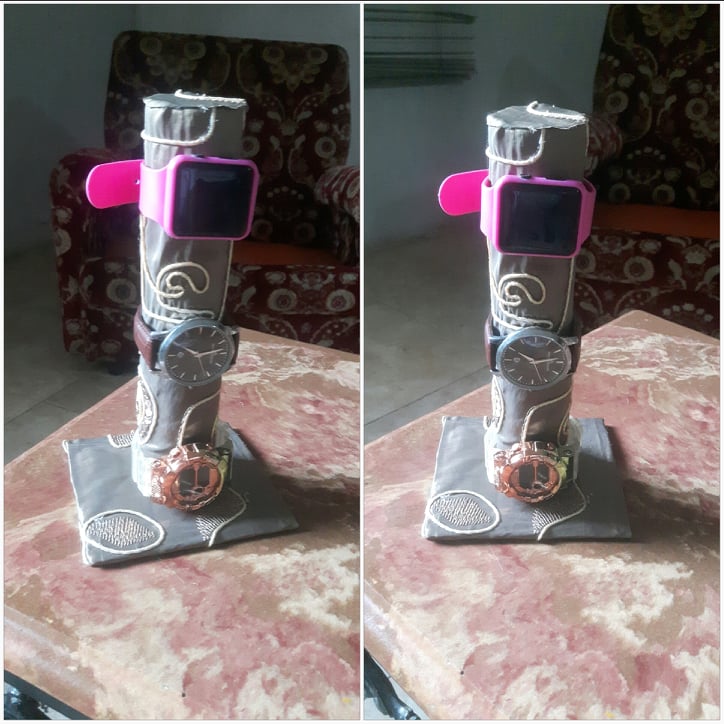
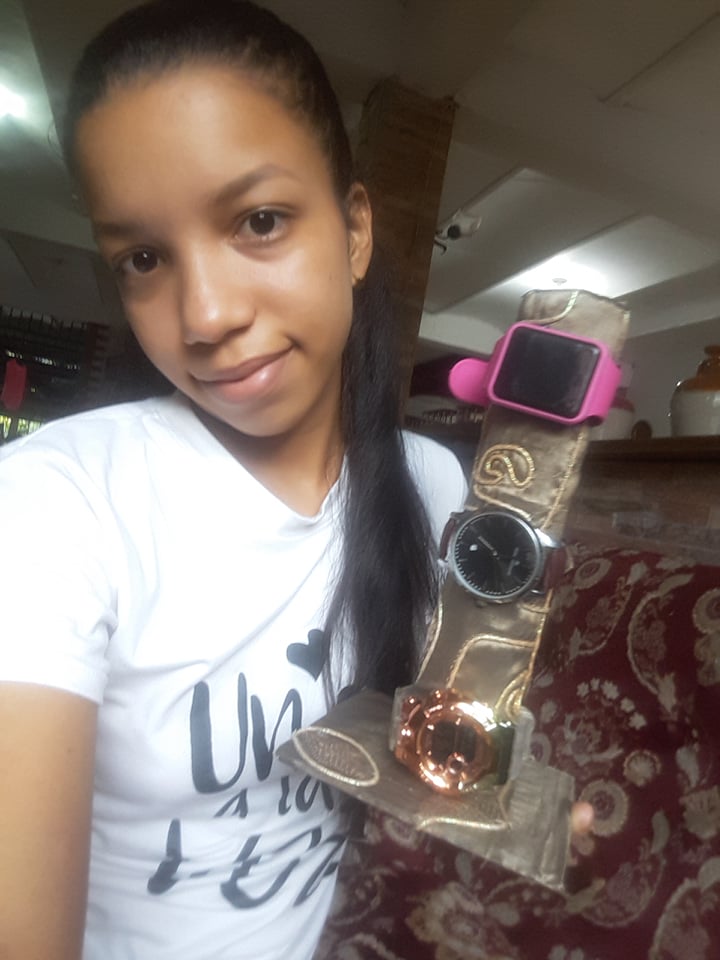
le colocamos los relojes y listo, así quedo nuestro porta relojes, espero les haya gustado y les sirva de mucho como a mi

We put the watches and ready, so was our watch holder, I hope you liked it and serve you as much as me

242677999_383583386809624_4818149274904619050_n.jpg

242693271_942352313292769_3124648112577613922_n.jpg

Nos leemos pronto.gif

Imagen hecha en Canva.gif

Sort:  
Thank you for sharing this amazing post on HIVE!
  • Your content got selected by our fellow curator @rezoanulvibes & you just received a little thank you via an upvote from our non-profit curation initiative!

  • You will be featured in one of our recurring curation compilations and on our pinterest boards! Both are aiming to offer you a stage to widen your audience within and outside of the DIY scene of hive.

Join the official DIYHub community on HIVE and show us more of your amazing work and feel free to connect with us and other DIYers via our discord server: https://discord.gg/mY5uCfQ !

If you want to support our goal to motivate other DIY/art/music/homesteading/... creators just delegate to us and earn 100% of your curation rewards!

Stay creative & hive on!