¡Muy buenos días queridos amigos de HIVE! 💓
Good morning dear friends of HIVE! 💓

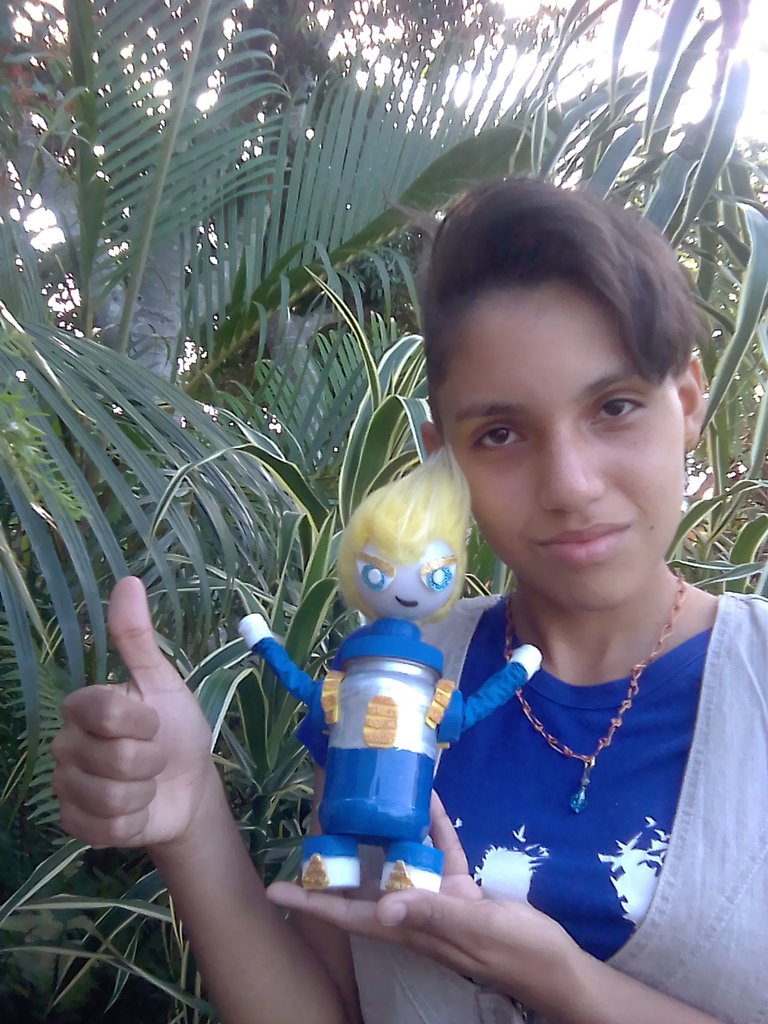
Today I bring you this cute little doll made with recycled material, inspired by my favorite character from the dragon ball Z saga, Vegeta the prince! 💓 😍 💓 In his transformation from "super saiyan phase 1", I love this character not only because of his personality but also because of his determination to fulfill the goals he sets for himself apart from the fact that he was one of the animes that marked my childhood.

Materiales:
Materials:
-Pinturas al frio, azul y blanco.
-Resorte.
-Foamy escarchado azul, amarillo y negro.
-Foamy amarillo y blanco.
-Cinco tapas de refresco de color azul y dos de color blanco.
-dos tapas de crema dental.
-Una tapa de bombillo LED.
-Papel de envoltura.
-Tela de peluche.
-Un envase con tapa.
-Punzón.
-Pistola de silicona.
-Tijeras.
-Tenaza.
-Encendedor.
-Lápiz.
-Pincel.
-Cold, blue and white paints.
-Spring.
-Foamy frosty blue, yellow and black.
-Foamy yellow and white.
-Five blue soda caps and two white ones.
-Two caps of toothpaste.
-A LED bulb cap.
-Wrapping paper.
-Plush cloth.
-A container with a lid.
-Awl.
-Glue gun.
-Pair of scissors.
-Pincers.
-Cigarette lighter.
-Pencil.
-Brush.

Procedimiento:
Procedure:
We heat the awl with the lighter to open small holes in the center of the soda lids, in the lid of the container, on the edge of the lid of the LED bulb and two on the sides and two under the container to make the connections for the arms and legs.

Then we will begin to paint the inside of the container, to make it look brighter and prevent the paint from coming off, first we paint the bottom with blue until we reach the middle of the container, then it is painted with white paint so that Whether it is the vest, after we let it dry for a few minutes and do the same procedure until our container is completely painted, the same will be done with the container lid which will be painted blue on the outside and the lid of the LED bulb will be painted inside white.

With the help of the pliers we cut five pieces of springs, we will carefully insert a spring in a soda cap to make the neck, arms and legs, the latter will have a white cap to be the boots, and a blue one to be the pants, then silicone is added to make them fixed. Now we cut two pieces of wrapping paper with the scissors, to cover the arms and glue with silicone, at the end we will glue the caps of toothpaste to hide the joints and make them look like gloves.

We will carefully insert the arms and legs into their respective holes and paint the arms blue to make them look like our character's sleeves and let them dry.

Now we start to assemble the head, for this we cut the stuffed fabric into two pieces, one that surrounds the edges of the LED light bulb cover and another to close the back of the head, then we glue a piece on the edge and on the Part of the forehead we glue in a “V” shape, we insert the spring that would be the neck and we add silicone on both sides to adjust it, then we glue the other piece of fabric on the back and thus we finish the head, it would only remain to add the eyes and the mouth.

With the pencil we will begin to draw on the foamy the pieces necessary to make, the eyes, the mouth, the details of the vest and the boots, for the eyes we will use the blue, yellow and white foamy, first we will make the eye itself white Then we will make the iris in blue and to make them look more tender we will make some small circles in white, and long yellow eyebrows, for the mouth only a small smile will be cut in the black foamy, for the vest we cut two oval pieces in The yellow foamy next to some strips of the frosted foamy and they will be glued in the form of stripes and for the boots two small triangles are cut out of the boat with the white caps and some strips of frosty foamy will be glued to it, and finally we glue all the pieces in their respective places with the glue gun.

And in this way we would have our cute little Vegeta doll, who could also be a nice toy to pamper the princes of the house, I hope you like it! 😉

We appreciate you visiting our blog and for giving us your support! 💓 and see you in an upcoming creative post, have a great day!

The photographs are of our authorship and were taken with a smartphone (ZTE Blade L130) and edited in Paint and Paint Tool SAI by @albakriz.
-translation: translate google.